- Checking That Your Computer Can Run Windows 11
- Checking Your PC Specifications Manually
- Things to Keep in Mind Before You Upgrade
- How to Download Windows 11
- How to Use the Windows 11 Installation Assistant
- How to Use the Media Creation Tool
- Download Windows 11 Disk Image (ISO) for x64 Devices
- Conclusion
- FAQ
As of 2023, internal data from Microsoft revealed that Windows 11’s active device usage surpassed 400 million and is projected to reach half a billion by early 2024. Most users are satisfied with the features and functionality of Windows 11, indicating that it meets their needs and expectations effectively.
As the successor to Windows 10, Windows 11 brings a fresh breath of aesthetic and functional upgrades that enhance user experience. The latest updates have introduced some exciting new features, including the implementation of AI technology.
If you’re eager to get Windows 11 on your device, you’re in the right place. In this article, you’ll find in-depth and easy-to-follow instructions on how to download Windows 11 . You’ll learn how to install Windows 11 from USB , as well as how to install Windows 11 on a new PC . Additionally, we’ll show you how to upgrade to Windows 11 from Windows 10

You can make your system more efficient while at it by using a program like Auslogics BoostSpeed. It makes sense to utilize this tool to get rid of junk files and faulty registry keys and optimize your system’s settings. Also, don’t forget to use a reliable antivirus program as hackers are always on the lookout for vulnerable computers.
Checking That Your Computer Can Run Windows 11
Windows 11’s strict system requirements have left many users unable to upgrade. If you haven’t seen the upgrade banner, your computer may not be compatible. Here are the system requirements for Windows 11:
- Secure Boot support
- TPM (Trusted Platform Module) 2.0
- Free storage of at least 64GB
- At least 4GB of RAM
- Two or more processor cores
- Processor clock speed of 1GHz or faster
To use TPM 2.0, ensure Secure Boot is turned on and you have more than 64GB of free storage on your hard drive. Most modern PCs come with TPM 2.0. Checking if your PC is compatible is simple. You can quickly use the PC Health Check application. Here’s how:
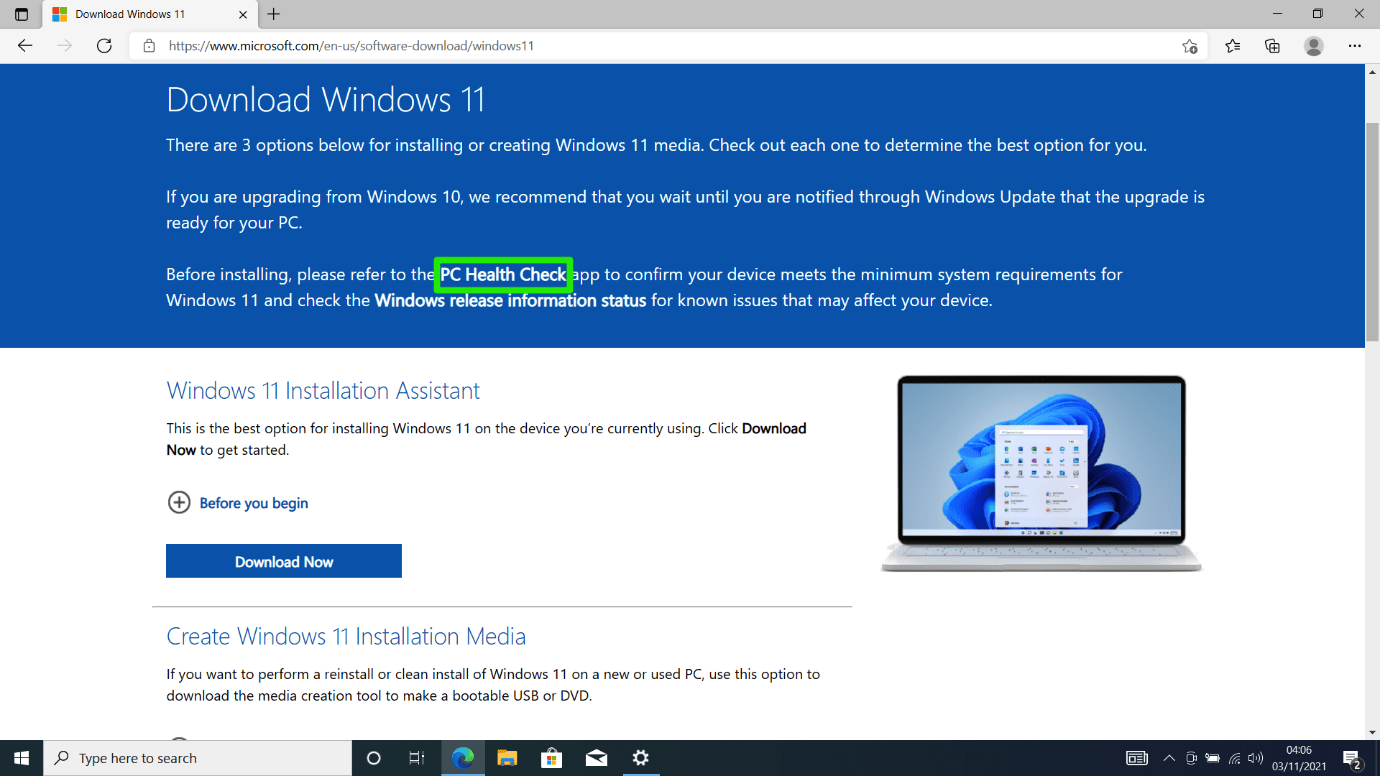
- Head to the Microsoft website and click PC Health Check on the Windows 11 download page.
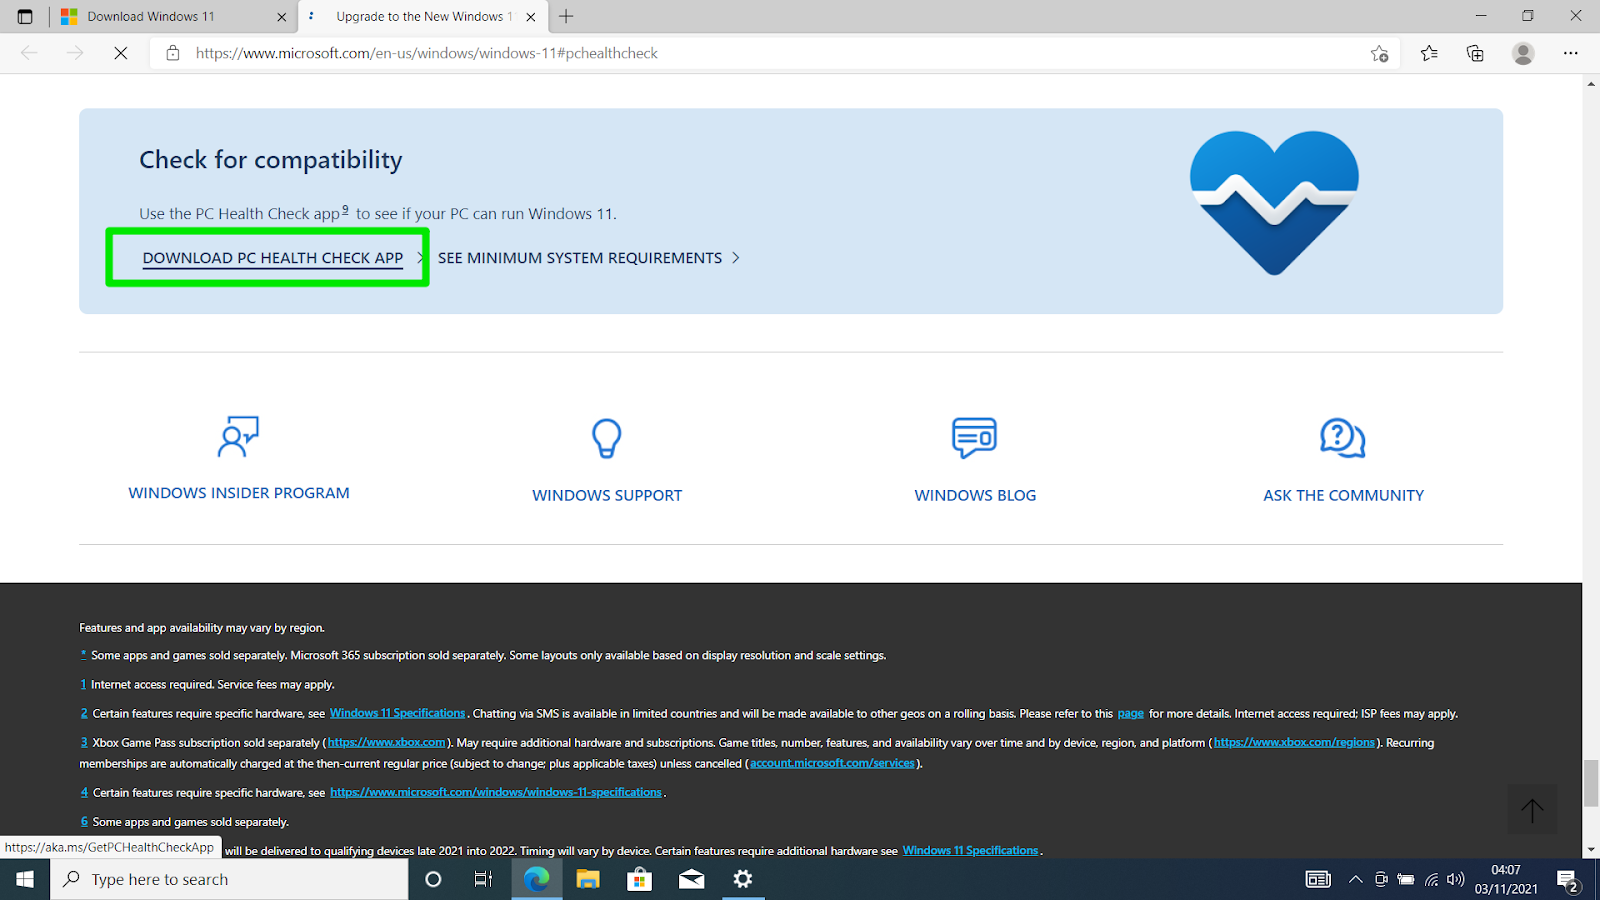
- Click on “Download PC Health Check App” under “Check for Compatibility”.
- Open the file once the download completes.
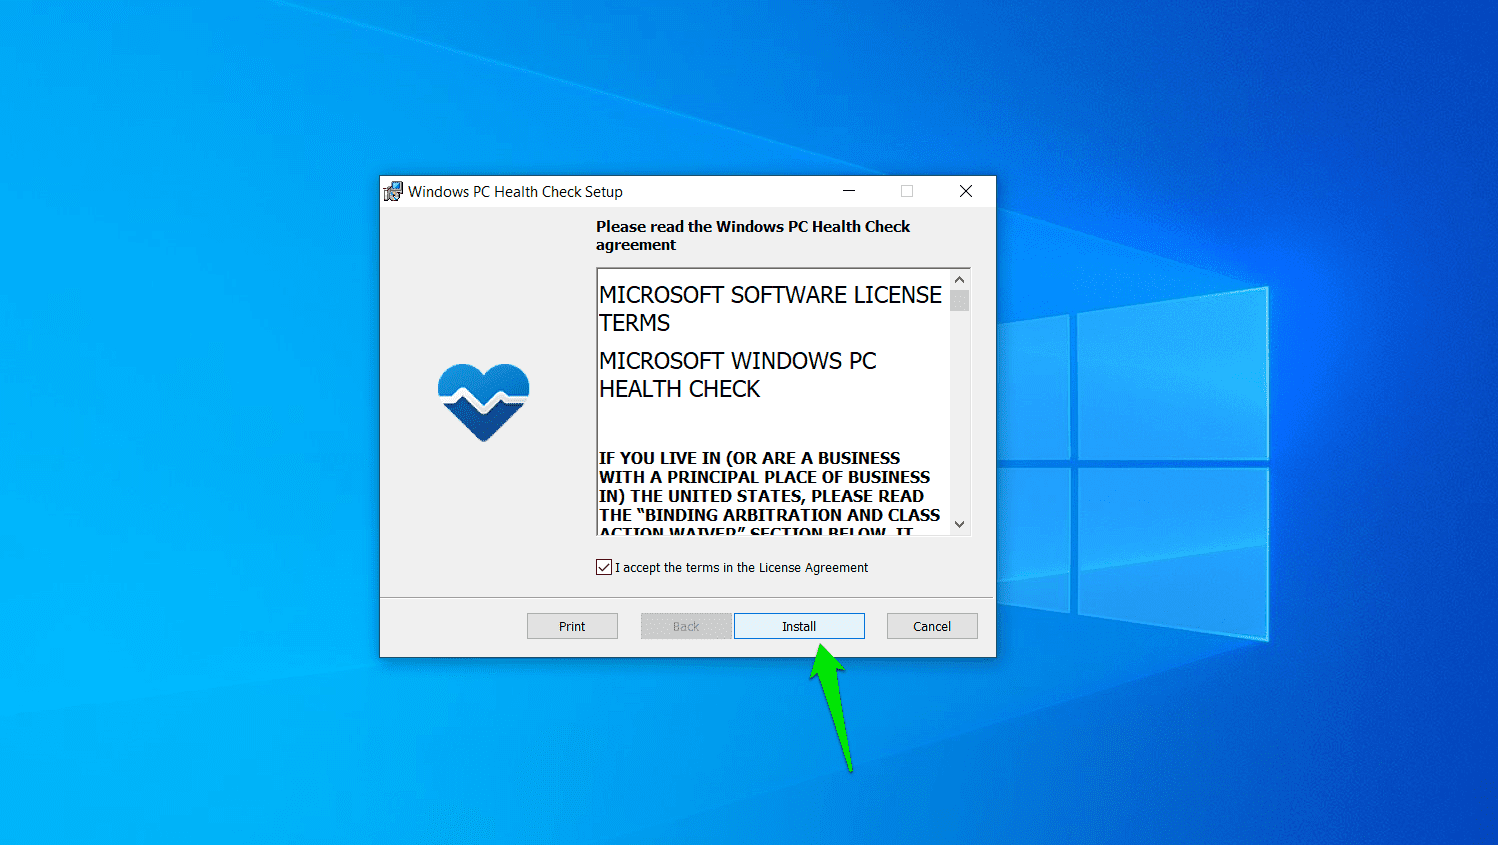
- Click on “I accept the terms in the License Agreement” and select Install when you see the setup page.
- Click on Finish to open the application.
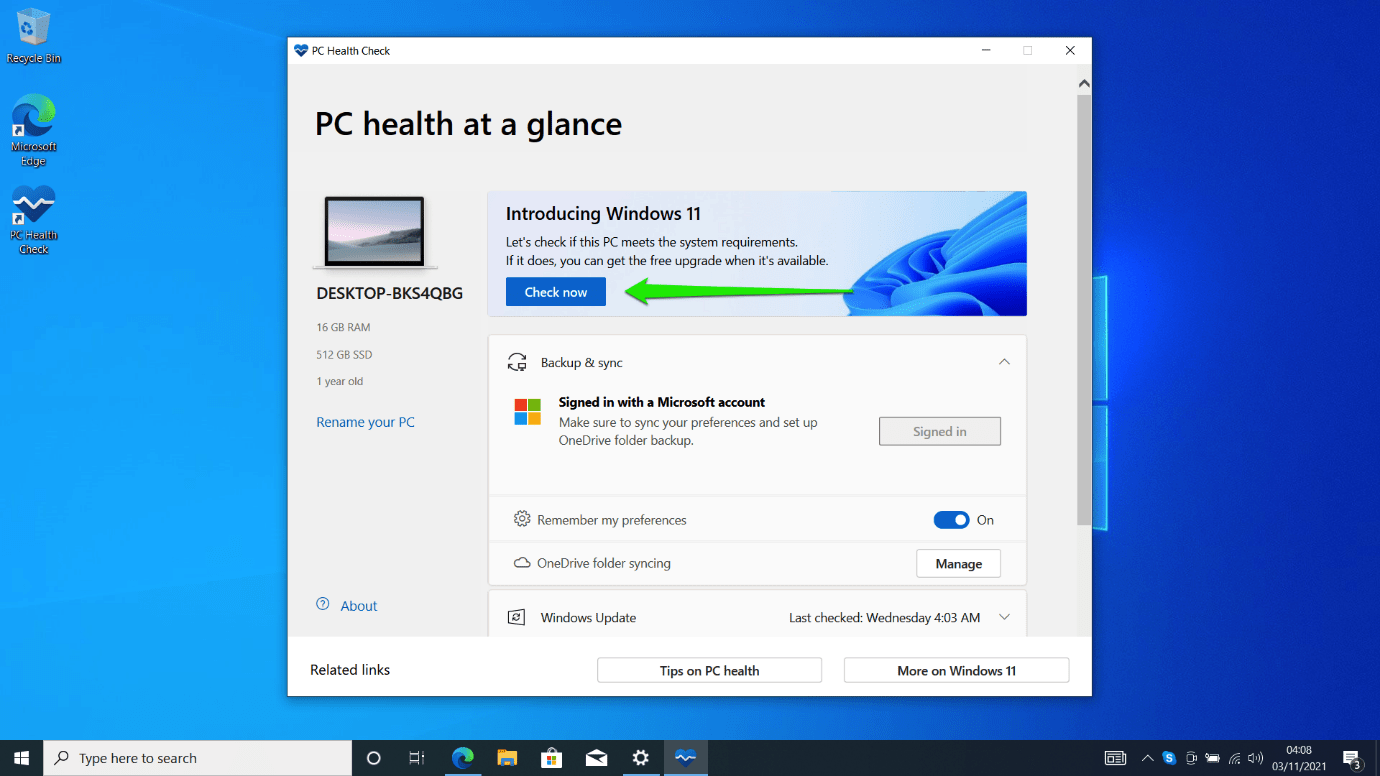
- Once you launch the app, you’ll see different resources on the first page. It displays the name of your computer and some basic details in the left pane.
- To check your PC’s compatibility, click “Check now” under “Introducing Windows 11”.
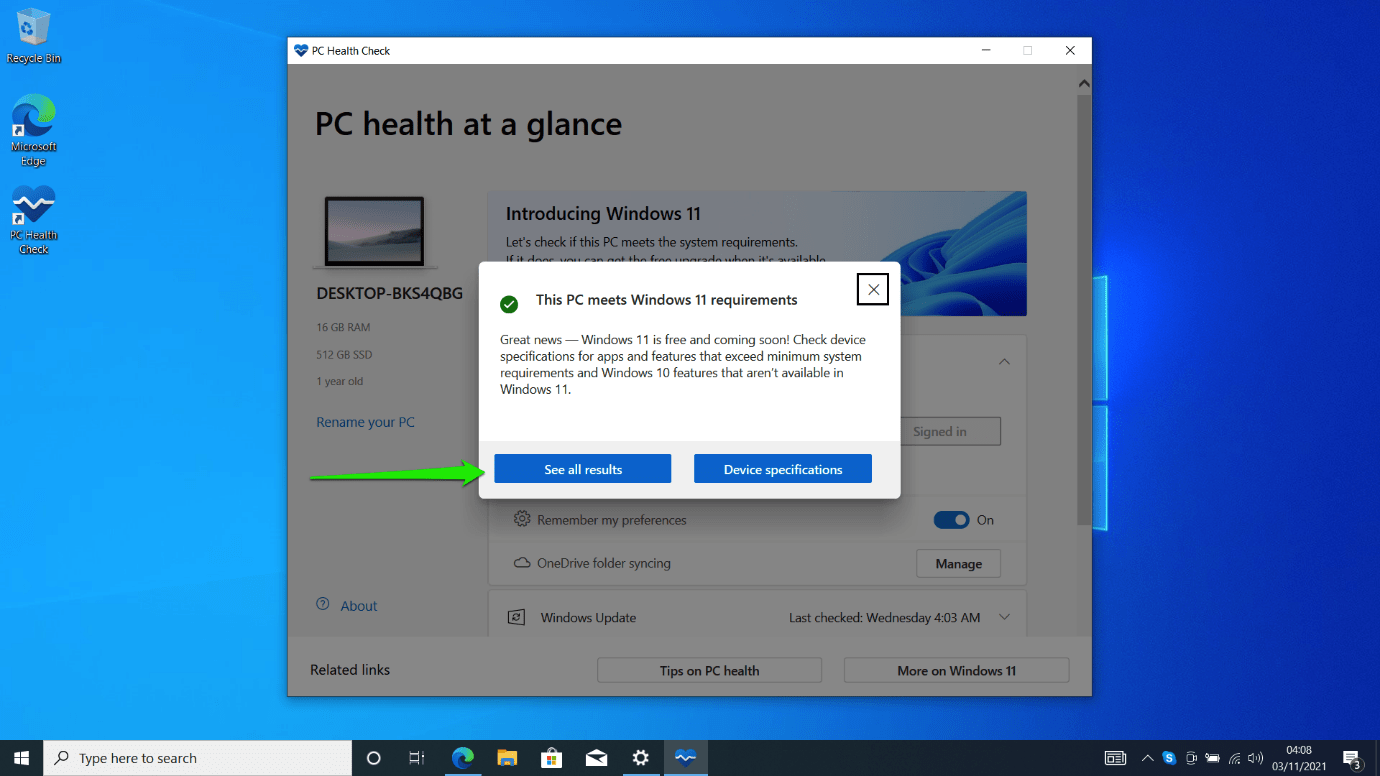
- A dialog box will pop up, confirming whether your computer meets the operating system’s requirements. Next, you can click “See all results” to check what’s missing on your computer.
If you encounter a message stating, “This PC can’t run Windows 11,” do not panic. There are steps you can follow to rectify this issue, as outlined in this comprehensive guide.
Also Read: ‘The PC Must Support TPM 2.0’ Error While Upgrading to Windows 11
Checking Your PC Specifications Manually
Sometimes, the PC Health Check app gets things wrong. For example, if TPM or Secure Boot is turned off at the BIOS level, the program could report that your system can’t run Windows 11.
So, if you believe that your machine should run Windows 11, we’ll show you the steps to check if it has all the required components.
Checking Your TPM Status:
- Press Win + R or right-click on the Windows icon in your taskbar and click on Run.
- Once the Run dialog window shows up, open the TPM management window by typing “tpm.msc” and hitting the Enter key.
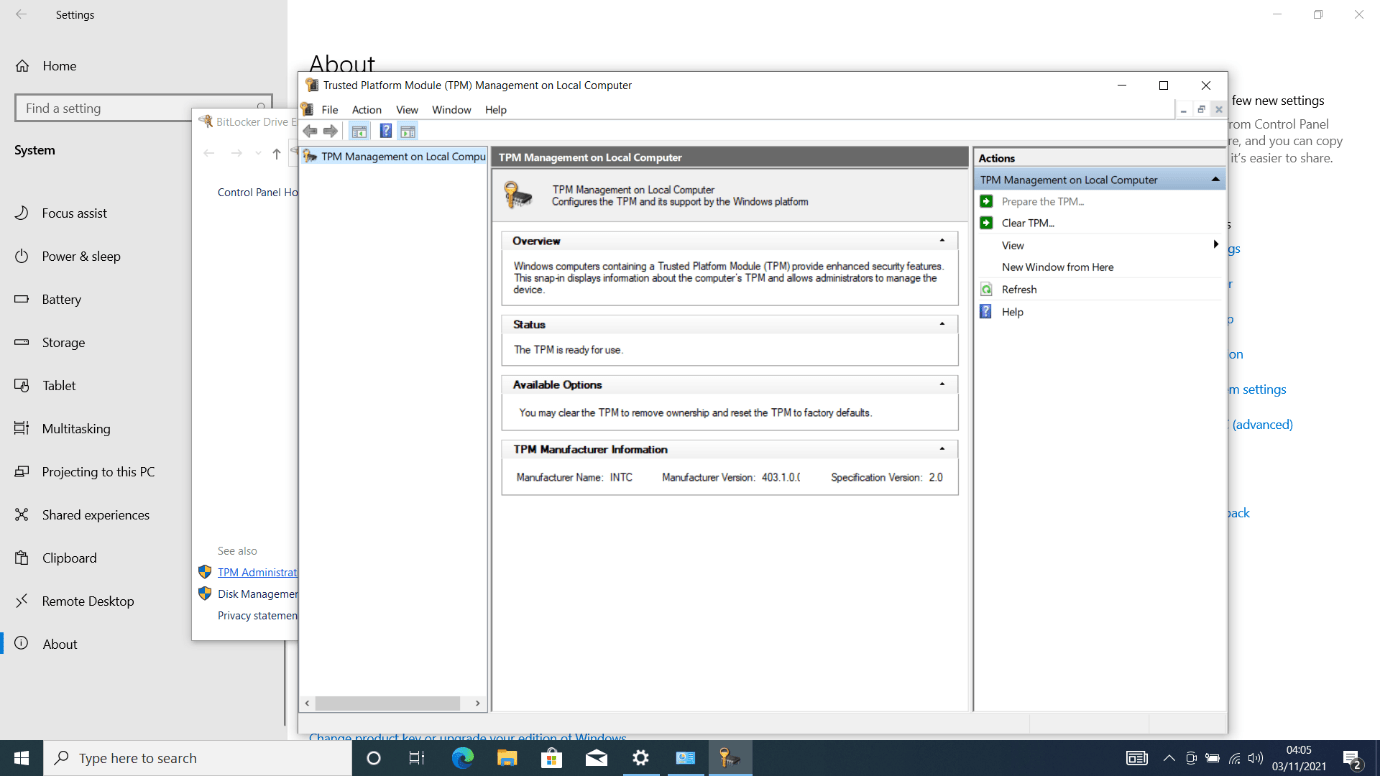
- The Trusted Platform Module (TPM) Management window will fly out.
- If TPM isn’t installed, you should see a message that says, “Compatible TPM cannot be found.”
- However, if your computer has the module installed, you should see the following sections:
- Overview: This section gives brief info on TPMs.
- Status: This section tells you whether the TPM is ready to use or not. If it’s not ready, then you have to go to your BIOS and turn it on.
- Available Options: This section lets you know if you can reset the module to factory defaults.
- TPM Manufacturer Information: This section displays the manufacturer information and version of your TPM. Windows 11 requires version 2.0. However, systems with version 1.2 can also install the OS.
Checking for Secure Boot Support:
- Press Win + R or right-click on the Windows icon in your taskbar and click on Run.
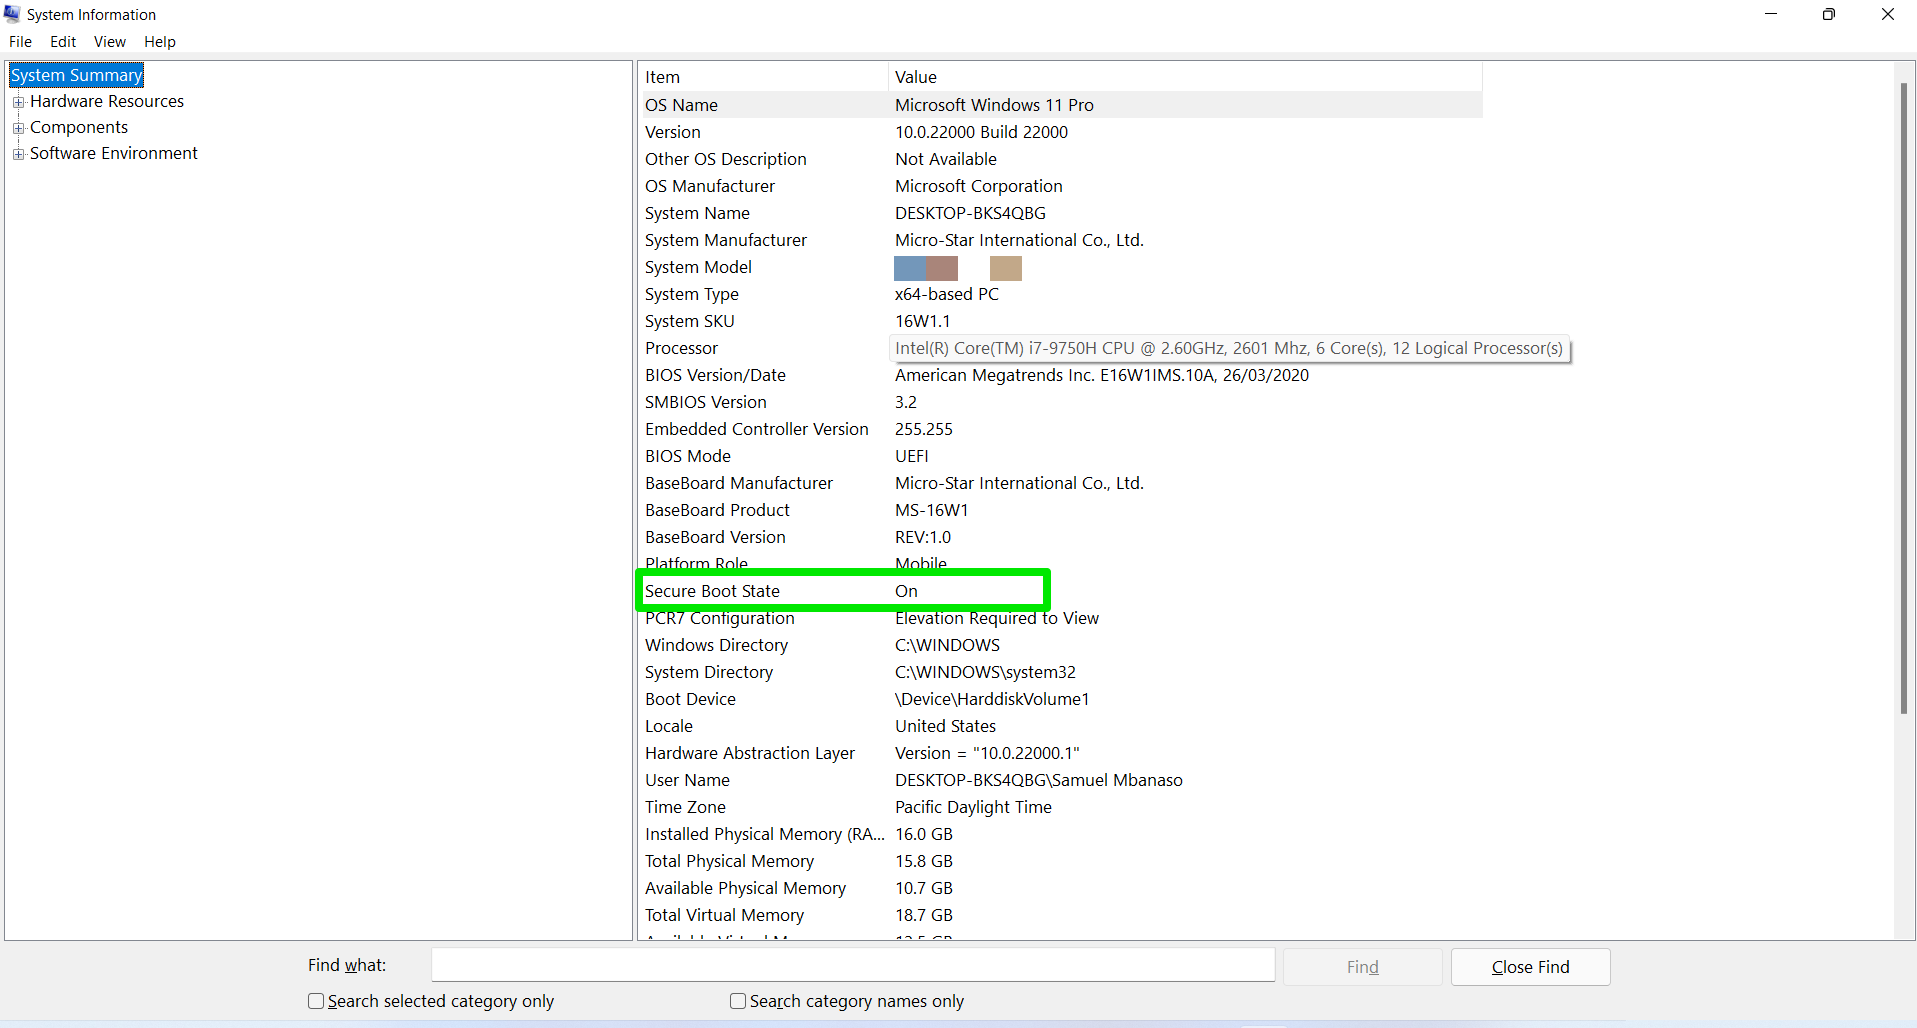
- Once the Run dialog window shows up, open the System Information window by typing “msinfo32” and hitting the Enter key.
- The System Information window will now appear.
- Scroll to Secure Boot State to check if Secure Boot is turned on or not.
Extra Tip: You can boost your system’s performance by using our Disk Defrag Ultimate.
Things to Keep in Mind Before You Upgrade
To upgrade to Windows 11 safely, keep these things in mind:
- Downgrading to Windows 10 after the “Go Back” period may result in losing files, so back up your computer and consider your decision carefully.
- Check if your computer meets system requirements, especially the TPM chip.
- Staying on Windows 10 until 2025 is best if you’re unsure.
How to Download Windows 11
Microsoft offers various methods to download and install the operating system, including using Windows 11’s installation package for PC restoration and repair. We will guide you on how to upgrade your system.
How to Upgrade to Windows 11 Through Windows Update
In case you want to benefit from the new features and upgrades, here are detailed instructions on how to upgrade to Windows 11 from Windows 10, making the process hassle-free and straightforward. To install the new OS, visit the Windows Update page and click Download and Install.
Note that even with automatic updates turned on, you must manually click the button to upgrade to Windows 11. So, follow these steps:
- Hit the Windows + I combo on your keyboard to launch Settings.
- Select Update & Security on the first screen of the Settings window.
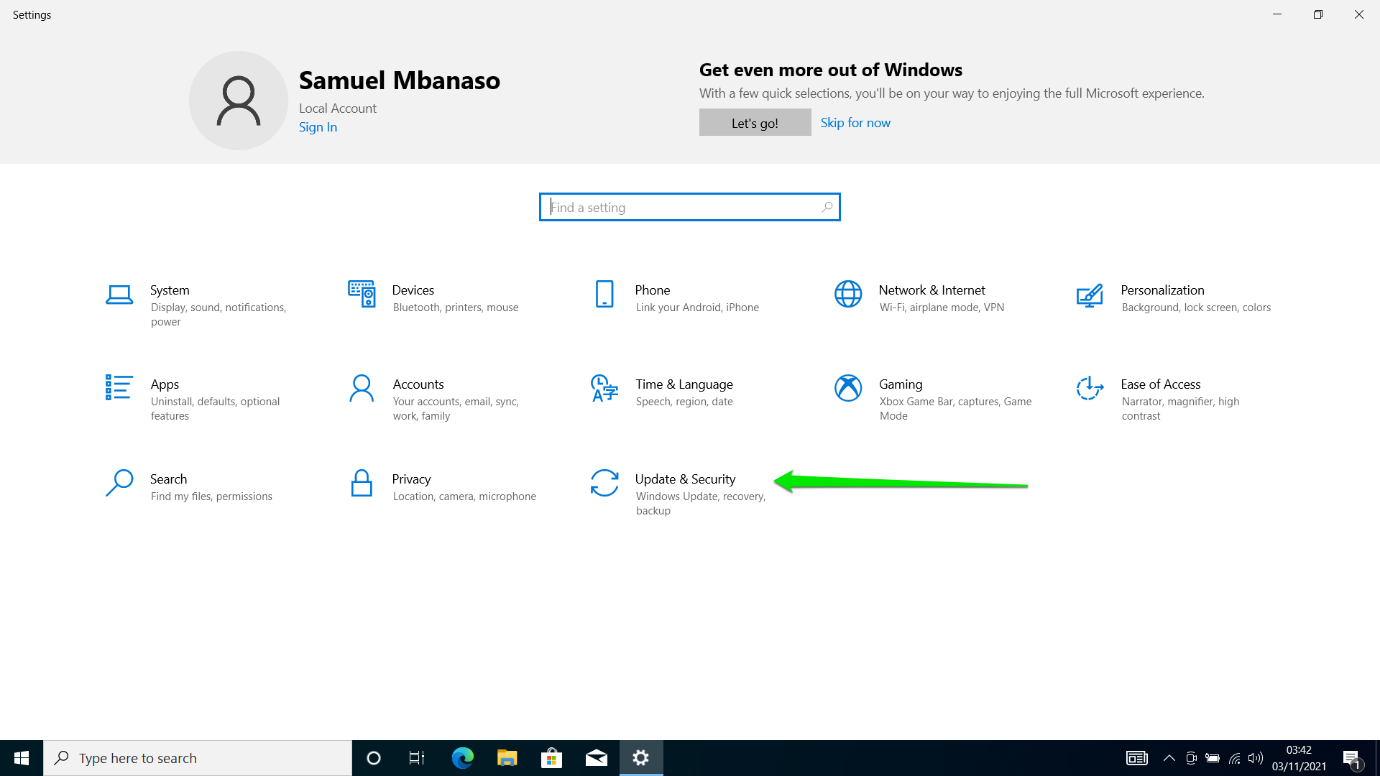
- After the Update & Security page appears, you should see a banner asking you to upgrade to Windows 11. Next, click on the Download and Install button.
- Windows Update will now download and install the operating system, keeping your applications and files intact.
After the Update & Security page appears, you should see a banner asking you to upgrade to Windows 11. Next, click on the Download and Install button.
Windows Update will now download and install the operating system, keeping your applications and files intact.
While each process upgrades your system to Windows 11, they have unique features.
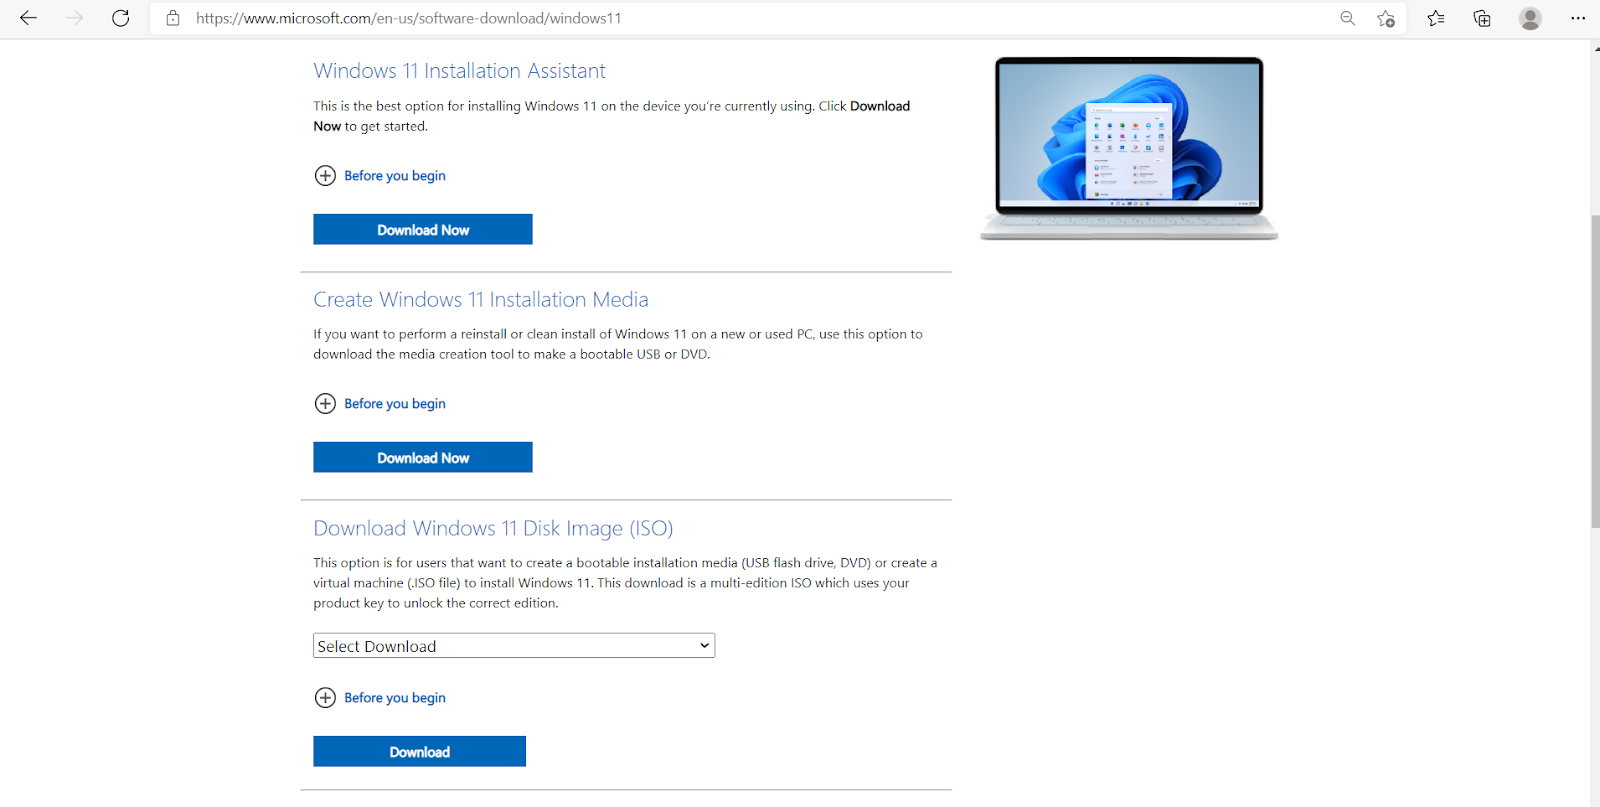
The Windows 11 Installation Assistant and Media Creation Tool help install the OS. The Tool allows you to create a bootable USB drive or DVD for future installations. You can also download the Disk Image (ISO) file to create a Windows 11 installation DVD or bootable USB drive. We’ll guide you through each process.
How to Use the Windows 11 Installation Assistant
This tool benefits individuals looking for a straightforward and guided upgrade from their current Windows version to Windows 11. This tool is ideal for those who prefer a simplified, direct upgrade process with minimal user intervention. It’s also suited for users with a stable internet connection, as the tool downloads the necessary files online. The Installation Assistant handles most upgrade tasks automatically, making it a user-friendly option for less tech-savvy individuals or those seeking a hassle-free upgrade experience.
According to Microsoft, this is the best option for installing Windows 11 on your device. Click Download Now to get started.
- Open the Microsoft website and click the Download button under Windows 11 Installation Assistant.
- After your browser downloads the tool, run it.
- Select Yes in the User Account Control window.
- Once the Assistant opens, click on the Accept and Install button.
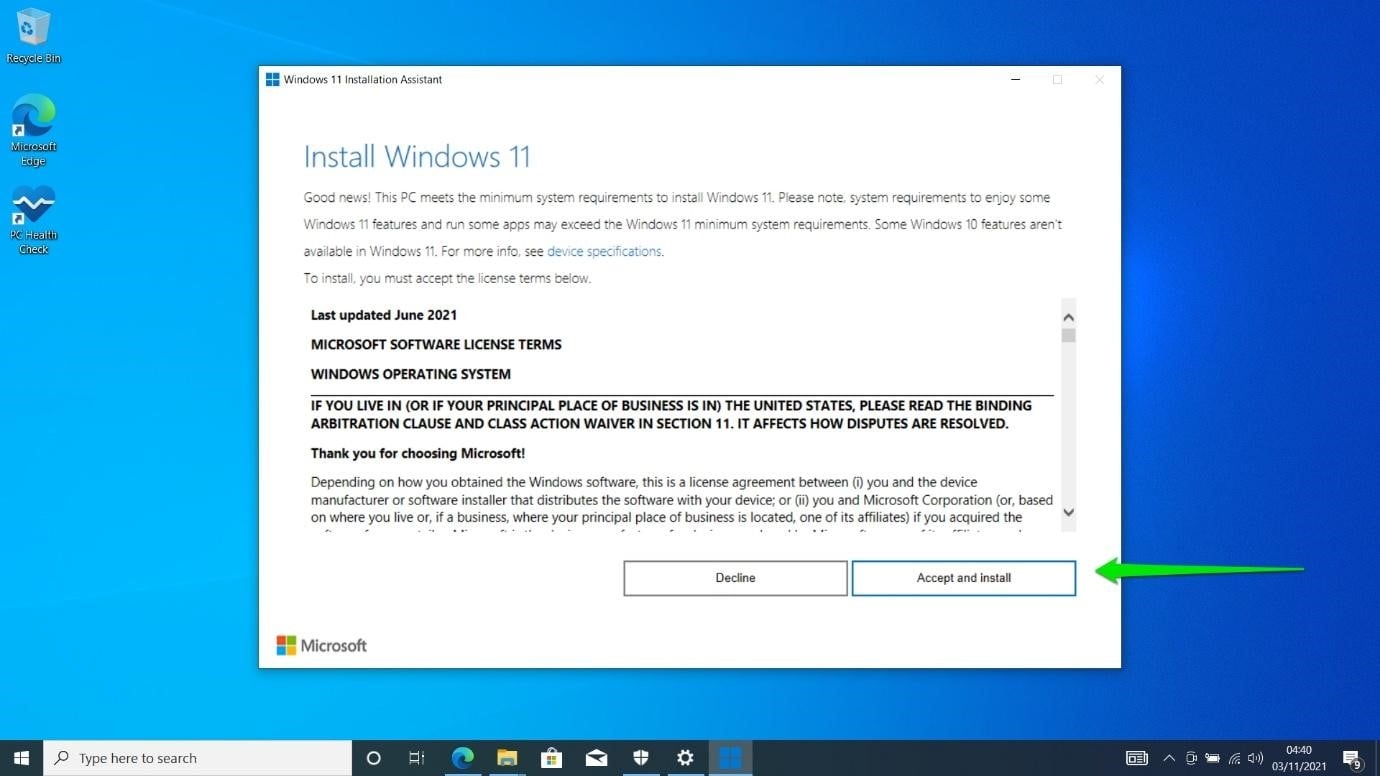
- The Downloading page will now appear.
- Once the phase is complete, a countdown will show on your screen. The tool will automatically restart your PC in 30 minutes. However, you can click on Restart Now to get on with it.
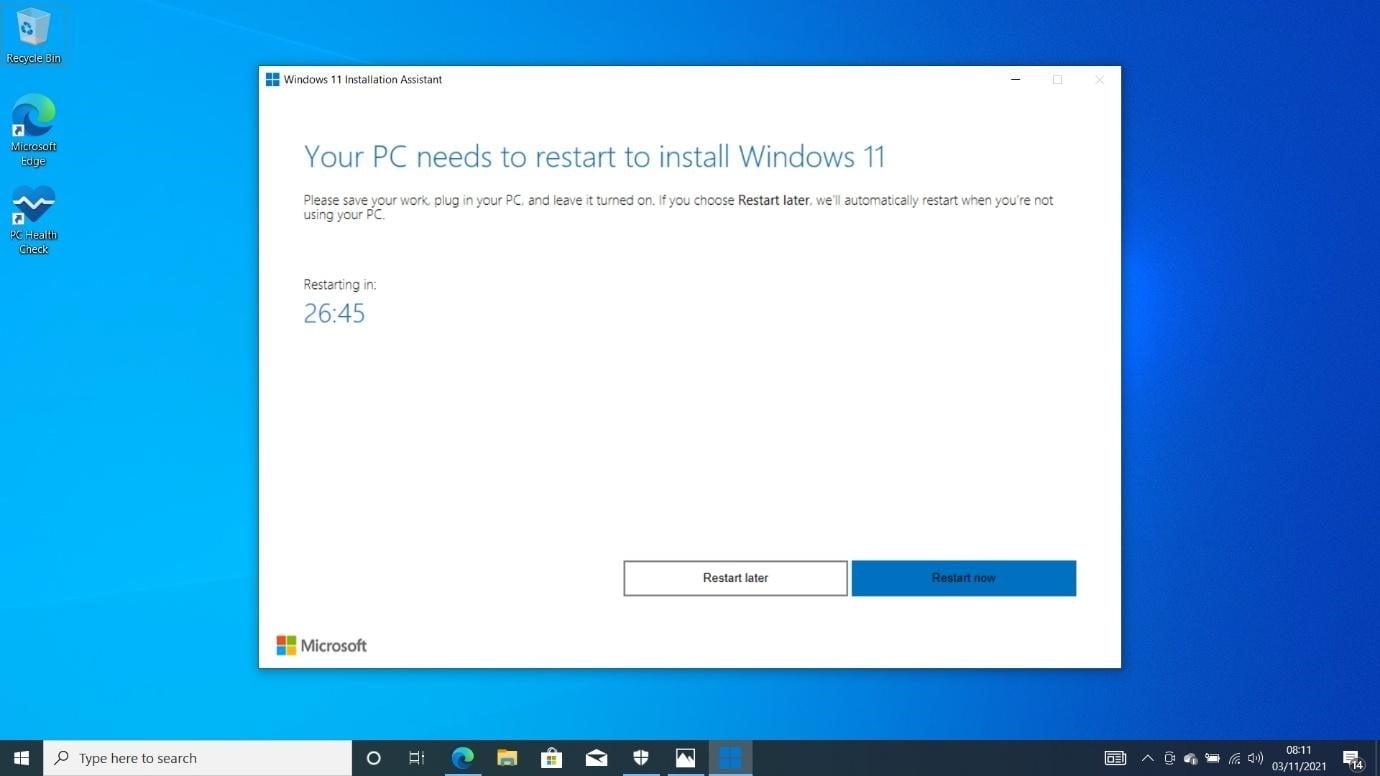
- Another warning page will show up, giving you the last chance to save any open work. Click on the Close button.
- Your PC will now restart into the installation environment.
- From here, the process is straightforward. After the installation is completed, you only have to perform a few rituals, and you’ll be on your desktop in no time.
How to Use the Media Creation Tool
You can also use the Media Creation Tool to download the Windows 11 Disk Image (ISO) file. This tool benefits those who install or upgrade multiple devices, prefer a custom or offline installation, require bootable media for troubleshooting, or deal with legacy hardware.
You can follow this process instead of downloading the file directly from the Microsoft site:
- On the Microsoft website, click the Download button under “Create Windows 11 Installation Media.”
- Run the setup file once your browser downloads it.
- Select Yes in the UAC window.
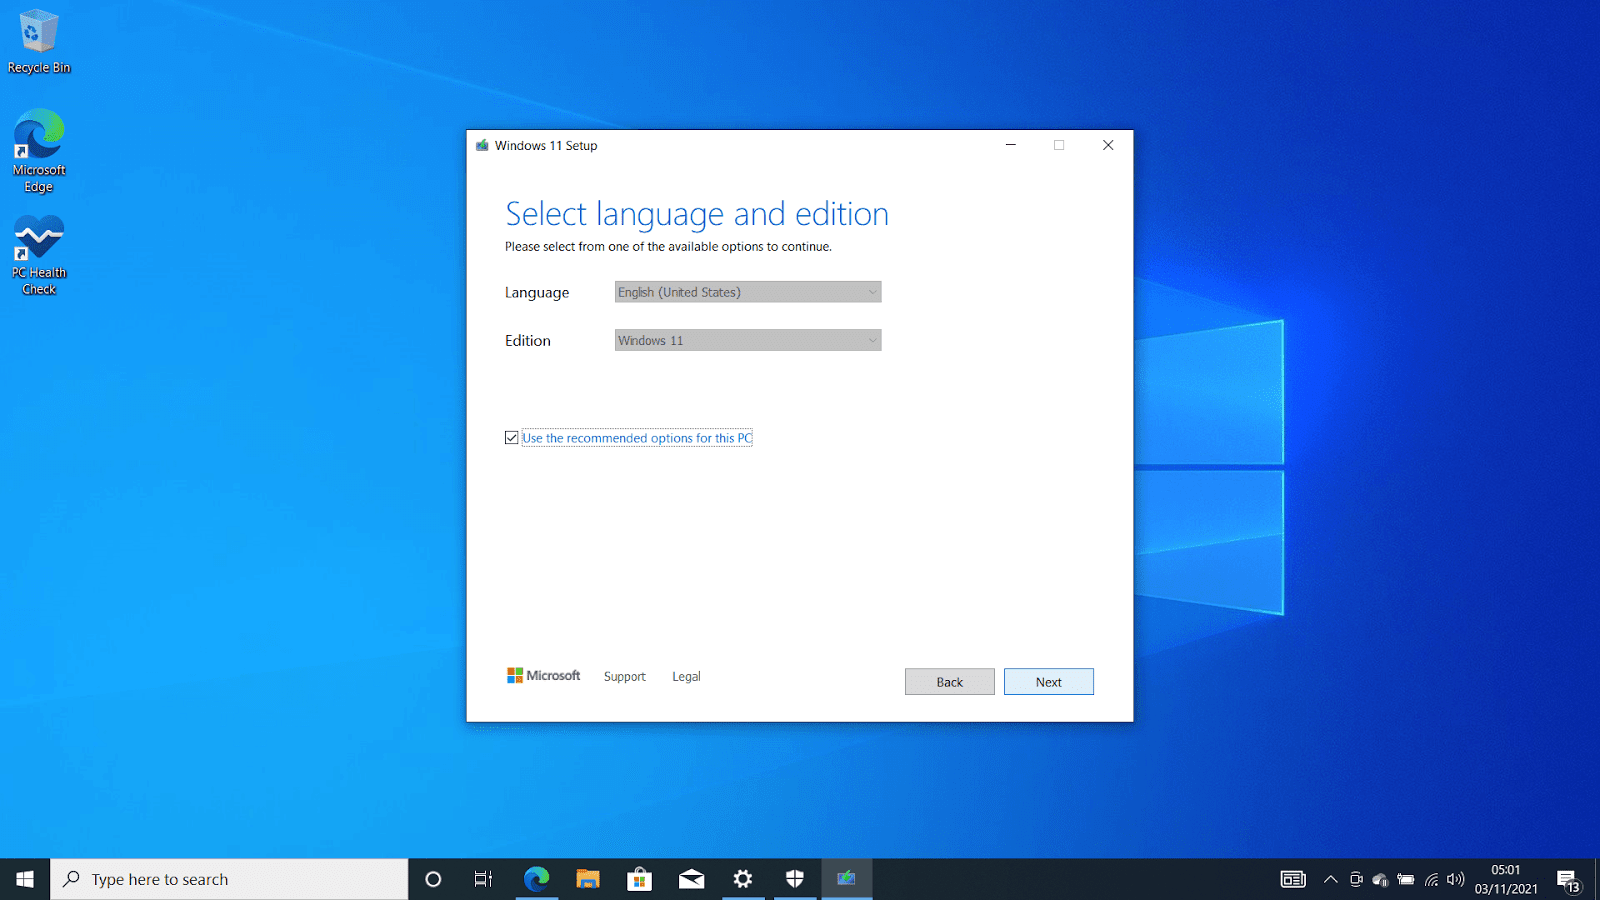
- Accept the license once the Windows 11 Setup window appears.

- On the page that follows, click on the Next button. Uncheck the “Use the recommended options for this PC” box to change your language.
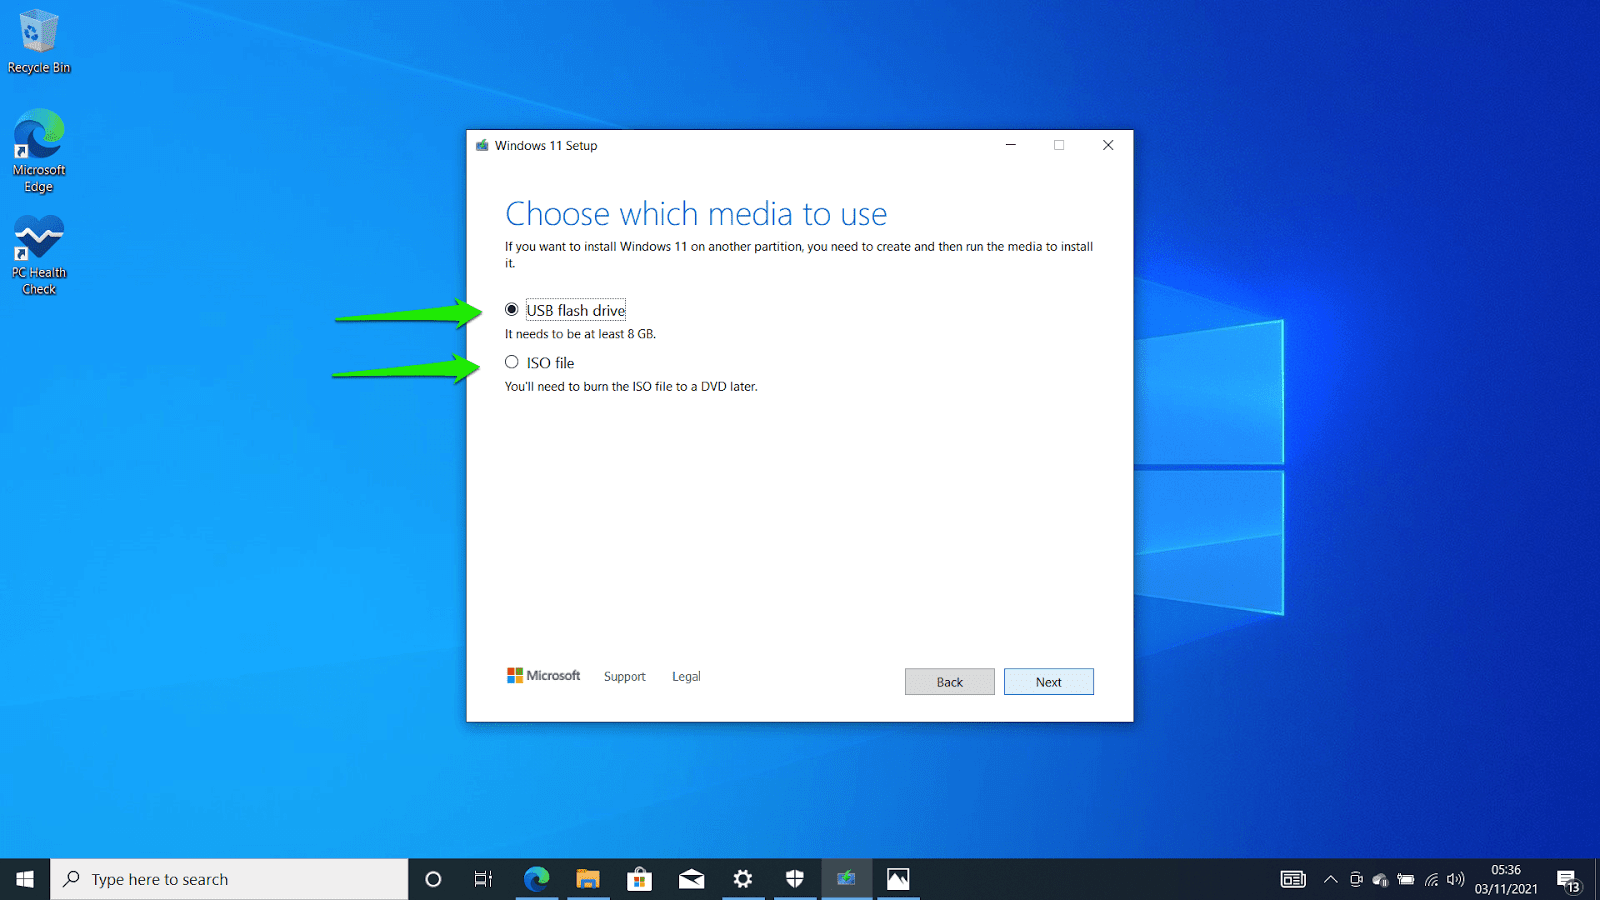
- On the next page, you must choose between a USB Flash Drive and an ISO File. The ISO File option downloads the setup package to your computer. You can burn it to a DVD later.
- If you use the USB option, the next page lets you choose your USB flash drive. It should be detected automatically. Click on the Next button after selecting it.
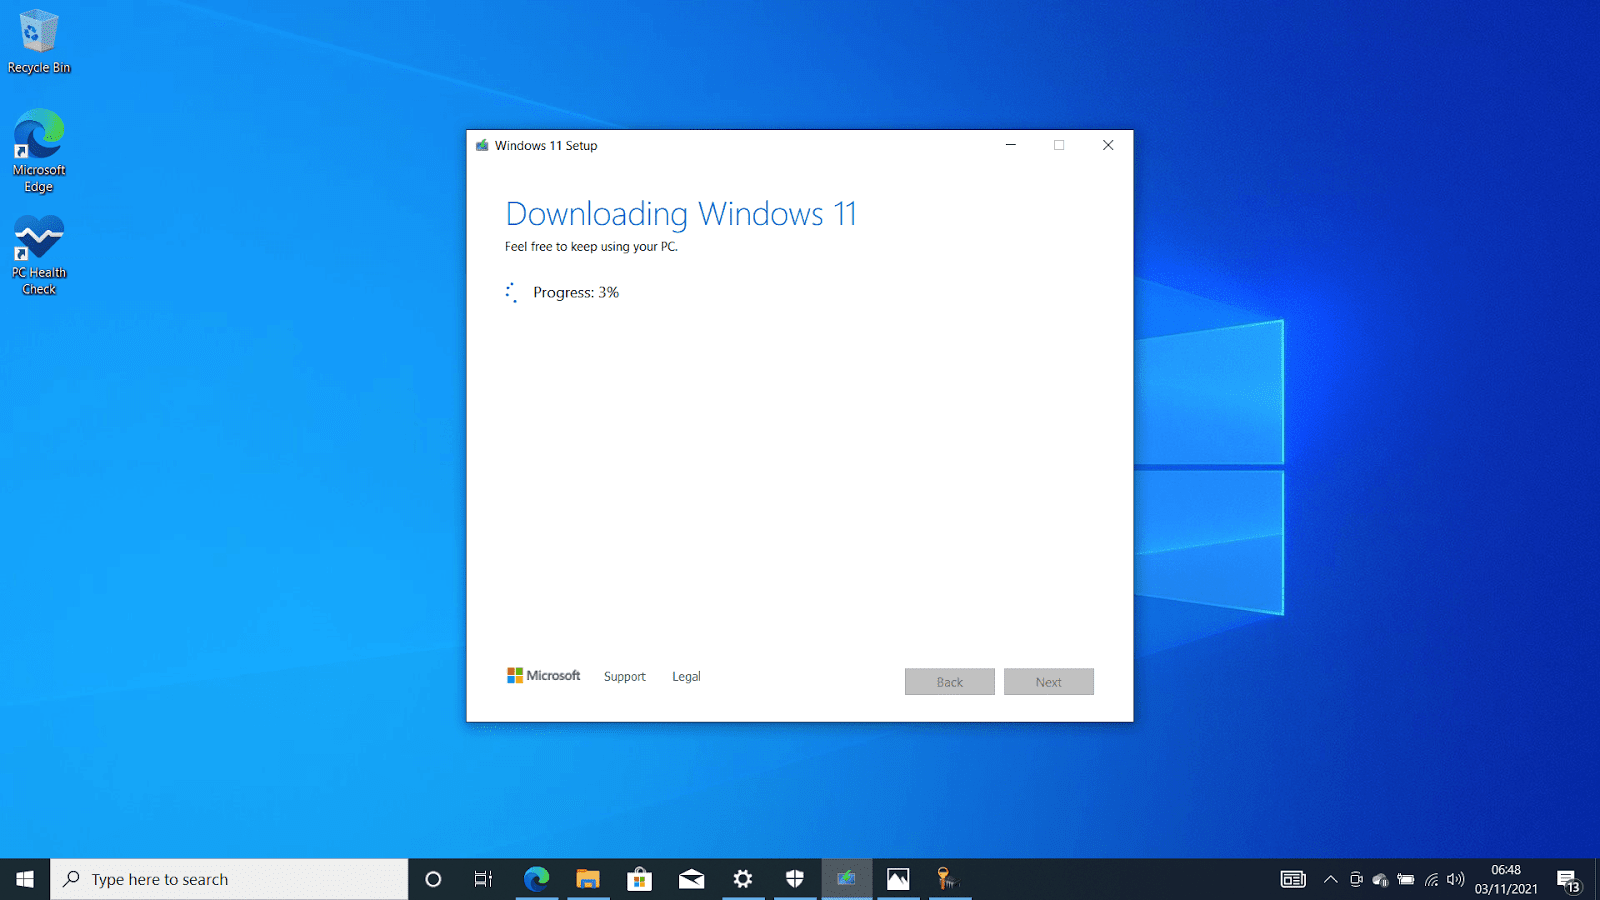
- You should now see the Downloading Windows 11 page. This is the same page you’ll see after selecting the ISO File option.
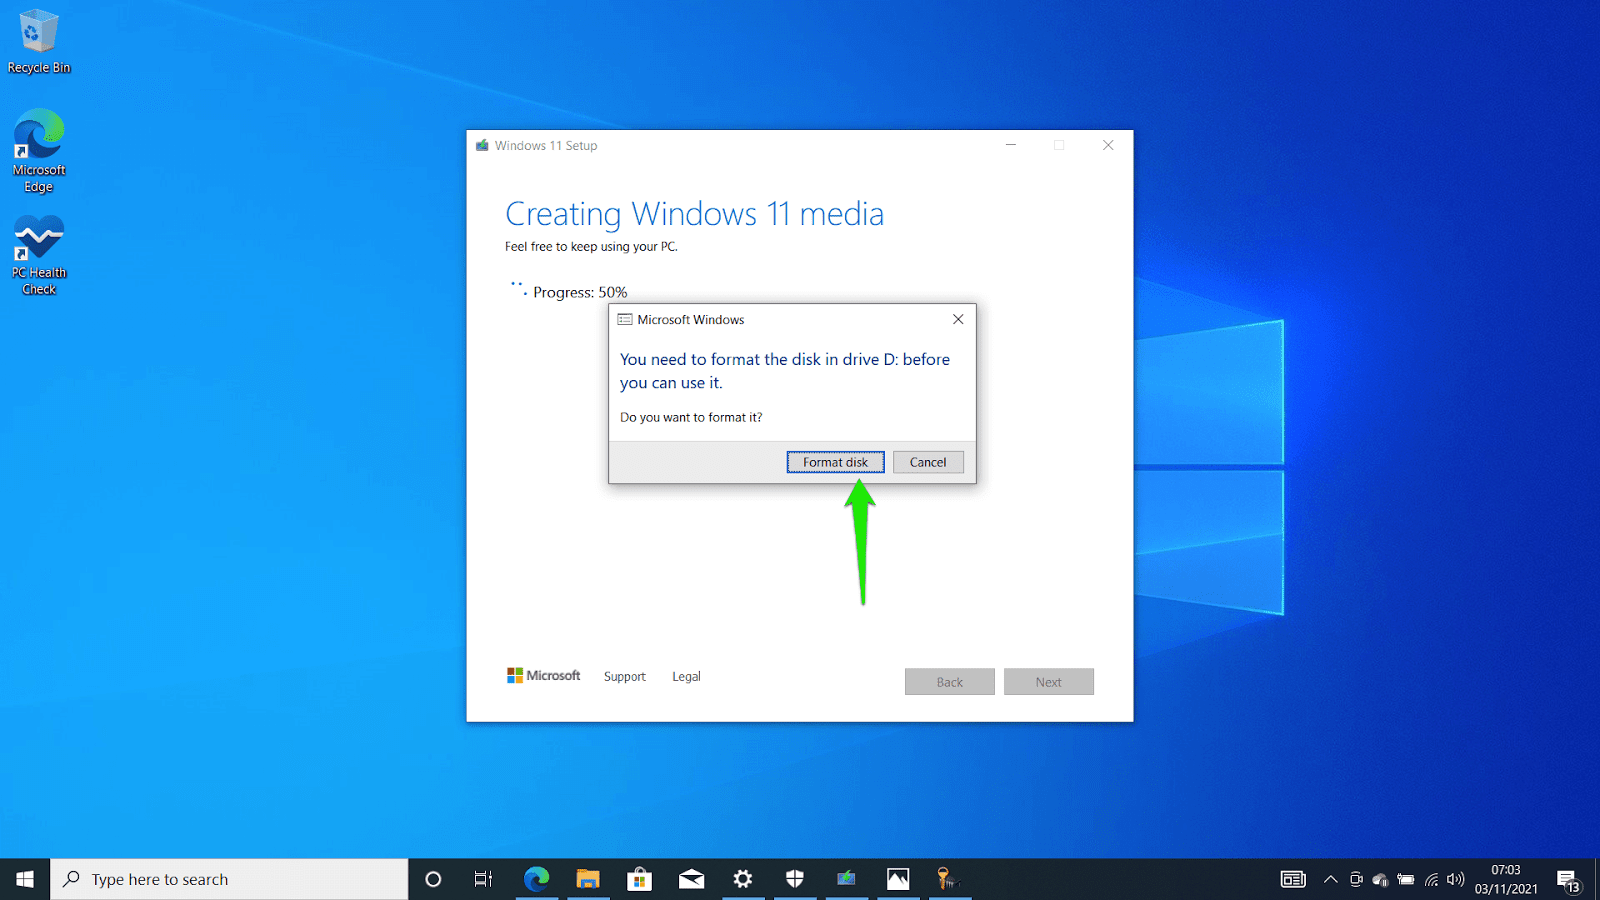
- After the download completes, the setup will start creating a bootable USB drive.
- A pop-up will ask you to format the disk. Click on Format Disk and allow the setup to continue its job. Don’t click on Start in the small Format dialog. Instead, close the page and let the Windows Setup complete the process.
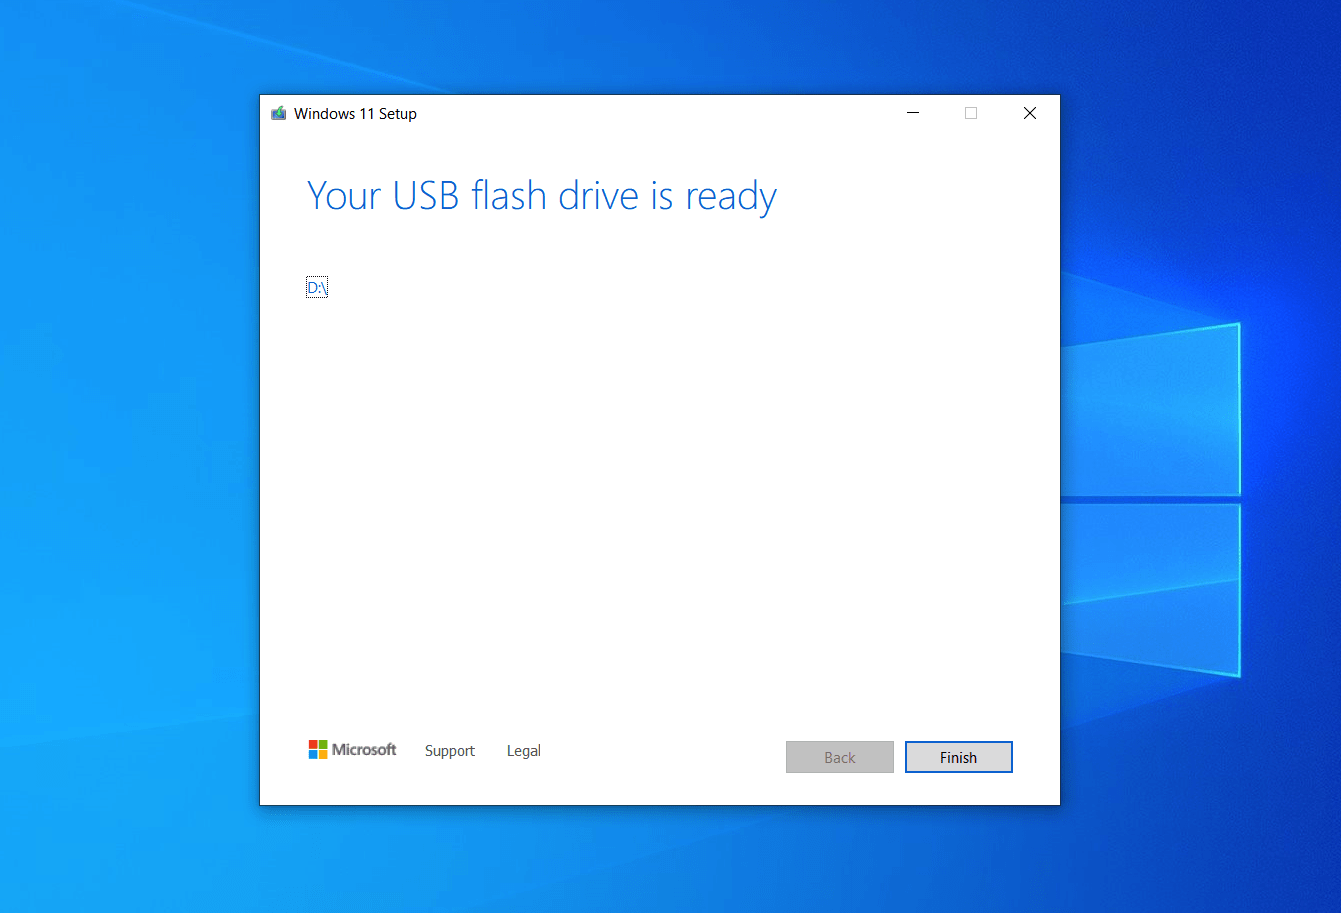
- The Media Creation Tool will notify you that your USB drive is ready once it completes the process. Click on Finish.
- To install Windows 11 using the USB drive, you must shut down your computer, insert the drive, and restart your system. Next, click on any button once your PC prompts you. Then, follow the steps on the setup page.
Download Windows 11 Disk Image (ISO) for x64 Devices
- Go to the official Microsoft website and find the link for the Windows 11 Disk Image (ISO) under “Create Windows 11 Installation Media.”
- Download the ISO File:
- Prepare a USB flash drive with at least 8GB of storage.
- Once downloaded, use a program like Rufus, a free software that helps create bootable media with the ISO file and USB drive.
- Install Windows 11
- Insert the bootable USB drive into the PC, restart it, and boot from the USB.
- Follow the on-screen instructions to install Windows 11, entering a product key when prompted.
- Ensure Windows 11 is activated in Settings -> Update & Security -> Activation.
This process allows for a clean installation or reinstallation of Windows 11 on your system.
Conclusion
Many people are wondering if they should upgrade to Windows 11. If you’re tempted by the new features, it’s worth considering. Most of the features are built on top of Windows 10, so you won’t miss out on much if you decide to switch.
The anticipated Windows 11 2023 Update (23H2) is on the horizon, slated for release soon. Notably, this update doesn’t introduce major hardware requisites, making it a seamless transition for existing users.
Keep in Mind: How to Reset Windows Update: Fixing Update Problems
Nevertheless, after upgrading, some users were dissatisfied with the new system and opted to switch back to Windows 10. Another thing to note is that you have a limited period for going back to Windows 10 once you upgrade. The period could be as little as 10 to 30 days. After that, you might be unable to keep your files and apps if you want to reinstall Windows 10.
Whether to upgrade or stick with Windows 11 is a topic of debate within the tech community. Although some praise Windows 11 for its enhanced gaming features and refined design, others argue that the change is minimal. Ultimately, it’s a matter of personal preference. Before deciding, you should weigh the pros and cons and consider how your workflow will be affected.
Also Read: How to Go Back from Windows 11 to Windows 10
FAQ
How Long Does It Take to Install Windows 11?
Windows 11 installation time varies based on various factors and can take anywhere from 30 minutes to several hours. Allow enough time for the process, especially if manual interventions are required.
How to Install Windows 11 Without a Microsoft Account?
To install Windows 11 without a Microsoft account, select “Offline account” or “Domain join instead” when prompted to sign in with a Microsoft account during installation. Remember that some features may be limited when not using a Microsoft account.
How to Install Windows 11 on Unsupported Hardware?
Microsoft only recommends installing Windows 11 on unsupported hardware as it can lead to a subpar user experience. If you decide to proceed, download the Windows 11 ISO file and create a bootable USB drive. Note that this could violate terms of service and compromise the secure and stable operation of Windows 11.