
The new Windows 11 operating system is taking shape to replace Windows 10 for good. While the latter will continue to receive support until 2025, users are migrating to Windows 11 in droves.
Unfortunately, the transition is not always a smooth one as Windows 11’s UI facelift makes it difficult for some users to apply basic settings. For example, you’ll now have to press Shift + F10 to see the old context menu options like Refresh and Customize.
Another setting that might seem a tad bit unfamiliar and less intuitive involves your system’s date and time. Windows 11 normally adjusts the date and time automatically using its online time server. However, if you do not see the correct date and time on your Windows 11 computer, this article will show you different ways to adjust them.
How to Change the System Date and Time Settings in Windows 11
There are different ways to change Windows 11’s date and time settings. From using the Control Panel to entering commands in Command Prompt and Windows PowerShell, you can easily find the best option for you.
Setting the date and time automatically
If you’ve been using manual settings, you can allow Windows 11 to set things up automatically.
Go to the right side of the taskbar. Right-click on the time and date display. Select “Adjust Date and Time”.
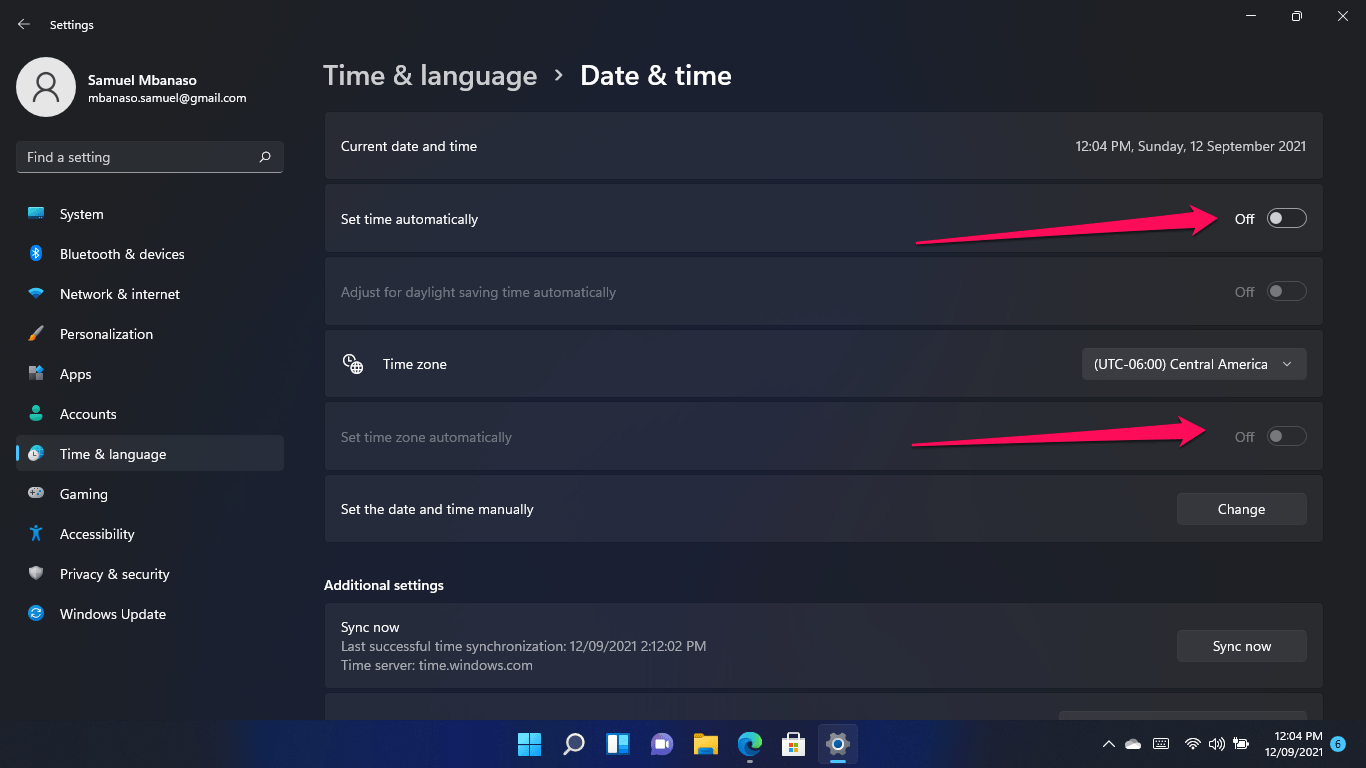
After the Time & Language >> Date & Time page opens, toggle the “Set time automatically” switch to On.
After doing that, toggle the switch for “Set time zone automatically” to On.
Adjusting the date and time manually
If the automatic date and time setting doesn’t work for you, going the manual route is an option. To do that, head to the Settings window by tapping the Windows logo key + I.
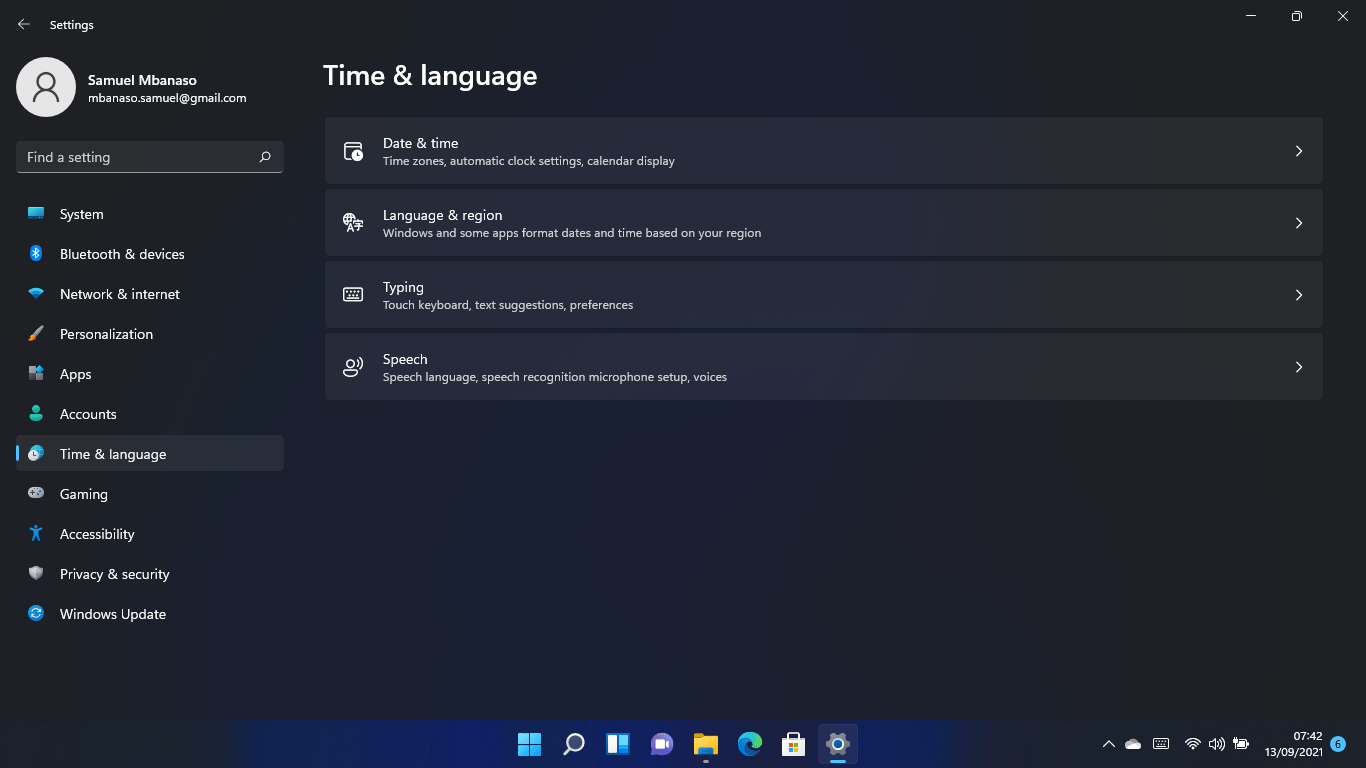
Click on Time & Language. Select Date & Time on the next page.
When the next page comes up, toggle off “Set time automatically.”
Go down to the “Set time zone automatically” switch after that and toggle it to Off.
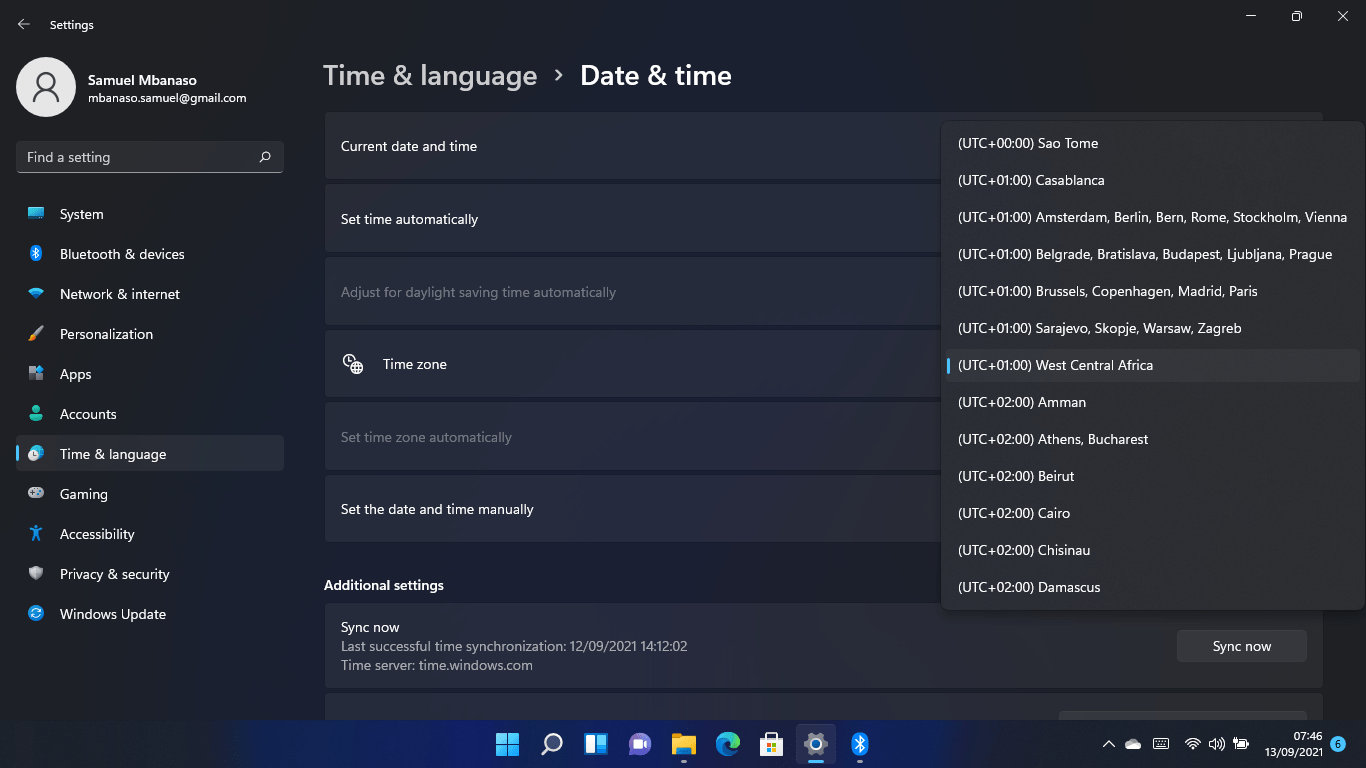
Next, go to the Time Zone drop-down menu to select your time zone.
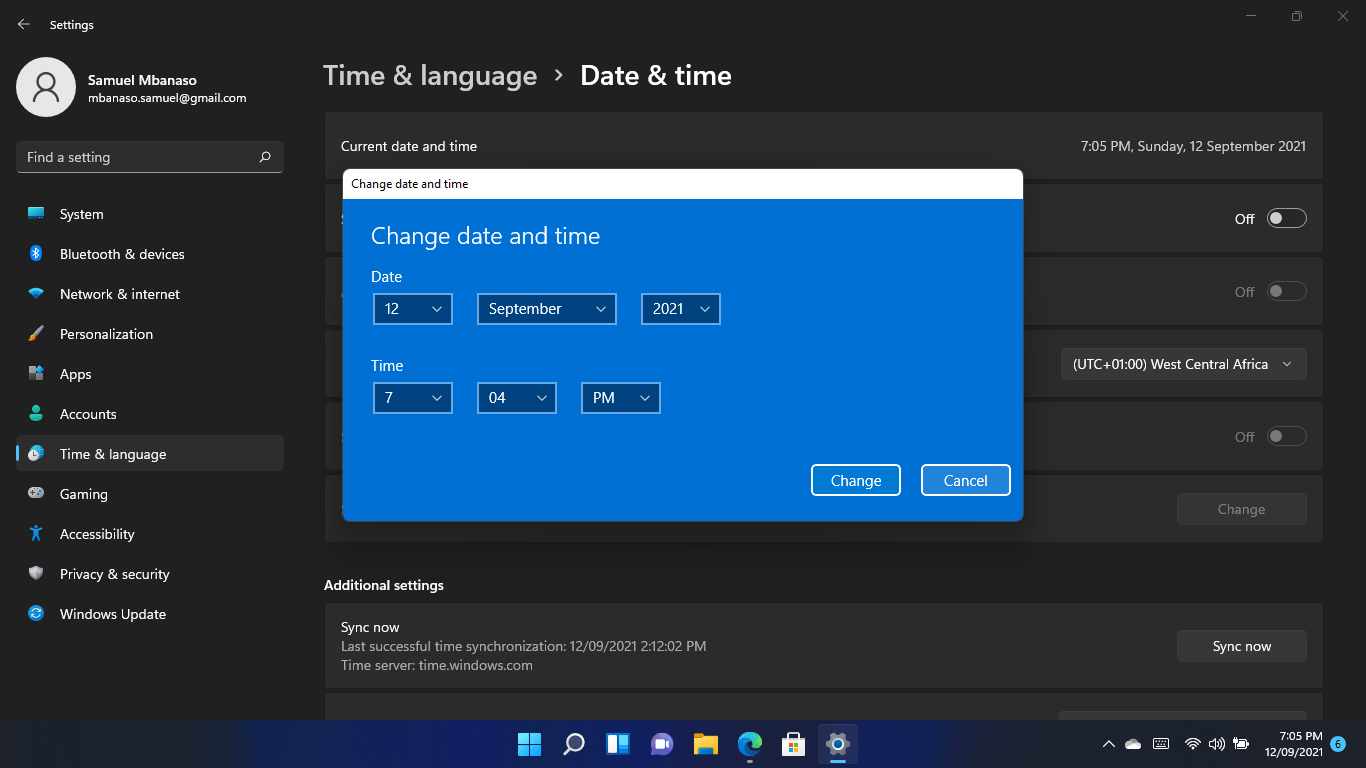
After that, head to “Set the date and time manually” and click on Change.
Adjust your date and time in the dialog box and select Change.
How to change the time and date in Windows 11 using the Control Panel
The Control Panel has made its way into Windows 11, and you can adjust the time and date settings using this interface. You can still follow the old process to get it done. However, here are the steps to follow in case you’ve forgotten how to do so.
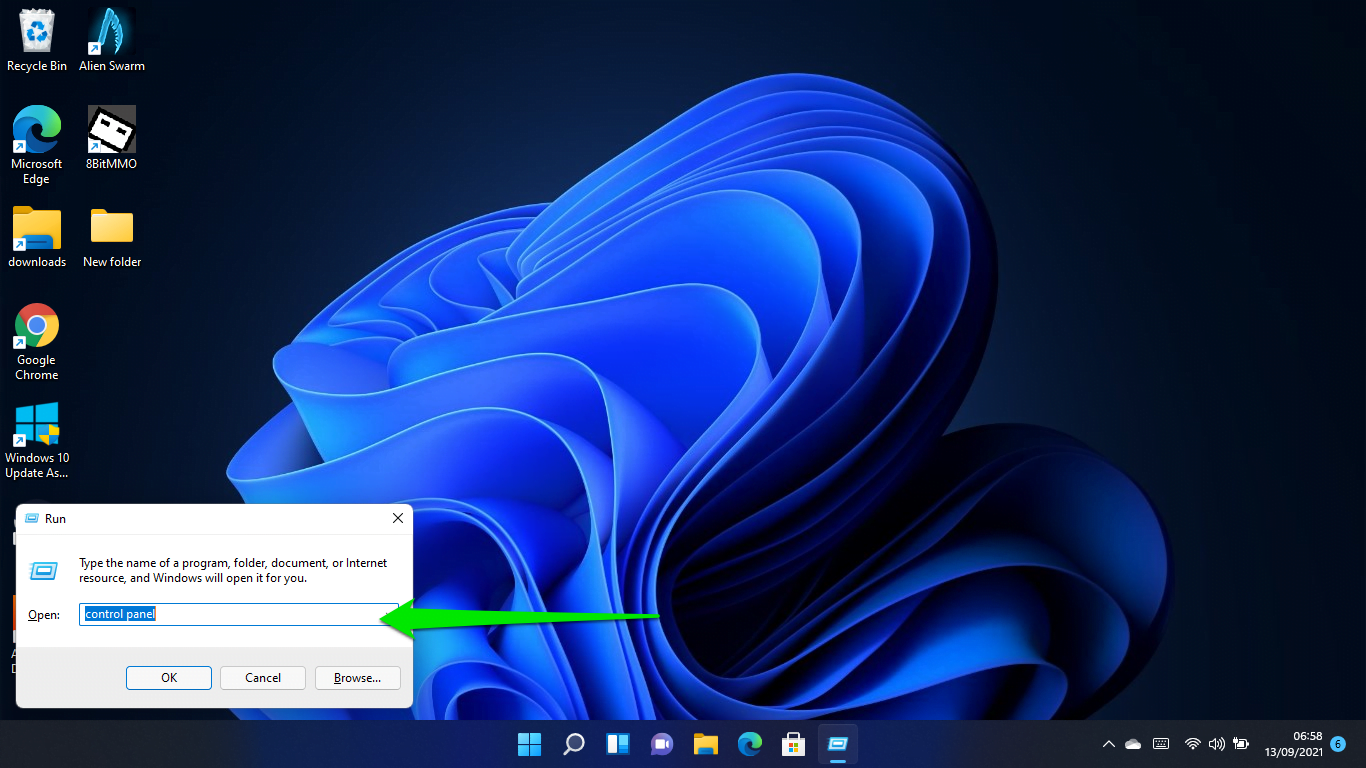
Launch the Run dialog window using the Win logo key + R shortcut. Type “control panel” into Run’s text box and hit Enter.
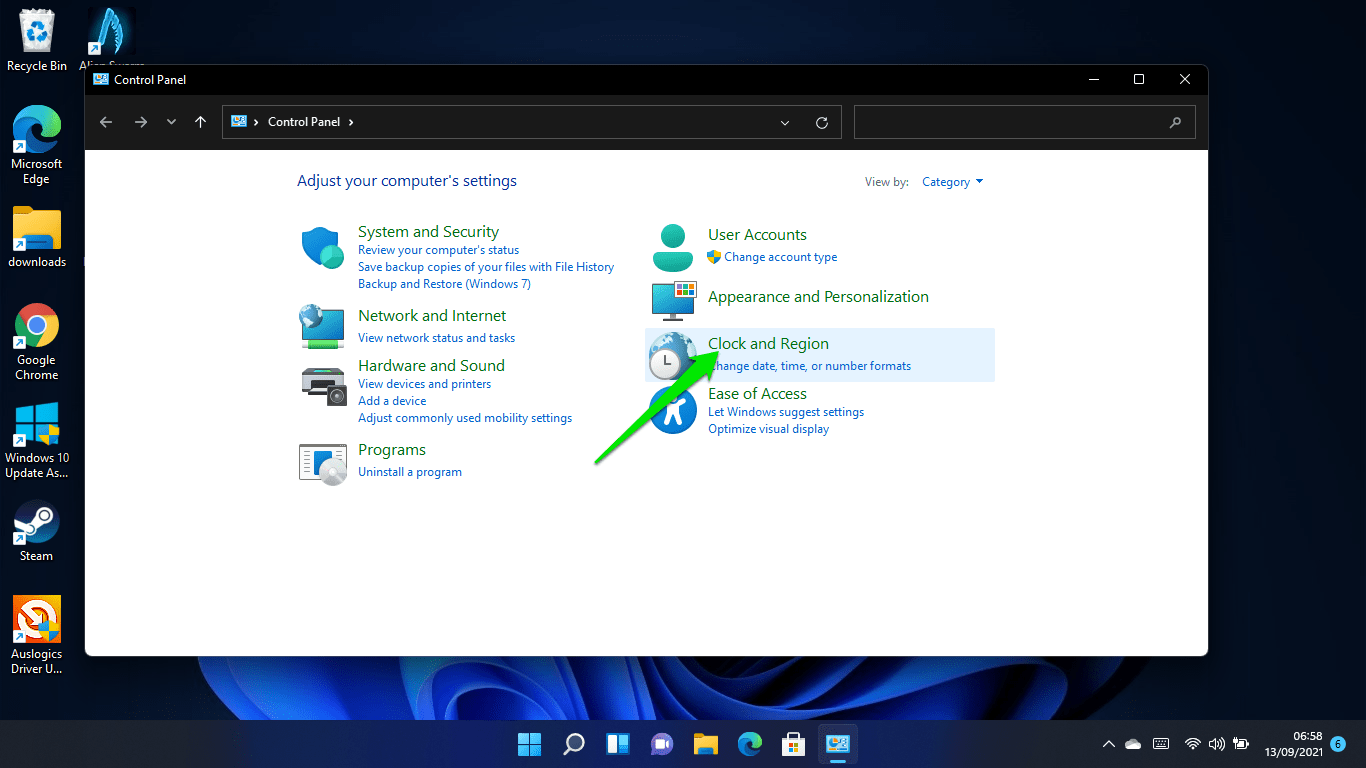
Click on Clock and Region when you open the Control Panel window.
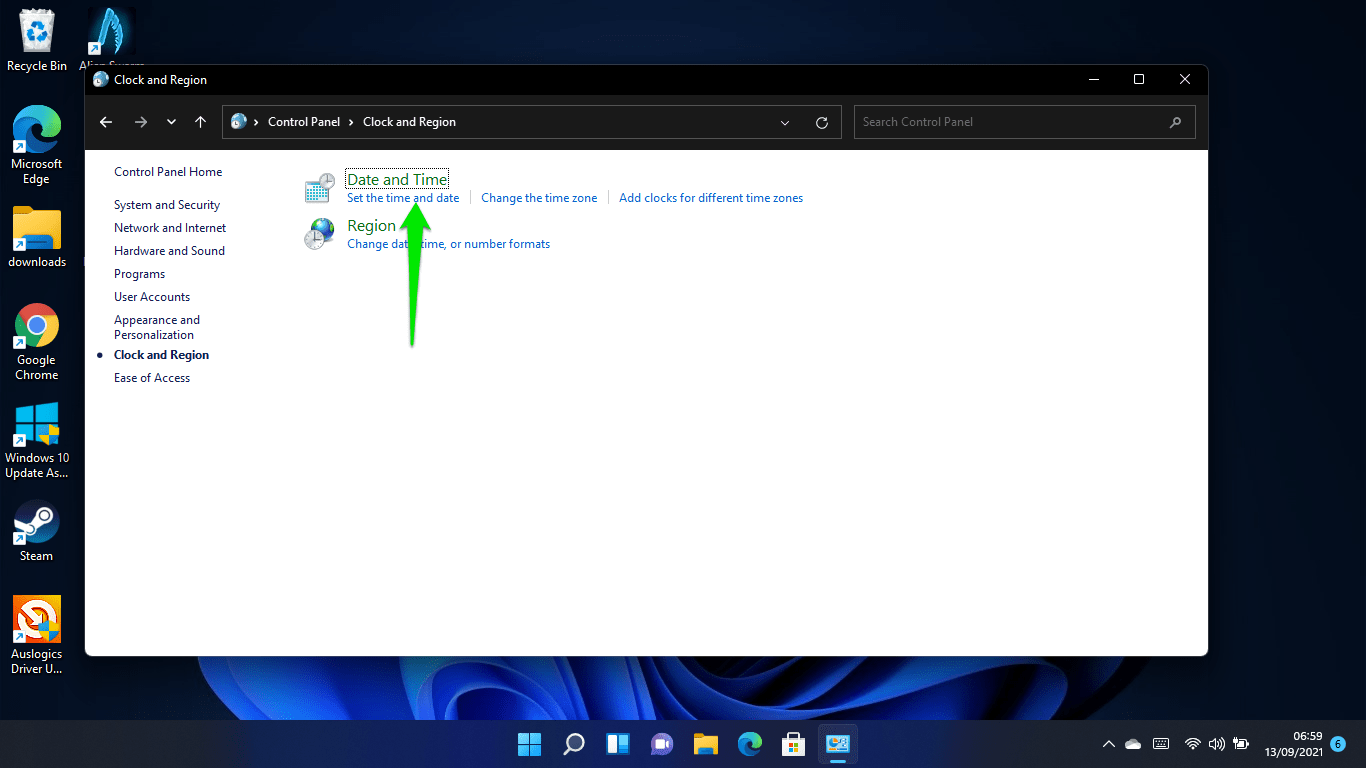
Next, click on Date and Time.
After the Date and Time window shows up, click the “Change date and time” button.
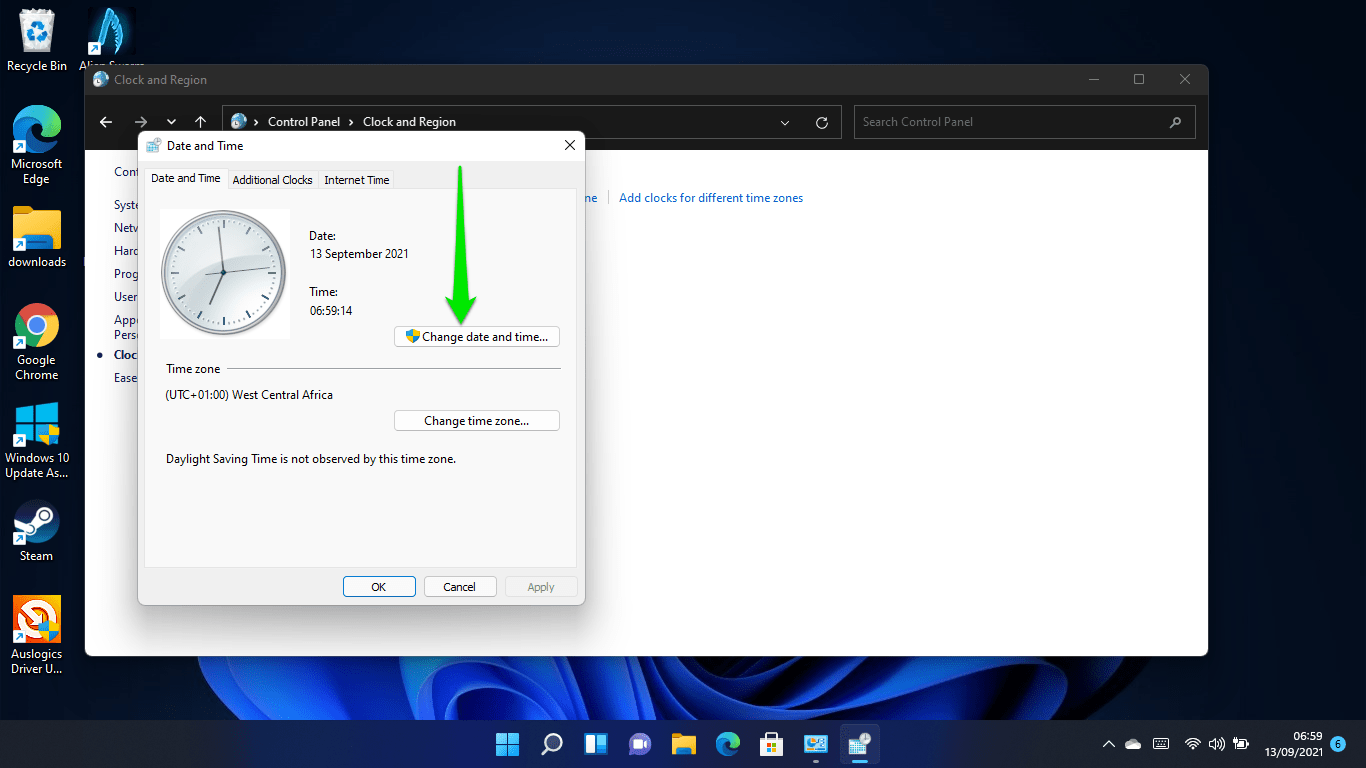
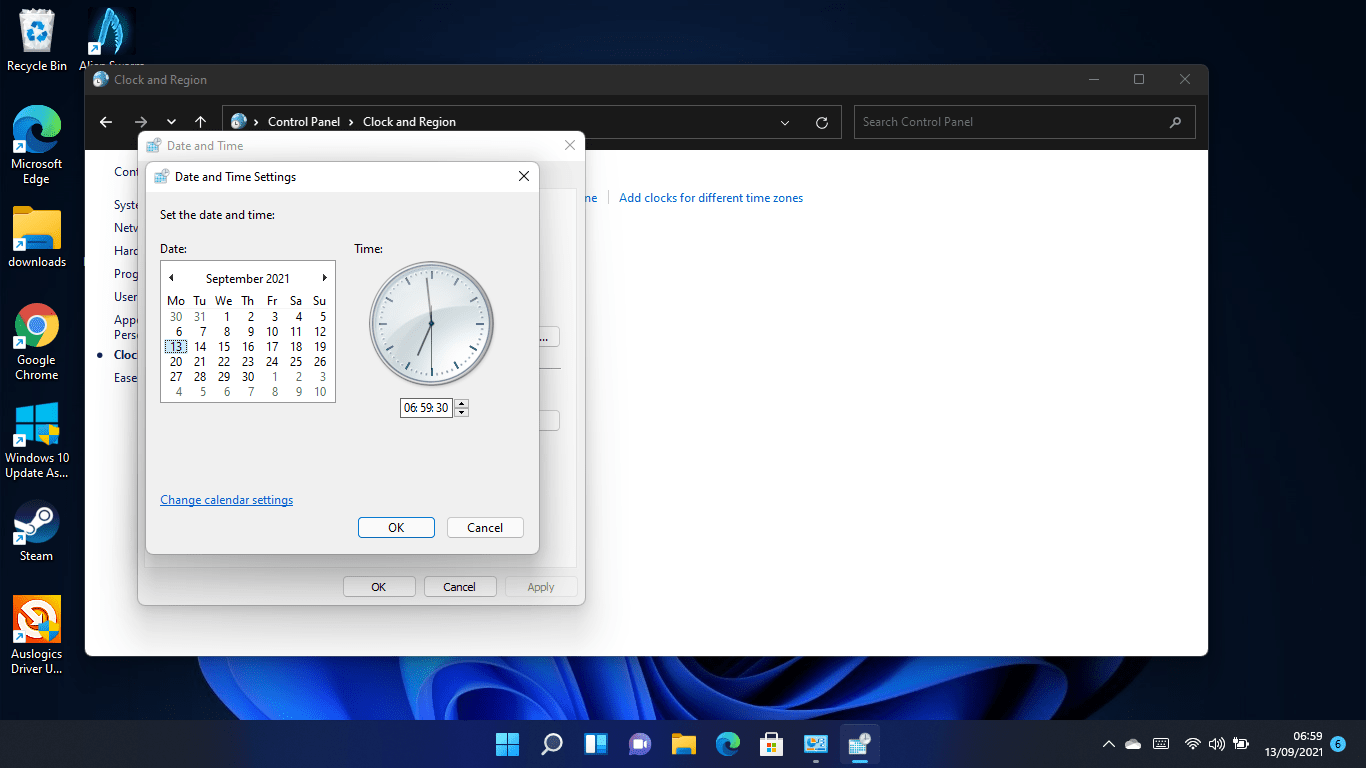
You can now adjust your date and time in the Date and Time Settings dialog. Click on the OK button after making your changes.
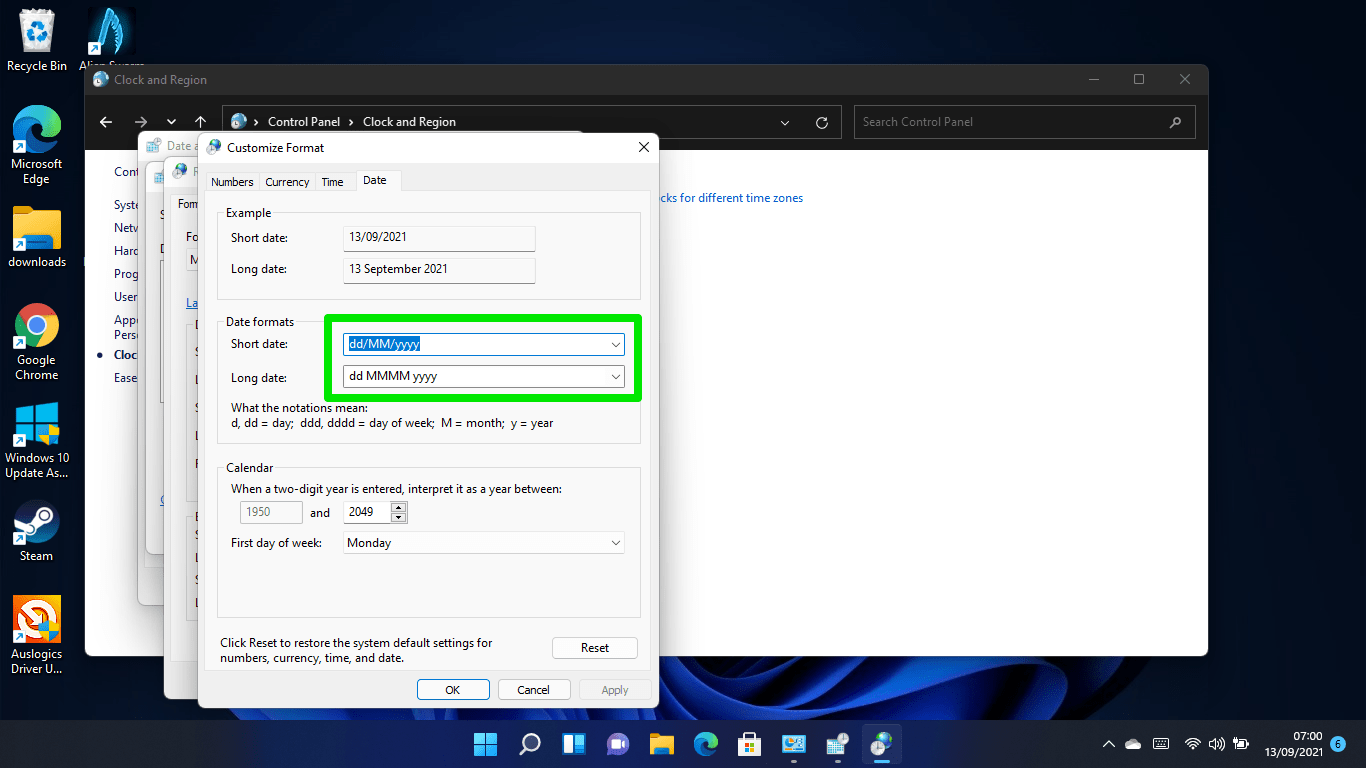
Click on the “Change calendar settings” link to adjust your date and time formats.

You can click on Additional Settings in the region dialog window to change your currency, measurement system, and date and time settings.
How to change the date and time using the Command Prompt in Windows 11
If you want to go technical, you can enter a set of commands into the Command Prompt to change your system’s date and time settings. Ensure you apply each step diligently.
We recommend that you launch the Command Prompt with admin privileges.
First, launch the Run dialog window using the Win logo key + R shortcut. Type “CMD” into Run’s text box and hit Ctrl + Shift + Enter.
Select the Yes option after the User Account Control permission request appears.
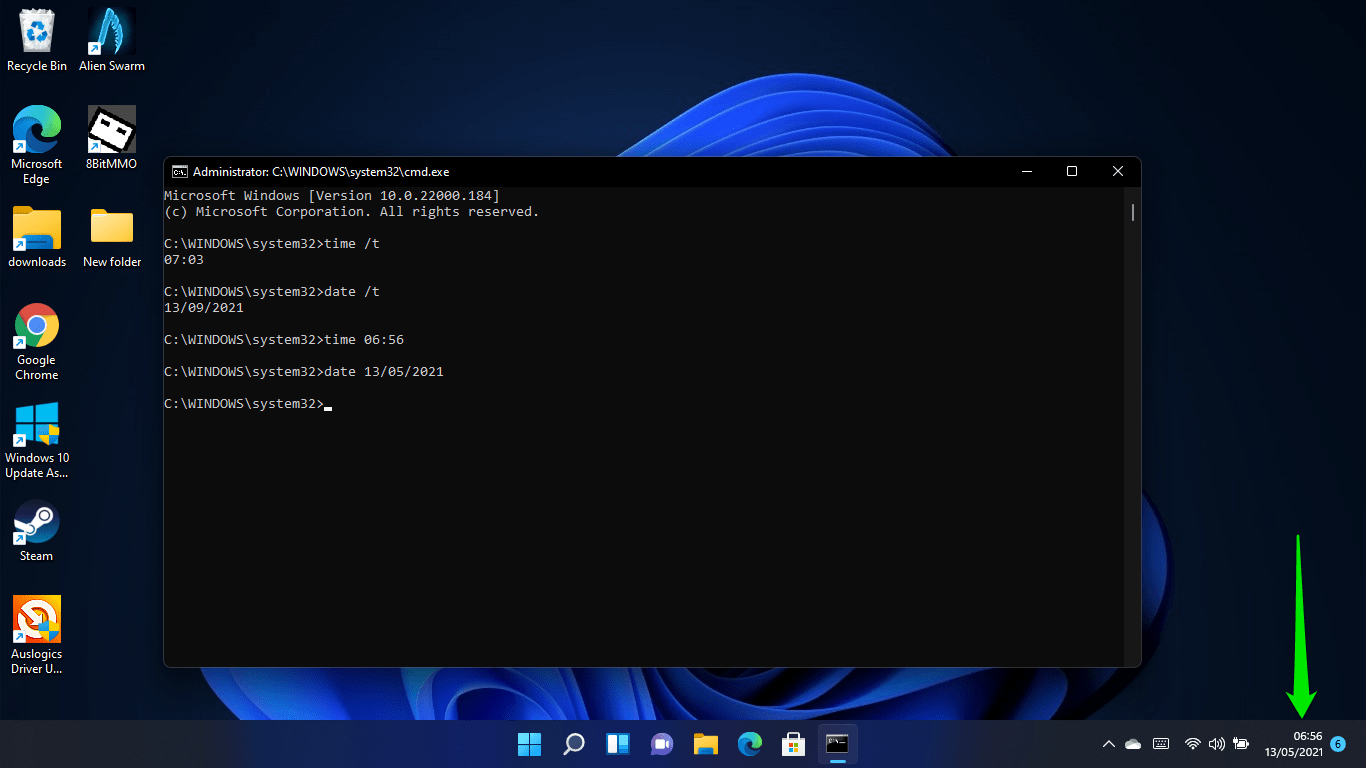
When Administrator: Command Prompt opens, type “time /t” (without the quotes) and press Enter.
Type “date /t” (without the quotes) to display the date.
To change the time, type in this format:
time hour:minute
Type the correct hour and minute in place of hour:minute. The command should look like this if the time is 06:56:
Time 06:50
Press Enter, and that’s it.
To change the date, you have to type in this format:
date MM/DD/YYYY
The month should come first (replacing MM), the day second (replacing DD), and the year last (replacing YYYY). It should look like this:
date 05/13/2021
Press Enter, and the date should be changed.
How to change the time and date in Windows 11 using Windows PowerShell
You can use Windows PowerShell (Windows Terminal in Windows 11) to change the system’s date and time with one command.
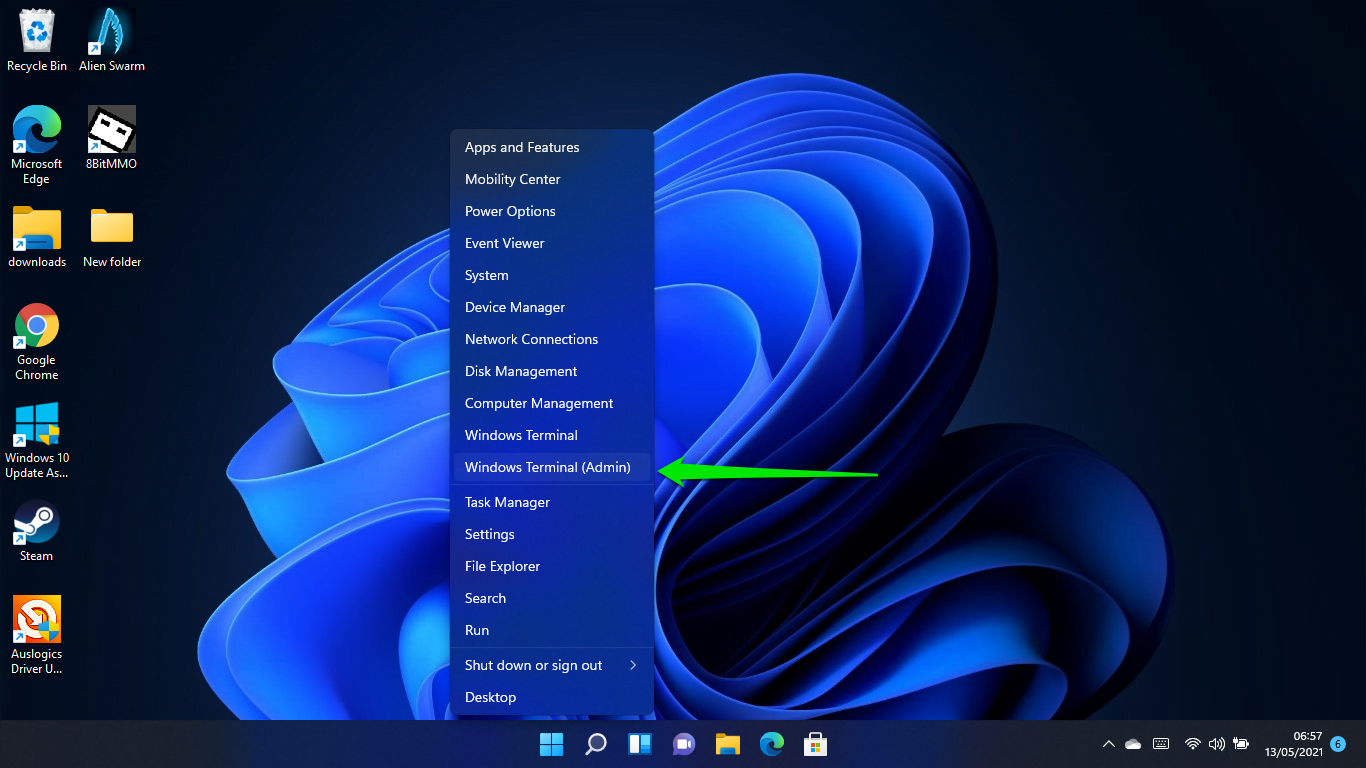
Right-click on the Start button or press the Windows logo key + X to launch the Power User Menu.
Select Windows Terminal (Admin).
After the Administrator: Windows PowerShell interface appears, use this format to change the date and time in the 12-hour clock:
Set-Date -Date “dd/mm/yyyy HH:MM AM”
The command should look like this:
Set-Date -Date “13/05/2021 6:56 AM”
Follow this format instead for the 24-hour clock:
Set-Date -Date “dd/mm/yyyy HH:MM”
And the command should look this way:
Set-Date -Date “13/05/2021 06:56”
Always hit Enter after each command line.
Why Can’t I Change the Date and Time on My Computer?
Sometimes, Windows 11 will fail to automatically update and sync your time, even with your best efforts. You’d have to change the time manually in this case. This particular problem seems to have crossed over from Windows 10.
However, not everyone experiences this. Therefore, we hope that Microsoft resolves this problem for every user sooner rather than later.
That said, you can restart the Windows Time service and check if that solves the problem. Open the Start menu and type “Services.” Click on Services to open the app.
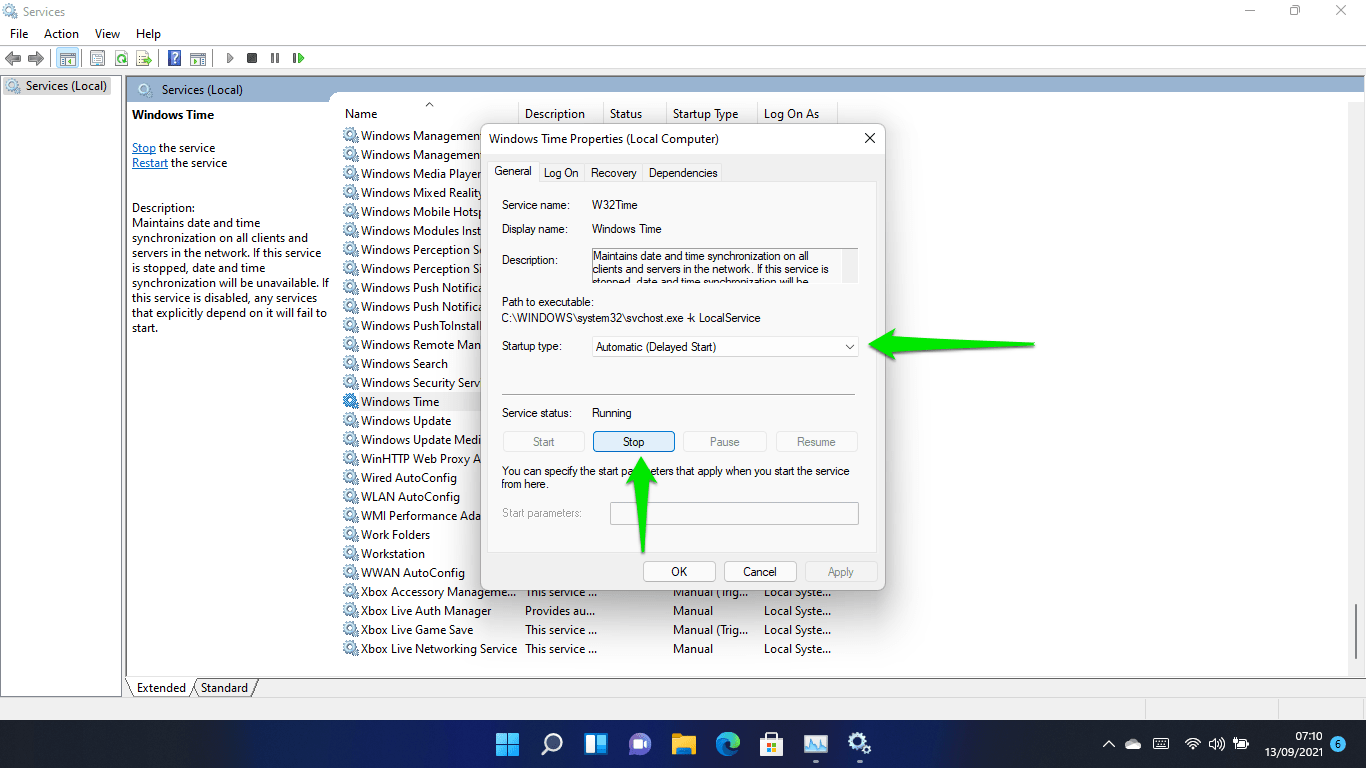
Scroll down and double-click on the Windows Time service to open its Properties dialog window when you see the Services interface.
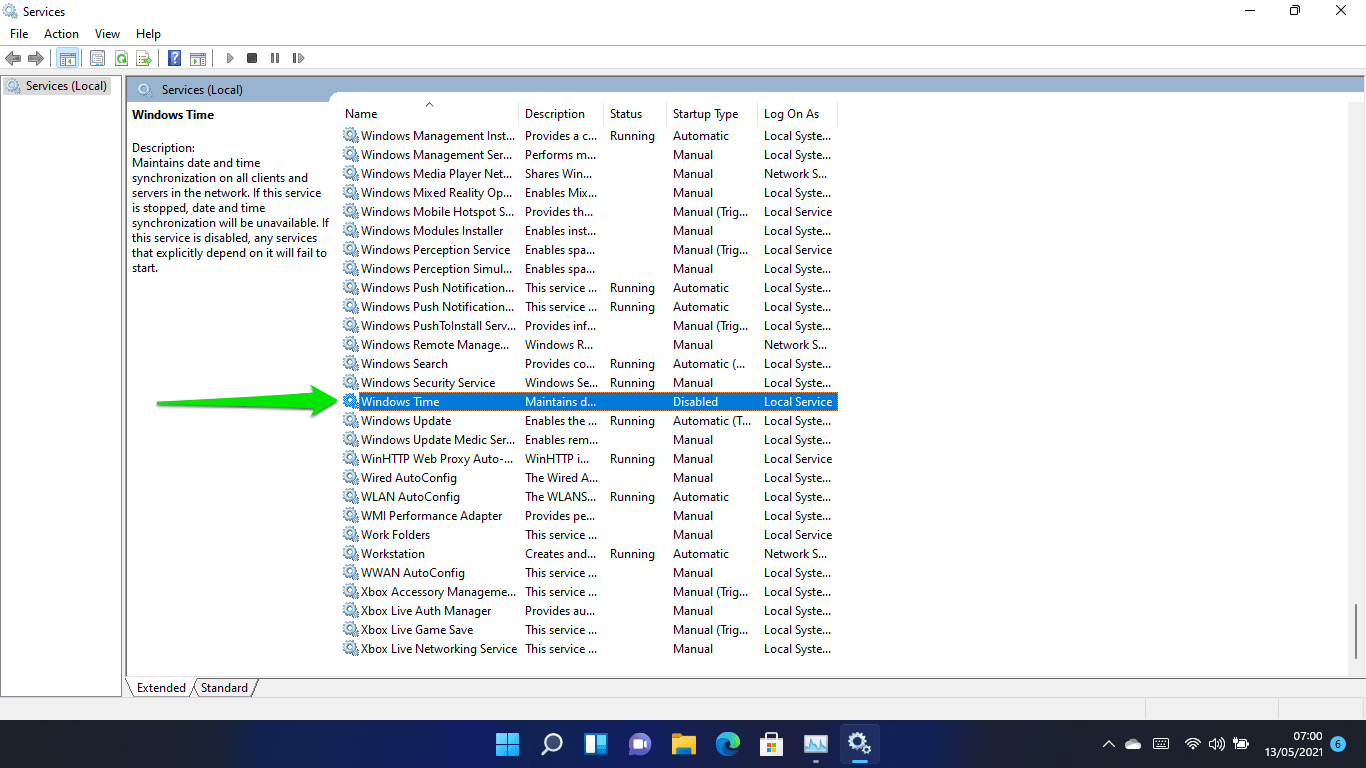
After the window shows up, click on Stop if the service is running and set the startup type to Automatic.
Finally, click the Start button and click OK.
You can also change the time server if Windows is not automatically syncing your time and region.
Follow these steps:
- Launch the Run dialog window using the Win logo key + R shortcut. Type “control panel” into Run’s text box and hit Enter.
- Click on Clock and Region when you open the Control Panel window.
- Next, click on Date and Time.
- Switch to the Internet Time tab once the Date and Time dialog window appears.
- After that, click the Change Settings button.
- Once the Internet Time Settings dialog opens, check the box for “Synchronize with an Internet time server.”
- Select “time.nist.gov” from the Server drop-down menu, then click on the “Update Now” button.
- Click on OK once you’re done.
You can go for other servers in the drop-down menu and stick with the one that works for you.
Conclusion
That’s how to set the date and time in Windows 11.
Download and install Auslogics BoostSpeed if you want to enhance your system’s performance and maintain it. The program is designed to optimize a PC’s performance by finding and removing junk files and buggy system registry keys that slow it down. It also protects the hard drive against spyware and comes with other tools that can help you tweak your system’s settings.
Auslogics BoostSpeed is compatible with Windows 11, and as Microsoft continues to improve the operating system, this app will help your PC achieve its maximum in terms of performance and efficiency.