
- What Is Ks.sys?
- What Does SYSTEM_SERVICE_EXCEPTION Mean?
- How to Fix the SYSTEM_SERVICE_EXCEPTION (Ks.sys) Blue Screen Error
- Check Connected Hardware
- Disable, Uninstall, Update, or Change Your Antivirus Tool
- Disable the Antivirus Tool
- Update, Uninstall or Change the Antivirus Tool
- Uninstall Conflicting Applications
- Go Back to the Previous Skype Version
- Install HP’s Generic Webcam Drivers
- Update Your Display and Graphics Drivers
- Run DISM and SFC Scans
- Run the Blue Screen Troubleshooter
- Check the Hard Drive for Errors
- Run Windows Memory Diagnostics
- Check the BIOS
- Wrapping Up
With Windows 10 now established on the scene for several years and the previous versions of the OS losing their shine (or support from Microsoft), more and more people are migrating. However, some of them ran into the SYSTEM_SERVICE_EXCEPTION (ks.sys) error shortly after making the jump to Windows 10.
This article tackles this error, explaining what it is and how to solve it.
What Is Ks.sys?
Ks.sys is a Windows kernel CSA library file. It is a core and non-removable Windows component. It is one of the files that underpin video recording on Windows. It manages video capture and also interacts with the associated drivers, like the imaging, display and graphics drivers.
If a system file, third-party file, program, app, or game conflicts with ks.sys, it can result in the SYSTEM_SERVICE_EXCEPTION error.
What Does SYSTEM_SERVICE_EXCEPTION Mean?
The SYSTEM_SERVICE_EXCEPTION error occurs when a running process tries to move from “unprivileged” to “privileged” code. This is Windows speak for when a running process or program tries to access files that the system has determined that it cannot access.
With respect to ks.sys, this error likely means that an app or program or game or even antivirus tool tried to use the file but cannot because of a conflict with ks.sys.
In general, the system stops the attempt and triggers the error as a defense mechanism to protect your computer. Until the issue is resolved, the OS may keep throwing this error:
Your PC ran into a problem and needs to restart. We’re just collecting some info, and then we’ll restart for you. If you would like to know more, you can search online later for this error: ks.sys. STOP 0x0000000A: IRQL_NOT_LESS_EQUAL – ks.sys
The error could be a one-off glitch in Windows or could be linked to corrupted system files or obsolete drivers. Whichever the case, the steps below should help you eliminate the blue screen for good.
How to Fix the SYSTEM_SERVICE_EXCEPTION (Ks.sys) Blue Screen Error
When a blue screen of death happens, it is touch and go whether you’re able to access your desktop. For a lot of BSODs, the system stays stuck on the error screen, and a reboot doesn’t make a difference. After the computer starts back on, it simply returns to the blue error screen.
Obviously, using most of the tips in this guide requires you to be able to log in normally. Thus, if you’ve got the SYSTEM_SERVICE_EXCEPTION error in Windows 10 and your PC isn’t booting to desktop, you will have to boot into Safe Mode with Networking to be able to use the fixes given here – and elsewhere.
Why Safe Mode with Networking and not just the basic Safe Mode? The reason is that the former option also activates network drivers that are needed when connecting to the internet. Internet connection might be necessary for some solutions.
Now that you know the preparation you might have to do, here’s how to activate the networking version of safe mode and escape from the blue error screen.
The precise method to use depends on how your PC is behaving after the error happens. For some users, they can log into their computers at first, but the error shows up after a few minutes, forcing the system to reboot into a blue screen.
Before this happens, quickly boot into the Advanced Startup Options screen.
Method 1
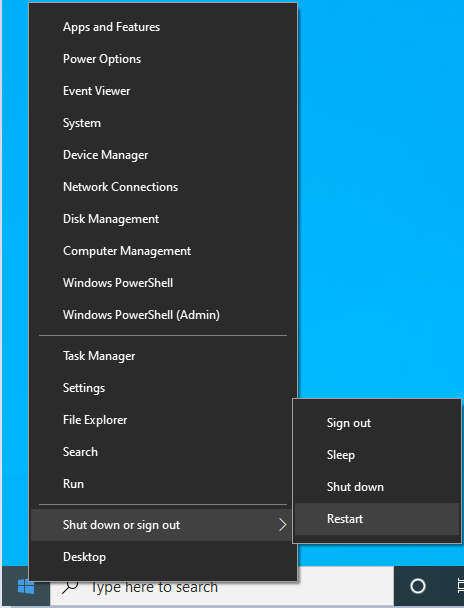
- Right-click the Start menu and select “Shut down or sign out“.
![Right-click the Start menu and select “Shut down or sign out”]()
- Hold down the
Shift keyand click Restart.
![Hold down the Shift key and click Restart.]()

Method 2
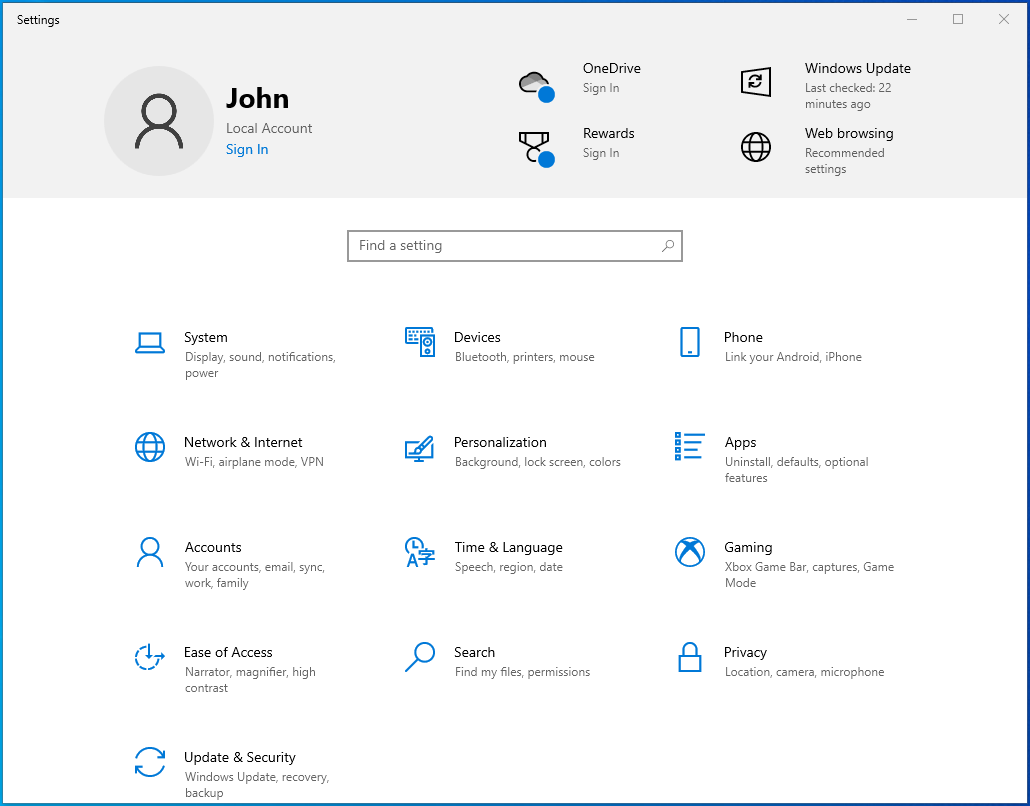
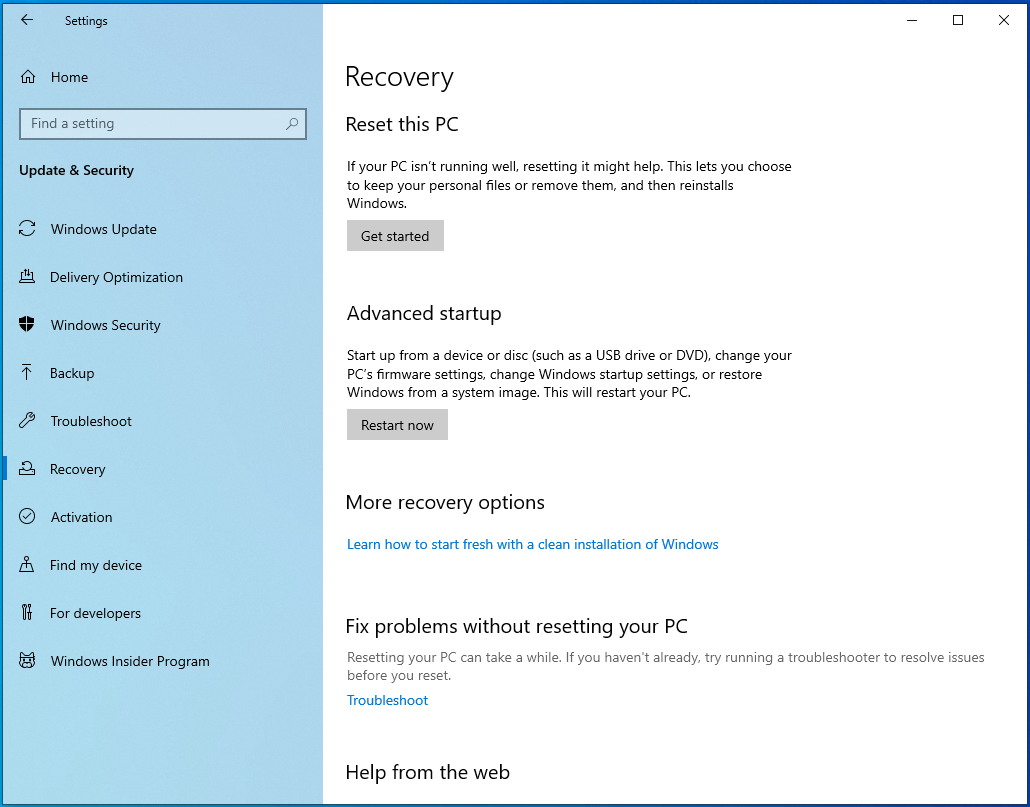
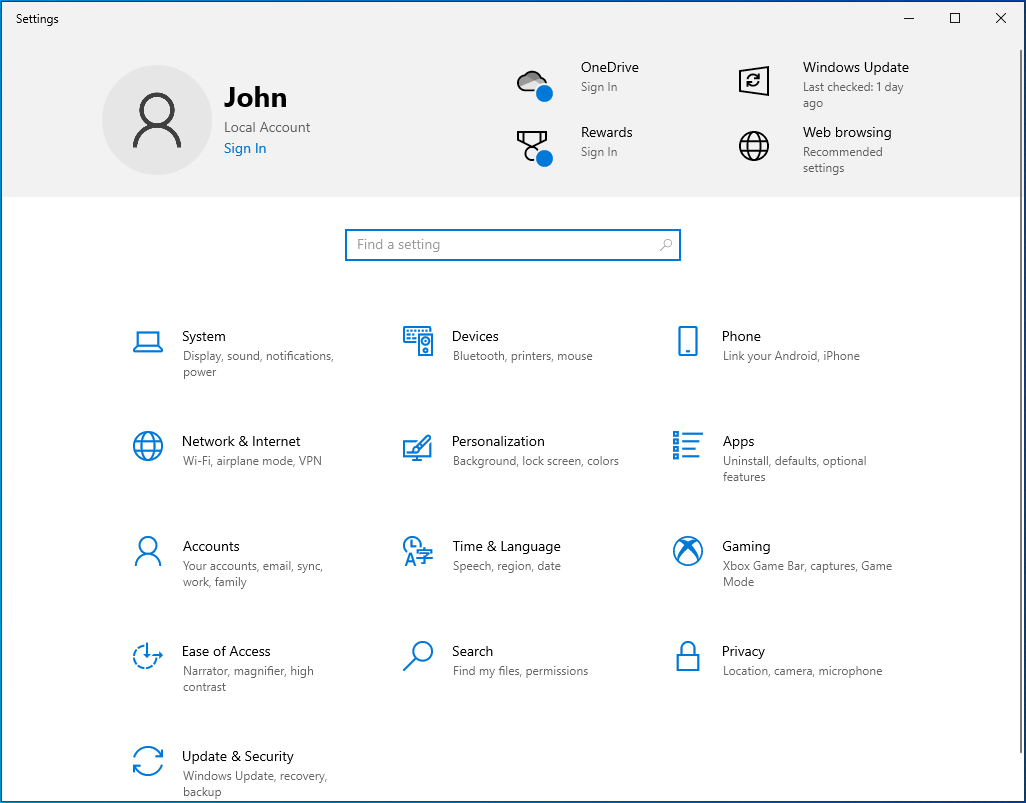
- Open Settings.
![Open Settings.]()
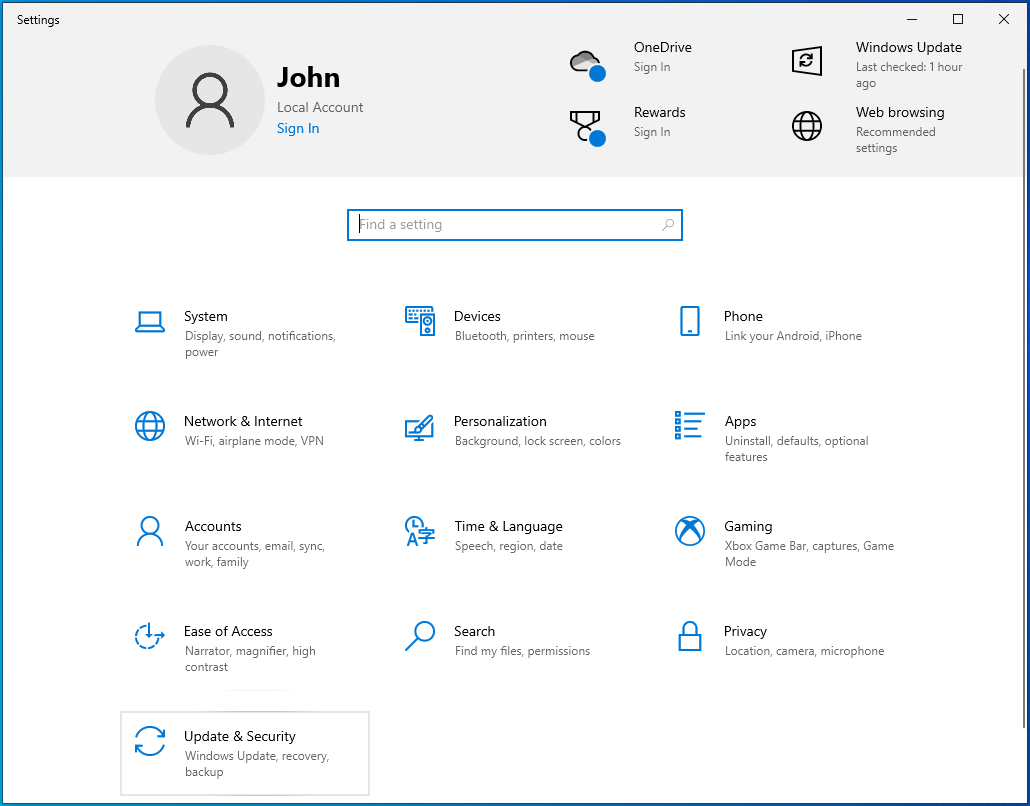
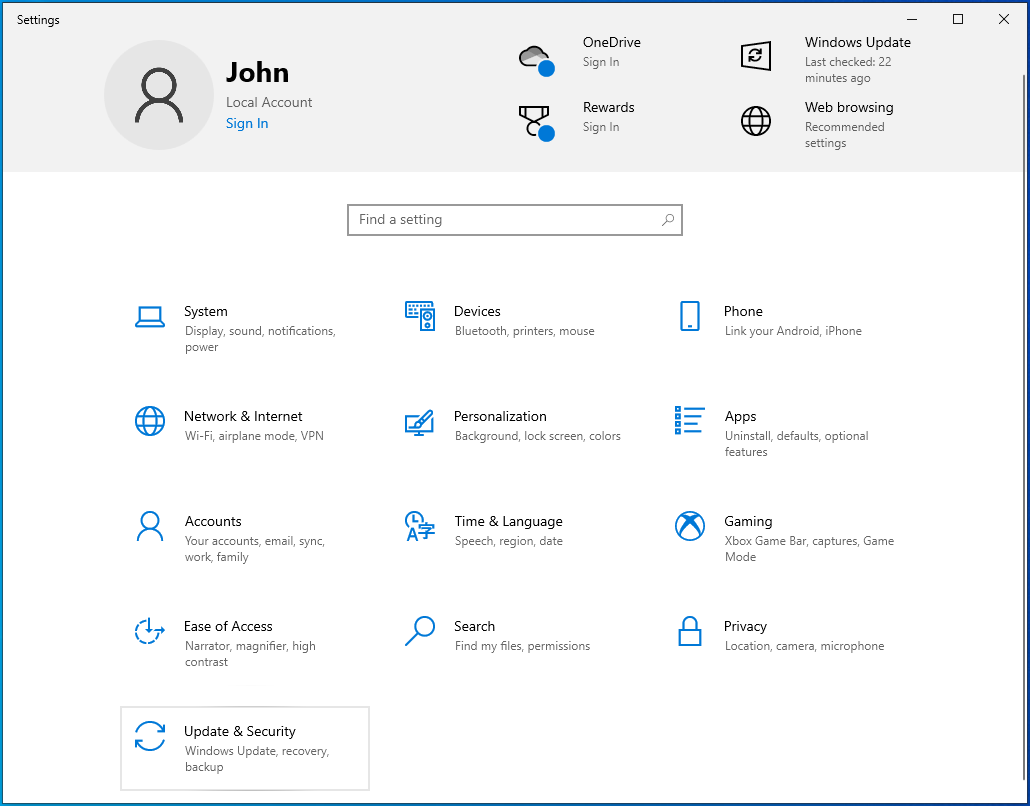
- Go to Update & Security.
![Go to Update & Security.]()
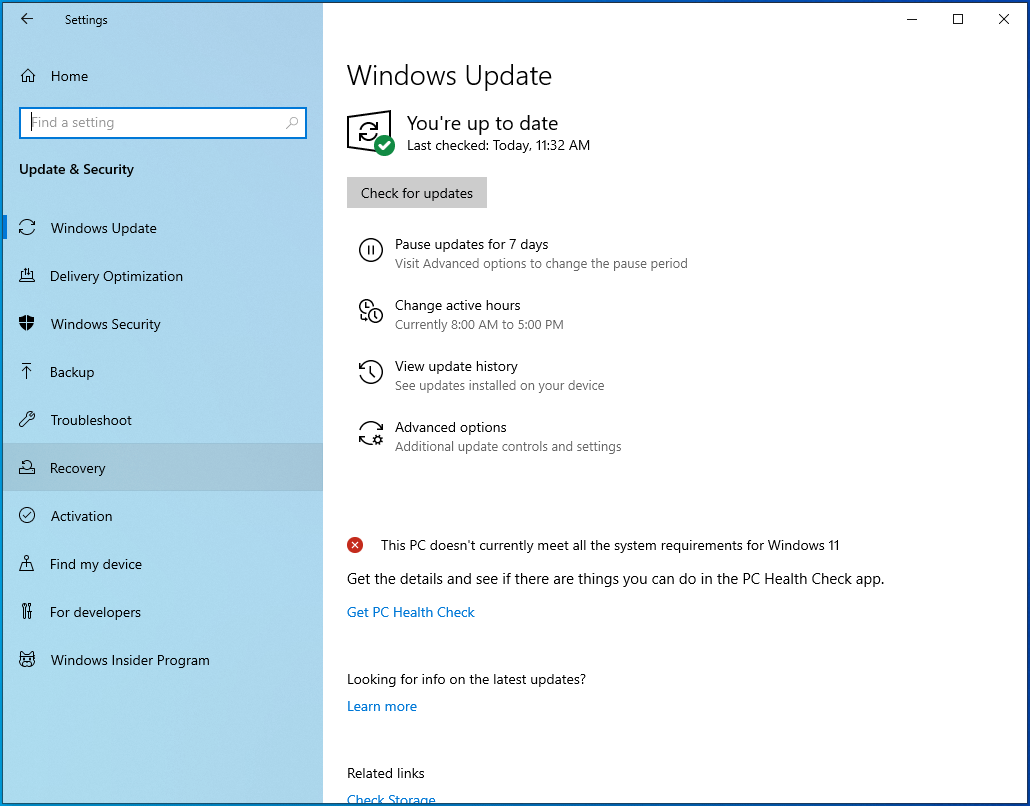
- Select Recovery on the left pane.
![Select Recovery on the left pane.]()
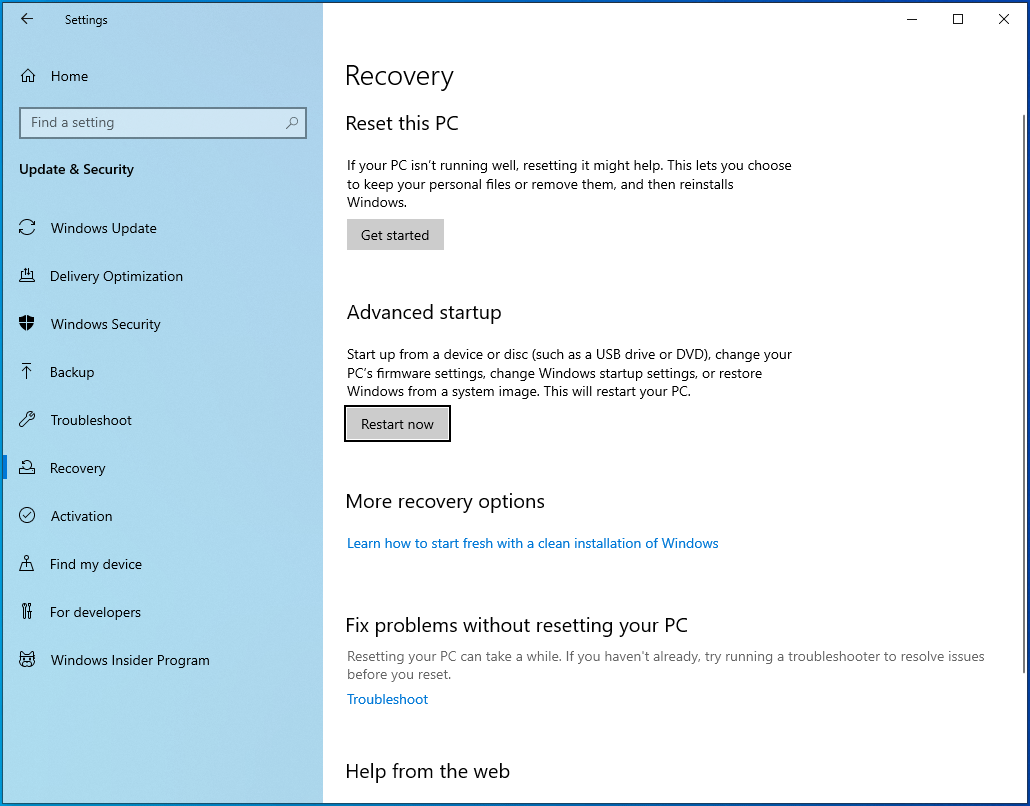
- Look for Advanced startup on the right pane.
![Look for “Advanced startup” on the right pane.]()
- Click the Restart now button.
![Click the “Restart now” button.]()
Whichever method you choose will reboot your computer into the Advanced Startup Options screen.
If your PC is stuck on the SYSTEM_SERVICE_EXCEPTION (ks.sys) blue screen and can’t boot into Windows, you can use a couple of tricks to force the advanced startup screen to open. Either make the system automatically boot into recovery mode or use a bootable installation drive to achieve the same result.
To force Windows to boot into recovery mode, hold down the Power button until the system shuts down. Then, turn the PC on, wait for a few seconds, and shut it down again. Repeat the process until you see a notification on the screen that Windows is entering the recovery environment. Don’t shut the PC down this time. Windows will boot into the Choose an Option screen.
If you have a bootable drive around, plug it into your PC, go to BIOS, and select the drive as your primary bootable device.
Now, restart the computer, and the system will boot from the USB drive. On the Windows Setup screen, click the “Repair your computer” link to open the advanced recovery screen.
When you’ve successfully loaded the advanced recovery screen by using any of the methods above, navigate to Troubleshoot > Advanced Options > (Windows) Startup Settings and then click Restart.
The system will boot into the Startup Settings screen. Press 5 or F5 on your keyboard to boot into Safe Mode with Networking.
If the operation is successful, you should be able to log into Windows, albeit in a restricted environment.
You can then safely try out the solutions provided in this guide.
Of course, if you’re able to log into Windows normally, for long enough to be able to test each solution here, that is even better!
-
Check Connected Hardware
We have established that the SYSTEM_SERVICE_EXCEPTION error is related to hardware on your PC, particularly a video camera.
Therefore, when this error happens, you should immediately pay attention to your connected hardware with video functions.
The prime suspect is, of course, the webcam, be it embedded or connected via USB or Bluetooth. A malfunctioning webcam or webcam driver can cause conflicts with the system, leading to the BSOD.
If you have connected an external camera, consider disconnecting or disabling it. This might immediately solve your problem. If the embedded webcam is the cause, that’s a bit more difficult. However, you can disable it using Device Manager:
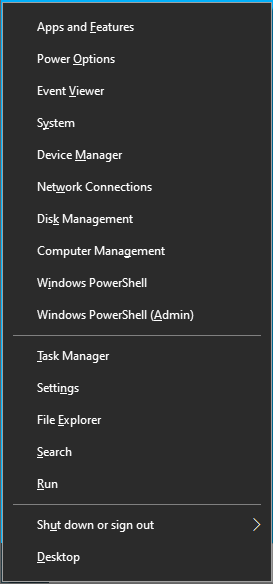
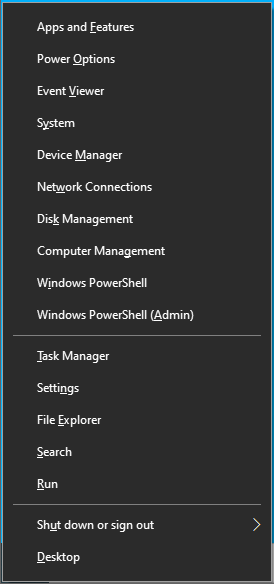
- Use
Win + Xto open the Power User menu.
![Use Win + X to open the Power User menu.]()
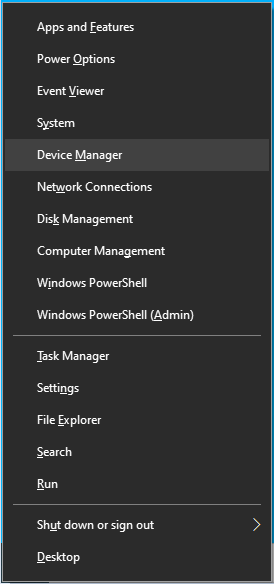
- Select Device Manager.
![Select Device Manager.]()
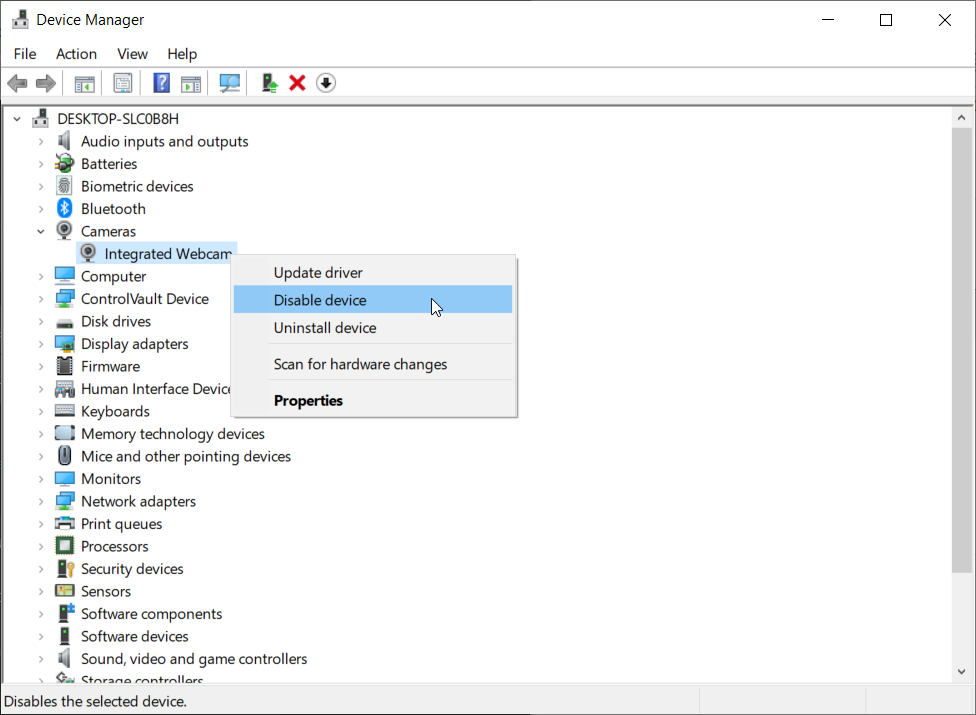
- In Device Manager, locate the Cameras section and expand it.
- Right-click your webcam and select Disable.
![Right-click your webcam and select Disable.]()

Ultimately, this can only provide temporary comfort at best. You will likely still have use for your web camera, so you might need to reinstall or replace the drivers to resolve the issue for good.
Keep in mind that the webcam isn’t the only hardware that can cause the error. Depending on how your system is set up and how many external hardware devices you’ve connected, you may need to disable some of them to locate the one causing trouble.
-
Disable, Uninstall, Update, or Change Your Antivirus Tool
There are reports that some third-party antivirus tools can cause the SYSTEM_SERVICE_EXCEPTION blue screen of death.
Basically, antivirus tools are too aggressive and try to control many settings and features on the system, causing conflicts that result in system failure.
When the user opens a certain program that needs to produce audio and video, the program tries to access the relevant hardware, drivers and supporting files. But the antivirus tool interferes, causing a system breakdown and the ks.sys error.
In this scenario – if the antivirus tool seems suspect – you can do one of the four things below:
-
Disable the Antivirus Tool
This is a test method that checks whether the security software is indeed complicit in the ks.sys error. When you disable your antivirus, it is no longer able to control your files and programs. If the error stops happening after the tool is neutralized, it follows that it is likely the culprit.
How you disable your antivirus utility depends on the specific tool in use. If Windows Defender is your main anti-malware program, here’s how to turn it off:
- Open Settings.
![Open Settings.]()
- Go to Update & Security.
![Go to Update & Security.]()
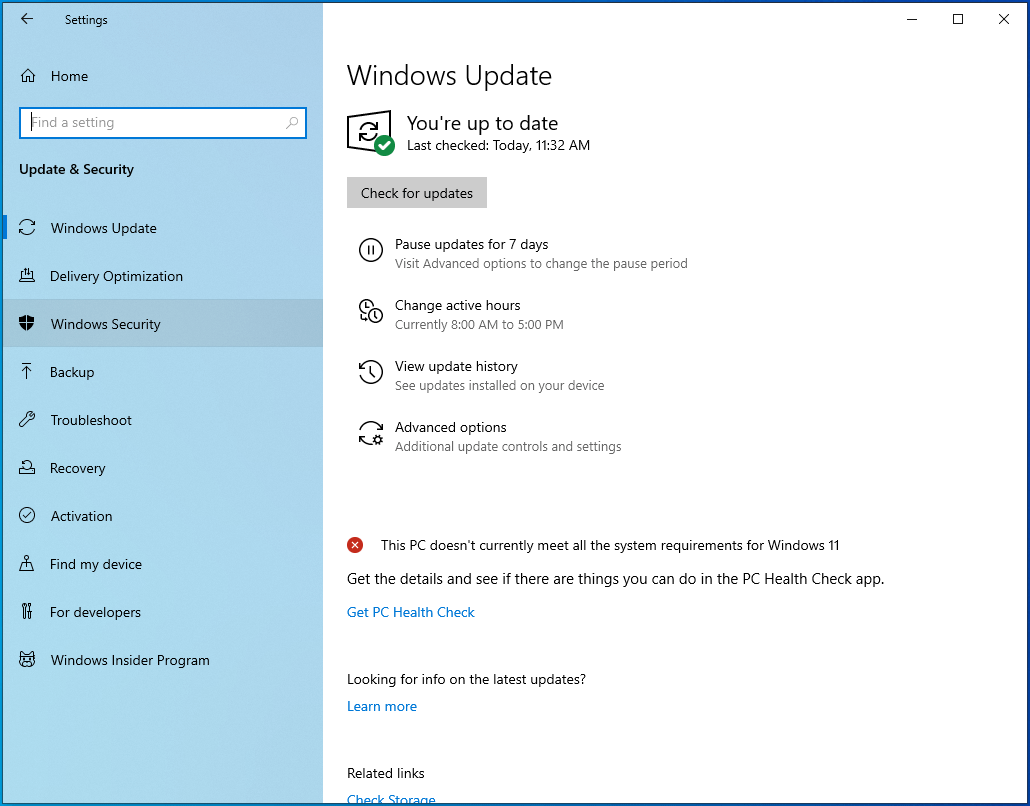
- Navigate to Windows Security.
![Navigate to Windows Security.]()
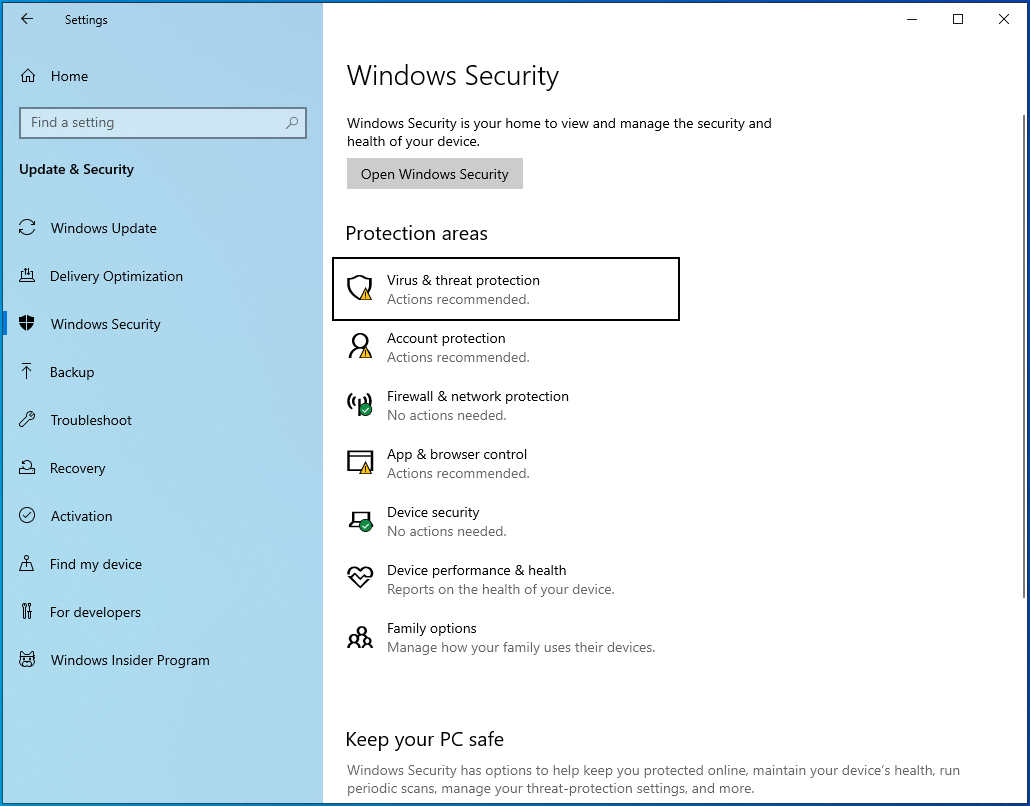
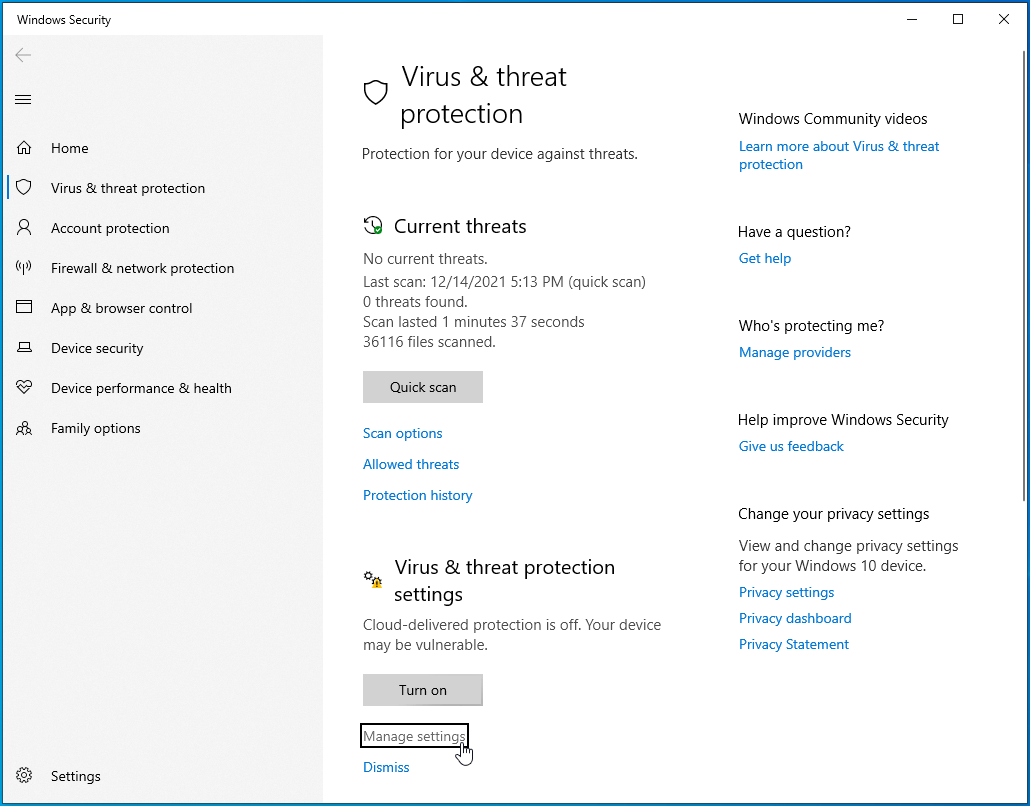
- Select Virus & threat protection.
![Select “Virus & threat protection”.]()
- On the right pane, click Manage settings under Virus & threat protection settings.
![On the right pane, click “Manage settings” under “Virus & threat protection settings”.]()
- On the Virus & threat protection settings screen, turn off the Real-time protection toggle.
![On the “Virus & threat protection settings” screen, turn off the “Real-time protection” toggle.]()
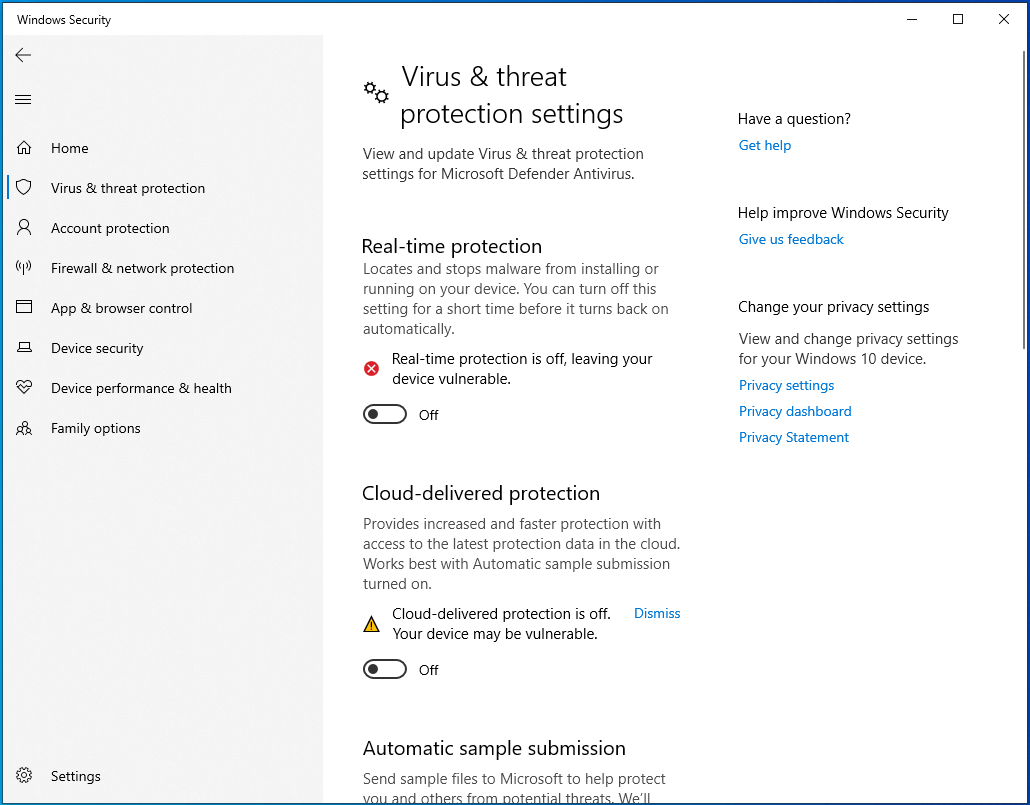
Windows Defender will stop monitoring your files and programs (though scheduled tasks will still be performed). You can try opening the affected program or performing the activity that resulted in the ks.sys error.
-
Update, Uninstall or Change the Antivirus Tool
If your troubleshooting has indicated that a third-party tool is responsible for the error, you obviously can’t keep using it just like that as it might give you the same error and even cause others.
You can check with the software manufacturer for an update. Installing the latest version of the tool might help curb its aggressive tendencies.
If that doesn’t help, you have no choice but to uninstall the tool and switch to one that is compatible with your system and installed programs.
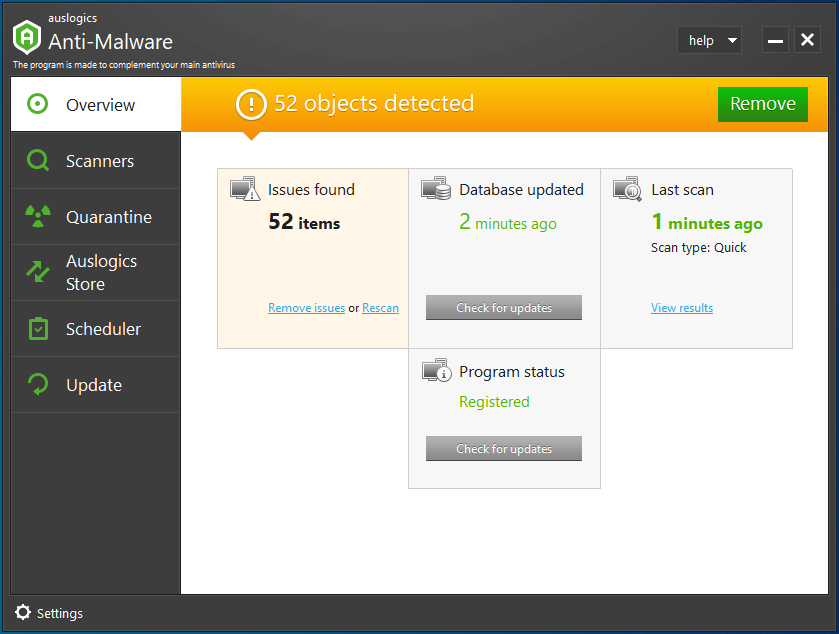
Windows Defender is good enough for normal protection, but we recommend that you fortify your computer with an additional security utility like Auslogics Anti-Malware to keep it safe and secure at all times.
-
Uninstall Conflicting Applications
Certain applications can cause this error on Windows 10 computers. Some graphics and drive-based programs use drivers and services that conflict with ks.sys, causing that file to trigger a blue screen.
One of the reported programs is Virtual CloneDrive. Virtual CloneDrive is software that lets users create virtual ISO images that act just like physical hard drives. You can create up to 15 virtual drives at a time with this tool.
Despite its usefulness, it can cause the SYSTEM_SERVICE_EXCEPTION error on Windows. Obviously, no amount of virtual drive-creation capability is worth getting a blue screen for. If you have this program, we suggest you uninstall it, at least to check whether the error will reoccur.
XSplit is another piece of software that should be uninstalled immediately to prevent further occurrence of the SYSTEM_SERVICE_EXCEPTION (ks.sys) BSOD. Reports suggest that the live gaming and recording software isn’t compatible with some video drivers.
If you’re using an MSI computer, consider ditching MSI Live Update and using another source to get the latest BIOS and device drivers. The program has been known to use incompatible drivers that trigger the error on Windows 10.
In addition, some network add-ons, like Cisco VPN, have been known to be installed on computers that have experienced this error. Some of the affected users claimed that the problem had gone away after uninstalling such programs. If you have Cisco VPN, in particular, installed on your PC, you should do that too.
Another program that has been identified as possibly culpable is the Asus GameFirst Service. This software is loaded on Asus computers by default. It enhances online gaming by optimizing the network to get the best bandwidth and connection stability.
Even though some gamers rely on this service, it has been known to cause issues like the SYSTEM_SERVICE_EXCEPTION (ks.sys) BSOD on Windows 10.
Uninstall the service and any other suspicious program. This is necessary to prevent further system interruptions by the blue screen.
-
Go Back to the Previous Skype Version
A faulty Skype update can cause random reboots and blue screens. If the issue started happening after you updated your Skype app, the sensible thing to do is revert to the previous version.
If that solves the issue for you, then you’ll have to avoid updating Skype till a future update after the current one. This assumes that the Skype update is indeed the trigger for the SYSTEM_SERVICE_EXCEPTION (ks.sys) blue screen error.
For this to be successful, you need to remember what version of Skype you previously used. This can be tricky since most of us don’t even notice small things like version numbers until a problem happens. One thing you can do is check your current version number and then look online for what was the version before that.
Next, uninstall your current Skype version:
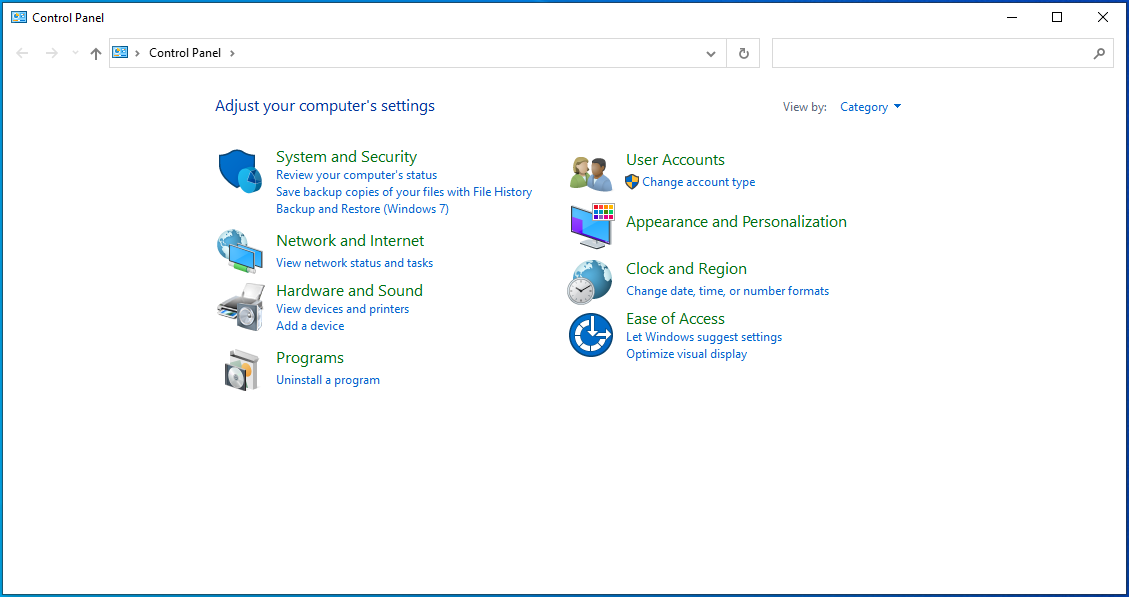
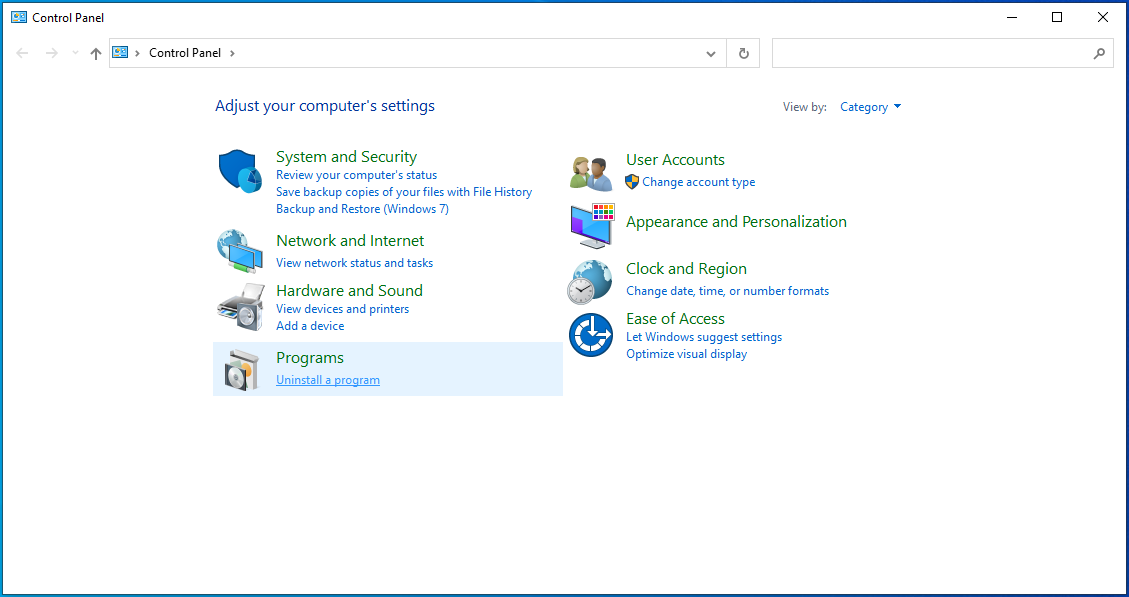
- Open the Control Panel and set the view in the top right corner to Category.
![Open the Control Panel and set the view in the top right corner to Category.]()
- Click Uninstall a program under Programs to open the Programs & Features screen.
![Click “Uninstall a program” under Programs to open the Programs & Features screen.]()
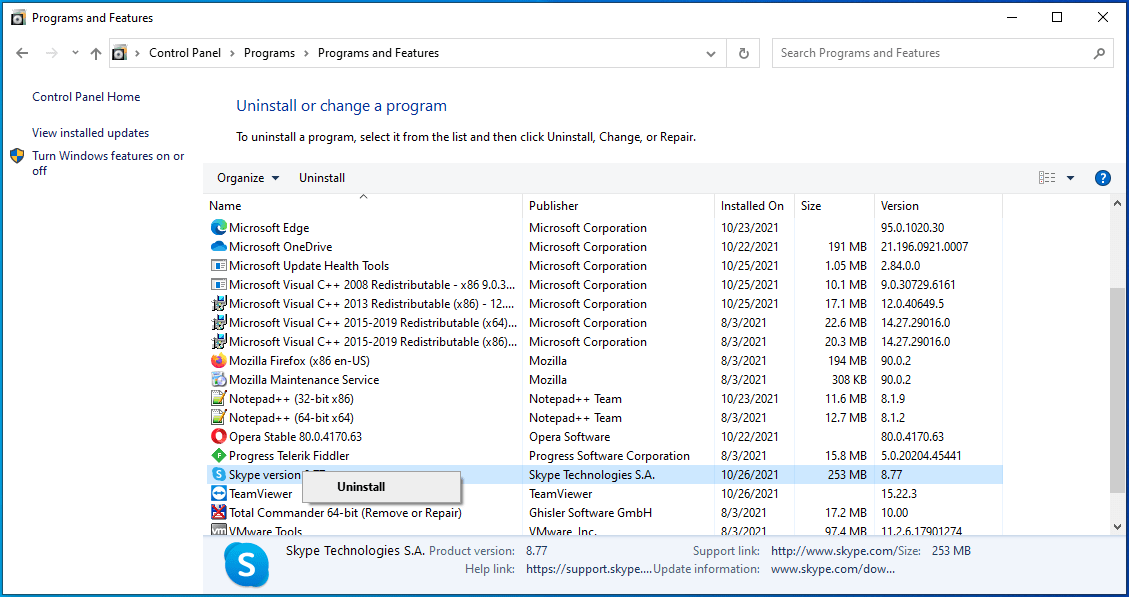
- Locate Skype in the list of installed apps and uninstall it.
![Locate Skype in the list of installed apps and uninstall it.]()
Open your browser and search for the version of Skype you previously used. Install that one and check whether the ks.sys issue has been resolved.
-
Install HP’s Generic Webcam Drivers
HP’s webcam drivers and the operating system could be in conflict, causing issues like this. Perhaps the system doesn’t work well with the current version of the webcam drivers.
Microsoft includes generic drivers for the most fundamental hardware components. This means that programs will be able to use the hardware even without dedicated drivers. Therefore, if the webcam drivers are misbehaving, you can uninstall them, and Windows will replace them with generic drivers.
Even though you might lose some features of the dedicated drivers, that isn’t comparable to losing the ability to use your PC because of frequent blue screens.
To uninstall the HP webcam drivers, open Device Manager and expand either Cameras or Imaging Devices. Locate the HP webcam device. Right-click it and select Uninstall. Confirm your action on the pop-up screen to get rid of the drivers.
After you’re done with this, restart the machine. Of course, the installed webcam will not work without supporting drivers. Windows knows this, so, during the reboot, it will activate the generic webcam drivers. Since those drivers are fully compatible with the OS, there won’t be any conflicts, and you’ll be able to use the webcam — and, by extension, your computer — properly.
-
Update Your Display and Graphics Drivers
The ks.sys error is often linked to video camera issues. This means that the display and graphics card drivers could also be affected.
The display drivers are, of course, responsible for video output. If they don’t work well or are out of date, this can affect both video playback and feedback. A graphics card driver, though more specialized, can also contribute to the issue if it is not compatible with the operating system.
Therefore, it is important to keep these drivers up to date. For users who started facing constant crashes after upgrading from Windows 8 or 7, this is especially important. The upgrade might have rendered some of their previously perfect drivers obsolete.
If you’re ready to update your drivers, let’s begin with the display driver:
- Use the
Windows logo key + Xkeyboard shortcut to open the Power User menu.
![Use the Windows logo key + X keyboard shortcut to open the Power User menu.]()
- Select Device Manager to open the applet.
![Select Device Manager to open the applet.]()
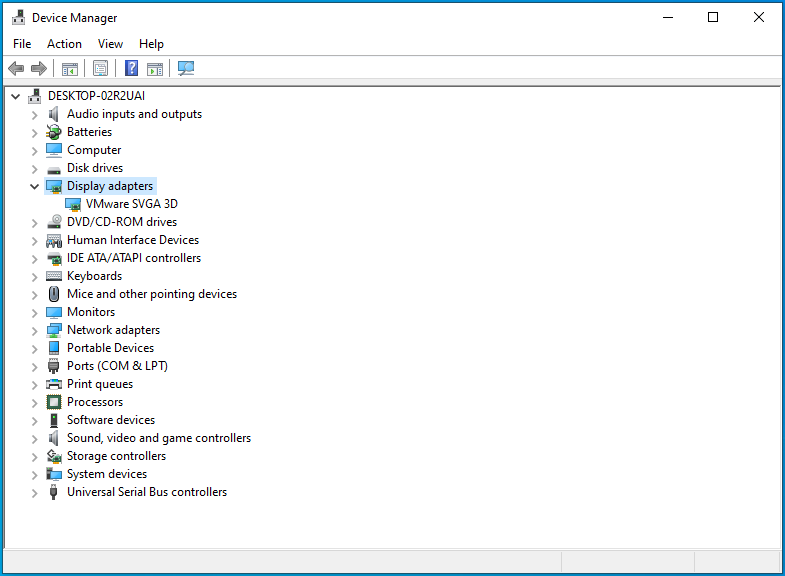
- In Device Manager, expand the Display adapters entry.
![In Device Manager, expand the “Display adapters” entry.]()
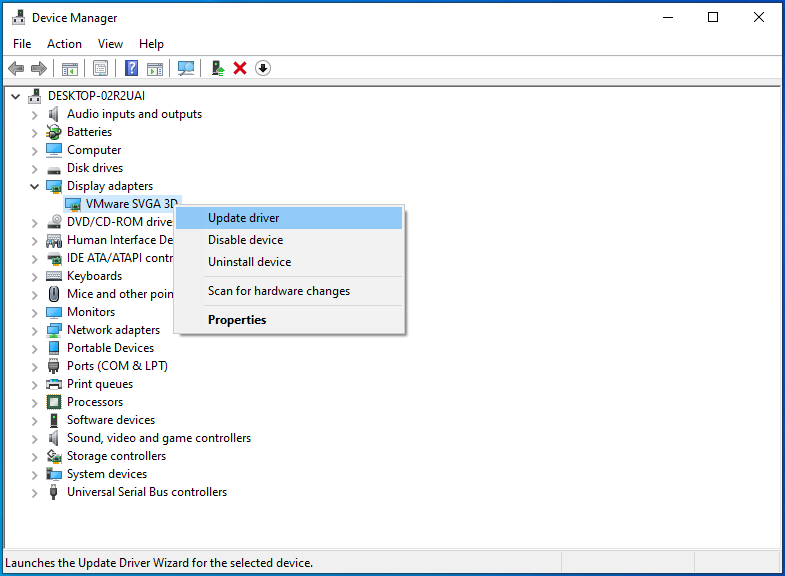
- Right-click your display adapter and select Update Driver.
![Right-click your display adapter and select Update Driver.]()
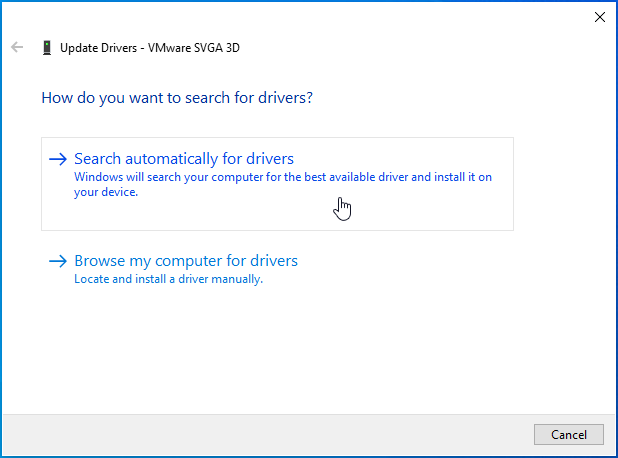
- On the next screen, choose the Search automatically for drivers option.
![On the next screen, choose the “Search automatically for drivers” option.]()
Windows will install the latest available drivers for the chosen device.
Next, update the graphics driver:
- Right-click the Start menu to open the Power User menu.
- Select Device Manager to open the applet.
- In Device Manager, expand the Sound, video and game controllers entry.
- Right-click your graphics card and select Update Driver.
- Choose Search automatically for drivers.
An outdated or incompatible graphics or display driver can cause this issue. That is why it is important to update them whether the problem is already happening or not.
Using the methods above should help you keep them up to date, even though there is no guarantee that Windows will always find the latest drivers.
That’s alright though. Updating drivers all the time isn’t at the top of most people’s list of things to do with their computers. The process can be both annoying and cumbersome, especially when you have to update multiple drivers one after the other.
Auslogics Driver Updater can take the load off your back by doing it automatically. You can use it to schedule periodic updates while you focus on other things.
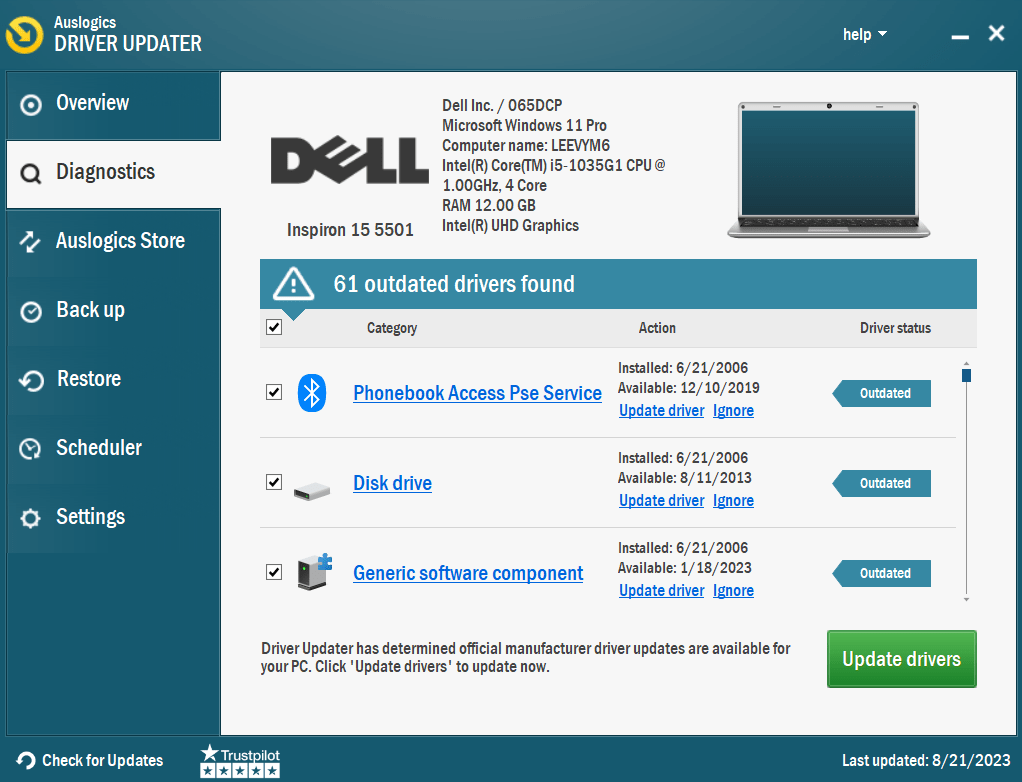
The software is 100% safe and approved by Microsoft. It only downloads the approved drivers from official sources.
-
Run DISM and SFC Scans
The SYSTEM_SERVICE_EXCEPTION (ks.sys) error can be triggered by file corruption. Some of the myriad underlying files that constitute the operating system could be corrupt.
It isn’t easy to identify the specific problematic file. It is actually nigh on impossible to do so without a sophisticated program of the sort that isn’t available for ordinary users.
The solution? Scan all the files in one go and let the system fix the corrupt files itself. More specifically, we can use a couple of inbuilt Windows utilities to scan for and fix system file issues.
Deployment Image Servicing and Management (DISM) and System File Checker (SFC) are the tools we will use here. These utilities are two sides of the same coin. One checks the Windows image for bad sectors, and the other scans individual files for corruption.
Microsoft recommends that Windows 10 users run the DISM and SFC scans together, so that is what you should do.
- To perform a scan with SFC, open an elevated Command Prompt window.
- Run the command below:
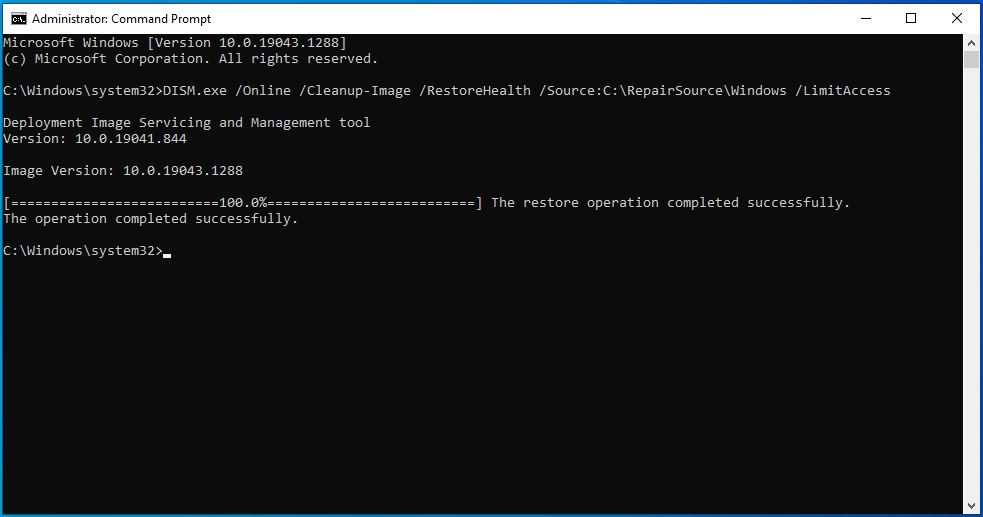
DISM.exe /Online /Cleanup-image /Restorehealth
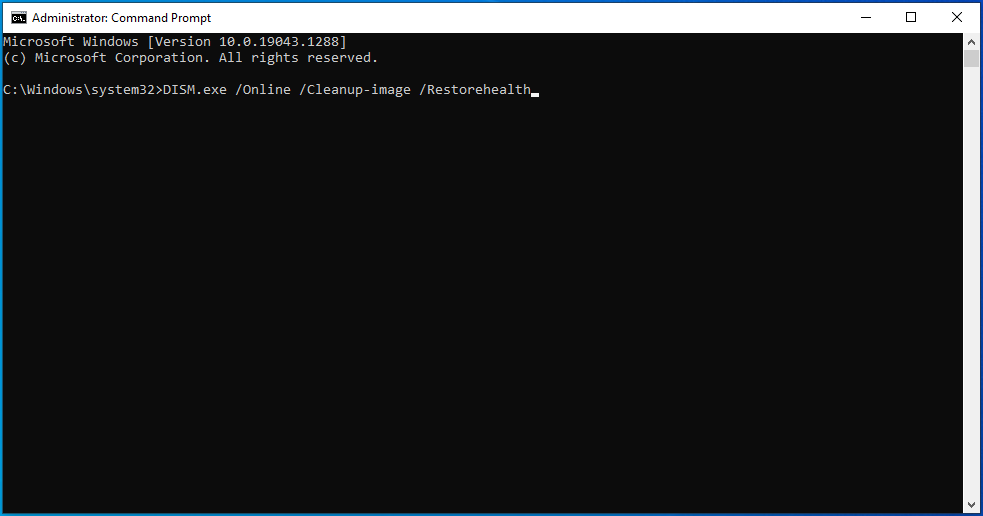
- Make sure your PC is connected to the internet when running this command. The DISM tool sources for replacement files through Windows Update. Any needed files are downloaded from Microsoft’s servers.
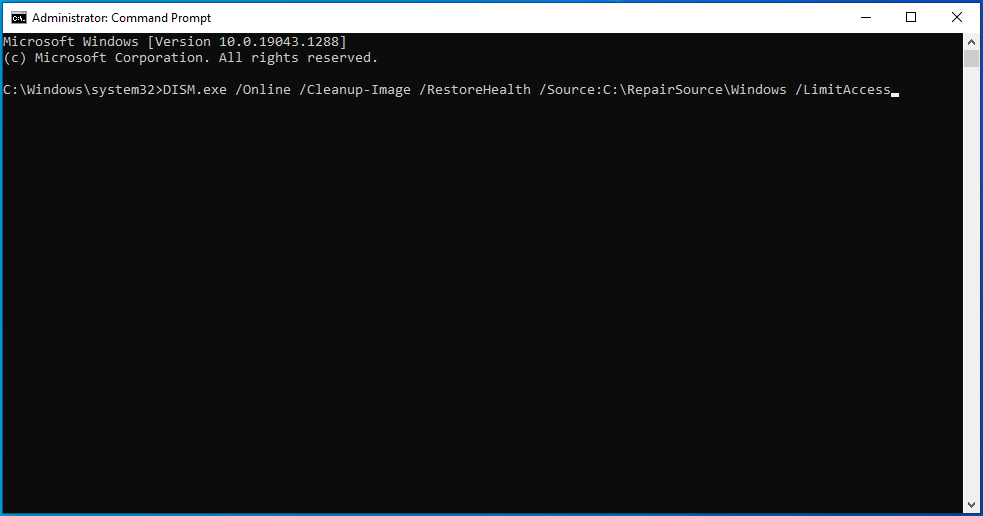
- However, if that isn’t possible, you can use a running Windows installation, a network share, or removable media as the repair source. In that case, run the command below instead and remember to replace the highlighted placeholder with the location of your repair source:
DISM.exe /Online /Cleanup-Image /RestoreHealth /Source:C:\RepairSource\Windows /LimitAccess
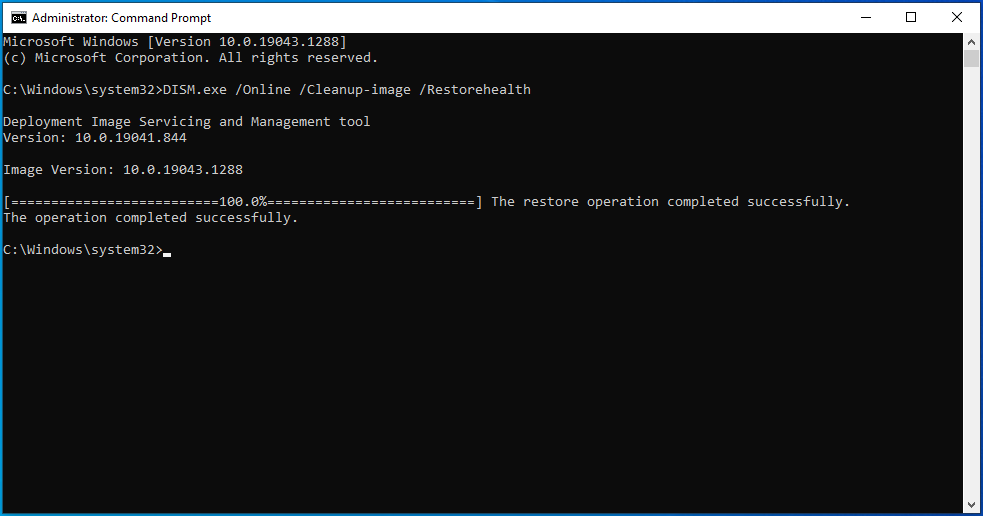
- Wait until the DISM scan is done.
- Then run an SFC scan with the command below:
sfc /scannow
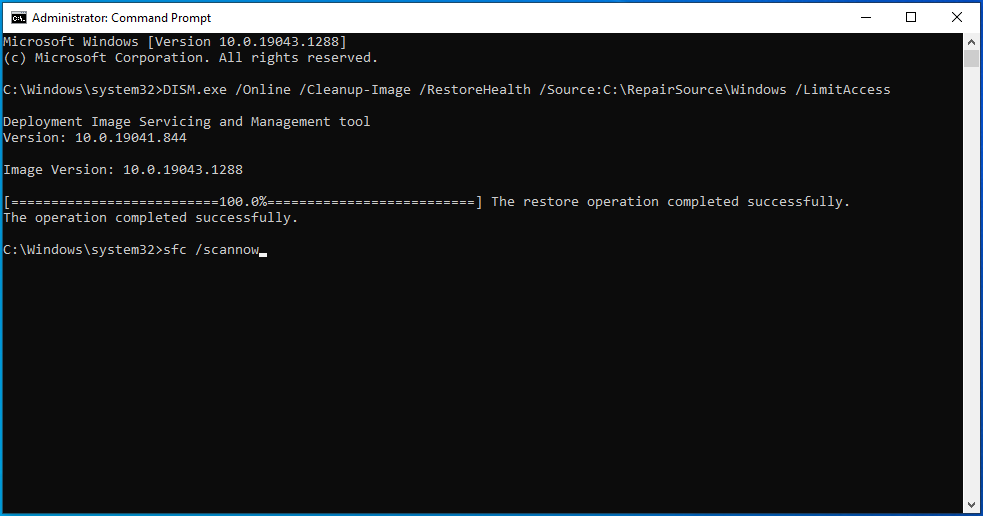
- You might want to grab a cup of coffee as this process can take up to an hour on older computers. The tool will scan all protected system files and replace bad, corrupt or missing files with fresh copies from the cache in the Windows directory.
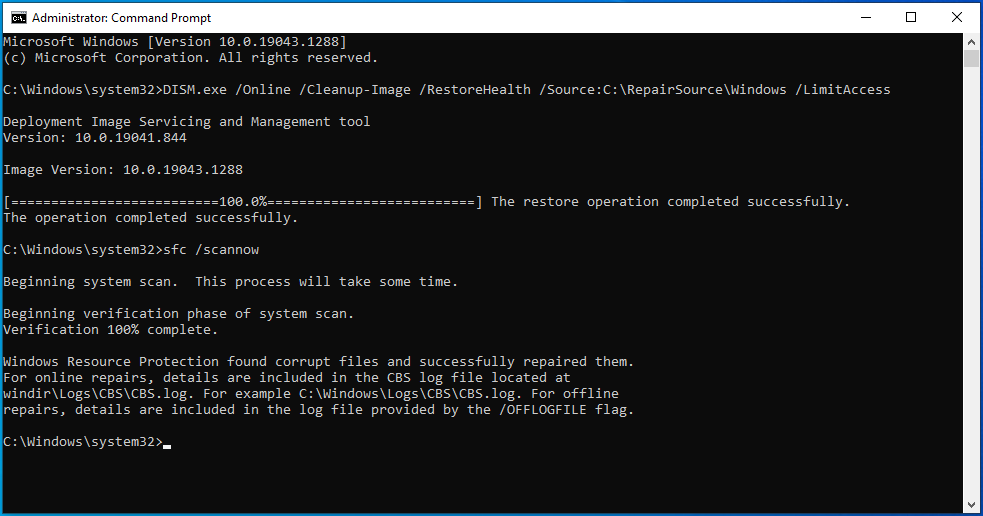
Don’t do anything on your PC or close the Command Prompt window until the process is 100% complete. Thereafter, the scan results will be displayed.
You’ll get one of the following four messages:
- Windows Resource Protection did not find any integrity violations.
- Windows Resource Protection could not perform the requested operation.
- Windows Resource Protection found corrupt files and successfully repaired them.
- Windows Resource Protection found corrupt files but was unable to fix some of them.
You can either stop your troubleshooting here or continue with other fixes depending on the message you get.
-
Run the Blue Screen Troubleshooter
Perhaps, while developing Windows, Microsoft took note of the types of errors that could conceivably happen. This explains the addition of different troubleshooting tools designed for different types of errors. As blue screens of death make up a sizable portion of all Windows errors, it is no surprise that Microsoft added a troubleshooter to deal with that specific issue.
As you know, blue screen errors are linked to hardware or driver issues. The Blue Screen troubleshooter will scan the PC for problematic hardware and drivers and make a diagnosis. Depending on the nature of the issue, you can even solve the problem right there and then by clicking a button.
To use the troubleshooter, follow the steps described here:
- Open Settings and go to Update & Security > Troubleshoot.
- On the Troubleshoot screen, check for Blue Screen under “Find and fix other problems“. If you’re using the latest Windows version, click the “View additional troubleshooters” link.
- Click Blue Screen to expand it and then click “Run the troubleshooter“.
Follow the instructions given by the troubleshooter. When it finishes scanning and applying the suggested fixes, reboot the machine and check whether you’re still getting the ks.sys error.
-
Check the Hard Drive for Errors
A corrupted hard drive is an enemy of proper Windows functioning. Since the hard drive stores plenty, if not all, of your files, easy access by the OS is paramount.
If your hard drive has an error, it can cause system failure, like the SYSTEM_SERVICE_EXCEPTION (ks.sys) error, due to the system’s inability to access the files on the drive.
Therefore, you should check the system drive for file corruption. Even if you use an SSD with an additional HDD as a storage drive, check the HDD since that’s likely where most game and graphics files are stored.
The easiest way to check the status of your hard drive configuration is by running the chkdsk command. You can run it manually or use the Command Prompt. Here are the instructions to follow:
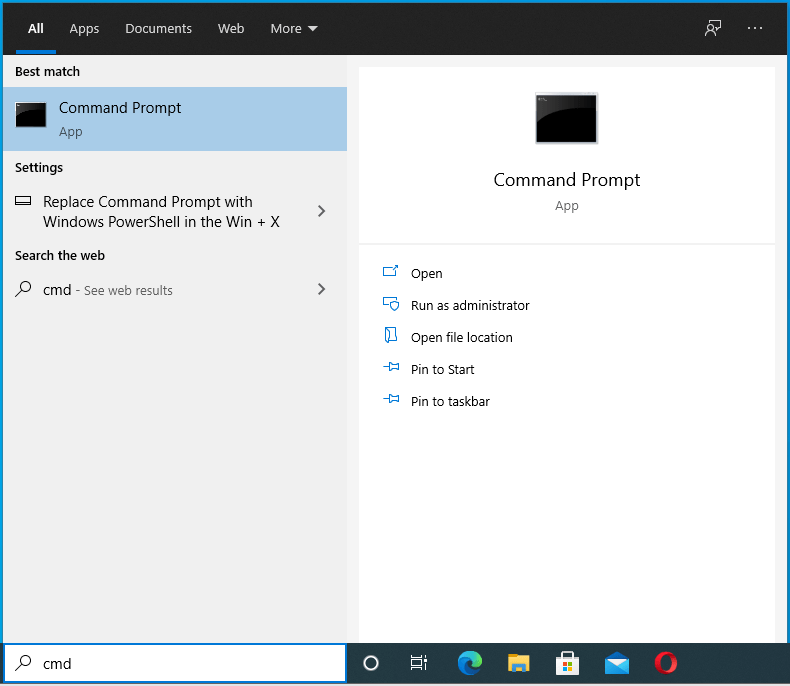
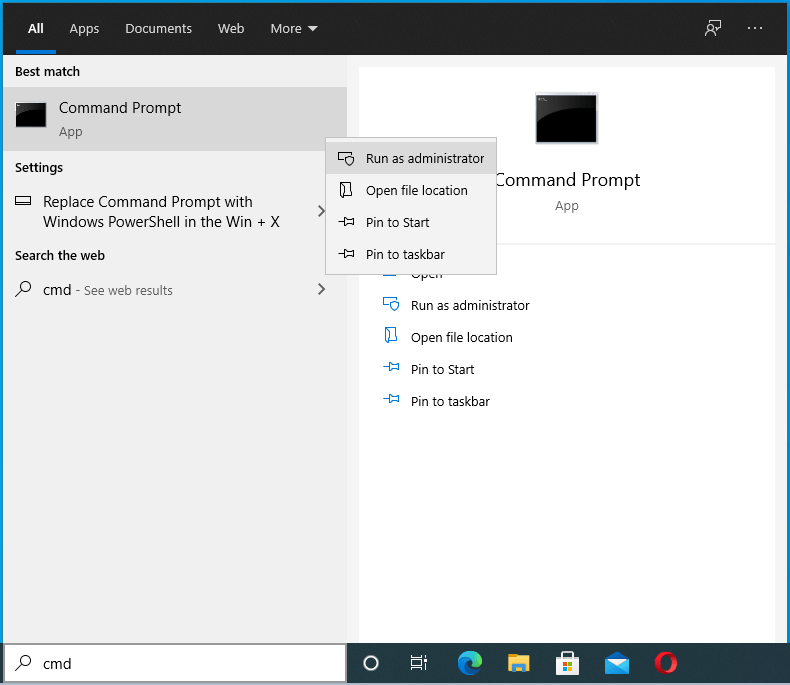
- Type
cmdinto the Search box.
![Type “cmd” into the Search box.]()
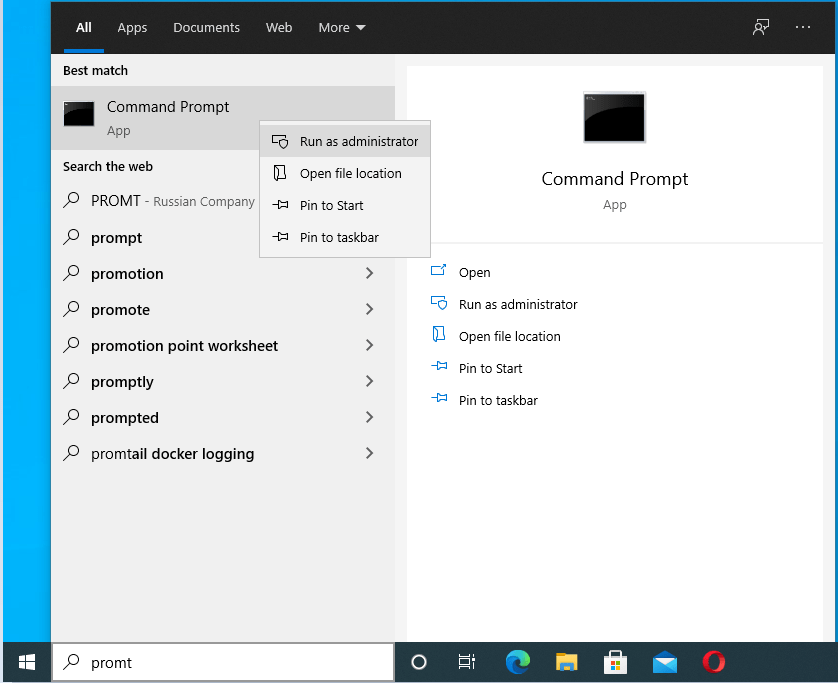
- Right-click Command Prompt in the search results and select “Run as administrator“.
![Right-click Command Prompt in the search results and select “Run as administrator”.]()
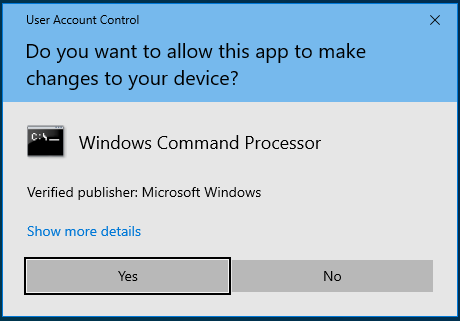
- Allow the Command Prompt to make changes to your device.
![Allow the Command Prompt to make changes to your device.]()
- Type or paste
chkdsk /f C:into the window and hit theEnterkey.

When the operation concludes, reboot your machine.
-
Run Windows Memory Diagnostics
The hard drive isn’t the only important hardware component that can become faulty. The RAM sticks too can become either damaged or corrupt. Without properly working memory, even basic system operations might become impossible.
You can use the Windows Memory Diagnostics Tool to check the status of the device memory.
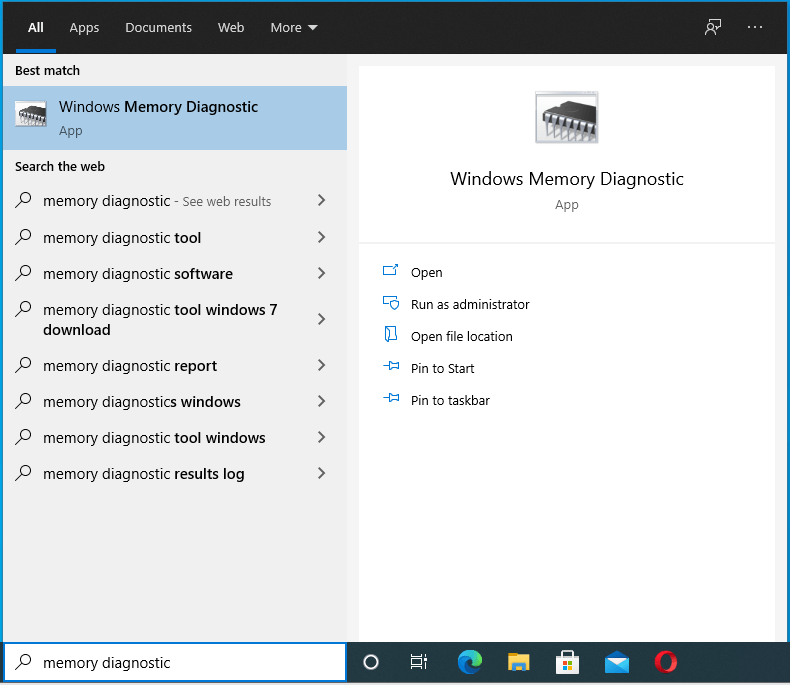
- Type
memory diagnosticinto the Search box.
![Type “memory diagnostic” into the Search box.]()
- Click Windows Memory Diagnostic in the search results.
- Select “Restart now and check for problems“.
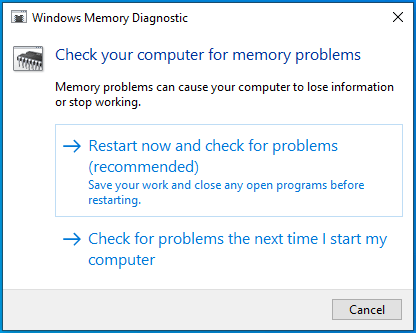
The Windows Memory Diagnostics tool will start to check the system memory for errors. Wait for some time while it runs a series of tests to figure out if anything is wrong with the installed RAM.
When the tool has finished scanning your memory, the system will reboot into your desktop and display the results of the test. If no result is shown, you can follow the steps below to retrieve it using the Event Viewer:
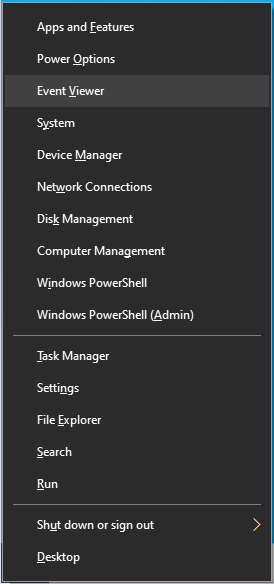
- Press the
Windows logo key + Xshortcut.
![Press the Windows logo key + X shortcut.]()
- Select Event Viewer.
![Select Event Viewer.]()
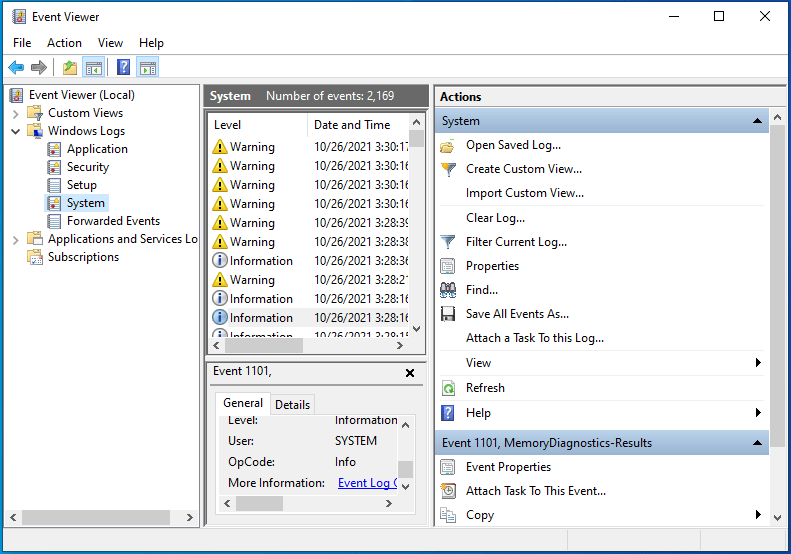
- When the Event Viewer opens, select Windows Logs on the left pane and then click Find on the right pane.
![When the Event Viewer opens, select Windows Logs on the left pane and then click Find on the right pane.]()
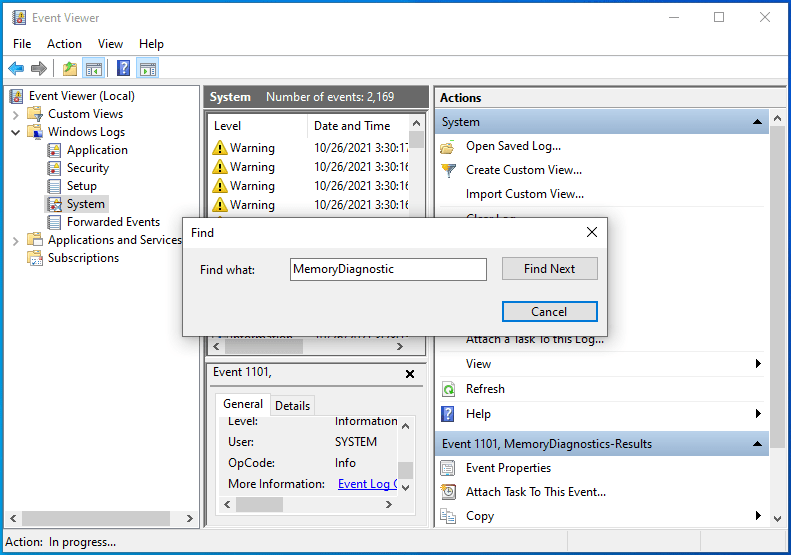
- Type
MemoryDiagnosticinto the Find box and click Find Next.
![Type “MemoryDiagnostic” into the Find box and click Find Next.]()
- The test results will appear at the bottom of the window.
If the tool detects no errors, the results will read as follows: “Windows Memory Diagnostic tested the computer’s memory and detected no errors”. Otherwise, it will specify the nature of the detected error. Act according to the error discovered.
-
Check the BIOS
The BIOS or UEFI is best thought of as the low-level operating system that governs the PC’s bootup process.
If the various methods given in this guide haven’t solved the SYSTEM_SERVICE_EXCEPTION (ks.sys) error for you, then you can try updating your BIOS.
We placed this method at the bottom of this article for a good reason: updating the BIOS is a last resort. Tampering with the BIOS can be potentially fatal. Doing the wrong thing in there can turn your computer into a piece of expensive brick.
In other words, steer clear of this method unless you know what you’re doing and are extremely careful.
After reading the disclaimer, perhaps you still want to update your BIOS because you really have no other recourse to solve the ks.sys issue. In that case, follow the instructions, and remember to be extremely careful.
Before you can update your BIOS, you need to know your current BIOS version. That way, you will know whether an update is available by comparing your version with the latest release on the manufacturer’s website.
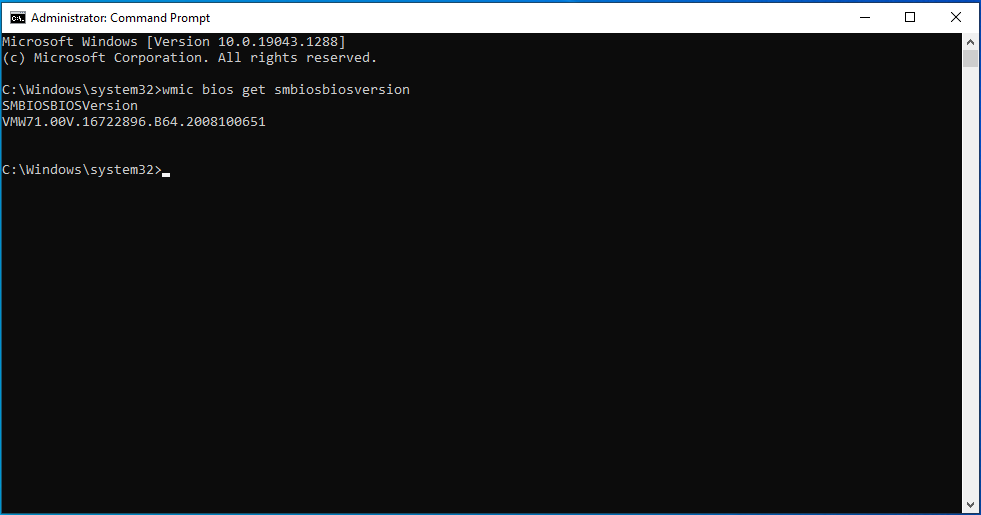
To quickly check your BIOS version, open a Command Prompt window with admin rights as explained previously and run the command below:
wmic bios get smbiosbiosversion
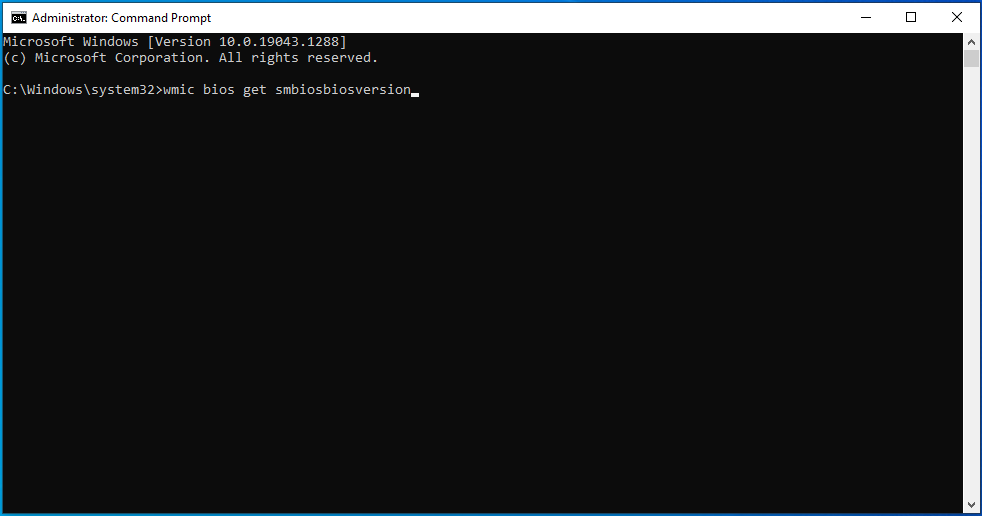
The number under SMBIOSBIOSVersion represents your BIOS version. Write it down somewhere.
Next, you have to check the model of your motherboard. You can do that by running a simple command.
Into the cmd window already open, type or paste the command below and press Enter:
wmic baseboard get product,Manufacturer,version,serialnumber
After running this command, the manufacturer, product version, serial number, and version of your motherboard will be shown.
With this information on hand, you can now visit the support page of the computer’s manufacturer and download the BIOS update file.
Select your motherboard model on the support page. Make sure you choose the exact model as installing the wrong BIOS update can wreck your PC.
After choosing the motherboard model, check for and download the BIOS update. Make sure that the version number of the update you are downloading is higher than your current BIOS version number.
If a release or update note is available, read it to learn what issues the update solves and other relevant information, like how to safely install the update.
Extract the update file from the archive and peruse the readme note for precise instructions on how to carry out the update.
Once the update is complete and you’ve successfully booted the machine, log in to your system and run your favorite programs without worrying about further blue screens.
Wrapping Up
A small number of Windows 10 users have been complaining about the SYSTEM_SERVICE_EXCEPTION (ks.sys) error. Even though this bug used to be common in the past, many people believe it has been completely eradicated. Unexpectedly, it has been occurring more frequently lately, though the issue is still limited to a relatively small number of computers.
With that said, the error is undoubtedly both annoying and damaging since it stops users from doing important work. Not to mention the sudden crashes and frequent reboots, which can damage system components.
With the solutions, workarounds and tips in this guide, we’re confident you’ll be able to solve this error and resume normal activity on your PC.