
- How to Fix Escape from Tarkov Keeps Crashing on Windows 10
- Start here: Make sure your system has the specs to run Escape from Tarkov
- Fix 1: Install the game’s latest update
- Fix 2: Install the Windows 10 Media Feature Pack
- Fix 3: Run Escape from Tarkov as an administrator
- Fix 4: Run Escape from Tarkov on your dedicated graphics card
- Fix 5: Perform an integrity check
- Fix 6: Roll back your graphics card driver
- Fix 7: Update your graphics card driver
- Fix 8: Increase your paging file
- Fix 9: Prevent your antivirus program from blocking the game
- Escape from Tarkov Keeps Crashing on Windows 10: Fixed
In this article, you’ll find easy-to-follow steps that will guide you towards a smoother and more enjoyable Escape from Tarkov gaming experience, free from unexpected interruptions. We start with quick fixes that will only take a few minutes and move on to more complex solutions. But here’s the best part: we will also share a few tools that can make every fix a simple one!
Let’s get started.
How to Fix Escape from Tarkov Keeps Crashing on Windows 10
Start here: Make sure your system has the specs to run Escape from Tarkov
It’s common knowledge that computers are manufactured differently. The fact that your system can easily play other video games doesn’t mean it has all it takes to run Escape from Tarkov without issues. There’s a chance you’re facing the crashing issue because your computer fails to meet one or more of the requirements for running the game.
So, before you start tweaking your system and settings in the game, start by confirming that your computer packs the right resources.
You’ll find the game’s minimum and recommended system requirements below. Also, we’ll show you how to confirm whether your PC meets them.
- Operating system: Windows 7 (64-bit); Windows 8 (64-bit); Windows 10 (64-bit)
- CPU: Intel Core 2 Duo or Core i3 2.4 GHz; AMD Athlon, Phenom II 2.6 GHz
- System memory: 8 GB RAM
- GPU: DX11-compatible with 1 GB of VRAM
- Sound card: DirectX-compatible
- Disk space: At least 8 GB of free storage space
Also Read:
Server Connection Lost in Escape from Tarkov
- Operating system: Windows 7 (64-bit); Windows 8 (64-bit); Windows 10 (64-bit)
- CPU: Intel Core i5, i7 3.2 GHz; AMD FX, Athlon 3.6 GHz
- System memory: 12 GB RAM
- GPU: DX11-compatible with 2 GB of VRAM or more
- Sound card: DirectX-compatible
- Disk space: At least 8 GB of free storage space
How to check your PC’s specifications:
- Right-click on the Start button and select Settings in the Quick Access menu to open the Settings application. You can also tap the Windows and I keys simultaneously to open the app.
- After the home screen of Settings opens, click on the System icon.
- Once you get to the System interface, switch to the left pane, scroll down, and then click on About.
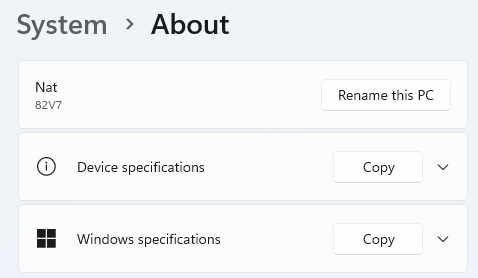
- Now, move over to the main window (the About tab) and check your system’s specs under Device specifications. This is where you’ll see your CPU’s make, model and architecture, as well as your RAM size, among others.
- If you want to check how much storage you have, double-click on This PC on your desktop and navigate to Devices and drives.
- To check the details of your display adapter, follow these steps:
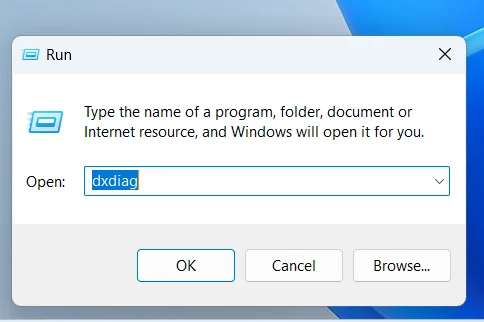
- Right-click on the Start button and select Run.
- After Run opens, type
dxdiaginto the text box and click on the OK button or hit the Enter key.
-
- After the DirectX Diagnostic Tool window appears, go to the Display tab and check the details of your graphics card, such as its make and model and its driver version.
Fix 1: Install the game’s latest update
If you’re behind on installing Escape from Tarkov’s latest update, try doing that. Battlestate Games has released a number of updates since the game’s release. These updates are geared towards improving performance and fixing general bugs and glitches. It’s possible that the root cause of the crashing problem you’re experiencing has been fixed in an update.
If updating the game does not solve the problem, move on to the next solution.
Also read:[FIXED] New Games Don’t Start or Are Not Working on Windows 10
Fix 2: Install the Windows 10 Media Feature Pack
After the 0.12.4 update, some gamers started reporting that their games began to crash suddenly. The reason for this problem isn’t known, but the game tends to crash after gamers attempt to start a raid. If this is the problem you’re facing, you can easily get rid of it by downloading and installing the Windows 10 Media Feature Pack.
Fix 3: Run Escape from Tarkov as an administrator
The random crashes you’re experiencing could be resulting from the game’s lack of permissions. PC video games need every system resource available due to their need for heavy graphics processing. Unfortunately, they won’t be able to access the resources they need if they don’t have the required permissions.
You can resolve the issue, in this case, by running the game as an administrator. To do that, your user account must have admin privileges:
- Locate the game’s desktop shortcut, right-click it, and then click on Run as administrator.
- If you don’t have a desktop shortcut, open a File Explorer window, navigate to the game’s installation folder, then right-click its EXE file and select Properties.
- The installation folder should be located in C:\Program Files\Escape_From_Tarkov.
- After the Properties window opens, go to the Compatibility tab and check the box beside Run this program as an administrator.
- Click on the OK button, then check for the crashing problem.
Fix 4: Run Escape from Tarkov on your dedicated graphics card
If your computer has two video cards, the crashing problem might be occurring because your system is forcing the game to run on the integrated card. Integrated graphics cards are not designed to handle heavy video processes that come with games like Escape from Tarkov. If you’re going to resolve the issue here, you’ll have to force the game to run on your dedicated GPU.
Also read:Windows PC Guide: How to Set GPU as Primary for Apps and Games?
There are different ways to pin the game on the dedicated card: you can use the Settings app, the NVIDIA Control Panel, or AMD Radeon Settings.
Using the NVIDIA Control Panel:
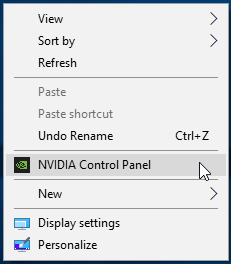
- Right-click on your desktop and click on NVIDIA Control Panel in the context menu.
- Once the app shows up, move to the left pane and click on Manage 3D Settings under the 3D Settings tree.
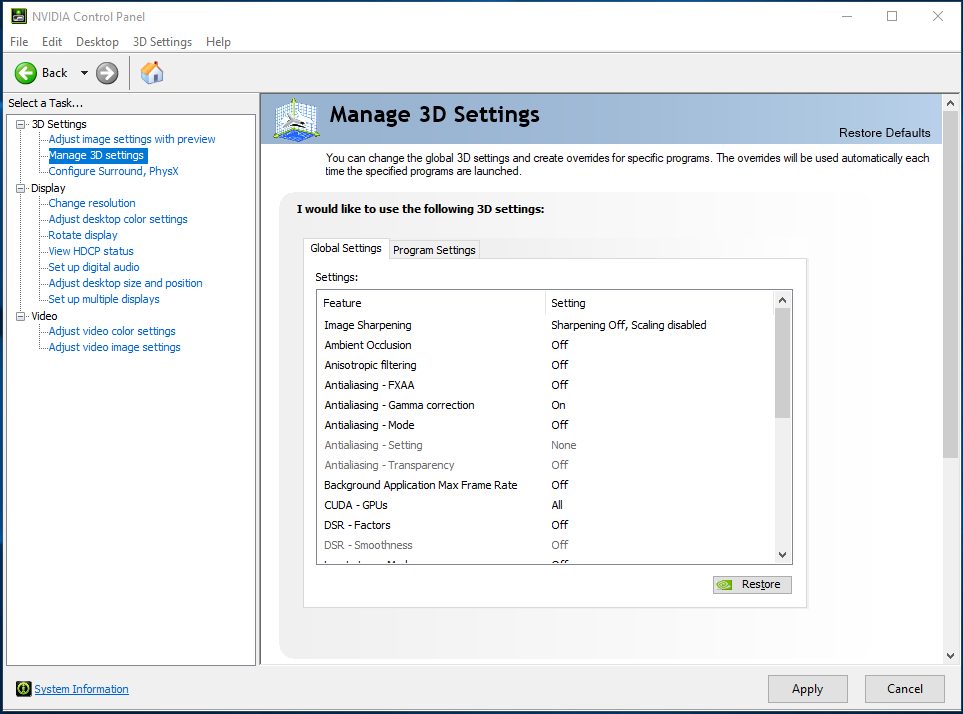
- Go to the right pane, stay in the Global Settings tab, and then click on High-performance NVIDIA processor in the Preferred Graphics Processor drop-down menu.
- After that, head to the Program Settings tab.
- In the Choose a program to customize drop-down menu, click on Escape from Tarkov. If you can’t find the game in the menu, click on Add, then go to Escape from Tarkov’s installation folder and double-click its executable file.
- Now, go to the Select the preferred graphics processor for this program menu and select High-performance NVIDIA processor.
- Click on the Apply button to save your changes, then check for the crashing issue.
Using AMD Radeon Settings:
- Summon AMD Radeon Settings by right-clicking on your desktop and selecting AMD Radeon Settings from the context menu. You can also search for the app in the Start menu and launch it.
- Once AMD Radeon Settings opens, navigate to the top of the window and click on System.
- Click on Switchable Graphics in the top-right corner of the app once the System interface opens.
- You’ll see the Running Applications view by default once the Switchable Graphics interface appears. If Escape from Tarkov is open, it should be visible. Click on the arrow under it and select High Performance.
- If you don’t see the game, navigate to the top-right corner of the Switchable Graphics interface and click on Running Applications.
- Click on Installed Profiled Applications on the next page in the same position.
- Locate Escape from Tarkov and change its Switchable Graphics option to High Performance.
- If the game still doesn’t appear, go to the top-right corner again and click on the Browse button. Once the Browse dialog opens, find your way to the game’s installation folder and add it.
- You can now change its option to High Performance.
- The Power Saving option means that the game will always run on the integrated GPU.
- The Based on Power Source option means the game will run on the integrated GPU when your PC is saving power and the dedicated card when your laptop is plugged to a power source.
Using the Settings App:
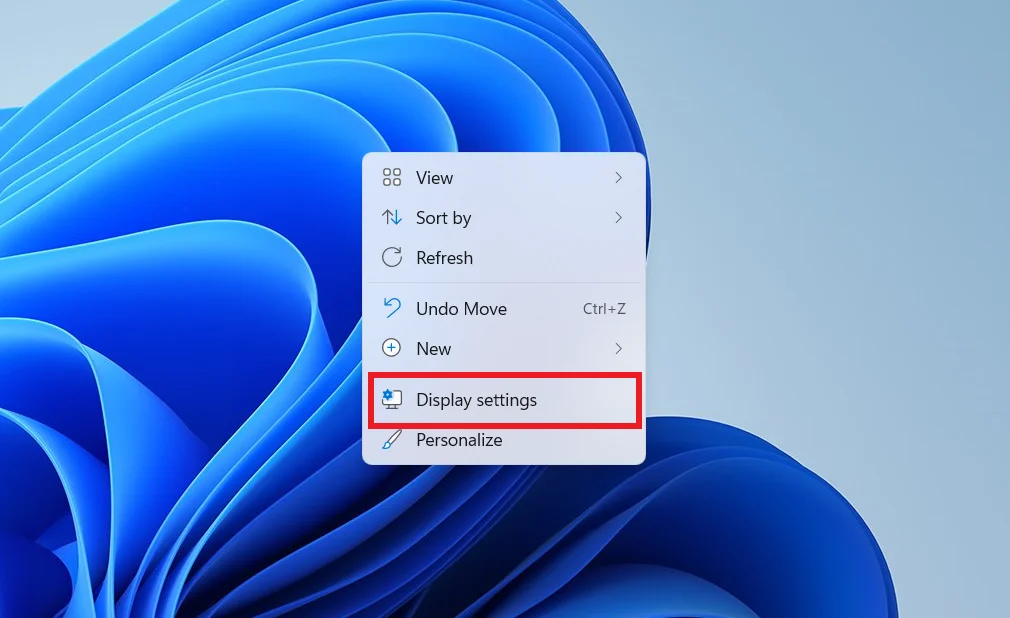
- Right-click on your desktop and click on Display settings in the context menu. If you want to launch Settings faster, tap the Windows and I keys simultaneously.
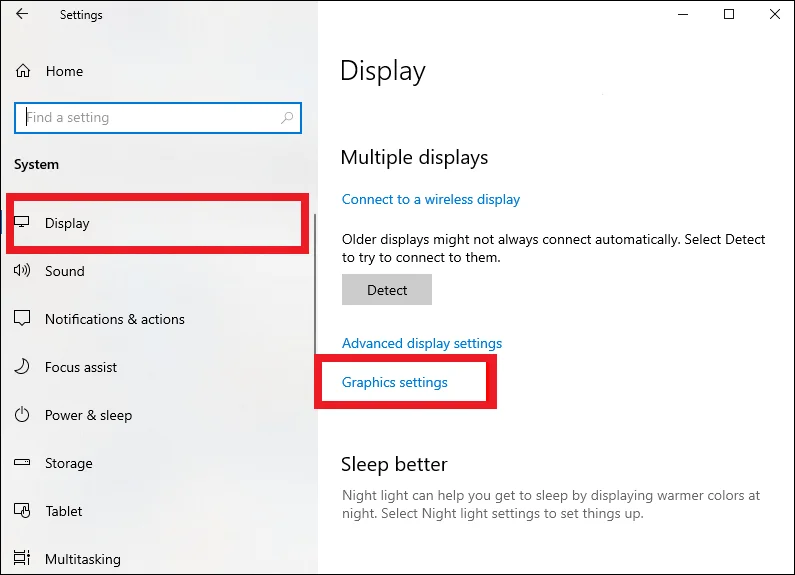
- Once the Display interface of the Settings app shows up, go to the bottom of the window and click on Graphics settings.
- After the Graphics Settings screen appears, go to the drop-down menu under Choose an app to set preference and select Classic app.
- Now, click on the Browse button, then go to the installation folder of Escape from Tarkov and double-click on its EXE file.
- Once the game’s icon appears, click on it, then click on Options.
- Next, select High performance in the dialog box that pops up and click on the Save button.
Also read:How to Fix No Suitable Graphics Card Found Error?
Fix 5: Perform an integrity check
Some of the game’s files might be corrupt or missing. It’s possible that a malware attack compromised the files, your antivirus program tampered with them, or an abrupt system shutdown damaged them. To resolve the problem, you have to use the Battlestate Games launcher to perform an integrity check.
What the launcher does is it scans the game’s files on your computer and compares them with their updated versions on Battlestate’s servers. After that, the program will automatically replace the files that are missing or faulty. The following steps will show you what to do:
- Go to the Start menu, search for the Battlestate Launcher and open it. If you have the launcher’s desktop shortcut, double-click it.
- Once the application opens, go to the top-right corner of the window and click on the arrow beside your username.
- In the context menu that drops down, click on Integrity Check.
- Allow the launcher to check for faulty game files and replace them automatically.
- Once the process is complete, restart the launcher and run the game.
Fix 6: Roll back your graphics card driver
If Escape from Tarkov started crashing after you performed an update for your graphics card driver, try reinstalling the previous driver and check if that solves the problem. The steps below will walk you through the process:
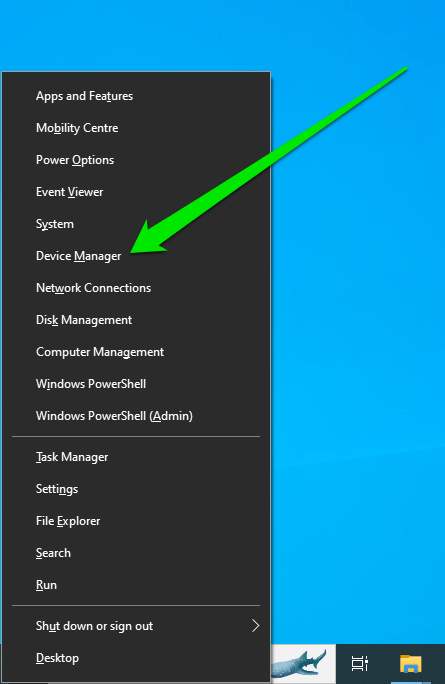
- Right-click on the Start button to summon the Quick Access menu.
- After the menu appears, click on Device Manager.
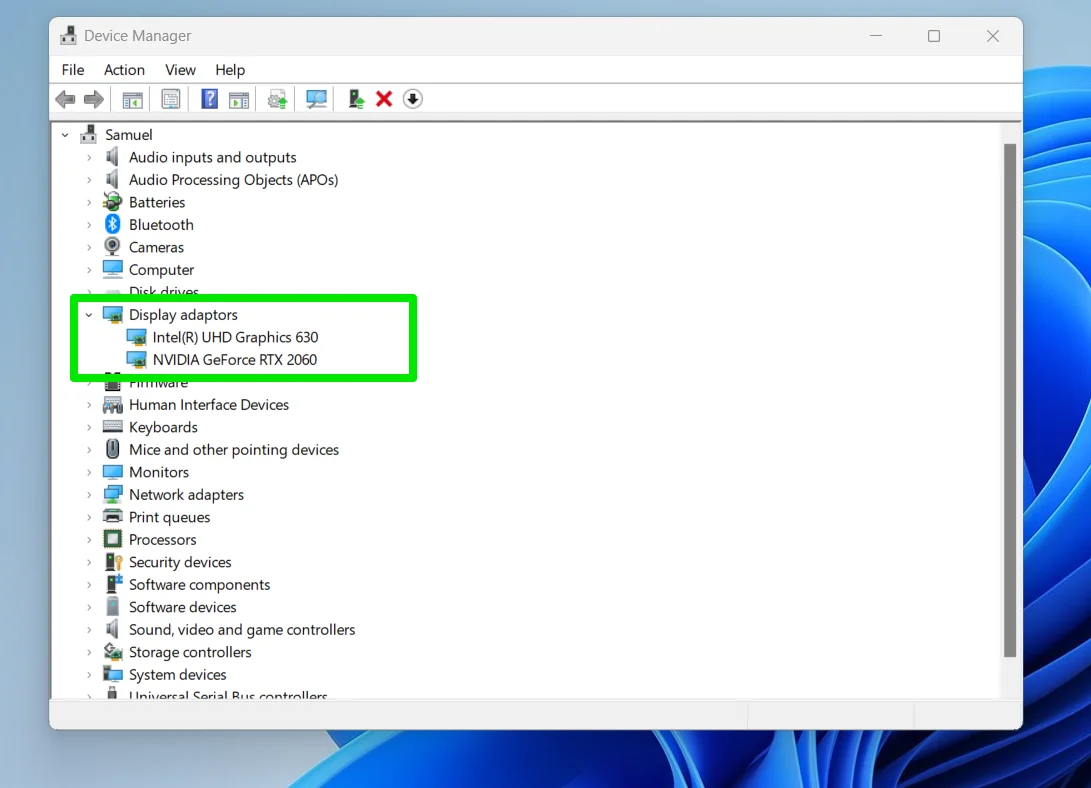
- Once the Device Manager shows up, click on the arrow beside Display adapters to reveal your graphics adapter.
- Right-click on the adapter and click on Properties.
- Once you see the Properties dialog window, switch to the Driver tab.
- Now, click on the Roll Back Driver button.
- After clicking on Roll Back Driver, the Driver Package Rollback dialog window will pop up. Select your reason for rolling back the driver, then click on the Yes button to continue.
- Once Windows rolls back the graphics adapter driver, restart your computer, and then check for the crashing issue.
You can easily check your current driver version under the Driver tab of the display adapter’s Properties dialog.
Run the driver package once you download it. You can also install the driver via the Device Manager. The steps below will guide you:
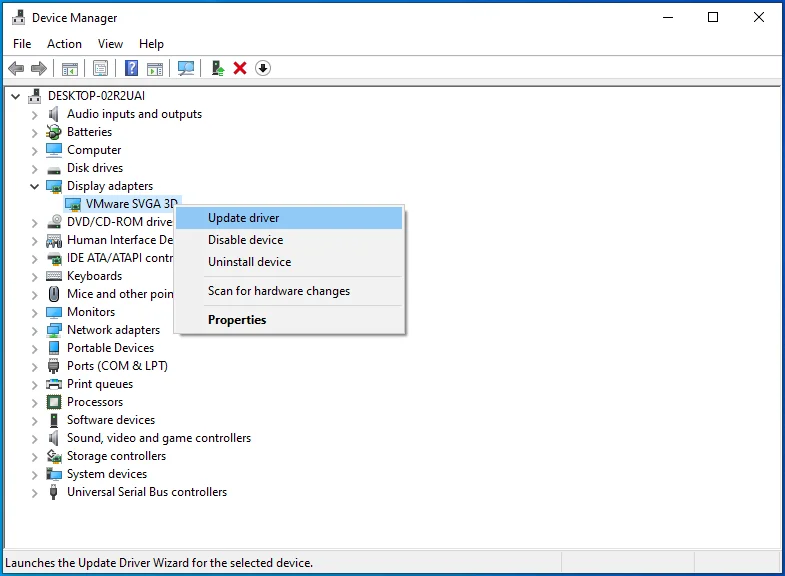
- Open the Device Manager and expand the Display adapters menu.
- Right-click on your video adapter, then click on Update driver.
- Once the Update Drivers dialog window comes up, click on the second option, which says, Browse my computer for drivers.
- Now, navigate to the folder where you extracted the driver package that you downloaded, and then allow Windows to install it.
- Once the installation process is complete, restart your system and run Escape from Tarkov to check for the crashing issue.
Fix 7: Update your graphics card driver
You’ll have to update your graphics card driver if installing its previous version hasn’t resolved the problem. As it turns out, outdated drivers don’t do well with games like Escape from Tarkov. It’s also possible that the update you installed earlier is problematic or that you installed the wrong software. We’ll be showing you different methods that you can apply to update the driver properly.
Using the Windows Update utility
Windows Update is a tool that installs critical updates for your operating system and core Microsoft applications and services. These software updates range from virus definitions to device drivers.
Every update goes through rigorous test phases before it is released. This means that updating your driver via Windows Update gives you software that is compatible with your PC. The single downside is that the testing process might delay the release of the updated driver software.
Also read:Ultimate Guide: How to Manually Check and Install Windows Updates
The steps below will show you how to use the Windows Update utility:
- Press the Windows and I keys simultaneously to open the Settings application.
- After Settings opens, go to the bottom of the page and click on Update & Security.
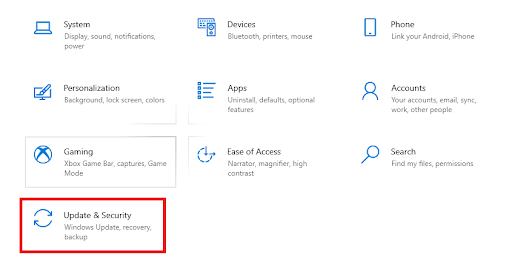
- After the Update & Security interface opens, click on Check for updates under Windows Update.
- The utility will now check for updates and begin to download those that are available for your system.
- Click on the Restart now button once the utility downloads the updates.
- Your system will now restart, and Windows will begin to download the updates.
- After the process completes and your system boots up normally, run the game and check if it crashes again.
Using the Device Manager
The Device Manager is another built-in tool that you can use to update your GPU’s driver. It will search for the graphics card driver on the Internet and install it automatically. Although you can download the driver manually and install it via the Device Manager, we recommend that you allow the Device Manager to update the driver automatically.
Follow these steps to do that:
- Press the Windows and X keys simultaneously, then click on Device Manager once the Quick Access menu shows up on the left edge of your screen.
- After the Device Manager opens, navigate to the Display adapters menu and expand it.
- Right-click on your graphics card and click on Update driver.
- After the Update Drivers window opens, click on the first option (Search automatically for drivers).
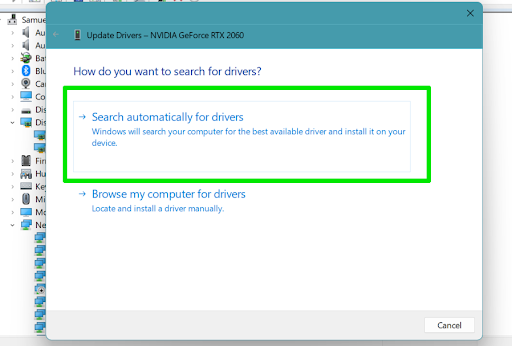
- Allow Windows to search for the updated driver and install it automatically.
- Run the game and check if the problem persists.
Updating the driver automatically
If Windows Update and the Device Manager can’t get the job done, you can use a dedicated program, which can be an even better option. Driver-updating programs are designed to keep every device driver on your system up to date and problem-free. This means that you’ll be fixing other problematic device drivers while you update your graphics card driver.
Also, during the update process, it will back up your previous drivers so that you can roll back in the future when there’s a need to.
Also read:[EASY GUIDE] How to Update Device Drivers on a Windows 10 PC?
Fix 8: Increase your paging file
The paging file is your computer’s virtual memory. It’s Windows’ way of extending the system memory when it gets filled up. Sometimes, the virtual memory itself might not be enough. In such a scenario, your game might be affected. The steps below will show you how to increase the paging file:
- Open the search function by clicking on the magnifying glass icon in the taskbar.
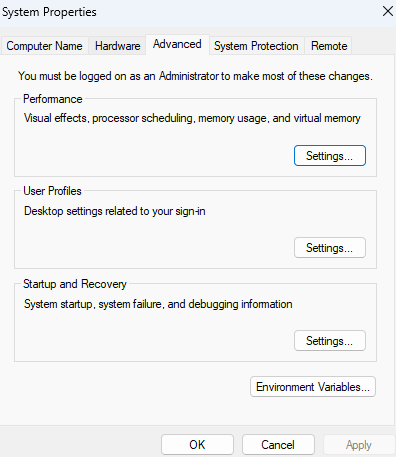
- Once the search box opens, type “advanced system settings” (without the quotes), then click on View advanced system settings once the search results appear.
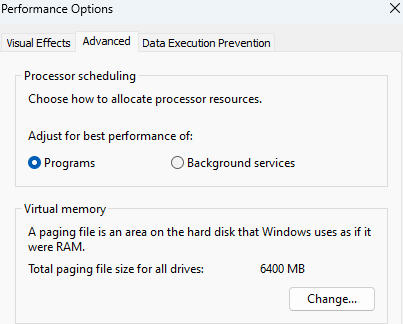
- After the Advanced tab of the System Properties dialog opens, click on the Settings button under Performance.
- Next, switch to the Advanced tab once the Performance Options dialog opens.
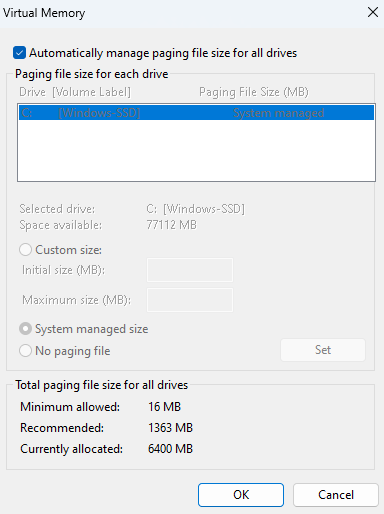
- Click on the Change button under Virtual memory.
- Uncheck the box beside Automatically manage paging file size for all drives, click on the radio button for Custom size, then increase the initial size (in megabytes) and maximum size (also in megabytes) of your paging file.
- Click on the OK button in the Performance Options and System Protection dialog boxes once you’re done.
Fix 9: Prevent your antivirus program from blocking the game
Antivirus programs normally amp up security and check for threats whenever you install a new application. In some cases, they block programs they consider to be threats, especially when they begin to consume a lot of system resources, just as games do. This could be the reason for the random crashes in Escape from Tarkov. Try adding the game to the security program’s exceptions list and check if that resolves the problem.
You’ll have to add the game’s installation folder as an exception, exclusion or exemption, depending on the antivirus program you’re using. For instance, if you use Bitdefender, you’ll be working with the Whitelist. You can always search for a guide on the website of your app’s developer if you don’t know what to do.
If you use Windows’ native antivirus program, however, the steps below will show you how to stop the tool from blocking your game:
- Open the search function by clicking on the magnifying glass icon in the taskbar.
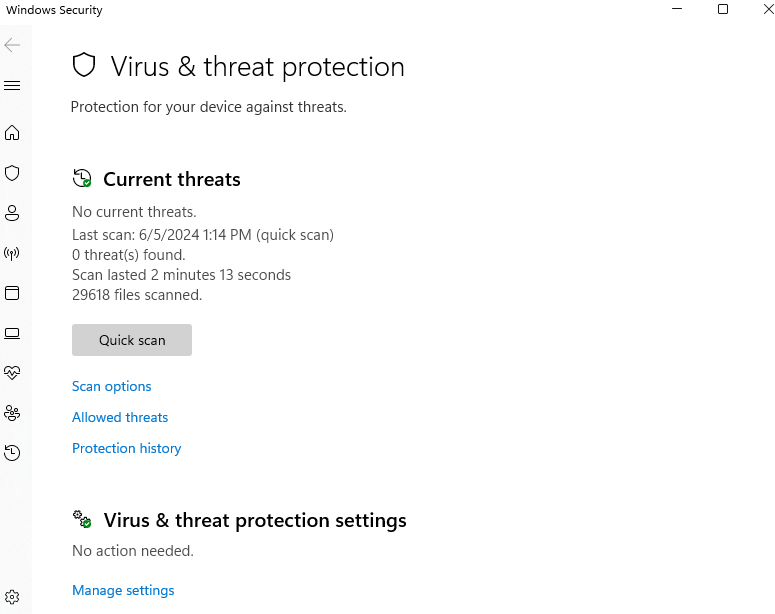
- Once the search box opens, type “Virus & threat” (without the quotes), then click on the first result.
- After the Virus & threat protection interface appears, scroll down to Virus & threat protection settings and click on the Manage settings link.
- After the Virus & threat protection settings interface appears, go to the Exclusions section and click on the Add or remove exclusions link.

- Now, click on Add an exclusion once you see the Exclusions screen, then click on Folder in the context menu.
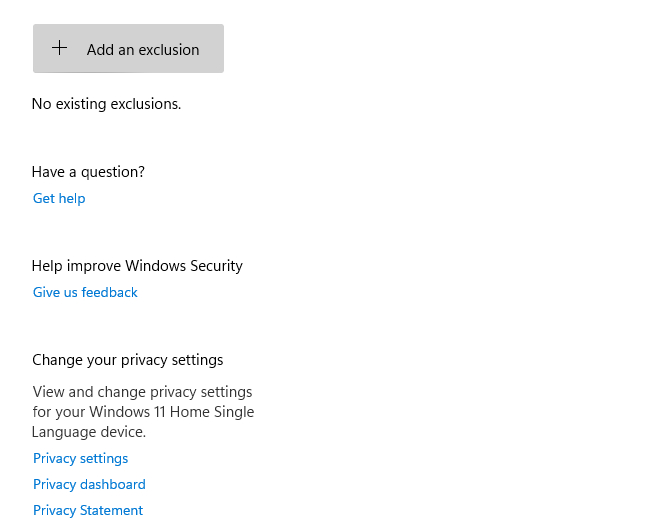
- After the Select Folder dialog window appears, go to the installation folder of Escape from Tarkov, select it, and then click on Select Folder.
If your current antivirus is frequently running into similar issues, consider switching to a different program.
The best part is that Auslogics Anti-Malware has been designed for Windows and can also run alongside other antivirus programs.
So, you won't be running into any compatibility issues.
If nothing works, your last resort should be reinstalling Escape from Tarkov. That said, we believe that the steps above will help you get rid of the random crashes.
Escape from Tarkov Keeps Crashing on Windows 10: Fixed
Dealing with crashes in Escape from Tarkov can be a frustrating experience. But if you follow the fixes above, you will get rid of the problem in no time. Make sure your system meets the game’s requirements, keep your software and drivers up to date, and tweak settings for a smoother gaming experience.
If you have other issues or want to share your experiences and thoughts, use the comments section below.
Happy gaming!