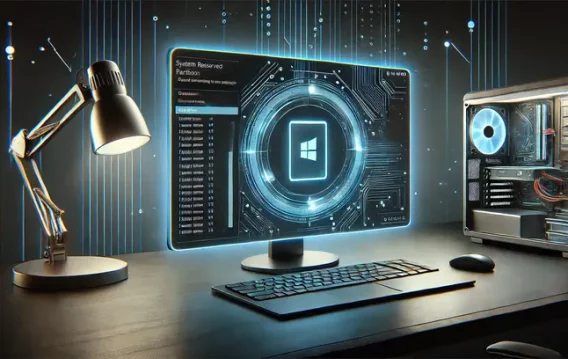
- What Is the System Reserved Partition?
- How to Know If You Have a System Reserved Partition
- What Is Stored on the System Reserved Partition?
- How to Delete the System Reserved Partition? (And Should You Do So?)
- Can the System Reserved Partition Be Extended?
- How to Stop the System Reserved Partition From Being Created
Windows is a multilayered operating system. Sometimes, you think you’ve got it all figured out, only to be pleasantly surprised by an obscure setting or an out-of-the-way option that proves to be a game changer at that moment. Take, for example, the “System Reserved” partition. It could very well be one of the best-kept secrets on Windows PCs.
Unless you’ve had the good fortune to see it in Disk Management (and who even opens Disk Management, anyway?), you’re unlikely to be aware of its existence. Yes, it exists, and not just exists: it stores a number of important files.
You may also have encountered an error message related to the reserved partition while trying to upgrade or update Windows.
Curious yet? We were, too, when we learned about it. Read this guide for a complete low-down on the System Reserved Partition on Windows 10/8.1/7 and Windows Server 2008 and later.
What Is the System Reserved Partition?
The System Reserved Partition (often abbreviated to SRP) is a hidden partition created on Windows 7 and later. Windows Server 2008 and later also have this partition. Versions of Windows prior to Windows 7 do not have this hidden partition.
The partition is carved out of the main system drive, which houses the operating system. It is automatically created while a clean copy of Windows 10/8.1/7 is being installed.
This partition is hidden by default, and most users aren’t even aware of its existence. Although hidden and taking up a relatively miniscule amount of disk space, this partition houses important files that are fundamental to how Windows operates. Boot files, recovery files, and files related to the native BitLocker encryption system are stored on this partition.
How to Know If You Have a System Reserved Partition
The answer to this question is pretty simple. If you’re using Windows 10, 8.1 or 7, then you have a hidden System Reserved Partition. The only exception is if you’re using a gifted PC from which the SRP has already been removed.
You can check that the System Reserved Partition is on your PC by opening the handy Disk Management utility in Windows. This tool helps you to modify partitions on your hard drives.
Here are several methods to open Disk Management in Windows:
- Through Search. Press the
Windows key, typedisk managementand clickEnter.
- Through the Power User menu. Hold down the
Windows key and press X. Select Disk Management in the Power User menu. - Through the Control Panel. Press the
Windows key, typecontrol paneland pressEnterto open the app. Set the View by mode in the Control Panel to Category. Select System and Security > Administrative Tools > “Create and format hard disk partitions”. - Through Run. Hold down the
Windows key and press R. Typediskmgmt.mscinto Run and click OK.
After launching the Disk Management utility, you will see a list of the partitions on your hard drives. Look for the partition named System Reserved. That’s the hidden partition that stores boot and BitLocker data.
What Is Stored on the System Reserved Partition?
Now that you are aware of the System Reserved Partition on your PC, you may be wondering what it contains and what it does. Both questions are different ways of asking the same thing: what is the purpose of the System Reserved Partition on your computer?
There must be a reason for the presence of a hidden reserved partition that isn’t even assigned a drive letter, right? If you think so, you’re right. The System Reserved Partition exists for several very important reasons. Below are three of them:
- The System Reserved Partition stores the Boot Manager and Boot Configuration Data. The Boot Configuration Data, or BCD, is data relating to your system’s boot operations and is, basically, information regarding how the system boots. The Boot Manager manages the boot process, ensuring everything is in order. The System Reserved Partition stores Boot Manager’s data, which is accessed every time you start up the PC.
- The System Reserved Partition stores BitLocker files. You can’t use BitLocker encryption without the System Reserved Partition. This is because the startup files used for BitLocker are stored on this special partition — they can’t be stored anywhere else.
- The System Reserved Partition contains Windows RE files. In Windows 10, some files related to the recovery process are stored on this partition.
To sum up, the special partition without a drive letter is reserved for Windows boot files, BitLocker startup files, and Windows Recovery files (in Windows 10).
Now that you know what is stored on the SRP, you might want to see the contents for yourself. There’s a very good reason that Windows keeps this partition hidden by default. Because of the critical nature of its contents, it won’t do if anything on it is mistakenly deleted. It can damage the Windows boot sector and lead to the system being unable to boot up.
However, you can easily view the contents of the SRP anyway. What stands between you and the partition is a drive letter. Once you assign it a drive letter, you can open and exit the partition as often as you wish.
To assign a drive letter to the partition, select and right-click the partition and click Change Drive Letters and Paths. Assign a drive letter and save your changes. Make sure that you choose a unique letter that hasn’t been assigned to another device.
Once you’ve done it, the SRP becomes visible in File Explorer. However, the contents of the partition remain hidden. To make them visible, you must enable the viewing of hidden files, folders and drives. Follow the steps below to do that in Windows 10:
- Hold down the
Windows key and press Eto open a File Explorer window. - Click the File tab and select “Change folder and search options“.
- Switch to the View tab of the Folder Options dialog.
- Under “Hidden files and folders“, tick the “Show hidden files, folders and drives” checkbox.
- Click Apply and then OK to save the changes.
If you’ve done everything right, the System Reserved Partition will show up as a separate drive under “Devices and drives” in This PC.
Simply double-click the drive to view its contents. You will discover that most of the folders stored on the system partition seem to be unique. Below is an explanation of the partition’s contents:
- Boot. The files in this folder are related to system boot configuration and the Boot Manager.
- Recovery. The files in this folder are related to Windows Recovery. These files enable recovery tools that can help during system repair, such as Startup Settings, Safe Mode, etc.
- Bootmgr. This is the main Boot Manager file. It is responsible for locating which partition Windows is stored on and initializing the boot process.
- BOOTNXT. This small file is related to Windows Startup options for USB, such as Windows To Go.
- BOOTSECT.BAK. This file is a backup of the PC’s boot sector. It is required in case the boot sector becomes corrupt. When Windows is repairing a corrupt boot sector, this backup comes in handy.
So, these are what you get on the system reserved partition. Obviously, they are critical items needed for Windows startup, BitLocker security, and recovery options.
How to Delete the System Reserved Partition? (And Should You Do So?)
I believe the real question should be, “Why should you delete the SRP?” There are obvious and important reasons why the reserved partition is better left alone.
Microsoft obviously intended the partition to remain hidden. That’s because of the important files it contains. Moving these files or deleting them along with the partition can cause critical system damage.
Moreover, there is no need to delete the partition if you want to free up extra space on your hard drive. The System Reserved Partition consumes 100 MB of space on Windows 7, 350 MB of space on Windows 8, and 500 MB of space on Windows 10. When compared to the massive amount of space on a typical hard drive, those figures really aren’t much.
Moreover, deleting the partition won’t free up 500 MB for you on Windows 10. The boot files and Windows RE files will still be present – they will be migrated to your main partition. The only thing you’ll really remove are the BitLocker files. Surely, those alone aren’t worth all the bother of deleting a small, unobtrusive partition?
If you feel like your hard drive can do with some more free space but don’t know where to look, we recommend Auslogics BoostSpeed to you. Its collection of utilities will help you discover and delete junk files, unneeded registry keys, and unused applications.
Finally, the partition insures you against a complete loss of data in the case of system failure. If your main system partition becomes corrupt, the files from the reserved partition can help you repair the system and get Windows working normally again. You lose that cushion if you move everything to the main partition.
Finally, no System Reserved Partition, no BitLocker. The equation is that simple. The hidden partition is mandatory if you use BitLocker encryption to secure your data or plan to do so in the future.
If you still wish to remove the SRP, this is possible. You will first need to unhide the partition and assign it a drive letter, as explained above. Once you can access the partition with File Explorer, you have to move the boot files to your Windows partition and disable Windows RE to proceed. Trust us, that isn’t as simple as it sounds. Doing all this correctly involves a lot of cumbersome processes, like editing the registry, updating or repairing the boot configuration data and making the C drive the active boot partition. Unless you have a really good reason, all this effort to save a few megabytes of space just isn’t worth it.
If you still wish to go ahead, you can consult any of the guides that explain how to do it safely. Microsoft, however, doesn’t support SRP-removal techniques, and neither do we.
If space is your major motivation for wanting to remove the partition, you can hunt more productively in other areas of your computer, such as the temporary files folder or even the registry. You can use Auslogics Registry Cleaner to free up as much space in a few seconds as you’d get from removing the SRP after an hour of work.
Can the System Reserved Partition Be Extended?
Perhaps, instead of looking for a way to remove the partition, you’re wondering how to enlarge its size.
There are some situations that make extending the hidden partition desirable. For example, some users were unable to upgrade to Windows 10 from Windows 7 because new files couldn’t be added to the partition. Thus, they got the “We couldn’t update the system reserved partition” error message.
Unfortunately, there is no straightforward way to natively allocate more space to the SRP once it has been created and is in use. We certainly haven’t discovered any surefire method. However, do a quick web search and you’ll discover some third-party tools that claim they can expand the partition size for you.
If you’re stuck with your current OS due to this type of error, we recommend you back up your data and perform a clean install of Windows 10 to bypass the issue.
How to Stop the System Reserved Partition From Being Created
Rather than troubling yourself wondering how or whether to remove the hidden partition, you can stop it from being created in the first place. Just keep in mind that you can only do this while clean-installing Windows 10/8.1/7.
If you’re installing Windows on a completely empty disk, the process of stopping the SRP from being created becomes much easier. Alternatively, you can format the disk first to wipe everything from it.
Follow the steps below to prevent the SRP from being generated when installing Windows on an empty disk:
- Start the installation process as usual.
- When you get a pop-up telling you that Windows might create additional partitions for system files, click OK.
- Windows will create two partitions on the hard drive: Disk 0 Partition 1: System Reserved and Disk 0 Partition 2.
- Select Disk 0 Partition 2 and click Delete. Click OK on the confirmation prompt.
- Disk 0 Partition 2 will become Disk 0 Unallocated Space in a moment.
At this point, what you need to do is extend the System Reserved Partition to cover all the space on Disk 0. This means extending it over the unallocated space.
- Select Disk 0 Partition 1: System Reserved and click Extend.
- Next, select the System Reserved Partition and click Format.
When the formatting is complete, go ahead and install Windows. The boot files and Windows Recovery files will be saved on the same partition.
All in all, since the System Reserved Partition contains important files and doesn’t take up significant space, it is best to ignore it and move on with your life.