- What is the Error 0x80042109 in Outlook?
- Solution 1: Removing then Adding Your Account
- Solution 2: Installing Pending Updates
- Solution 3: Disabling Your Proxy Server
- Solution 4: Disabling Your Third-Party Antivirus
- Solution 5: Using Command Prompt to Get Rid of Junk Files
- Solution 6: Checking Your Internet Connectivity
- Solution 7: Changing the Outgoing Port
- Solution 8: Reconfiguring Your Firewall
- Solution 9: Performing a System Restore
- Solution 10: Reinstalling Outlook
While many thrive in an organized mess, there are still people who prefer arranging their files and emails neatly. In many ways, Marie Kondo was right when she said that there’s transformative magic in the art of tidying up. This is also the reason why Microsoft Outlook remains popular to this day. This email management program not only allows a user to send and receive emails, but it also lets them sync their email directly into their calendar and contact list.
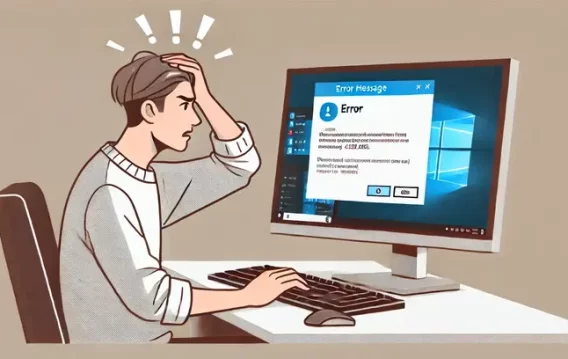
Like many other email services, Outlook is still no stranger to issues. Recently, many users have complained about issues on sending emails. They couldn’t deliver their mails successfully because the Error Code 0x80042109 prevents them from doing so. Well, if you found this article because of that problem, worry no more. We will teach you how to fix the Microsoft Outlook Error Code 0x80042109.
What is the Error 0x80042109 in Outlook?
The Error Code 0x80042109 usually appears while users try to send emails via Microsoft Outlook. Their outgoing emails fail to reach the recipient, and they see an error message about problems on the email server on their screen. This issue does not seem to affect other system processes. It does not cause system freezes, slowdowns, or crashes. It goes without saying that it only affects Outlook. In most cases, the following error messages show up:
“Sending and Receiving reported error (0x80042109): Outlook is unable to connect to your outgoing (SMTP) e-mail server.”
“Sending reported error (0x80042109): Outlook cannot connect to your outgoing (SMTP) e-mail server.”
If you received the first error message, it means that Internet connectivity issues are preventing you from delivering your emails successfully. Meanwhile, the second message tells you that Outlook is not responsive and it won’t let you perform any action. You won’t be able to configure it or update it, which will also keep you from sending or receiving emails.
This problem may seem familiar for people who ask, “What is the Error 0x800ccc0e in Outlook?” After all, their symptoms are quite similar. So, whether you encountered the Error 0x80042109 or the Error 0x800ccc0e, we’re confident that our solutions will help you send and receive emails successfully.
Solution 1: Removing then Adding Your Account
- On your keyboard, press
Windows Key+Ito launch the Settings app. - Once the Settings app is open, select Apps.
- Scroll through the apps until you find Outlook.
- Select Outlook, then click Advanced Options.
- On the next page, click Reset.
- After resetting your Outlook account, add your information again.
- Configure your Outlook account, then wait for it to complete the synchronization process.
After setting up your Outlook account, try sending emails again to see if the error is gone.
Solution 2: Installing Pending Updates
The regular updates are some of the great things about Windows 10. Of course, Microsoft listens to people’s feedback. It develops patches that will fix issues that users complain about. So, to get rid of the Error 0x80042109, we suggest that you install any pending updates. Usually, your system downloads these updates automatically in the background. However, you can also manually start the process to take care of the error promptly. Here are the steps:
- Go to your taskbar, then right-click the Windows icon.
- Select Settings from the menu.
- Now, select Update & Security.
- On the next page, go to the right pane and click Check for Updates.
- Let Windows Update check for available updates.
- If there are updates, download them. Once the process is complete, restart your computer to install the updates.
After installing the updates, try using Outlook again to see if the error is gone. If it persists, try the next solution.
Solution 3: Disabling Your Proxy Server
If there is trouble connecting with the email server, we recommend that you disable your proxy server temporarily. It may be interfering with the connection, causing the Error 0x80042109 to appear. To do that, follow the instructions below:
- Press
Windows Key+Son your keyboard to launch the Search box. - Inside the Search box, type
CMD. - You need to launch an elevated form of Command Prompt. So, instead of clicking OK, you need to press
Ctrl+Shift+Enteron your keyboard. - Once Command Prompt is up, execute the following command:
netsh winhttp reset proxy
This command line will remove your proxy server, configuring your system for direct access to the Internet.
Solution 4: Disabling Your Third-Party Antivirus
Aside from disabling your proxy server, it would also help if you deactivated your third-party antivirus as well. It is possible that your security app is interfering with Outlook’s operations. So, if this is the case, we suggest that you disable your antivirus temporarily. If the Error 0x80042109 is gone, it may be best if you uninstall your security app entirely.
If you’re worried about the vulnerability of your system, we recommend that you use a reliable antivirus. There are many security software programs out there, but Auslogics Anti-Malware is among the few that can provide comprehensive protection. It was also designed by a certified Microsoft Silver Application Developer. So, you can be sure that it won’t interfere with your messaging app. It goes without saying that you can use it alongside Windows Defender.
Windows 10/11 (8, 7, Vista, XP)
Solution 5: Using Command Prompt to Get Rid of Junk Files
- Click the Search icon on your taskbar, then type
Command Prompt. - Right-click Command Prompt from the results, then select Run as Administrator.
- If prompted to give permission to the app, click Yes.
- Inside Command Prompt, type
cleanmgr, then hitEnter. - Your system will start searching for and deleting junk files.
Once the cleanup process is complete, try sending emails via Outlook again to see if the problem has been resolved.
Solution 6: Checking Your Internet Connectivity
Sometimes, your email fails to go through because of your slow Internet connection. To check if this is the case, we recommend that you perform the following troubleshooting steps:
- Restart your router and modem.
- Try using a wired Internet connection instead of connecting to the Wi-Fi.
- Restart your computer.
Once you’ve ensured that you have a stable connection, you can try sending emails via Outlook.
Solution 7: Changing the Outgoing Port
By default, the value of a standard outgoing SMTP (Simple Mail Transfer Protocol) port is set to 25. It is worth noting that a lot of Internet service providers are blocking this port value. If this is the problem, then you won’t be able to receive and send emails. In this case, you can choose from two solutions:
- Changing the SMTP value to 26.
- Switching to TLS port, then choosing 587.
The second option implies setting a non-conventional port value. Nonetheless, it has been a tested solution for this issue. So, we suggest that you follow the instructions below:
- Launch Outlook, then click Tools.
- Access Account Settings, then double-click your email address.
- Select More Settings, then click Advanced.
- Change the Outgoing server SMTP port to 587, then choose TLS encryption.
- Confirm the changes you’ve made.
After modifying the outgoing port, check if you are able to send emails without the error message.
Solution 8: Reconfiguring Your Firewall
If the issue persists even when you’ve configured your outgoing ports, you should check if your firewall is causing the error. Windows Firewall rarely blocks trusted features on the operating system. That said, this problem can still happen from time to time. To check if your firewall is allowing Outlook to access the Internet, follow the steps below:
- Press
Windows Key + Son your keyboard to bring up the Search box. - Inside the Search box, type
Windows Firewall, then select Firewall & Network Protection from the results. - Once you’re inside Firewall & Network Protection, click the Allow an app through firewall link.
- Now, look for the following processes and enable them for both public and private networks:
For Outlook: Outlook.exe
For Outlook Express: Msimn.exe
- Click OK to confirm the changes you’ve made.
Restart your computer, then check if the error is gone.
Solution 9: Performing a System Restore
You can also bring back your system to a state wherein the issue did not exist. You can perform a system restore to get rid of the Error 0x80042109. To do that, follow the instructions below:
- Click the Search icon on your taskbar.
- Type
System Restore, then select Create a Restore Point from the results. - Click System Restore, then on the new window, click Next.
- Make sure that the Show More Restore Points option is selected.
- Now, select a restore point that dates back to the time when the problem did not exist.
- Click Next to begin the process.
After performing a system restore, restart your computer and try using Outlook again. If the error is still there, we recommend that you try the last solution in this article.
Solution 10: Reinstalling Outlook
If you’ve tried all the methods in this article and yet the issue persists, then your last resort is to reinstall Outlook on your PC. Of course, you need to uninstall the app first. You can do this by performing these steps:
- On your keyboard, press
Windows Key+R. Doing so will launch the Run dialog box. - Inside the Run dialog box, type
Control Panel, then click OK. - Now, click Uninstall a program under Programs.
- Look for Outlook, then right-click it.
- Select Uninstall to remove the app.
- After removing the app, reinstall Outlook.
Once the installation process is complete, restart your computer and check if the error is gone.
We hope one of our solutions helped you get rid of the Error 0x80042109.
If you want to suggest other methods for resolving the problem, please feel free to share them in the comments below.
Windows 10/11 (8, 7, Vista, XP)