![[FIXED] How to Fix Shift Key Not Working on Windows 10 PC?](https://www.auslogics.com/en/articles/wp-content/uploads/2023/11/shutterstock_2193913729-1-1-568x359.jpg)
No matter how convenient the touchscreen interface is, a lot of Windows users still prefer typing on a keyboard. After all, it is an input peripheral device that has provided reliable performance through the years. We’ve seen a lot of changes on Windows since the 1990’s
. However, keyboards stayed the same, providing service to millions of people across the world.
In most cases, they can be durable enough to last for many years, and you wouldn’t have any problems with them throughout their lifespan. However, there are users who have reported that after the system upgrade, certain keys on their unit have been malfunctioning. In most cases, the users specifically had issues with their Shift key. This key is important for daily typing. As such, we’ve compiled a list of solutions that will help you resolve Shift key problems.
How to Fix Shift Key Not Working on Windows 10 and Other Windows Systems?
Before we start fixing Shift key issues, it would be best to discuss the common scenarios related to this problem. Take a look at the examples below and see which one is similar to what you’re trying to resolve.
- Shift key malfunctioning on Windows 10 and older systems – Older Windows versions can also be affected by this problem. On the other hand, you can still get rid of the issue, using our methods below.
- Malfunctioning left Shift key – In some cases, only one of the two Shift keys is affected. It is possible that the key is just stuck. As such, you have to try to free it from getting stuck or make sure that the key socket is clear.
- Shift key on the keyboard is not working properly – Other users reported that they had tried to resolve Shift key problems by performing an antivirus scan. It is possible that the issue has been caused by malware, and removing it can get the Shift key to function properly again.
- Shift key refuses to capitalize letters – This is another common issue that may happen on your computer. Don’t worry because this can easily be fixed, using one of our methods below.
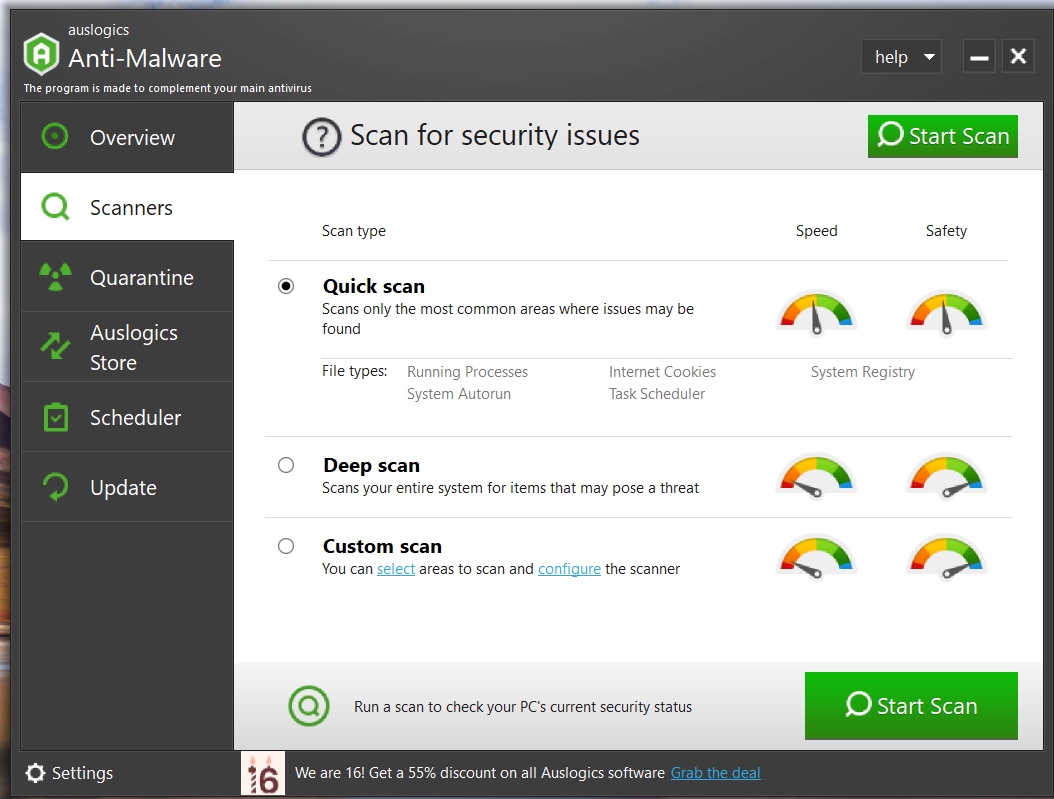
Method 1: Removing Malware
According to several users, malware infection can possibly cause the Shift key to malfunction. As such, we recommend performing a comprehensive system scan on your computer. You can use Windows 10’s built-in antivirus program. On the other hand, if you want maximum protection, we suggest using a reliable tool like Auslogics Anti-Malware.

Once you’ve performed a detailed scan on your computer, check if the issue with your Shift key has been resolved.
Method 2: Checking Your Hardware
Of course, you would also have to make sure that your keyboard is in good condition. So, we suggest connecting it to another computer, then check if the Shift key is still malfunctioning. You can also try switching between different USB ports. If you are using the PS2 keyboard, do not forget to plug it before the system boots. Meanwhile, you can plug in regular keyboards anytime. It is also possible that the key just got stuck. To fix this, you can free the Shift key by firmly pressing it. It is worth noting that you can experience this problem on almost any key, and not just the Shift key. In some cases, dust and dirt can hinder the key from functioning properly. When fixing Shift key issues like this, you have to remove the problematic key and use pressurized air to clean it. By removing the dust from the key socket, you can resolve the issue.
Also Read: Expert Tips: How to Clean Laptop Mouse and Keyboard
Some users mentioned that they had used pressurized air to clean the entire keyboard. However, with this method, you would have to open the keyboard and remove all the keys. So, if you do not want to do something as tedious and complicated, you can just try another solution.
Also Read: How to Fix a Jammed Keyboard Key Easily?
Method 3: Run the Hardware Troubleshooter
Windows includes a built-in troubleshooter that can diagnose and fix issues with hardware, including the keyboard. To run the hardware troubleshooter in Windows 10, follow these steps:
- Click on the Start menu or press the
Windowskey. - Select Settings (it’s the gear-shaped icon).
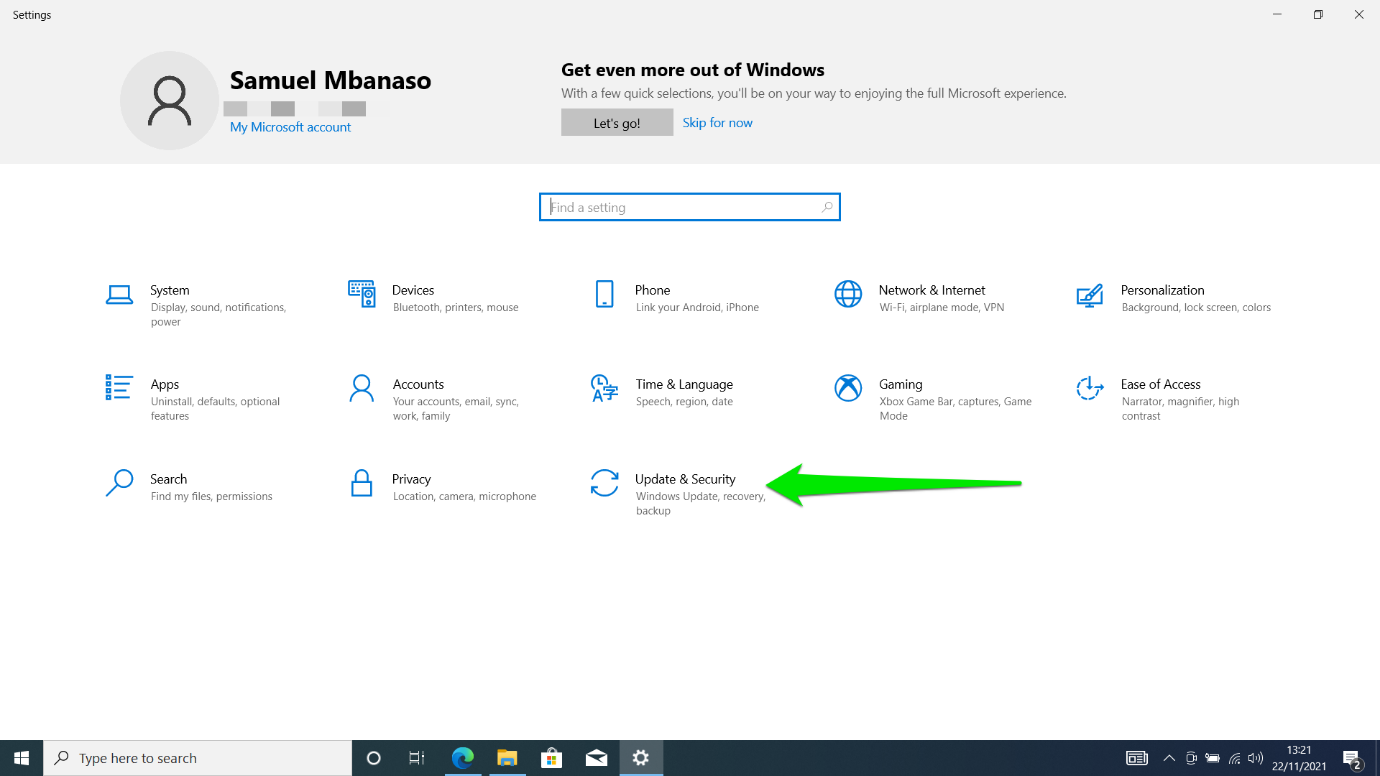
- In the Settings window, click on Update & Security.
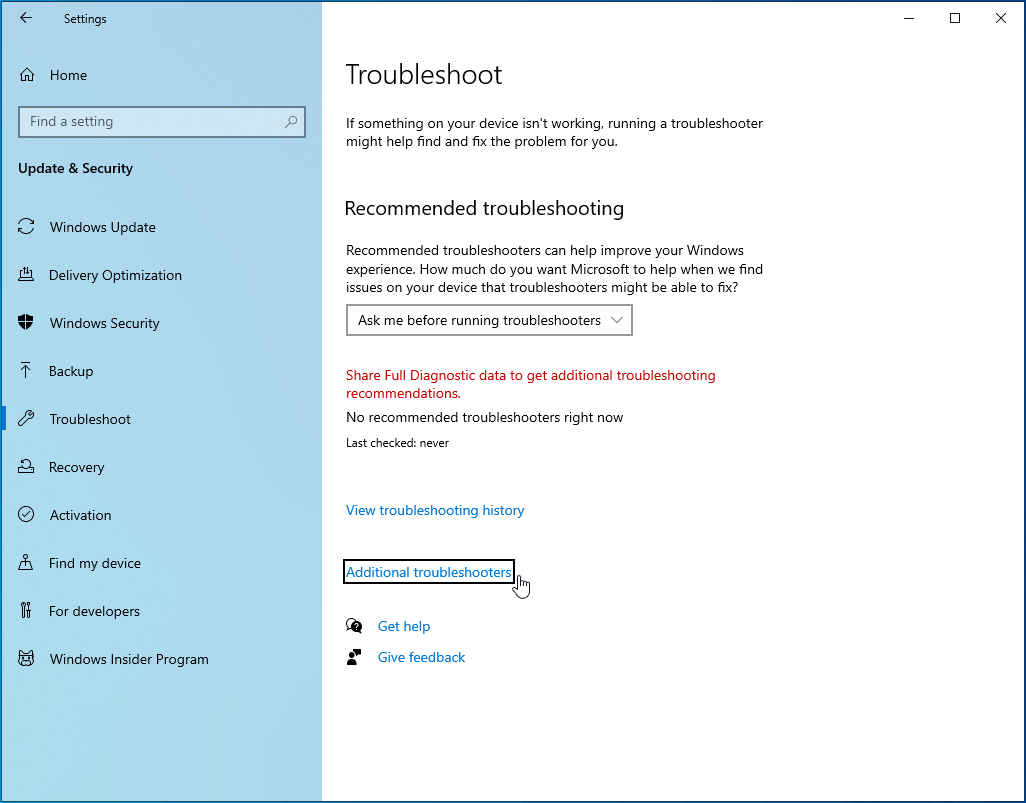
- From the left-hand menu in the Update & Security window, select Troubleshoot.
- Depending on your version of Windows 10, you might see an option for Additional troubleshooters or Other troubleshooters. Click on this to view more troubleshooting options.
- Find the Keyboard troubleshooter in the list and select it.
- Click on Run the troubleshooter.

- The troubleshooter will start and try to detect any issues with your keyboard.
- Follow any on-screen instructions to complete the troubleshooting process. This may include performing certain actions or making decisions based on the troubleshooter’s findings.
- Once the troubleshooter has completed its analysis, it will either resolve the issue automatically or provide suggestions on how to fix the problem.
- After completing the troubleshooting process, restart your computer to ensure that any changes take effect.
Windows 10/11 (8, 7, Vista, XP)
Method 4: Booting Into Safe Mode
If you’ve checked the hardware and the problem persists, then it is possible that the issue rooted from software. It would be ideal to check if you have a faulty driver installed on your PC by booting into Safe mode. In this mode, Windows only runs the essential services and drivers. So, this method will give you an idea of what’s causing the Shift key problem. You can start your computer in Safe mode by following these steps:
- Click the Search icon on the taskbar.
- Type
settings, then hitEnter. - Choose Update & Security.
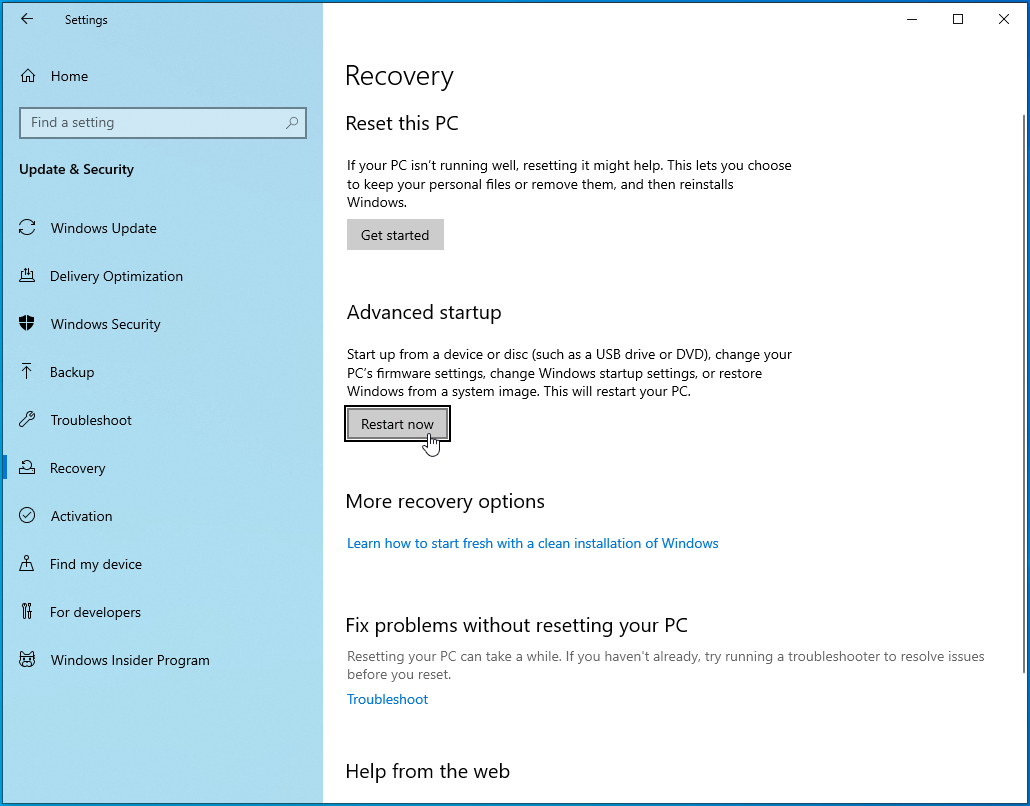
- Go to the left pane and click Recovery.

- Go to the Advanced Startup section, then click the Restart Now button.
- After restarting your computer, you will see a list of options for booting your unit.
- Choose Troubleshoot, then click Advanced Options.
- Open Startup Settings, then click Restart.
- After restarting your PC, choose Safe Mode or Safe Mode with Networking from the boot options.
Method 5: Updating All Your Drivers
A huge percentage of keyboards work with generic drivers installed through Windows update. However, if you have a wireless keyboard, you might need drivers coming from the original manufacturer of the hardware. So, it would be best to ensure that all your drivers are updated to their latest manufacturer-recommended versions.
You can do this manually or use a one-click solution like Auslogics Driver Updater.

It is worth noting that manually updating your drivers can be tedious and complicated. To give you a better understanding of how it works, we’ve listed the steps below:
- On your keyboard, press
Windows Key+X. - From the menu, choose Device Manager.
- Look for Keyboard in the list of drivers.
- Right-click it, then select Properties.
- Go to the Details tab, then choose HardwareID from the drop-down menu.
- Copy the first value, then paste it into your web browser. This should allow you to know the device’s exact name.
- Look for the official driver support and download the latest and compatible driver.
- Install the driver and restart your computer.
As you can see, when you download and install drivers manually, you are at risk of using the wrong driver. This can lead to serious problems. So, we strongly recommend updating your driver, using Auslogics Driver Updater. With just a click of a button, this tool will automatically scan your system and identify missing or outdated drivers. It will look for the latest versions and recommended updates for your drivers. The great thing about Auslogics Driver Updater is that it takes care of all problematic drivers—not just the ones related to your keyboard. So, once the process is complete, you can expect better performance and speed from your PC.
Method 6: Disabling the Sticky Keys Feature
Thanks to the Sticky Keys feature, you can toggle different shortcut keys instead of pressing them simultaneously. For instance, you can press Ctrl and C one at a time for the Copy command instead of pressing both of them at the same time. Sticky Keys can especially be handy for disabled users.
However, this feature can cause various keyboard malfunctions, including the Shift key issues. So, if you don’t need Sticky Keys, it would be best to disable the feature. Simply follow the instructions below:
- On your keyboard, press Windows Key + S. This should launch the Search box.
- Type “control panel” (no quotes), then hit Enter.
- Click Ease of Access Center, then select Make the keyboard easier to use.
- Look for “Turn on Sticky Keys” and uncheck it.
- Save the changes you made.
Method 7: Checking Your Keyboard Connection
If you are using a laptop, you should check if your keyboard is properly connected to your unit. Your Shift key may not be working because of the ribbon cable directly connecting your keyboard to your motherboard. If that cable is not tightly plugged to your motherboard, then you would start to experience issues with the keys. To resolve this problem, you just have to remove your keyboard and check if the ribbon cable is securely connected to your motherboard. It is worth noting that you might need to be tech-savvy to perform this solution. So, if you are not comfortable with removing your keyboard from your laptop, it would be best to ask a professional to do it for you.
Method 8: Updating Your Windows System
There are users who got rid of the Shift key problem by updating their Windows operating system. You can try this method to resolve the issue and prevent it from happening again.
Windows 10 automatically installs updates, but it can still miss an update or two. In this case, you can manually check for updates by following these instructions:
- Open Settings by pressing
Windows Key + Ion your keyboard. - Once the Settings window is up, go to Update & Security.
- Click the Check for updates button.
If there are available updates, you should immediately download them. They will be automatically installed when you restart your computer. After updating your system, check if the problem has been resolved. Can you suggest other solutions to this problem? Feel free to share them in the comments below!
Windows 10/11 (8, 7, Vista, XP)
Conclusion
If you’re facing the pesky issue of a Shift key that just won’t cooperate on your Windows 10 PC, don’t worry, you’re not alone! This common hurdle can often be overcome with a few simple steps. Start with a quick inspection of your keyboard for any crumbs or debris that might be causing trouble. Then, dive into the heart of your PC by updating or reinstalling those crucial keyboard drivers through the Device Manager. Don’t forget to peek into the Control Panel too, where a few adjustments to your keyboard settings might just do the trick. But hey, if you’re still stuck, why not try booting in Safe Mode? This can help you figure out if some sneaky third-party software is the culprit. And remember, keeping your system up-to-date and sometimes reverting to default settings can also work wonders. If all else fails, it might be time to seek help from a tech wizard or consider giving your trusty keyboard a well-deserved retirement. Hang in there, with a bit of patience and these tips, you’ll be back to smooth typing in no time!