
Finding the exact location of an executable file can sometimes feel like searching for a needle in a digital haystack—but it doesn’t have to be.
There is a quick and easy way to locate a program’s EXE file—and if this doesn’t work, we have a few workarounds for you.
Let’s get right to it. Here’s how to find EXE files on Windows 10 and 11.
Where Are the Executive Files for the Apps from the Microsoft Store Located?
By default, the apps you download from the Microsoft Store, along with their executable files, are stored in the following directory: C:\Program Files\WindowsApps. The WindowsApps folder has strict access controls.
This prevents most users (including administrators) from accessing and even viewing its contents. You can change this by taking ownership of the folder, but this is generally not advised as you will be risking having issues with your installed apps.
📌 Also read: Where Are Microsoft Store Apps and Games Installed on Windows 10/11?
How to Find EXE Files on Windows 10/11?
Method 1: Use the program’s shortcut
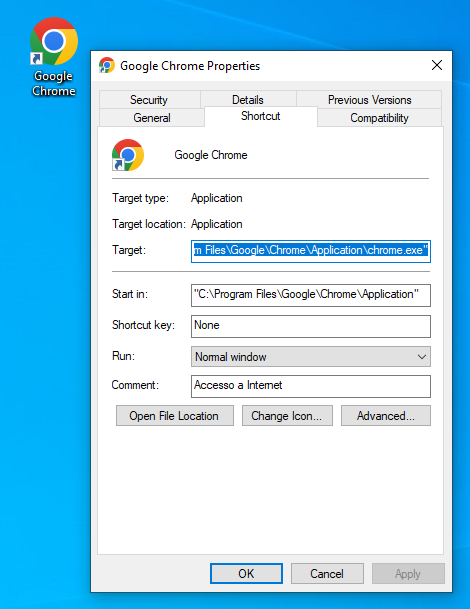
This first method is as simple as right-clicking the app’s desktop shortcut and selecting Open file location from the context menu. You can also right-click the shortcut, select Properties , and then click on the Open File Location button under the Shortcut tab of the Properties dialog window.
Method 2: Use the Task Manager
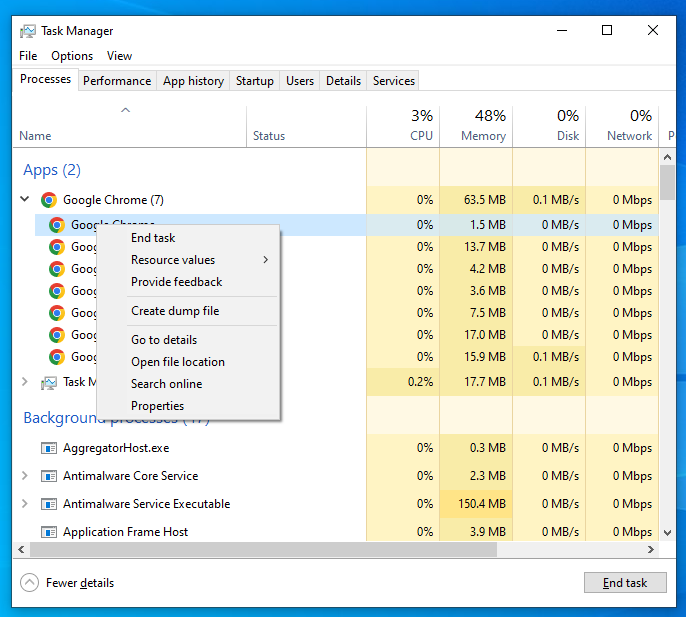
Secondly, you can easily open the installation folder of any program by going through the Task Manager. Note that the program has to be running for this to work.
Follow these steps:
- Press the Ctrl, Shift, and Esc keys together while the program is running to open the Task Manager.
- After the Task Manager opens, click on More details if you don’t see the Processes tab.
- Now, locate the program under the Processes tab, right-click it, and then select Open file location in the context menu.
📌 Also read: Ultimate Guide: How to Set Priority Using Windows Task Manager
What if You Can’t Find the Right Shortcut?
Method 3: Go through File Explorer
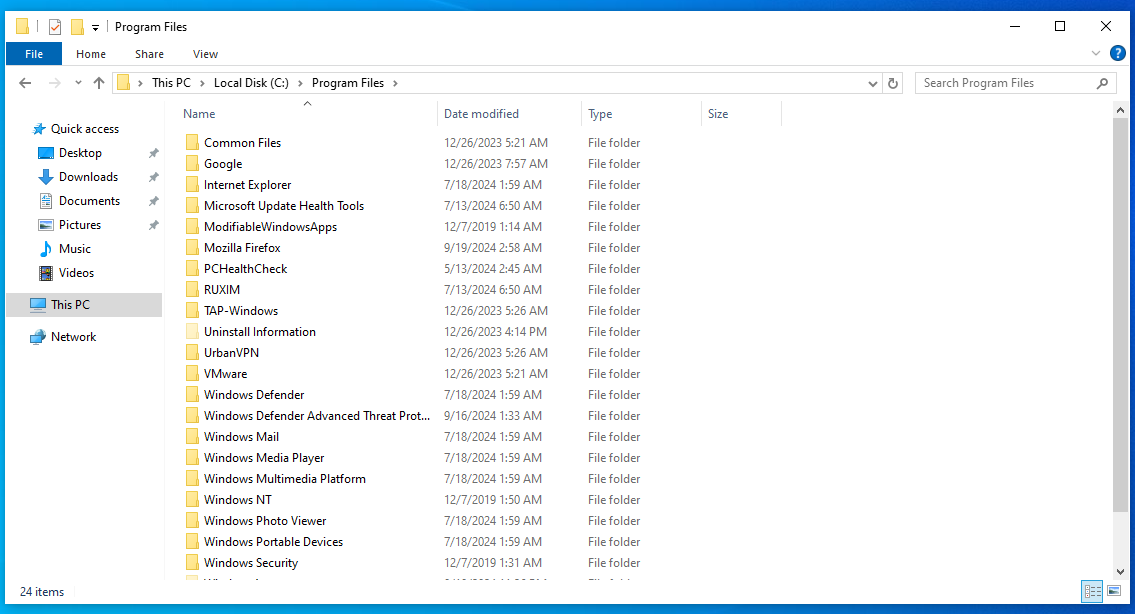
The next method involves using File Explorer. All you have to do is launch File Explorer by pressing the Windows and E keys simultaneously and then navigate to any of these paths:
C:\Program Files
C:\Program Files (x86)
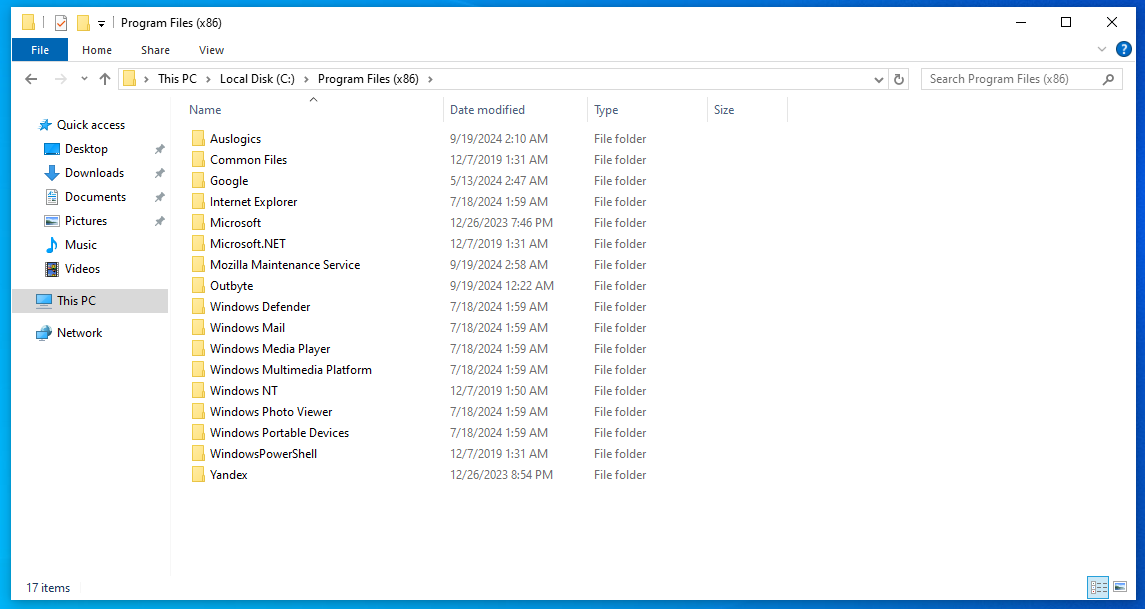
Open the folder named after the program you’re looking for to locate its executable file.
📌 Also read: Windows File Explorer Not Responding? Try These Solutions
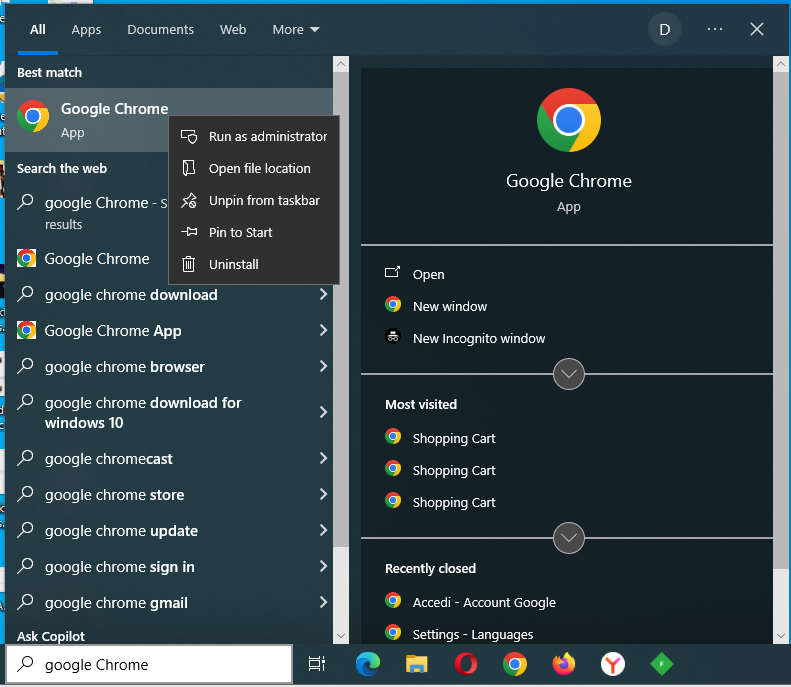
Method 4: Go through the Start menu
The forth method for finding the path or location of any executable application in Windows 10/11 is going through the Start menu. This is the method to use if you don’t have the app’s desktop shortcut or if the shortcut you have is broken.
Follow these steps:
- Tap the Windows logo keyboard button or click on the Windows logo in the taskbar to open the Start menu.
- Locate the program by typing its name. If the search function isn’t activated automatically, press the Windows + S keyboard buttons together, then perform the search.
- Once you see the program in the search results, right-click it and click on Open file location in the context menu. You’ll have to place your mouse pointer over More in the menu in certain cases.
- A File Explorer window will now show up. There you’ll find the main shortcut file for the application.
- Right-click on the shortcut and select Open file location in the context menu. Alternatively, you can select Properties and then click on the Open File Location button under the Shortcut tab.
- The folder that contains the EXE file will now pop up.
What if the Search Function in the Start Menu Is Faulty?
We’re going to show you how to fix Windows 10/11 search when certain apps aren’t showing up in the search menu or when the search goes blank whenever you try to run a search query. There are different solutions to the problem, so follow them one after the other until the issue goes away.
Solution 1: Allow background applications
If you disabled your background apps, the Start menu search cannot update and add certain programs. Allow background apps, then try running the search function to check for the problem. Follow these steps:
- Right-click the Windows logo in the taskbar.
- Select Settings from the Power User menu.
- You can also tap the Windows logo and S keyboard buttons simultaneously to launch the Settings application.
- After Settings opens, click on Privacy.
- Go to the left side of the next screen, scroll down, and then click on Background apps .
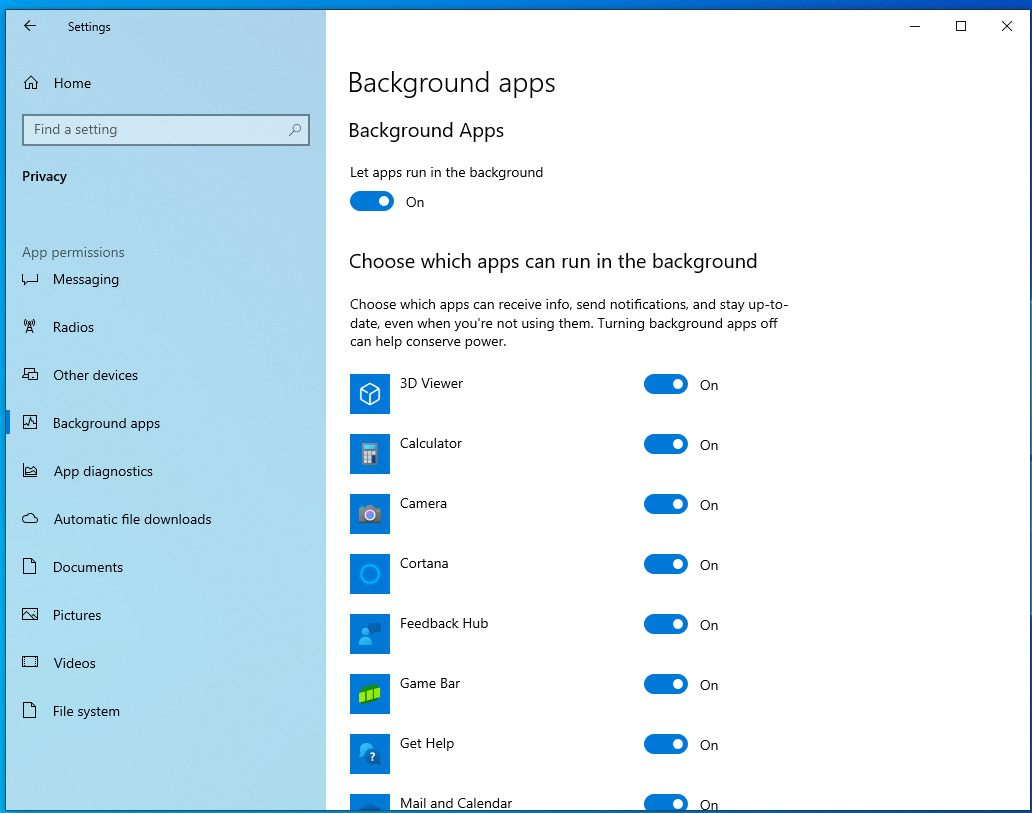
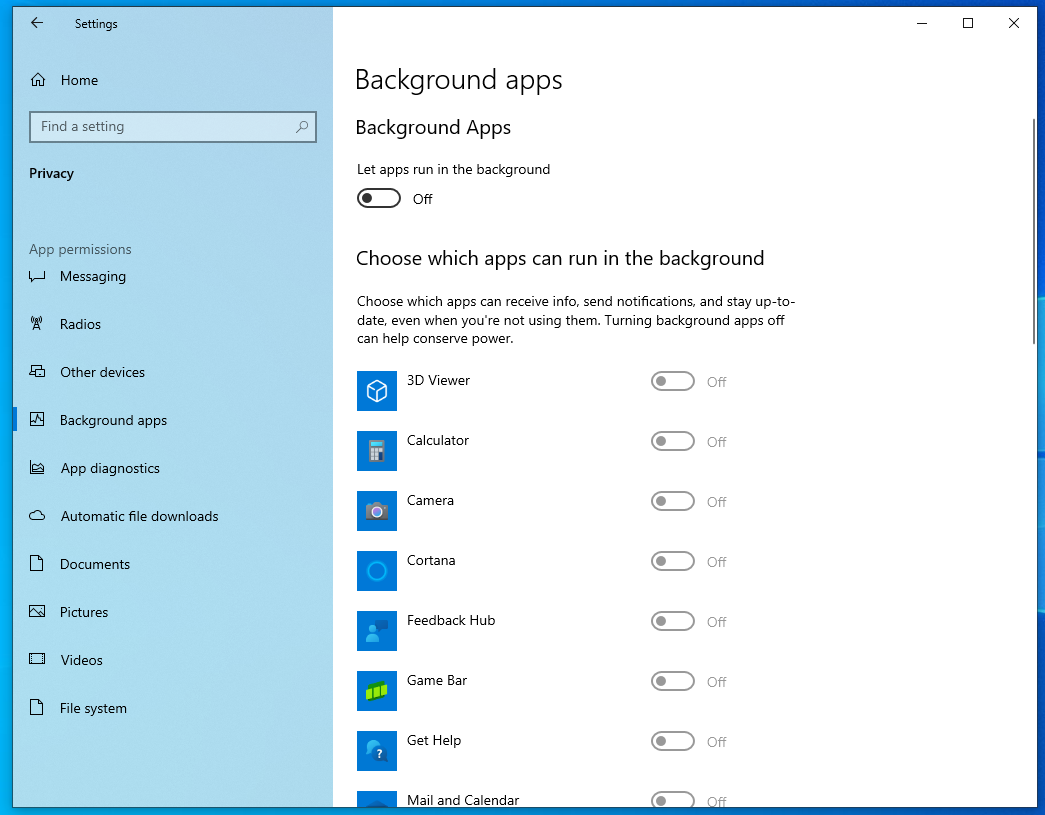
- Switch to the right side of the window and switch on the Let apps run in the background option.
- Run a search to check for the problem.
Solution 2: Rebuild the search index
Windows 10 and 11, just like other Windows versions , have an indexing service that helps it create a database of apps and files to make the search process easy. If this database (index) becomes corrupt or encounters an issue, the search function will not work properly.
One way to troubleshoot this issue is to rebuild the search index. The process involves deleting the current data and building the index from scratch.
This way, Windows will get rid of whatever file is causing the problem.
However, before you start, try troubleshooting the service and check if the issue is resolved. Follow these steps:
- Right-click the Start button.
- Click on Run in the Power User menu.
- Pressing the
Windows logo + Rkeyboard buttons will also open the Run dialog box. - After Run opens, type “Control Panel,” and then hit the Enter keyboard button.
- Once the Control Panel opens, go to the top-right corner of the window and select Large icons in the View by drop-down menu.
- Locate Indexing Options and click on it.
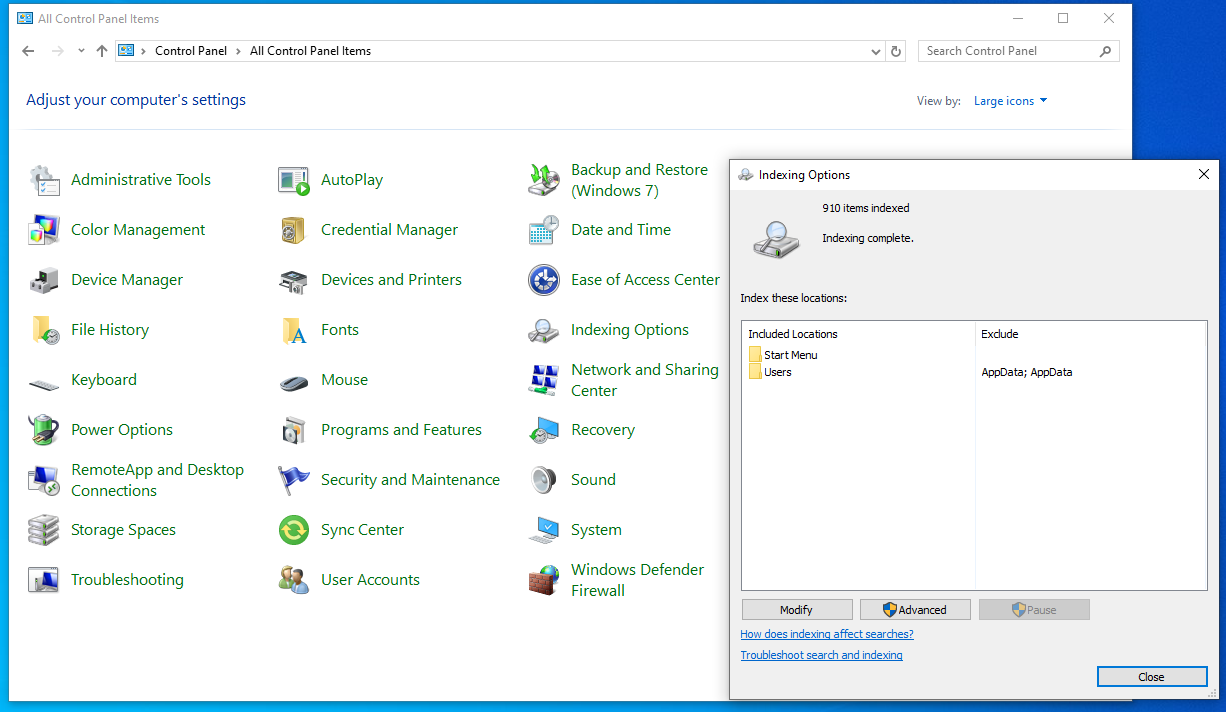
- Once the Indexing Options dialog window appears, click on the Advanced button.
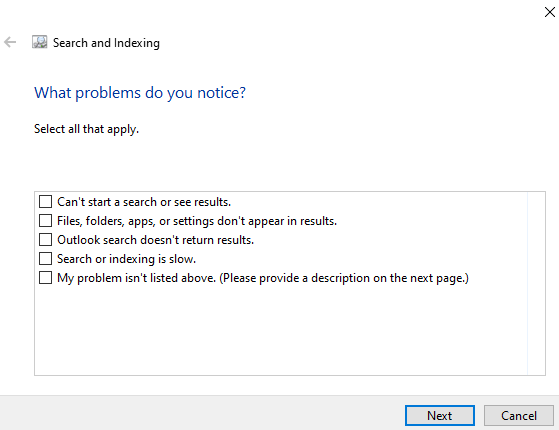
- When you see the Advanced Options dialog, go to Troubleshooting under the Index Settings tab and click on Troubleshoot search and indexing.
- Select the problem you’re experiencing on the What problems do you notice? screen.
- If prompted, choose the Try troubleshooting with administrator permissions option on the next screen.
- If the troubleshooter finds and fixes the problem, run your search. If not, head to the next method.
The following steps will show you how to rebuild the search index:
- Right-click the Start button.
- Click on Run in the Power User menu.
- Pressing the
Windows logo + Rkeyboard buttons will also open the Run dialog box. - After Run opens, type “Control Panel,” and then hit the Enter keyboard button.
- Once the Control Panel opens, go to the top-right corner of the window and select Large icons in the View by drop-down menu.
- Locate Indexing Options and click on it.
- Once the Indexing Options dialog window appears, click on the Advanced button.
- When you see the Advanced Options dialog, go to Troubleshooting under the Index Settings tab and click on Rebuild .
- Next, click on OK .
- After the indexing process is complete, try running a search.
Solution 3: Reinstall the Start menu
Before you start this, shut down the Start menu via the Task Manager. Follow these steps:
- Press the Ctrl, Shift, and Esc keyboard buttons together to open the Task Manager.
- Click on More details if you can only see apps that are currently running.
- Switch to the Details tab, locate the StartMenuExperienceHost.exe process, and then terminate it.

📌 Also read: [FIXED] Is the Windows 10 Start Menu Not Working?
Now follow these steps to reinstall the Start menu:
- Right-click the Windows logo in the taskbar.
- After the Power User menu opens, select Windows PowerShell (Admin).
- Click on Yes once the User Account Control dialog window opens.
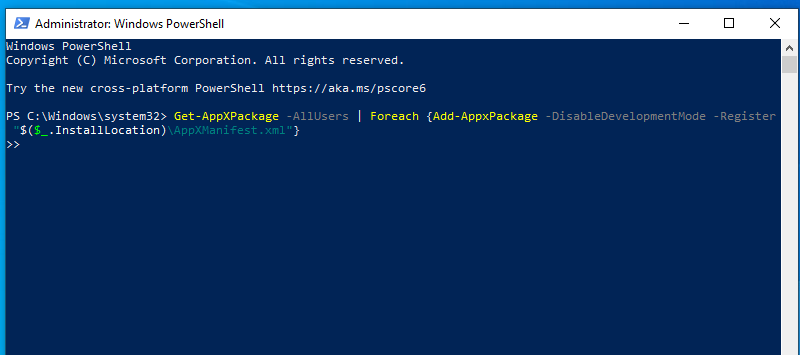
- Once the PowerShell window opens, type the following line and hit the Enter key:
Get-AppXPackage -AllUsers | Foreach {Add-AppxPackage -DisableDevelopmentMode -Register “$($_.InstallLocation)\AppXManifest.xml”}
- Once the command completes, restart your system and try running a search.
📌 Related: Most Useful Powershell Commands: Cheat Sheet with Examples
Solution 4: Check for faulty system files and replace them
The search function could be malfunctioning because some important Windows files are corrupt. Fixing the problem here involves repairing those corrupted system files. To do that, you have to run the DISM (Deployment Image Servicing and Management) and SFC (System File Checker) tools. Follow these steps:
- Right-click the Start button.
- Click on Run in the Power User menu.
- Pressing the
Windows logo + Rkeyboard buttons will also open the Run dialog box. - After Run opens, type “command prompt” into the text box, and then press the Ctrl, Shift, and Enter keyboard buttons together.
- Once the User Account Control dialog window pops up, click on the Yes button.
- After the Command Prompt appears, go to the black screen, type the following line, and then hit the Enter key:
DISM.exe /Online /Cleanup-image /Restorehealth
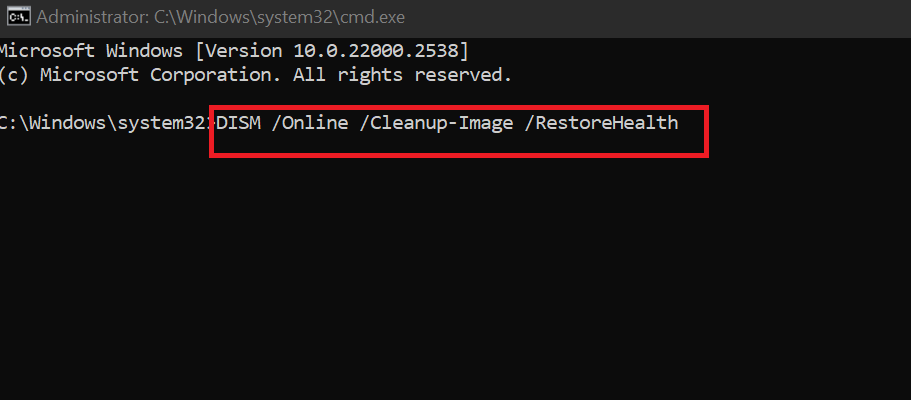
- DISM will now fetch the system files that SFC will use to run the repair process. Normally, the tool uses the Windows Update utility to fetch these files. Once the command executes, move to the next step.
- Now, type “sfc /scannow,” then hit the Enter key.
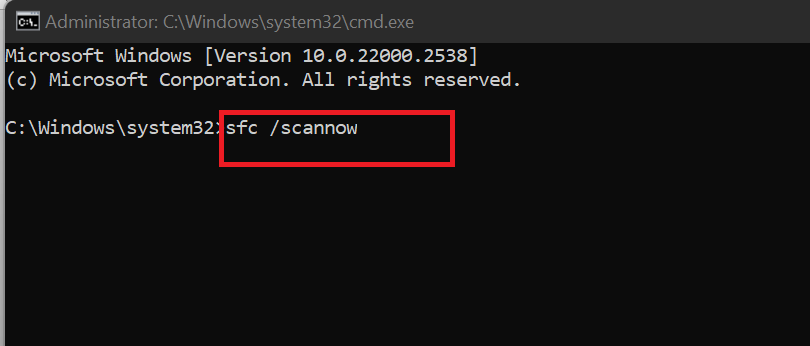
- If you see a completion message that reads, “Windows Resource Protection found corrupt files and successfully repaired them,” restart your system, and the issue should be resolved.
Solution 5: Use a different user account
The issue might be connected to your current user account. Log off and log into another account and try performing a search. If the search function works without issues, then your usual user account is the problem.
If you don’t have another user account, you have to create it . The steps below will show you how to do that:
- Press the Windows and I keys on your keyboard simultaneously to summon the Settings application.
- Click on Accounts .
- Go to the left pane of the Accounts screen and click on Family & other users.
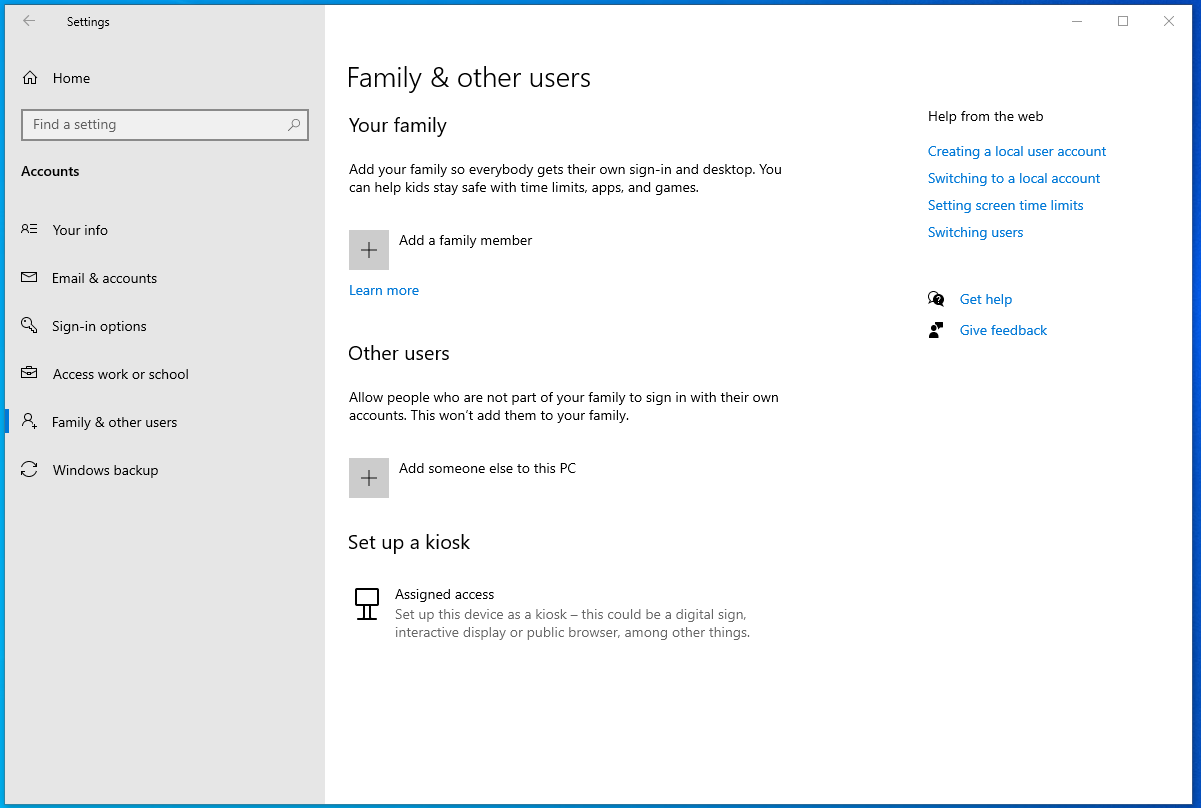
- Now click on Add someone else to this PC under Other users in the right pane.
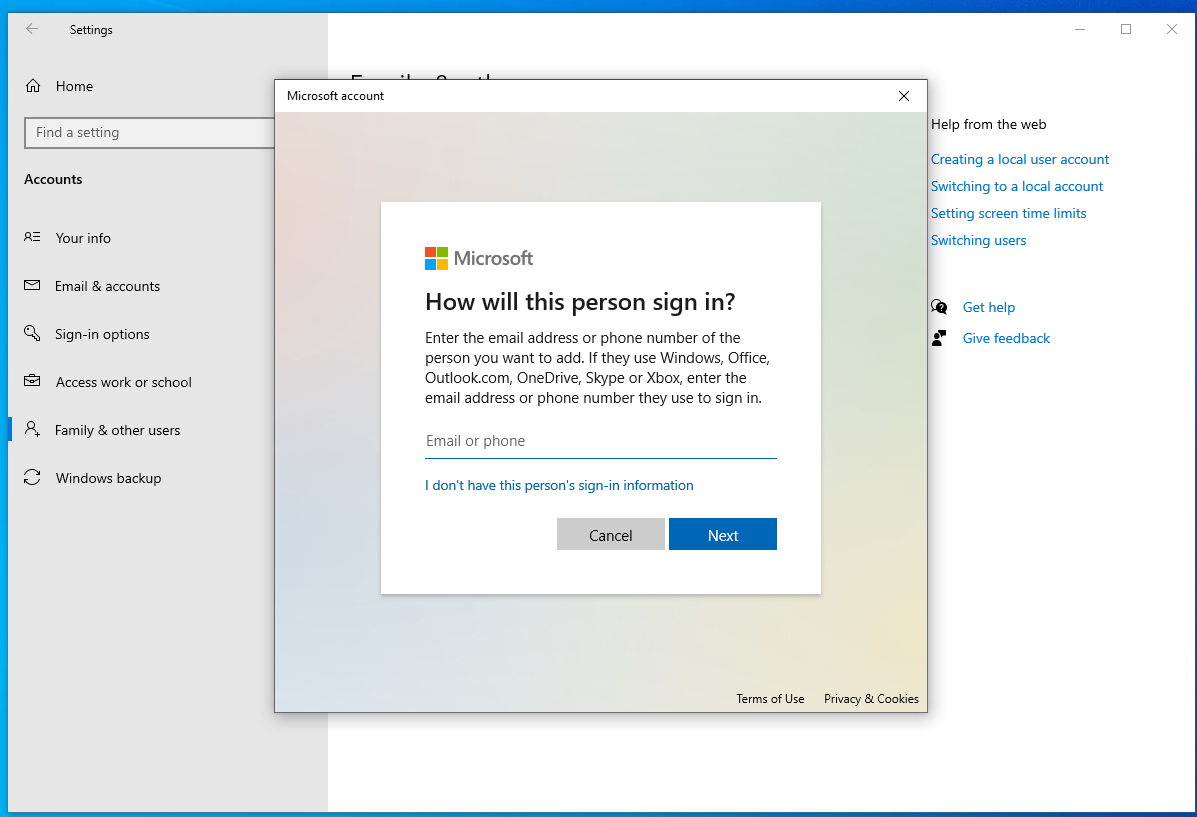
- Once the new screen pops up, click the I don’t have this person’s sign-in information option.
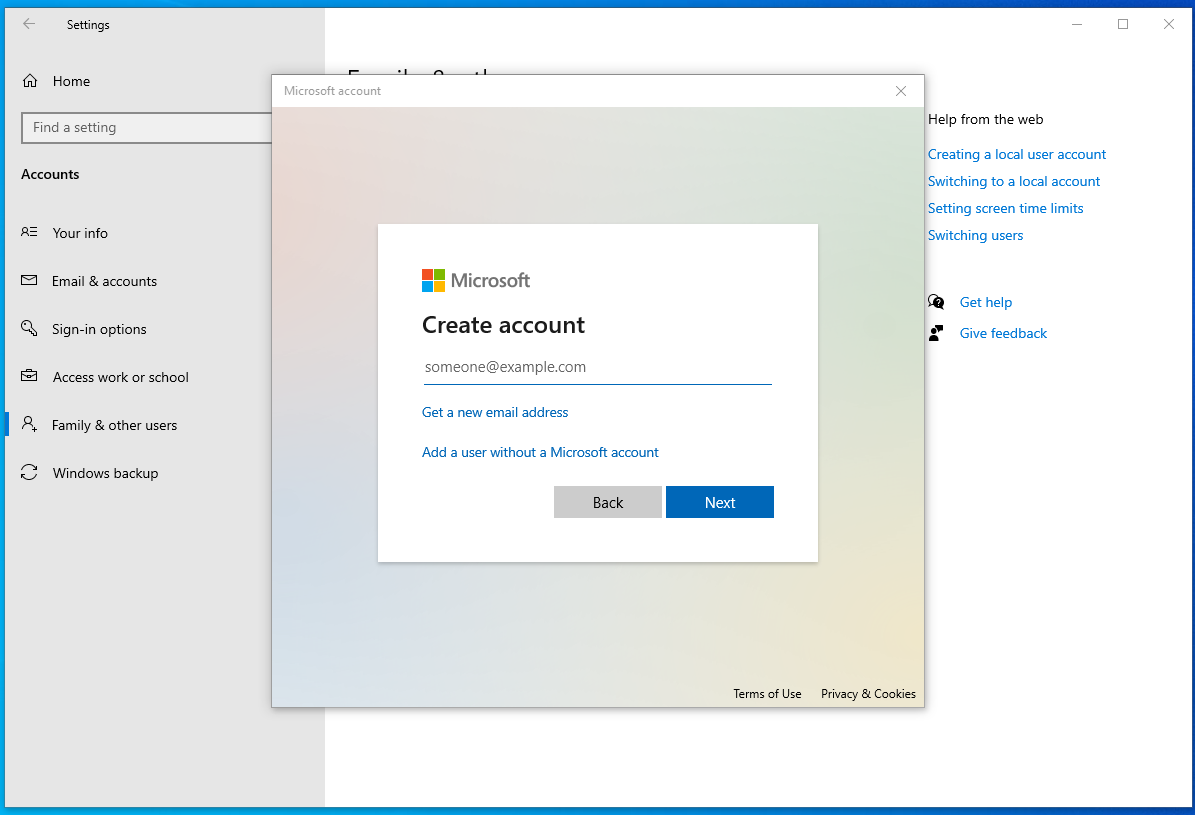
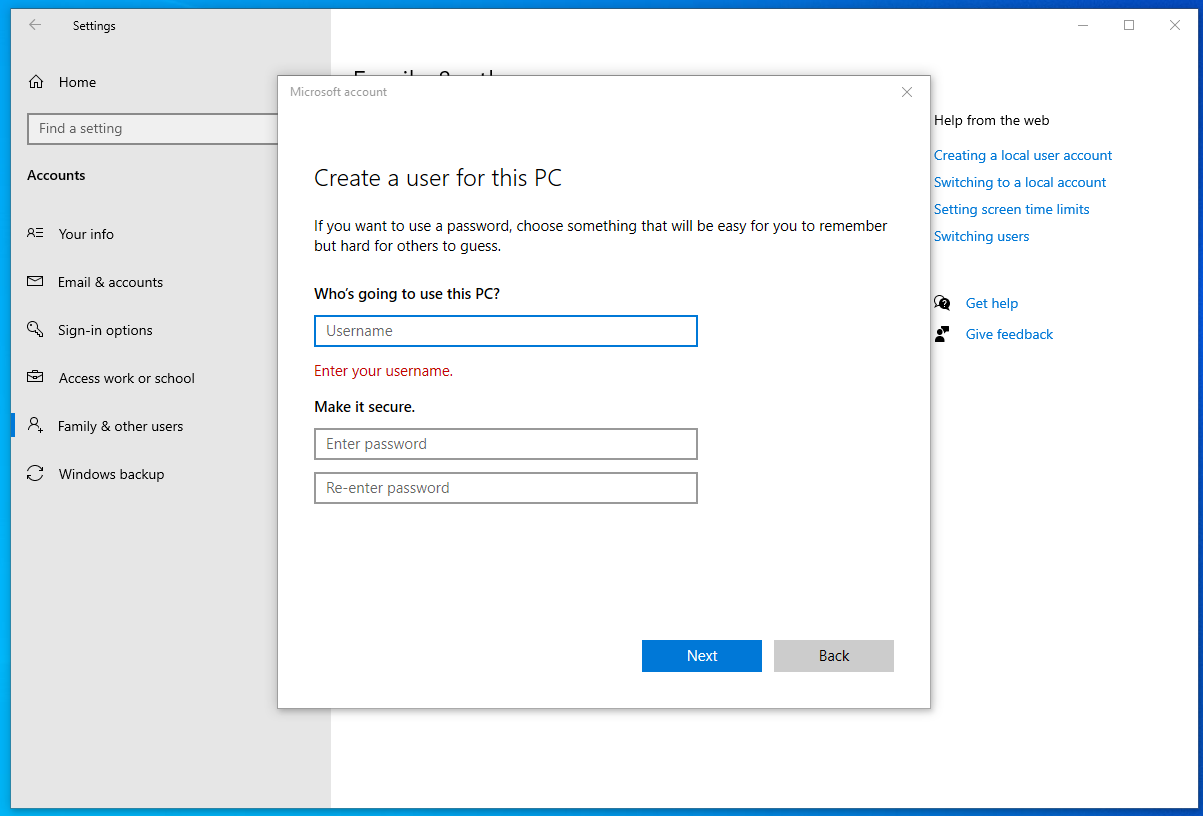
- Click on Add a user without a Microsoft account on the next page, and then enter the name and password of the account when the next screen shows up.
- Now go back to the Family & other users tab in the Accounts section of Settings.
- Locate the user account you just created, click on it, and then click on the Change account type button.
- Choose Administrator under the Account type drop-down and then click OK .
- Reboot your system and log into the new account, then try running a search.
Solution 6: Run a full malware scan
The search function might be affected by malware. Run a full and comprehensive malware scan to fish out the virus and remove it.
📌 Also read: How to Prevent Malware: Lock Down Your Online Safety
Here’s what you can do on Windows 10/11:
- Click on the Start menu and type “Windows Security.”
- Click on the Windows Security app from the search results to open it.
- Once Windows Security opens, click on Virus & threat protection from the menu on the left.
- Under the Current threats section, click on Quick scan to scan the most vulnerable areas of your PC.
The scan might take some time, depending on the size of your hard drive and the number of files. You can continue using your PC during the scan, but it may run slower due to resource usage. If any threats are identified, you will be given prompts on how to remove them.
Plus, Auslogics Anti-Malware is meant to run alongside your main antivirus with zero conflict.
How to Quickly Find a Program’s EXE File in Windows 10/11: Answered
Locating a program’s EXE file in Windows 10 or 11 is typically quite straightforward. The quickest way to find the needed exe file would be to simply right-click the program’s shortcut. But if you can’t locate the right shortcut, you can find the executive file location via the Task Manager or File Explorer
If you can’t find the needed program through the search menu, consider allowing background applications, rebuilding the search index, reinstalling the Start menu, checking for corrupt system files, using a different user account, and running a full malware scan with Auslogics Anti-Malware.