If you have ever given your PC keyboard a good look, you have probably noticed the Insert key—it is typically located in the top key section right above the arrow key cluster. If you have never used it, you might be wondering, “Why do I need the Insert key?
If you are not sure what exactly the Insert key is for, you’ve come to the right place. In this post, we will tell you exactly what it is for and give you the steps for how to disable it. Let’s get started.
What Is the Insert Key Used For?
The Insert key is mainly used for switching between the two modes of entering text: overtype mode and insert mode.
- In overtype mode, the characters you are typing overwrite the existing charters. So, basically, you will be typing over the text that you have already entered.
- In insert mode, on the contrary, you type the characters in their current positions, with all the characters that already exist on your page being shifted to the right.
It is useful to note that the insert/overtype mode switching is not meant for overall operations on your PC or even a particular application. Switching the modes by pressing the Insert key is valid only for the window you are working with at the moment. In many modern applications, insert mode is set by default, but the user can switch to overtype mode by pressing the Insert key.
Also read: How to Fix Can’t Type Password in Windows 10?
You can use the Insert key function in a variety of situations. That said, if you don’t need it, having the Insert key enabled on your PC can get irritating.
For instance, if you press the Insert key by mistake, the overtype mode will be activated automatically and the text you are currently typing will be overwritten. If you are working on something very important, it may start causing serious problems. So, you might reasonably ask: “How to turn off the Insert key in Windows 10?”
Also read: What to Do if the Mouse and Keyboard Are Not Working on a Laptop?
How to Disable the Insert Key on Windows 10?
If you want to avoid accidentally deleting your work, you can simply disable the Insert key. Here’s how to do it on a Windows 10 PC.
You can disable the Insert key using the Registry Editor. Here’s how:
- On your keyboard, press the
Windows key. - Type
registry editor. - Press
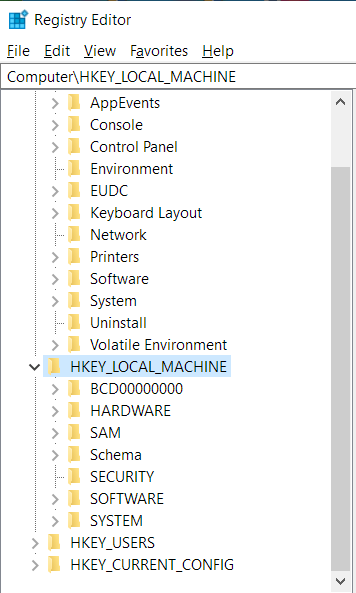
Enterand the Registry Editor window will pop up. - On the left side of the Registry Editor window, find the HKEY_LOCAL_MACHINE folder and double-click it.

- Find the SYSTEM folder and double-click it.
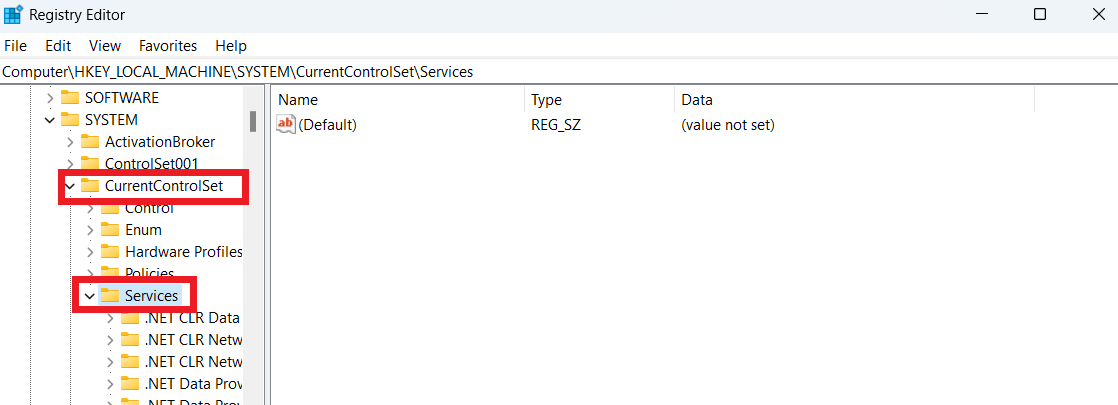
- Open the CurrentControlSet folder.

- Find the Control folder and double-click it.
- Open the Keyboard Layout folder.
- Once you are inside the folder, right-click the right section of the window and select New -> Binary Value and type any name you like, say
Insert_Disable. - Double-click the Insert_Disable file.
- In the Value data window, paste the following text:
00 00 00 00 00 00 00 00 02 00 00 00 00 00 52 E0 00 00 00 00
- Press the OK button.
- You can now exit the Registry Editor and restart your computer
- After you have restarted your computer, the
Insertkey will be disabled.
You can also disable the Insert key by using the special Registry Tool. Here’s how:
- Go to your default browser.
- Paste the following link into the address bar:
https://www.howtogeek.com/wp-content/uploads/2020/04/DisableInsertKey.zip
- Press
Enteron your keyboard. - Select the DisableInsertKey.zip file and unzip it.
- Then, double-click the DisableInsertKey.reg file.
- If prompted, click Yes.
- Restart your PC.
There you have it; the Insert key should now be disabled on your PC.
How to Disable the Insert Key in All Applications: Answered
Disabling the Insert key on your Windows 10 PC can prevent accidental text overwrites and streamline your workflow. Whether you use the Registry Editor, a registry tool, or third-party software, these simple steps will help you turn off the Insert key easily.
This guide offers multiple methods to suit different comfort levels, and remember, you can always re-enable the key if needed. Customize your keyboard to fit your needs and enjoy a smoother typing experience. If you have any questions, feel free to ask in the comments below. Happy typing!
