- What Is Write Protection on Windows 10?
- Why Am I Seeing the ‘Media Is Write Protected’ Error?
- How to Remove ‘Media Is Write Protected’ Message on Windows 10
- 1. Turn Off the Hardware Switch
- 2. Scan Your Computer for Malware
- 3. Remove Write Protection from Files and Folders
- 4. Use Diskpart to Remove Read-Only State
- 5. Check Your Disk for Errors
- 6. Turn off BitLocker
- 7. Clean Your Temporary Files and Folders
- 8. Repair System Files Using an SFC Scan
- 9. Disable Write Protection Using the Registry Editor
- 10. Disable Write Protection Using Group Policy
- Final Word
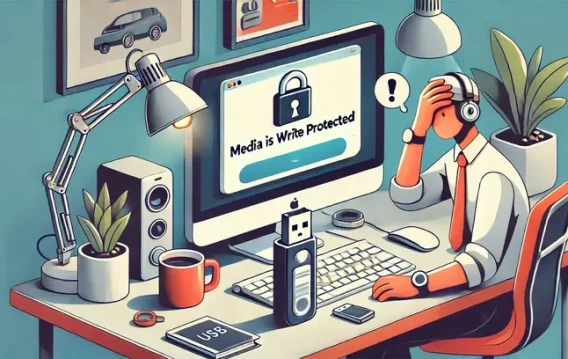
When transferring files to a USB drive or SD card, you may receive a “Media is write protected” error message. The same error can occur when overwriting a file or deleting a file from the media. Users do not understand why this error occurs or what it means, especially when their devices often operate without errors.
This article explains how to remove the “media is write protected” error message from a USB drive or SD card files. Instructions here apply to Windows 10 but can also be used on Windows 8 and Windows 7.
What Is Write Protection on Windows 10?
Users encounter the “media is write protected” issue, also called the “ERROR_WRITE_PROTECT” error message, when they try to write data on a storage device. Although the storage device is usually external, like a USB or an SD card drive, sometimes, this error can occur in internal devices. Now, what does it mean when the media is write protected?
Media Write Protection is a feature available in some USB, SD, and other storage devices that ensures the files are not accidentally modified or deleted. In most devices, the media write protection feature is a physical switch that you can toggle on and off.
When a file is write protected in a USB drive or SD card, you can’t change, transfer, or modify it. You can still read and copy files from write protected media, but you can’t format the drive or write and delete the files in it.
Why Am I Seeing the ‘Media Is Write Protected’ Error?
For starters, you may see the “media is write protected” error if you accidentally switched on the write protection lock feature. You can only be able to format or write on the drive if you toggle it off.
However, this is not the only case.
Sometimes, your SD card or USB drive may become write protected because of one or more of the following reasons:
- There’s malware infection in your system.
- The drive (USB/SD) is full.
- You’re trying to overwrite a read-only file.
- Security settings on the device are blocking your action.
- The drive is corrupted.
- The removable drive is broken or physically damaged.
- There’s a broken EXE, DLL, or SYS file.
If your computer glitches and crashes frequently, it is likely that there is a fault with the registry. Corrupt, damaged, or broken registry entries can adversely affect the whole system.
You can use the Auslogics BoostSpeed 12 Registry Cleaner to eliminate those annoying glitches and stabilize the PC.
How to Remove ‘Media Is Write Protected’ Message on Windows 10
If you encounter the “media is write protected” error message, follow the complete step-by-step guides in the solutions below.
1. Turn Off the Hardware Switch
Some disks and media devices come with a small write protection switch or notch, which enables or disables the write protection feature. Although the switch is marked clearly, it could be too small to notice. Besides, you could push it up by mistake.
Turn the switch off, and you will remove write protection on the USB or SD card. Once done, try and see if you can write on the disk or delete something from it.
2. Scan Your Computer for Malware
Malware can cause various issues, including errors, on your computer. Some malware can write-protect disks or drives to prevent their own deletion.
This is not the most likely case you’re getting the write protection error. However, you need to perform a full system scan to help you detect any malware running on your system.
You can use the Windows built-in Windows Defender antivirus or trusted third-party security solutions.
To perform a system scan using Windows Defender, use the below steps:
- Press the
Windows Key + Ito launch the Settings app. - On Settings, click on the Update & Security tile.
- On the left pane, click on Windows Security.
- Under Protection Areas, in the right pane, click on Virus & Threat Protection.
- Now, in the Virus & Threat Protection window, click on the Scan Options link.
- Next, select the “Microsoft Defender Offline scan” option, then click Scan Now.
- This will help you remove the difficult malware that hides in your system.
Once you’re done, restart your system and see if the write protection error has been resolved.
3. Remove Write Protection from Files and Folders
Sometimes, your problem with write protection could be on specific files and not the entire disk. In this case, you can remove the protection using File Explorer. Here’s what to do:
- Press the
Windows Key + Eto launch File Explorer. - Navigate to the write-protected file/folder.
- Select the files/folders to locate and right-click on it (them).
- From the context menu, select Properties.
- Now, under the General tab, locate Read-Only next to Attributes.
- Ensure the box next to the Read-Only attribute is unchecked.
- Click on Apply, then click OK.
- Try again to modify the file/folder and see if the write protection issue is solved.
4. Use Diskpart to Remove Read-Only State
The disk may be in a read-only state. This can cause the write protection error.
You can remove the disk’s read-only state through the Diskpart tool in the Command Prompt.
Follow the below steps to remove the disk from the read-only state:
- Press the
Windows key, then typecmd. - Right-click Command Prompt from the results, then select Run as Administrator.
- In the Command Prompt window, perform the following actions:
- Type
diskpart, then pressEnter. - Type
list diskorlist volumeand pressEnter. This will reveal all disks on your Windows PC. - Now, select Disk X and press
Enter. In this case, X represents the disk number of this you want to remove the write protection from, such as the SD card. - Next, still in the Command Prompt, type
attributes disk clear readonlyand pressEnter. - You should see a prompt informing you that the system removed the write protection.
- Close the Command Prompt.
- Finally, try to delete a file or write on a file and see if the issue was resolved.
5. Check Your Disk for Errors
If the problem is not read-only on the disk, perhaps the PC’s hard disk has a problem. You can use the check disk tool to find out the problem and fix it. Here’s what to do:
- Press
Windows Key+Ron your keyboard to launch the Run dialog box. - Type
cmd, then pressCtrl+Shift+Enterto launch Command Prompt as an administrator. - In the Command Prompt window, type
chkdsk C: /fand pressEnter. Replace C with the disk you want to check (hard drive partition). - Allow the tool to check and find disk problems (if any). The command will inform you about any errors.
- Once done, you can try deleting or writing a file to see if the write protection issue has been resolved.
6. Turn off BitLocker
Bitlocker is a creative Windows feature if you want to encrypt and protect files. It is possible that you enabled Bitlocker for the media or SD card by mistake. On Windows, any drive that has Bitlocker enabled will display a lock or sometimes show the “Media is write protected” error when viewed on File Explorer.
If that’s the case, you may want to turn off BitLocker.
To turn off BitLocker, you will need admin rights.
Turning off the BitLocker feature is easy but takes some time. Here’s what to do:
- Right-click on the drive that is locked with BitLocker.
- Choose to Turn off Bitlocker.
You can also enable Bitlocker via the Control Panel using the following steps:
- Press the
Windows Key + Rto launch the Run dialog box. - Type
controland pressEnter. - This will open the Control Panel.
- From the list of items, choose BitLocker Drive Encryption.
- Expand the BitLocker-protected drive and choose Unlock drive.
- Then input the password to confirm your admin rights.
- Now, click Turn off BitLocker for the drive you choose.
7. Clean Your Temporary Files and Folders
As you browse the Internet and continue using your computer, you accumulate various junk and unnecessary files. These temporary files and folders may affect your PC’s processing speed, causing apps to slow and even trigger various errors like the write protection issue.
Use the following steps to clean up the junk files using Disk Cleanup:
- Go to Windows Start.
- Type
Disk Cleanup. - Launch the Disk Cleanup tool.
- In the Disk Cleanup Window, select the disk that you want to clean.
- Wait as the tool calculates how much space you can free up.
- Now, click the Cleanup system files button.
- Click Yes if prompted with a User Account Control.
You can repeat the same process for all other disks in your system to clean all the possible junk files that may be causing errors. Once done, restart your system and see the write protection error is gone.
8. Repair System Files Using an SFC Scan
You can use Windows built-in System File Checker (SFC) to check for and fix system file corruption automatically. Here’s how to run the SFC scan:
- Press the
Windows key, then typecmd. - Right-click Command Prompt, then select Run as Administrator to launch an elevated Command Prompt.
- In the Command Prompt window, type
chkdsk sfc/ scannowand pressEnter. - Allow the scan to run to completion, then restart your computer.
- The system will replace all the corrupt files on reboot.
- Once done, try to delete or write on a file and see if the write protection is now gone.
9. Disable Write Protection Using the Registry Editor
Registry editing is not for everyone. It’s tricky and, if anything goes wrong, can render your computer inoperable. So, before beginning any operation on the registry, create a restore point.
To disable the write protection using the Registry Editor, follow these steps:
- If the drive you want to modify is external, insert it into the PC using a USB/SD card port.
- Press
Windows Key + Rto launch the Run dialog prompt. - Type
Regeditand pressEnter. - If prompted by UAC, click Yes.
- In the Registry Editor window, navigate to the following path:
Computer\HKEY_LOCAL_MACHINE\SYSTEM\CurrentControlSet\Control\StorageDevicePolicies - On the right pane, double-click on WriteProtect.
- This will open the Edit DWORD.
- Now, in the Value data section, change the value from “1” to “0” to remove the read-only state.
- Click OK and close the Registry Editor, then restart your computer.
If you cannot locate the StorageDevicePolicies folder in the Registry Editor, you will need to create it. Here’s how:
- Press the
Windows key + Rto launch the Run dialog prompt. - Type
Regeditand pressEnter. - If prompted by UAC, click Yes.
- Now, navigate to the following path:
HKEY_LOCAL_MACHINE > SYSTEM > CurrentControlSet > Control
- Right-click on the Control folder.
- In the right pane, select New, then select Key.
- Name the new folder StorageDevicePolicies and press
Enterto confirm. - Now, right-click on the StorageDevicePolicies folder, and select New, then select DWORD.
- Name it WriteProtect and press the
Enterto confirm. - Now, you can proceed and edit the StorageDevicePolicies registry as shown above.
10. Disable Write Protection Using Group Policy
This option is only available for Windows 10 Pro, Education, and Enterprise editions. So, if you’re using Windows 10 Home, your option is using the Registry Editor.
To disable the write protection using Group Policy, follow the steps below:
- Press the
Windows Key + Rto launch the Run prompt. - In the Run box, type
gpedit.mscand pressEnter. - This will direct you to the Group Policy Editor.
- Next, in the editor, navigate to the following path:
Computer Configuration > Administrative Templates > System > Removable Storage Access
- Depending on the media device with issues like CD, USB, or Tape, change the Write access to disabled.
- Once done, close the group policy editor and restart your system.
Final Word
That’s it. We believe these methods will help you remove the “media is write protected” error message on Windows 10. Please share with us any feedback or questions you have through the comments section.