
The error message indicates a failure in establishing communication between your Windows system and the designated device or resource. Typically, this means that your Windows can’t connect with the primary DNS server.
This breakdown in communication disrupts internet connectivity, leaving you unable to browse and access online services.
This article aims to provide comprehensive guidance on resolving the “ Windows can’t communicate with the device or resource ” error, focusing on fixing DNS-related issues that may be causing the problem.
Common Causes of the Error
When your Windows can’t communicate with the device, showing the error in discussion, it can be attributed to several common causes:
- Faulty network drivers: Out-of-date or corrupted network drivers can lead to communication errors between your device and the network.
- DNS cache issues: Corrupted DNS cache can hinder the communication process, resulting in the error message.
- Incorrect adapter settings: Misconfigured adapter settings, including DNS and IP address assignments, can cause communication problems.
- Malware infections: Malicious software on your system can disrupt network communication, leading to the error.
- Hosts file modifications: Alterations to the Hosts file can interfere with DNS resolution, resulting in the inability to communicate with the intended device or resource.
Essentially, DNS enables users to access websites and other online services using familiar domain names instead of numeric IP addresses .
Now that we’ve learned the causes, it’s time to explore the fixes to the “ Windows can’t communicate with the device or resource (primary DNS server) ” error.
How to Fix the Error
1. Update your network driver
The first thing to try when your Windows can’t communicate with DNS is to update your network driver. You can download it manually from the vendor’s website if you know the exact model of your network card, update it using Device Manager, or automate the process and let the specialized tool do that for you.
First, let us show you how to update the driver via Device Manager.
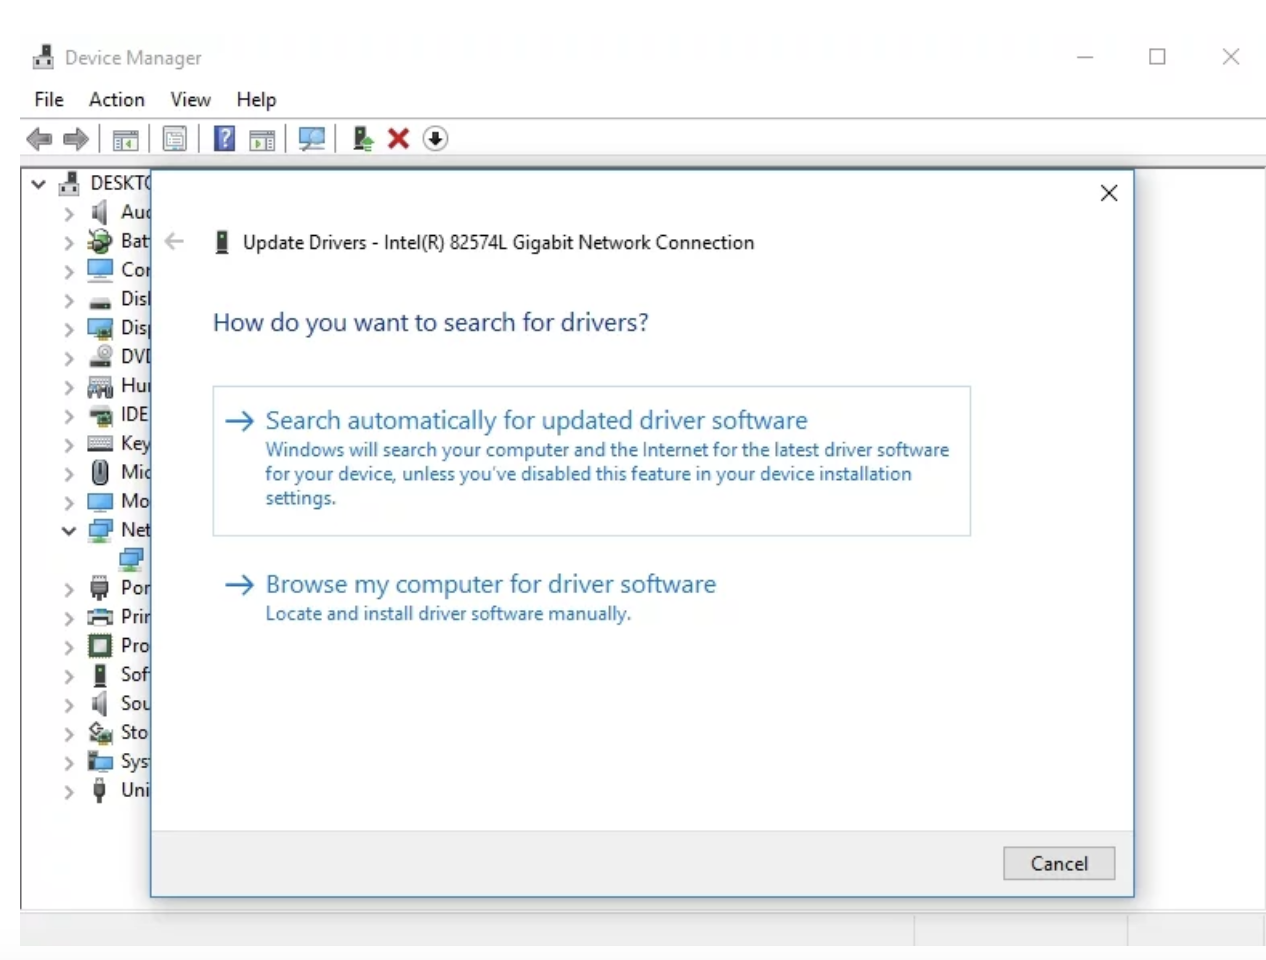
Using Device Manager
- Press
Win + Xon your keyboard, then select Device Manager from the menu that appears. - In Device Manager, expand the Network adapters category by clicking on the arrow next to it.
- Right-click on the network adapter you want to update the driver for.
- Select Update driver in the context menu.
- Select Search automatically for updated driver software. Follow any on-screen instructions that may appear to complete the update process.
- Restart your computer to apply the changes after the driver update is complete.
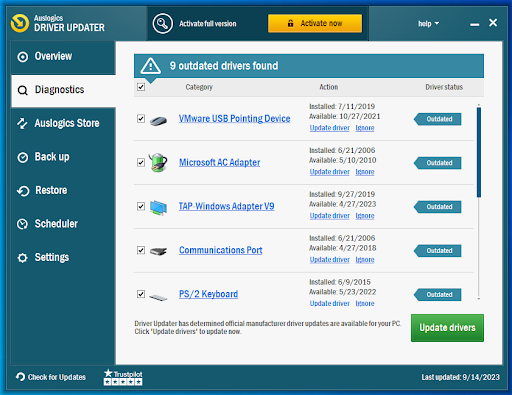
Using Auslogics Driver Updater
If you’re looking for a more comprehensive solution, the easiest way to troubleshoot your driver problems is to make use of special software to automate the process. Consider trying Auslogics Driver Updater – this intuitive software will fix and update all your drivers , not only the network one, in no more than one click.
Besides, it will come in handy for keeping a close eye on your drivers in the future, allowing you to keep performance and stability issues at bay.
2. Adjust adapter settings
If the “Windows can’t communicate with the device or resource” error persists, it’s time to adjust how you obtain your DNS and IP addresses. Here’s what you should do:
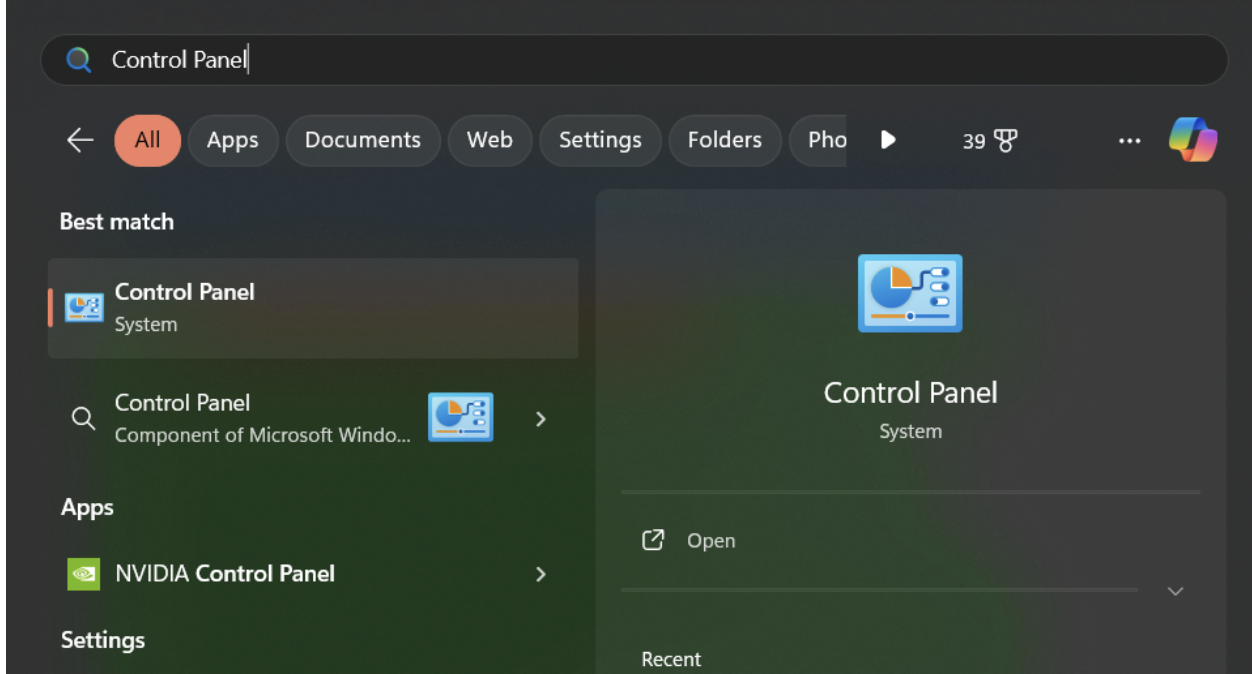
- Begin by accessing the Start menu via the Windows icon on your taskbar.
- Next, search for Control Panel and click on the first result.
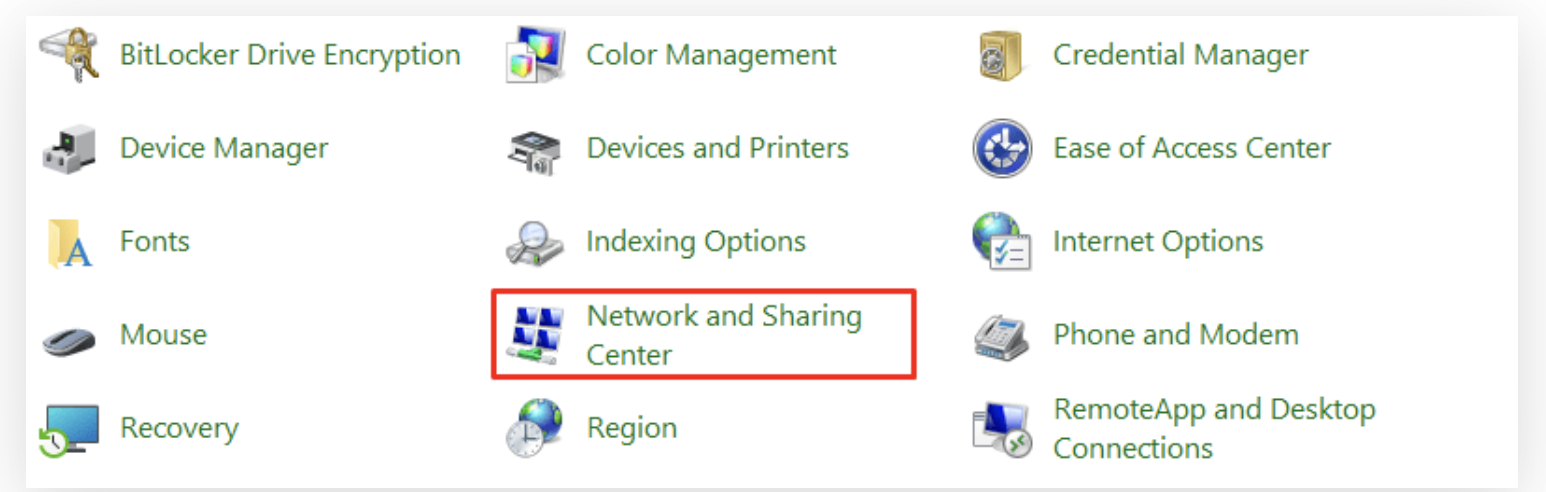
- In the Control Panel, find the View by menu and opt for the Large icons option.
- Click on Network and Sharing Center.
- Within the left pane, locate and click on the Change adapter settings link.
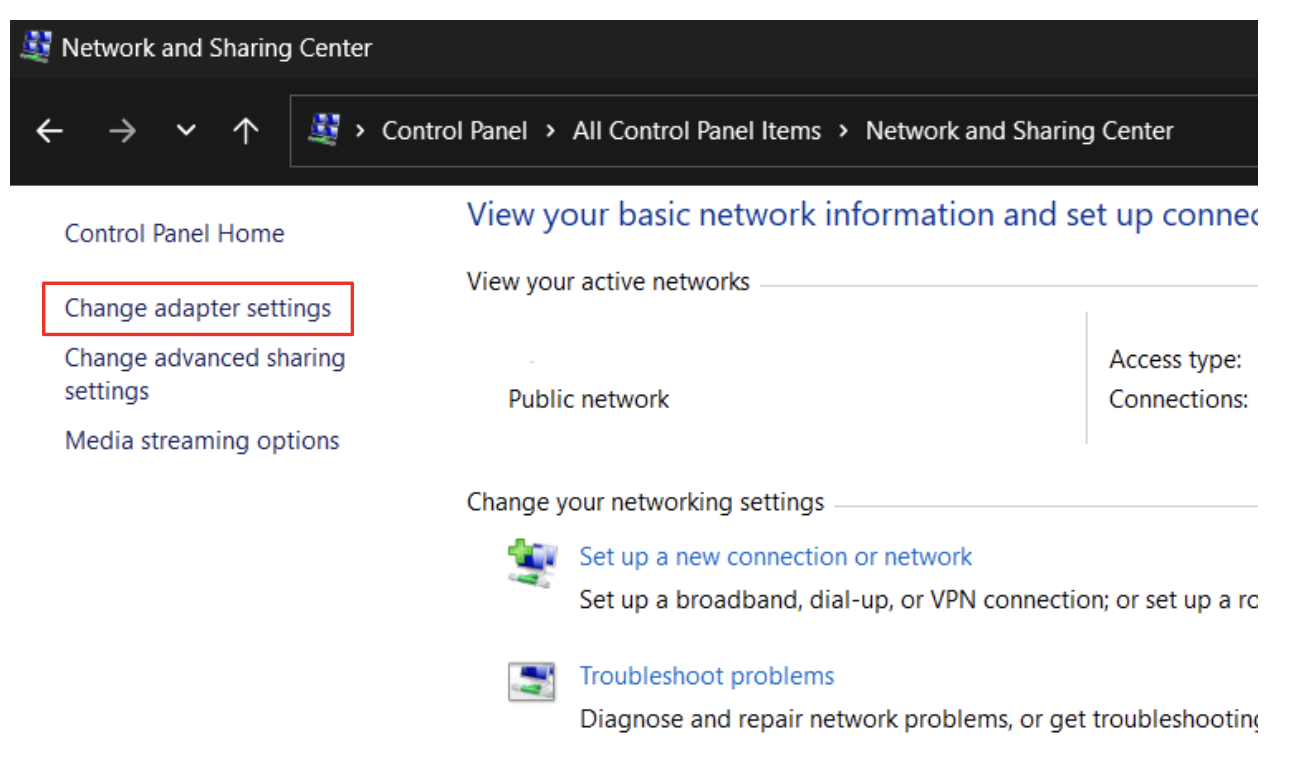
- This will open the Network connections window.
- Right-click on your current network and select Properties from the drop-down menu.
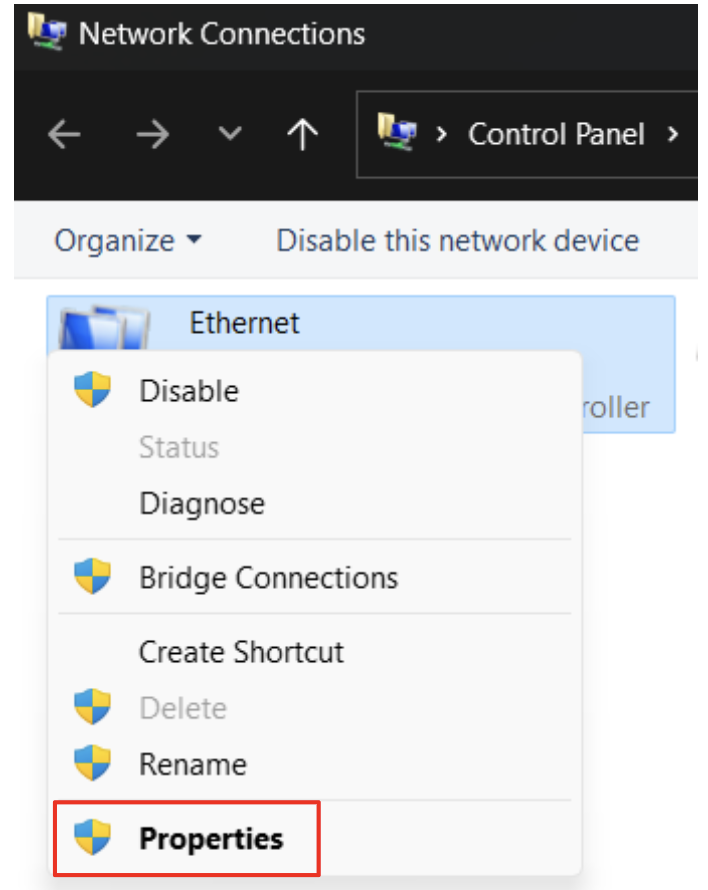
- Find Internet Protocol Version 4 (TCP/IPv4), click on it, then on the Properties button.
- Within the General tab, ensure both Obtain an IP address automatically and Obtain DNS server address automatically are selected.
- Confirm the changes by clicking OK.
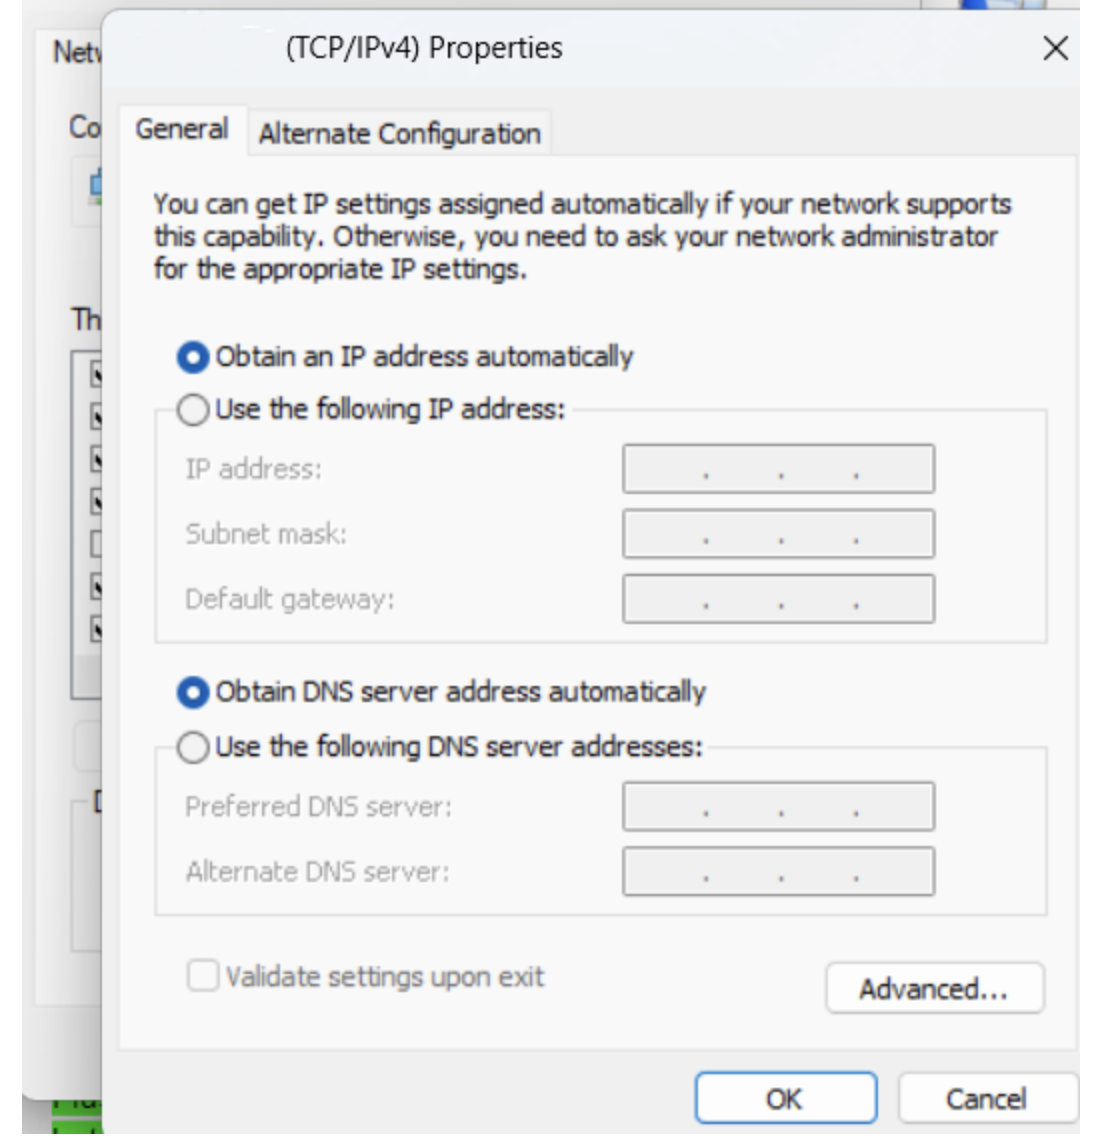
- Once the settings are adjusted, verify if the issue persists.
3. Switch to Google Public DNS
Switching to Google Public DNS may sometimes fix the “ Windows can’t communicate with the device or resource (primary DNS server) ” error if the problem lies with your Internet Service Provider (ISP) DNS server. To do that, repeat the steps 1-8 from the previous fix, then do the following:
- Within the General tab, check the Use the following DNS server addresses radio button and set Preferred DNS server to 8.8.8.8.
- Set Alternate DNS server to 8.8.4.4.
- Confirm the changes by clicking OK.
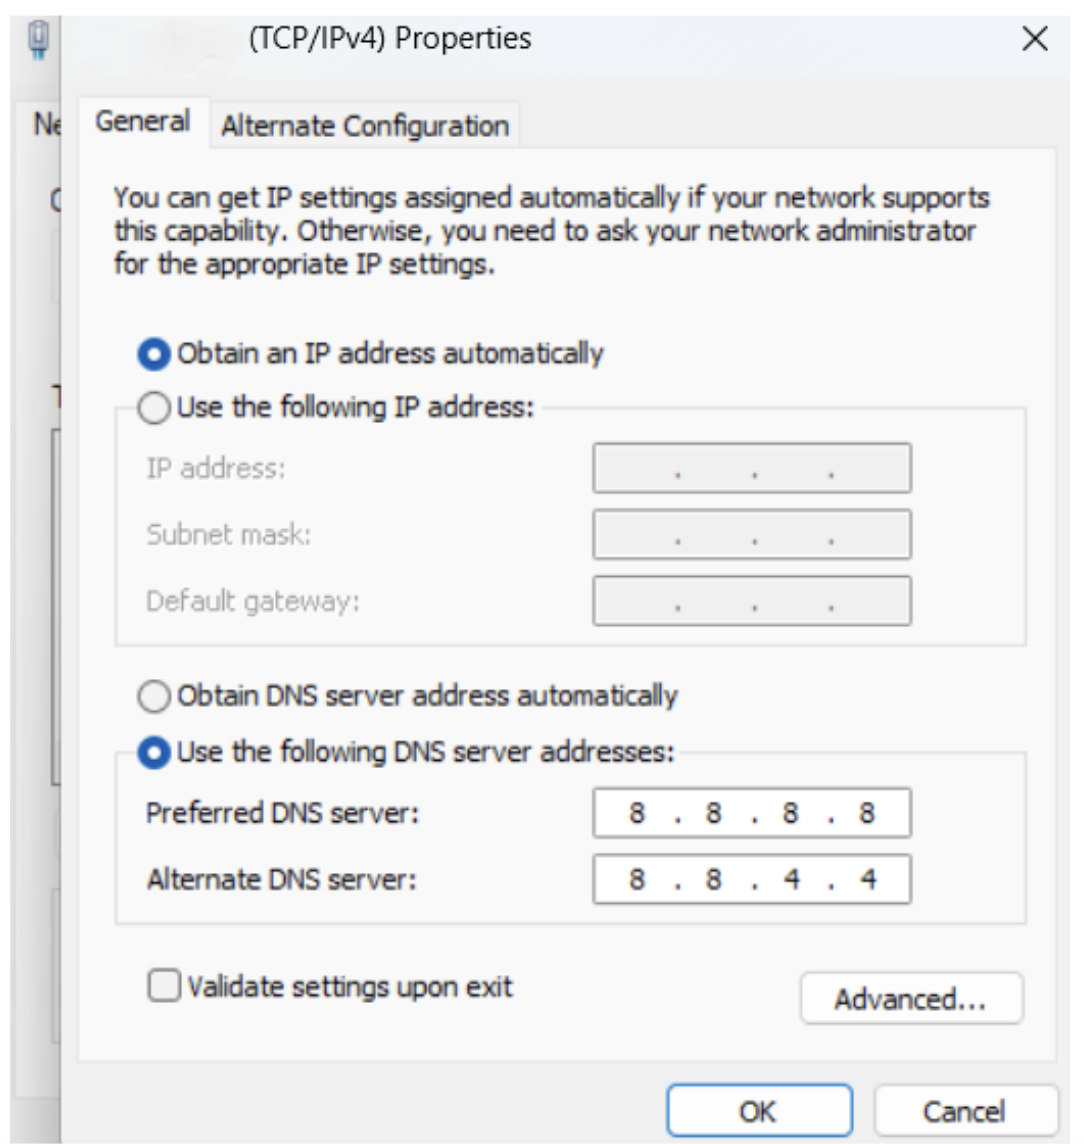
- Restart and check if the error still persists.
4. Edit the Hosts file
Another workaround to resolve the “ Windows can’t communicate with the device or resource ” error is resetting the Hosts file to default. Here’s how to do it:
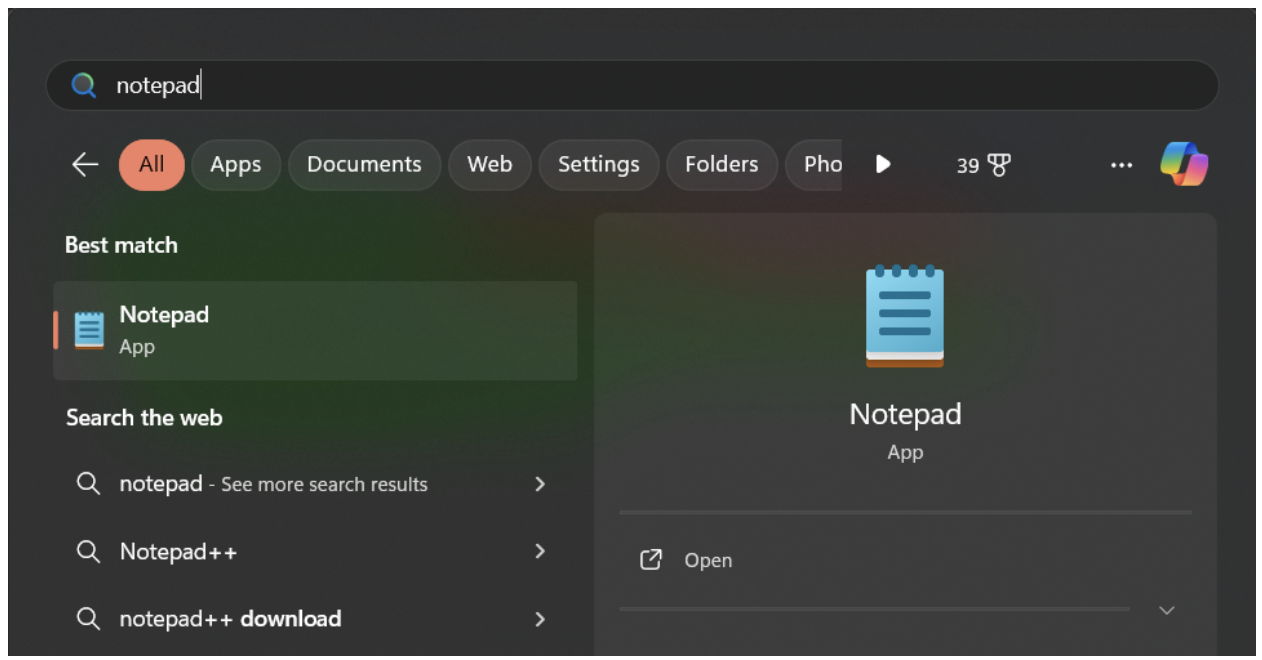
- Open the Notepad application. To initiate this process, locate and click on the Notepad icon after searching for it.
- Paste the provided text into the Notepad file:
# Copyright (c) 1993-2006 Microsoft Corp. # # This is a sample HOSTS file used by Microsoft TCP/IP for Windows. # # This file contains the mappings of IP addresses to host names. Each # entry should be kept on an individual line. The IP address should # be placed in the first column followed by the corresponding host name. # The IP address and the host name should be separated by at least one # space. # # Additionally, comments (such as these) may be inserted on individual # lines or following the machine name denoted by a '#' symbol. # # For example: # # 102.54.94.97 rhino.acme.com # source server # 38.25.63.10 x.acme.com # x client host # localhost name resolution is handle within DNS itself. # 127.0.0.1 localhost # ::1 localhost
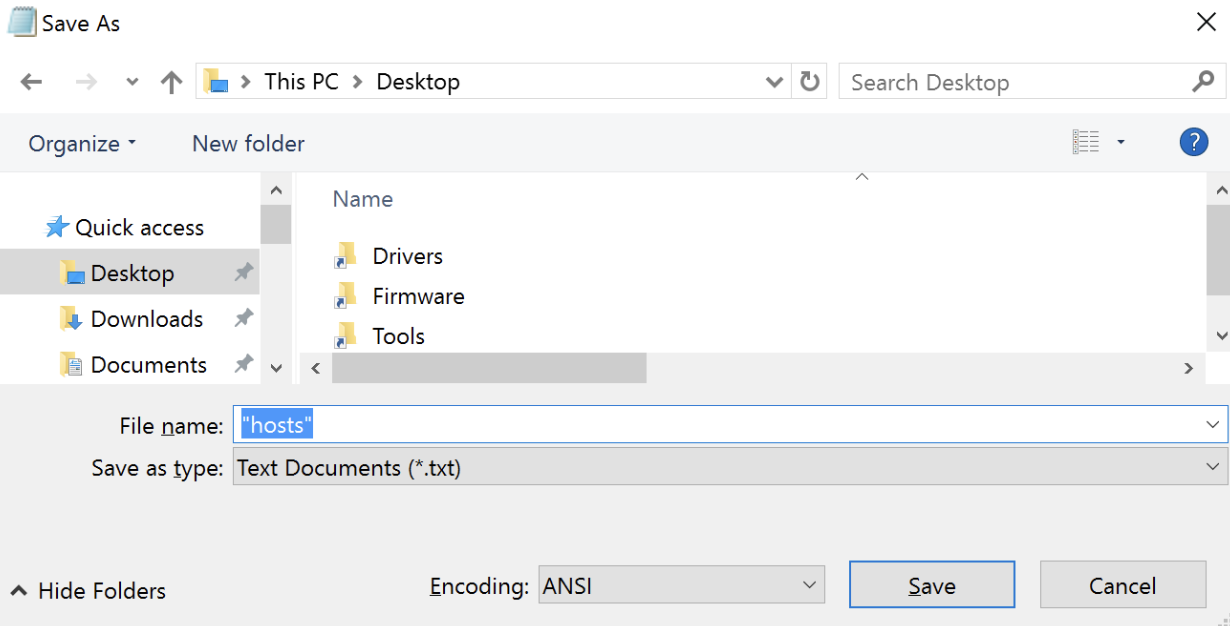
- Navigate to the File menu, choose Save as, enter
hostsin the File name field, and save the file to the desktop.
- Close the Notepad application.
- Look for the directory %WinDir%\System32\Drivers\etc, then click on the File folder icon.
- Right-click or tap and hold on the Hosts file, select Rename, and rename the file to
hosts.old. - Move or copy the Hosts file created in step 3 from the desktop to the %WinDir%\System32\Drivers\etc directory. If prompted for an administrator password, choose Continue.
5. Clear DNS cache
Flushing the DNS cache to eliminate potential corruption issues may possibly fix the “ Windows can’t communicate with the device or resource (primary DNS server)” error. Here’s how to do it:
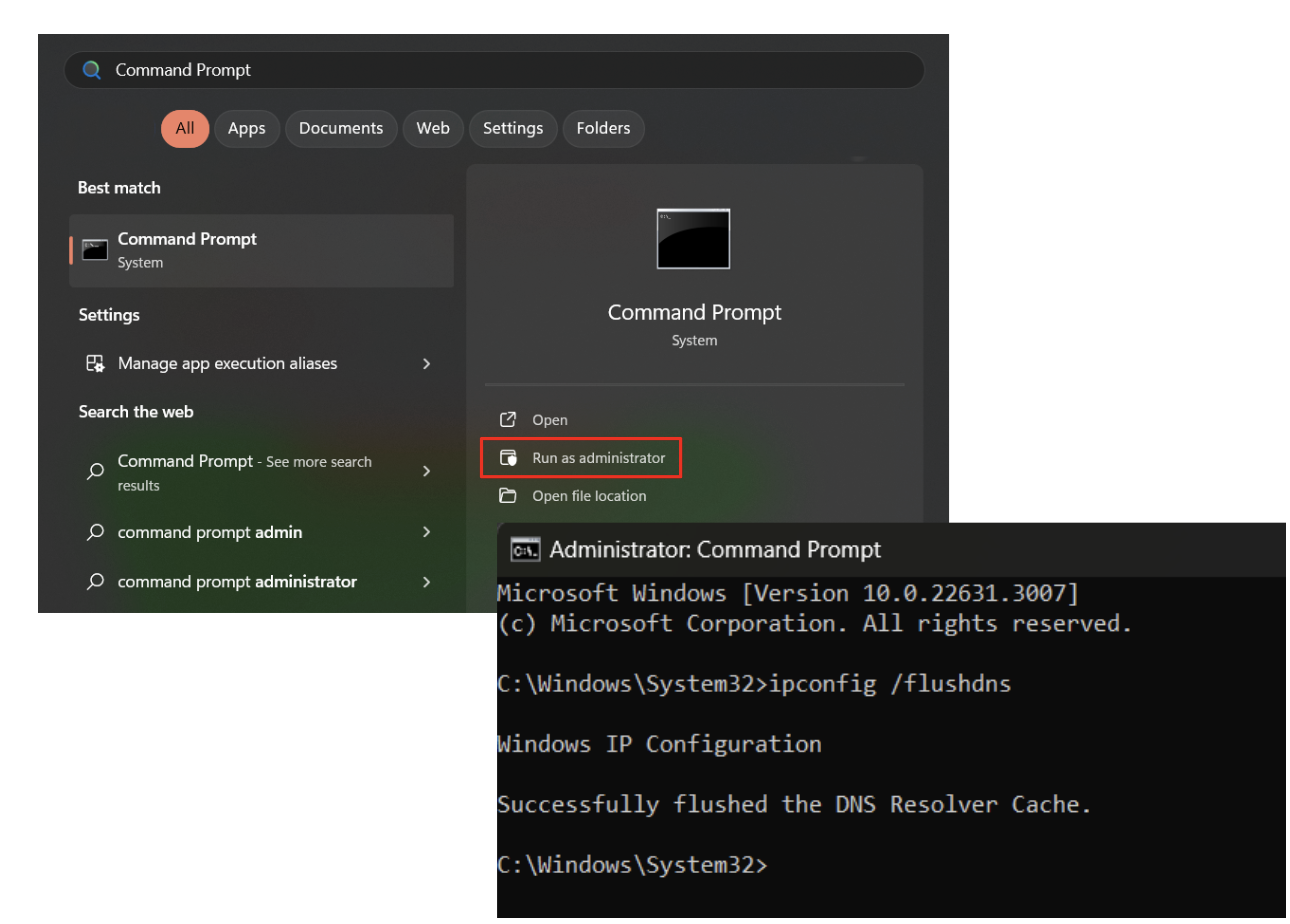
- Open your Search box (
Win key +S). - Type
Command Prompt. - Select Run as administrator.
- In the Command Prompt, type
ipconfig /flushdnsand hitEnter. - Exit the Command Prompt after the DNS cache has been cleared.
Check if you can access the Internet now.
Windows 10/11 (8, 7, Vista, XP)
6. Reset Winsock and TCP/IP
Resetting Winsock and TCP/IP protocols using the elevated Command Prompt is another potential solution to resolve the “Windows can’t communicate with the device or resource” error. Here’s how to do it:
- Open the elevated version of the Command Prompt (follow the steps 1-3 from the previous fix).
- Type the commands below and make sure you press
Enterafter each:
nbtstat –r
netsh int ip reset
netsh winsock reset
- Let the reset complete (do not abort the process). Then exit the Command Prompt.

7. Scan for malware
If you are still experiencing the error, chances are that your computer is infected with malware . Running a malware scan can help you get rid of the problem. If you use a third-party antivirus , follow the instructions from the vendor. Here’s how to run the built-in Windows Security scan:
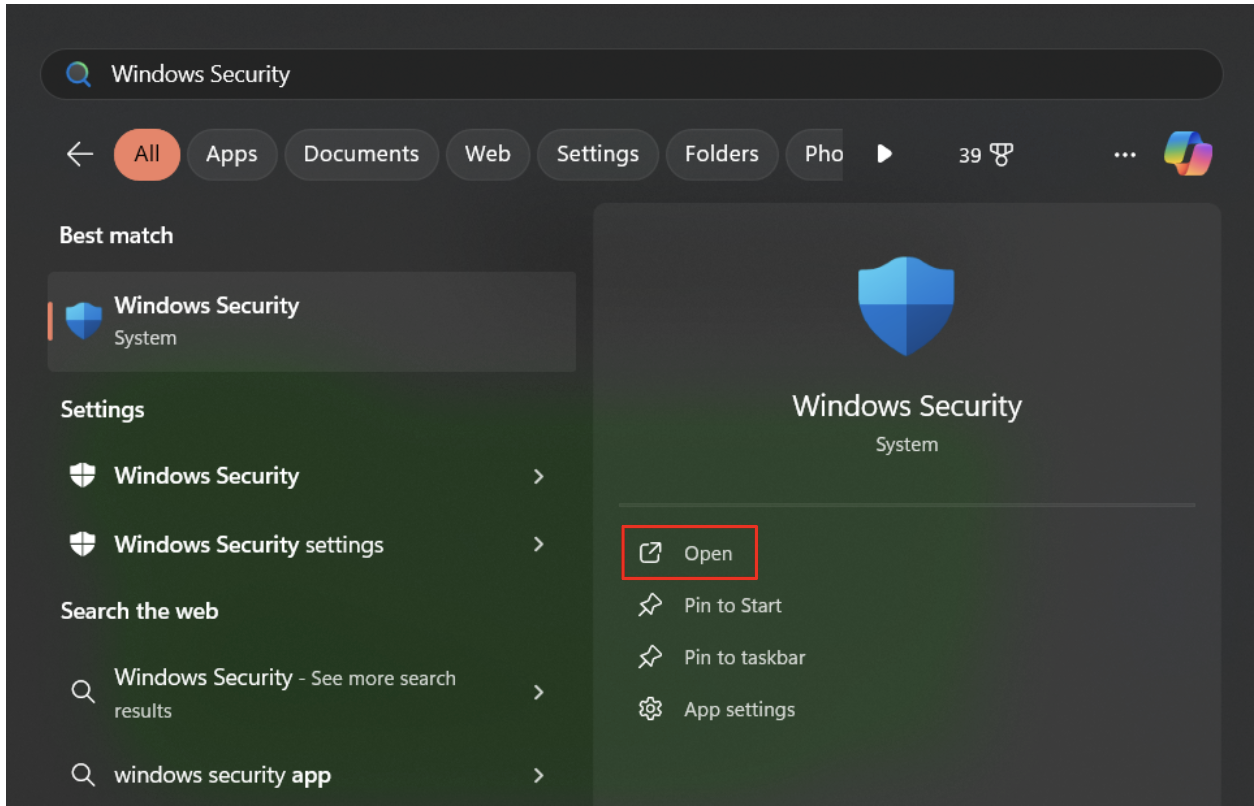
- Click on the Start button, type
Windows Securityinto the search bar, and pressEnteror click on Open.
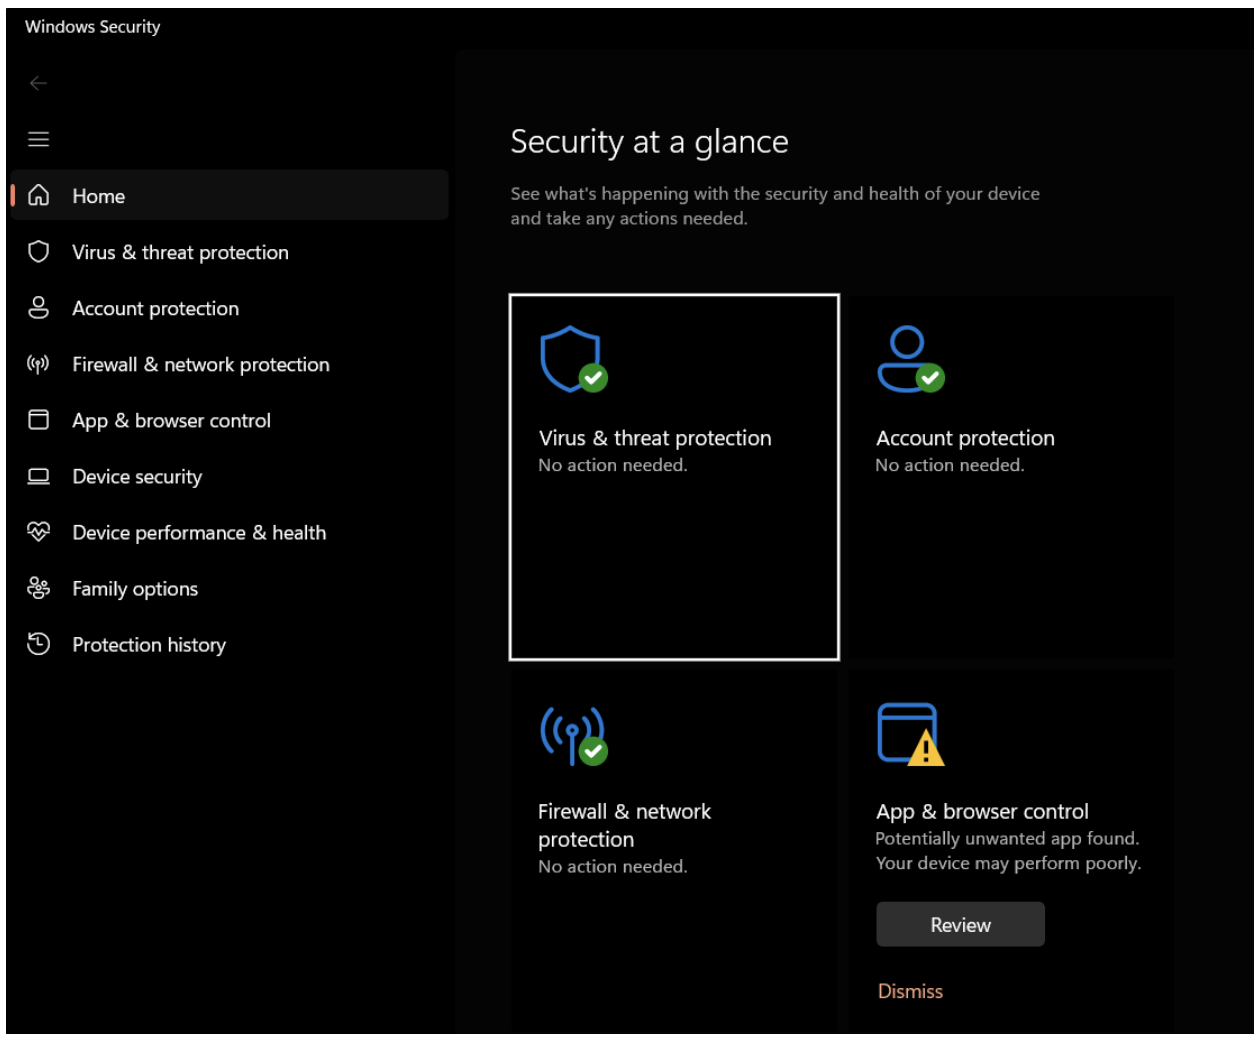
- Navigate to Virus & threat protection.
- Under Virus & threat Protection, select Scan options.
- For a thorough check, select Full scan.
- Click on the Scan now button to initiate the malware scan.
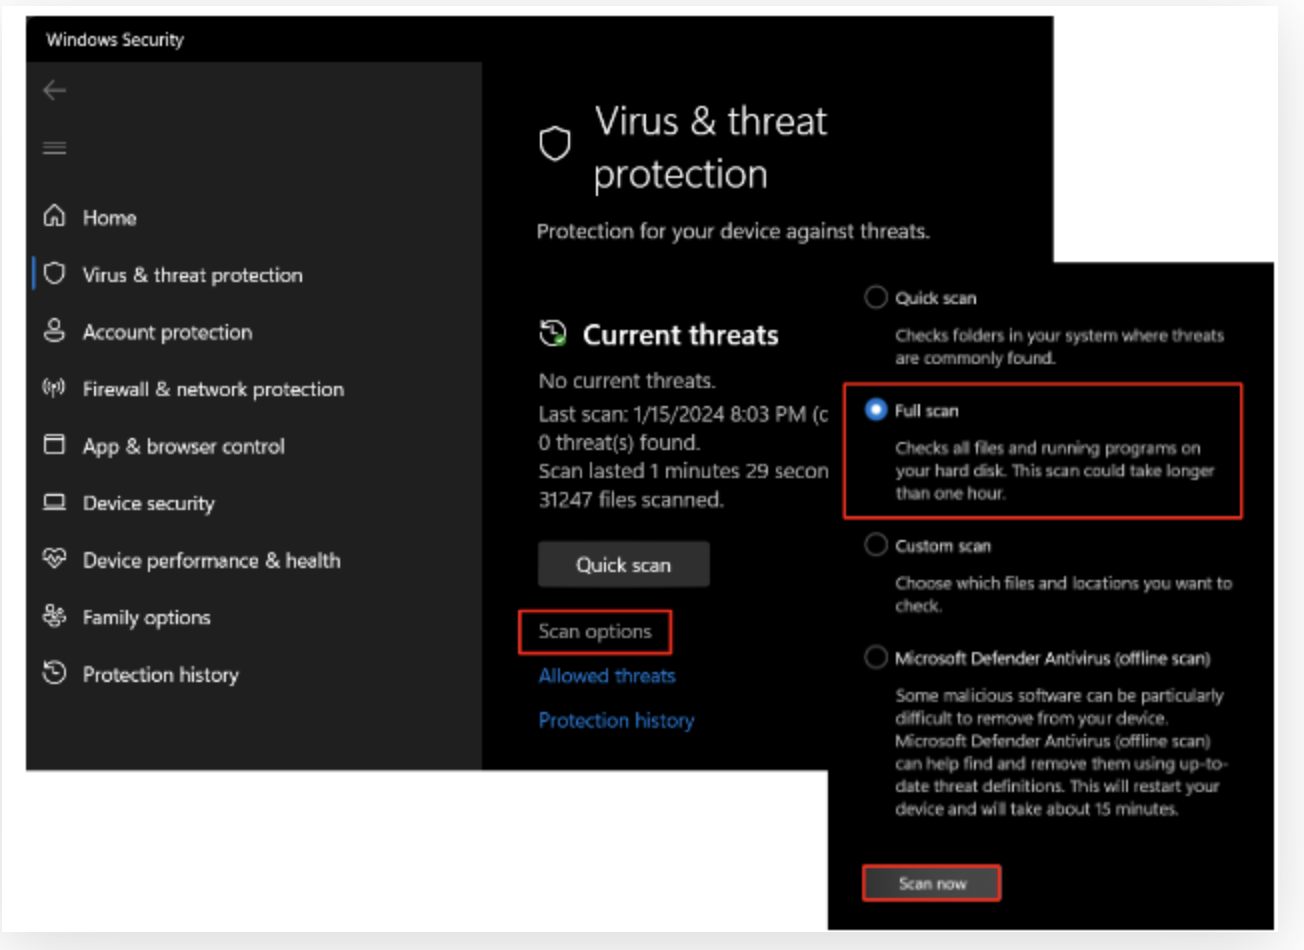
- After the scan is complete, review the results to see if any threats were detected. Follow the prompts to take appropriate action, such as removing or quarantining any identified malware.
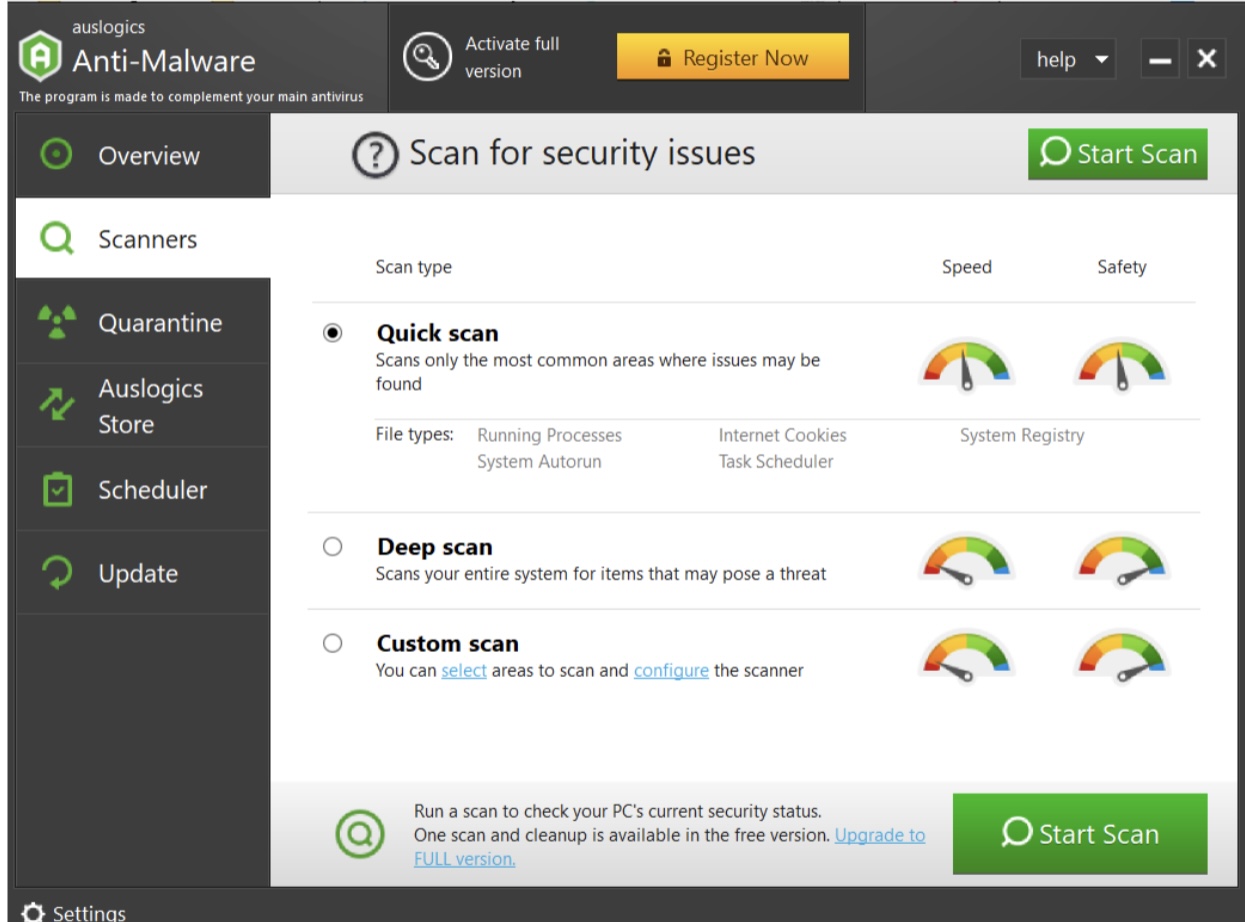
We also recommend you to add an extra layer of protection to make sure no malicious enemy can harm your OS. As such, consider using Auslogics Anti-Malware to keep even the most cunning threats out. This reputable tool is designed to work alongside your main antivirus, strengthening protection against malware.
Windows Can’t Communicate with the Device or Resource – Fixed
Encountering the frustrating error message “ Windows can’t communicate with the device or resource (primary DNS server) ” can leave you hanging, unable to access online services. However, armed with the knowledge shared in this article, you now have a comprehensive set of solutions to tackle this issue.
By addressing common causes, such as faulty network drivers, DNS cache issues, incorrect adapter settings, malware infections, and hosts file modifications, you can now resolve the “ Windows can’t communicate with the device or resource ” error with confidence.
Simply follow the step-by-step instructions provided and you’ll be back online in no time. Which fix worked for you? Feel free to share a comment below!
Windows 10/11 (8, 7, Vista, XP)