
Navigating the intricate settings of Windows 10, one might often wonder how to block apps on Windows 10 to ensure a safer and more personalized user experience. This isn’t just about privacy; it’s about harnessing the full scope of how Windows 10 restricts access to programs.
There are compelling reasons for examining these settings. You may want to prevent users from tapping into built-in utilities that can modify system configurations, or maybe there’s a specific application that holds sensitive information meant only for your eyes.
In professional settings, where standardized software suites are the norm, you might need to limit access to specific applications to align with your organization’s guidelines. If you want to learn how to block an app , you’re in the right place.
This guide offers a step-by-step walkthrough to help you make the most of Windows 10’s app restriction features.
How to Block User Access to Programs
For different users, you can create personalized access. By adjusting the app permission setting, you can regulate what data and features an application can access on your device. To do this, you should know about the ability of Windows 10 restrict user access to programs , which comes in handy in multi-user environments. This guide will show you how to restrict apps on Windows 10 effectively.
Method 1: Block user access to programs by editing the registry
Changing the Windows registry can gravely damage your computer, so be careful before you begin. There are plenty of stories where a small change in the registry leads to serious issues, for instance, when a u ser couldn’t even access their C drive.
Before you proceed with this method, it’s a good idea to set up a system restore pointto which you can go back if you want to undo the changes later. Also, keep in mind that maintaining and cleaning your Windows registry is crucial to ensuring optimal performance.
Consider using Auslogics Registry Cleaner, a trusted tool that safely optimizes your registry.
Once you’ve set up your restore point, you can proceed with the steps below:
Steps to block applications via the Registry:
- Run Dialog: Press
Windows + Rto open the Run dialog box. - Access Registry: Type
regeditand click OK to open the Windows Registry Editor.

- Navigate: Go to
Computer\HKEY_LOCAL_MACHINE\SOFTWARE\Policies
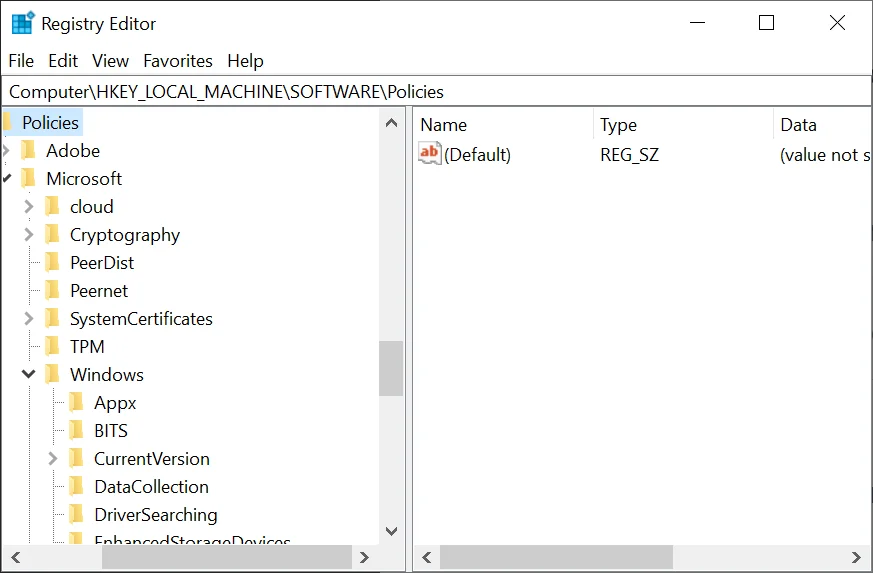
- Check for an Explorer key under Policies. If it’s not present, create a new key and name it Explorer. (Right-click the mouse to bring up the menu).
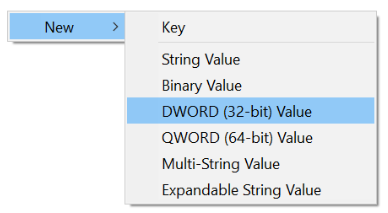
- Inside the Explorer key, create a new DWORD (32bit) named DisallowRun. Set its value to “1”.
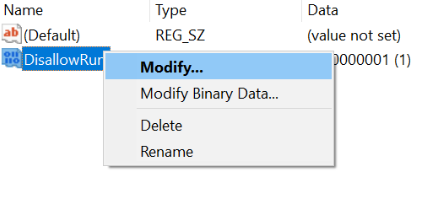
- Create a string value inside the DisallowRun key for each program you wish to block. For example, name the first program “1“, the second “2“, and so on. Set the string value data to the exact name of the program’s executable.
- Restart the computer or log off and log on for the changes to take effect.
The Windows Registry is a hierarchical database that stores configuration settings and options, which can easily get cluttered, leading to system stability issues. Registry Defrag can help by defragmenting and compacting the registry, reducing memory usage, and improving user experience.
Also, while we’re on the topic of the Windows Registry, be sure to check out our guide on how to fix broken registry items.
📌 Also read: [FIXED] System Restore Not Working in Windows 10
Method 2: Block access via the group policy editor
The Local Group Policy Editor is a management tool that allows network administrators to implement specific configurations for users and computers within an Active Directory environment. Steps to block software via the Group Policy Editor:
- Run Dialog: Press
Windows + R, typegpedit.mscand press Enter to launch the Group Policy Editor.
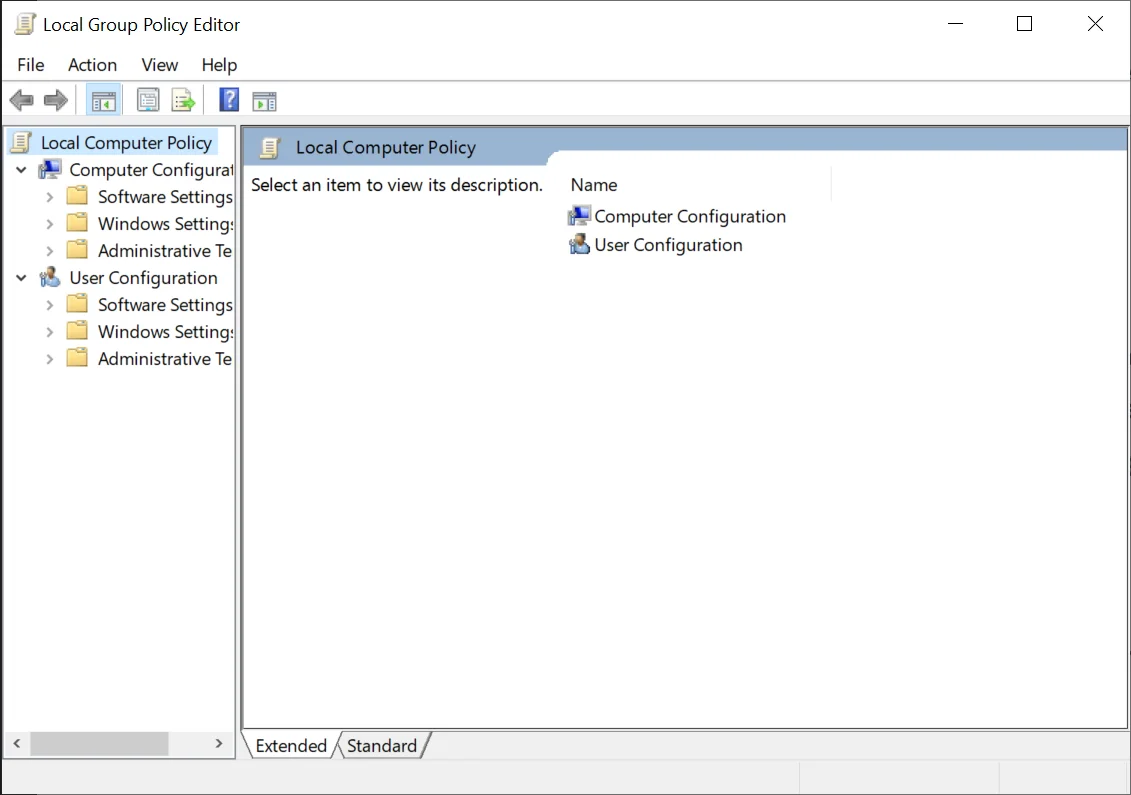
- Navigate to User Configuration > Administrative Templates > System.
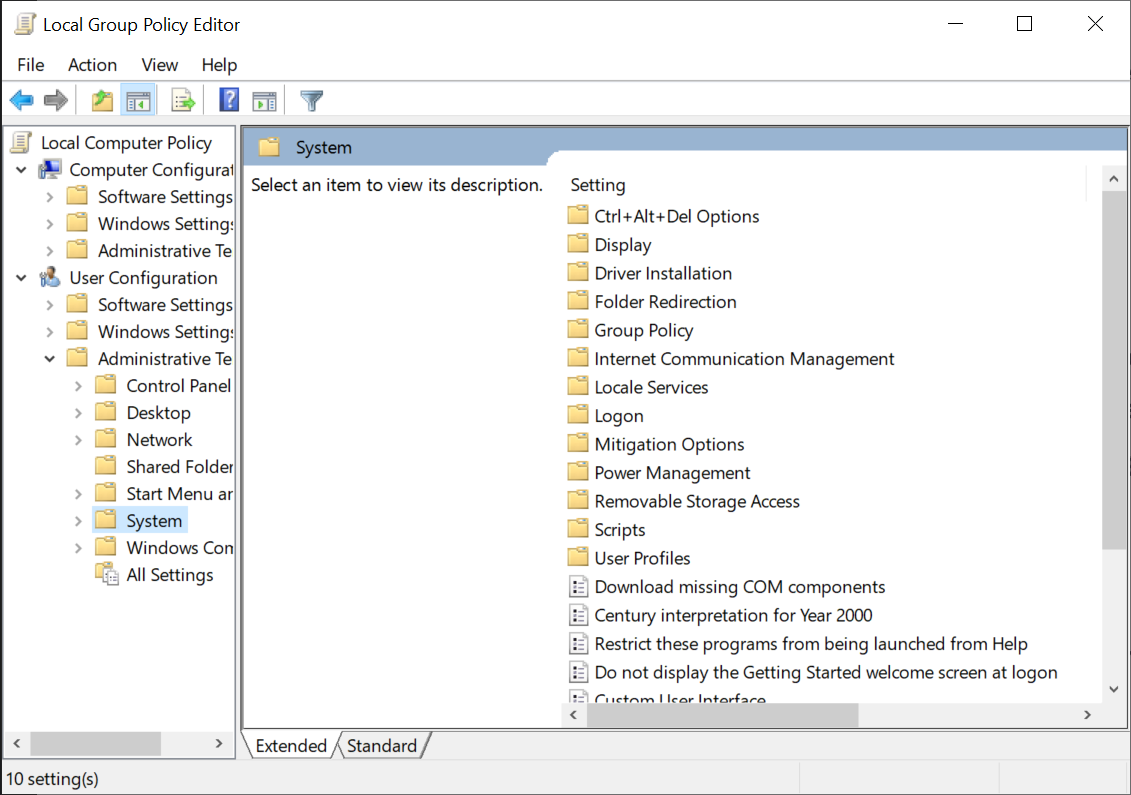
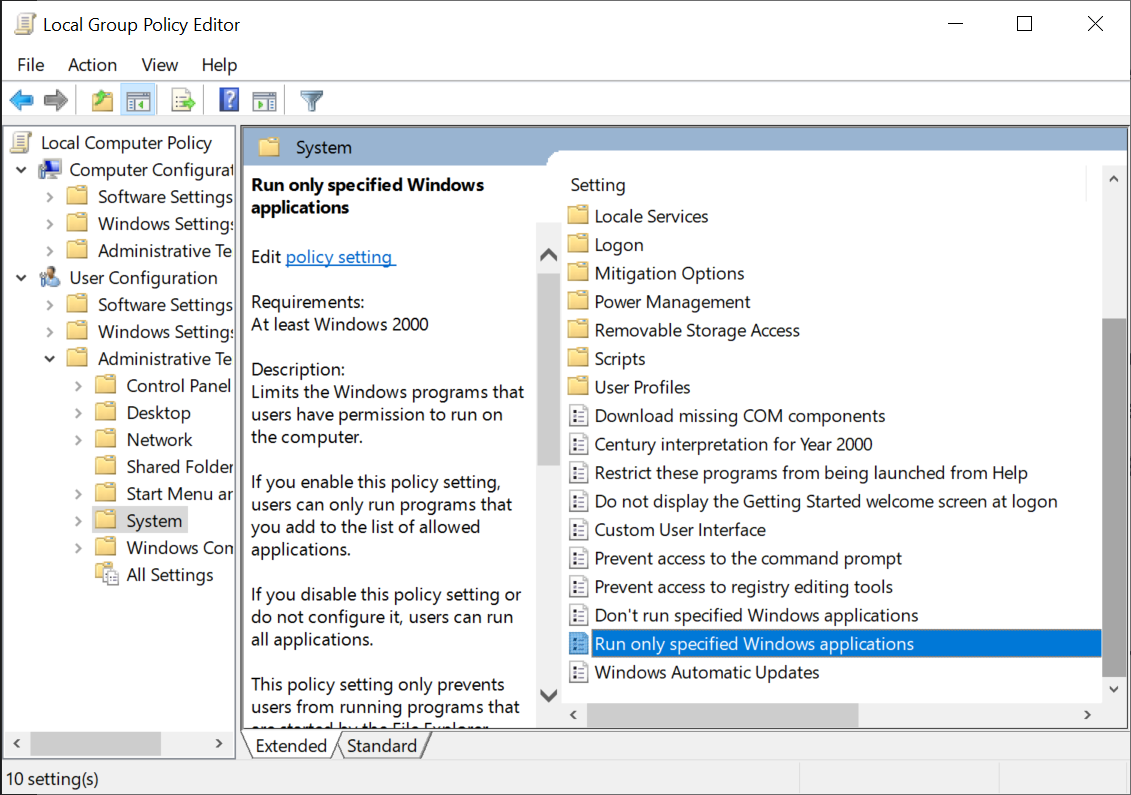
- Double-click on the policy Run only specified Windows applications or Don’t run specified Windows applications, depending on your intention.
- Activate the policy by choosing the Enabled option.
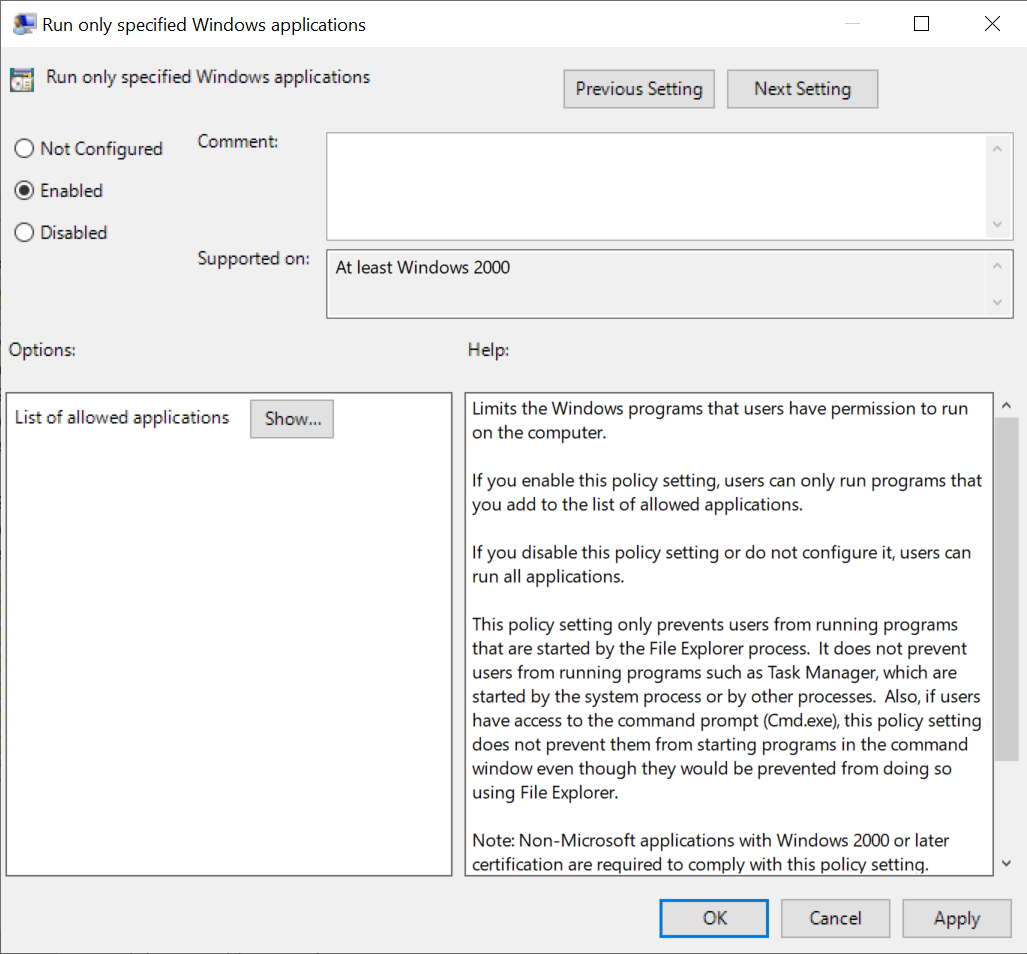
- Click on the Show button and enter the names of the applications you either want to restrict or allow. Ensure you list the exact executable names.

- Click OK to finalize the changes. The policy will be applied either immediately or after a system restart.
In that case, they will receive an error message: “This operation has been canceled due to restrictions on this computer. Please contact your system administrator.
If you want to stop more programs from running on your Windows 10 PC, you will need to enter the names of these programs as string values within the DisallowRun key. String value names will need to be changed accordingly: input “2” as the Value name for the second program you want to block, input “3” for the third program you want to block, and so on.
Method 3: Block user access for specific users
If you are using Windows 10 Pro or Enterprise, you can prevent software from running using Group Policy Editor. You can use the Run-only specified Windows applications setting with the Group Policy Editor.
Group Policies are managed using the Microsoft Management Console. Here is how to proceed:
- Launch MMC: Press
Windows + R, typemmc.exe, and press Enter. - Add the Snapin
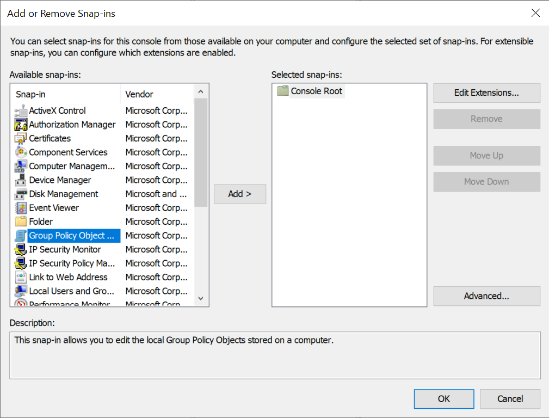
- In the MMC window, click on File and select Add/Remove Snapin.
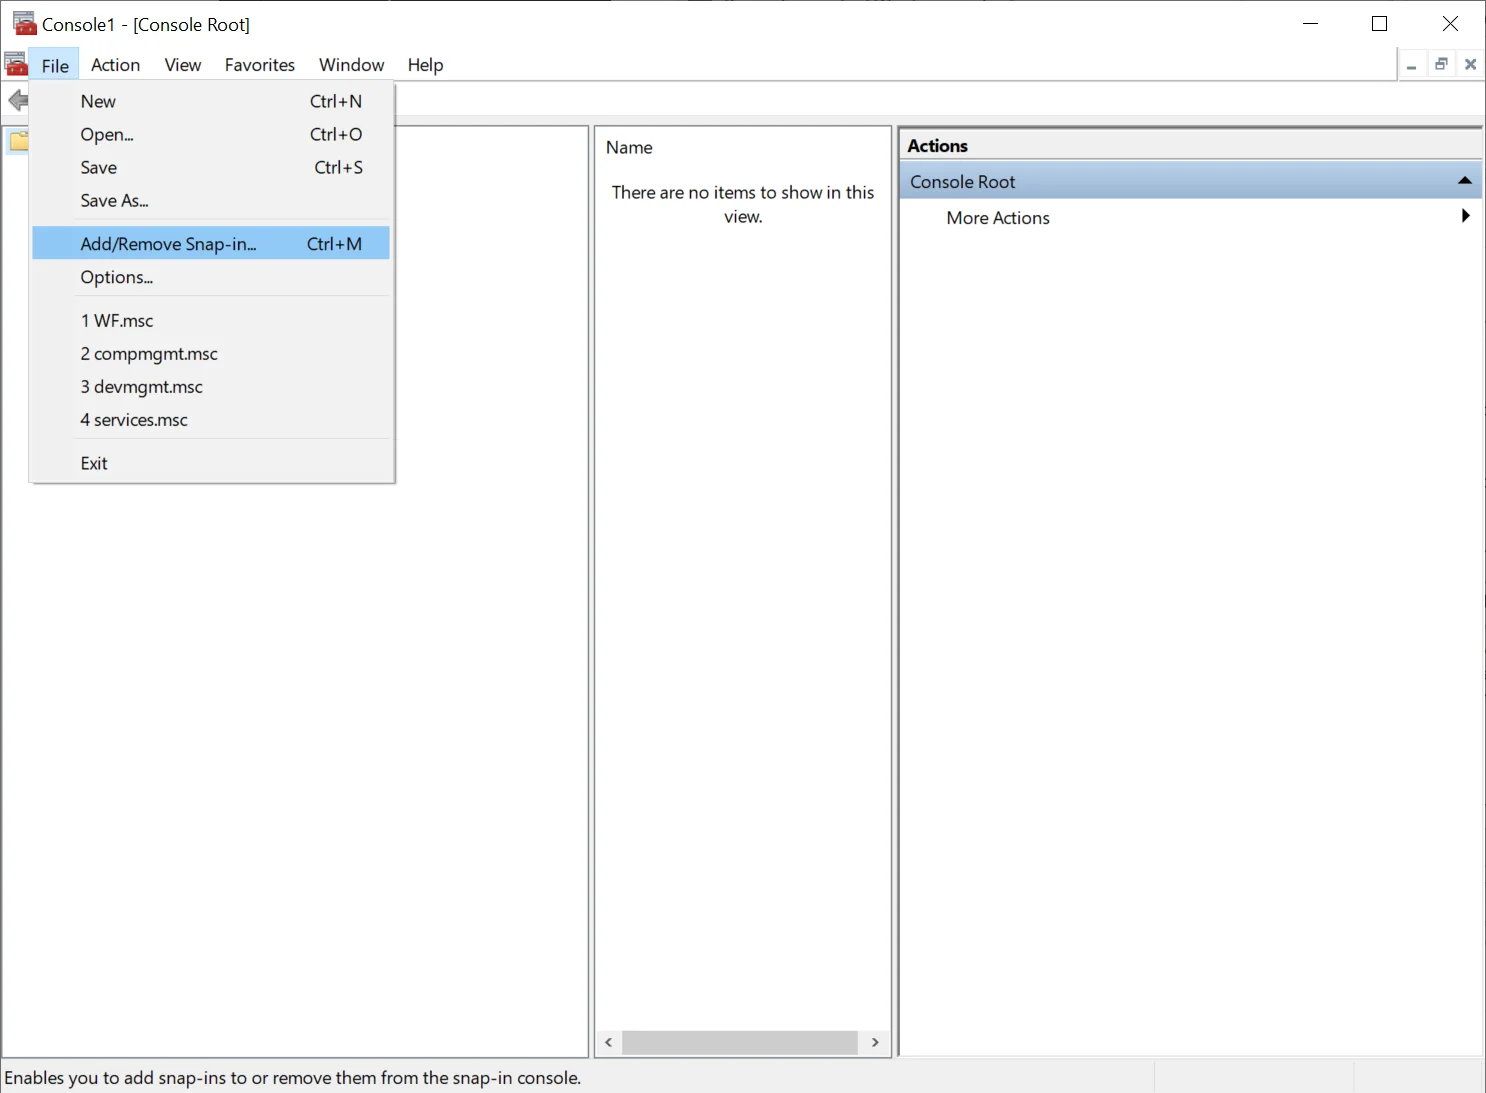
- Select Group Policy Object Editor from the list of available snapins and click Add.
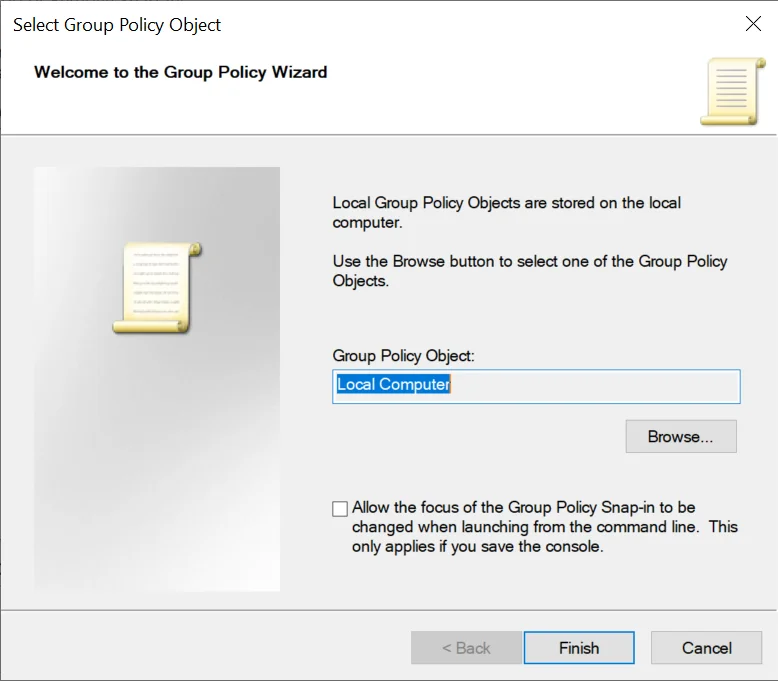
- Select User Profile:
- In the Select Group Policy Object window, click Browse.
- Navigate to the Users tab in the new window. This will list all user accounts present on the computer.
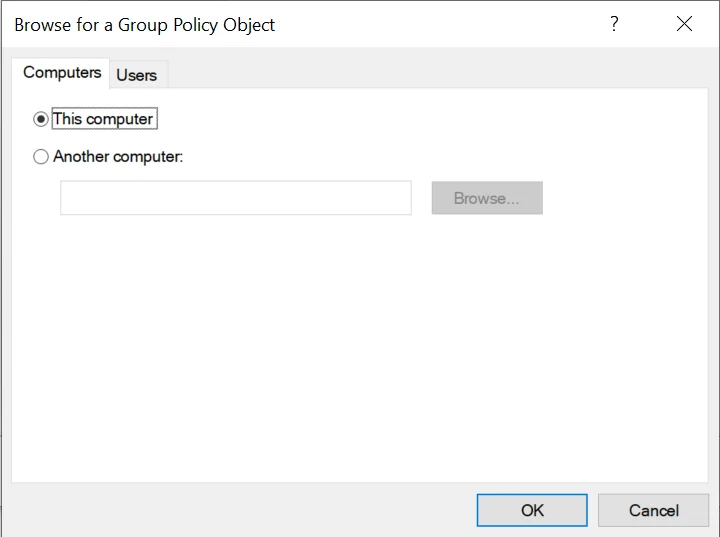
- Select the user or user profile for which you’d like to set the restrictions and click OK.
- Click Finish on the snapin window.
- Set the Policies: Under the User Configuration node, you can navigate to policies like in the Local Group Policy Editor.
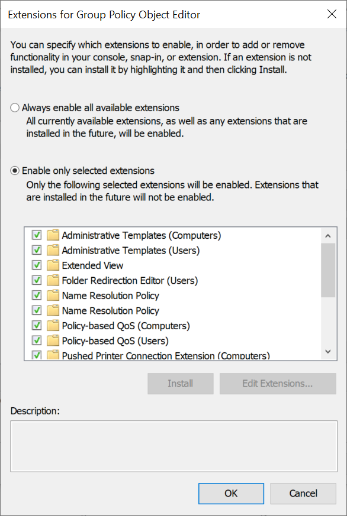
- For example, User Configuration > Administrative Templates. You can set policies like Run only specified Windows applications or Don’t run specified Windows applications. List the exact executable names of the apps you wish to control.
- Once you’ve configured the policy settings for the specific user, you can save this MMC setup for future use. Click File and choose Save or Save As. Provide a name and save the .msc file.
- Once you’ve made and saved your changes, they should take effect the next time the specific user logs in.
Method 4: Blocking desktop apps with security policy
When it comes to enforcing stricter app usage guidelines, this feature is a must-have. To put it into action, follow these steps:
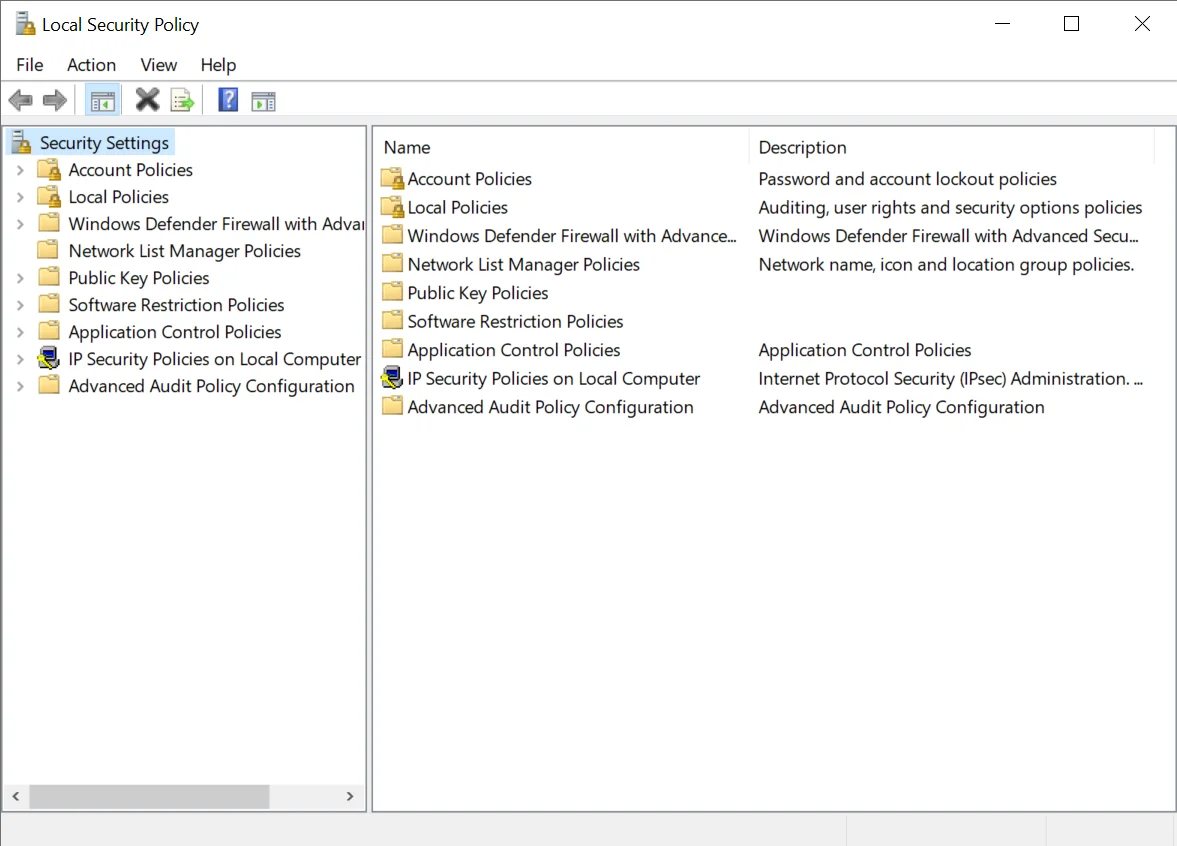
- Open Local Security Policy by typing
secpol.mscin Start. - Go to Software Restriction Policies. If absent, create it under Security Settings.
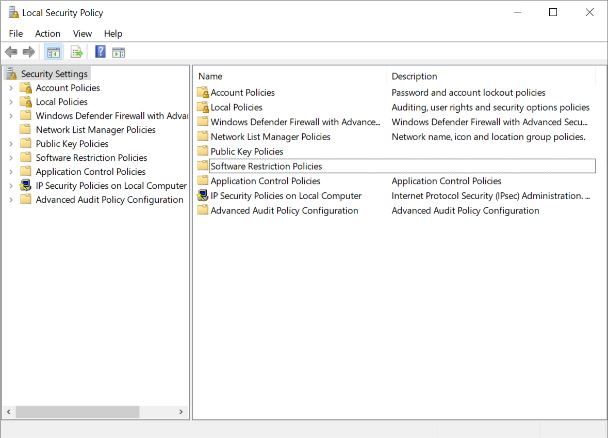
- Under Software Restriction Policies, set software as Disallowed by default for stricter control.
- Add rules: Right-click Additional Rules, select New Path Rule, input the app’s path, set it as Disallowed, and confirm.
- Apply changes and test the blocked app.
- Periodically check and update relevance rules.
Method 5: Unblocking apps with appLocker
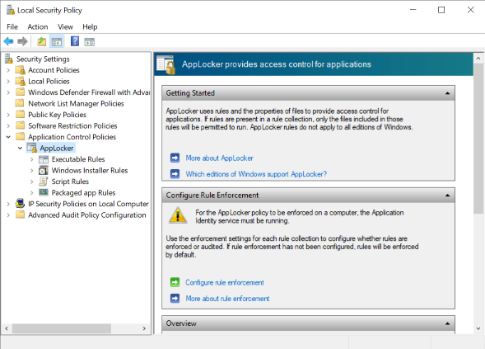
AppLocker is an application management tool built into Windows. You can use it to block or restrict certain apps from running based on various factors.
AppLocker can be used to block apps, but it can also be used to lift restrictions. Here’s how to use it for unblocking apps:
- Type
secpol.mscin the Start menu and open Local Security Policy. - Go to Application Control Policies > AppLocker.
- Select the rule collection for the app type (executable, script, etc.).
- Find the rule blocking your app.
- Right-click the rule and choose Delete or Disable.
- Update AppLocker policies using Update Policy.
Other Access Control Options
Several options are available for those who want to refine or diversify their access controls on Windows or through third-party software. Here are some of them:
- User Account Control (UAC): A Windows feature prompting for app installation permissions.
- Parental Control Software: Tools like Norton Family or Net Nanny restrict app and content access.
- Windows Defender Application Control (WDAC): Controls which software can run.
Conclusion
There you have it: this is how you can prevent users from using specific software in Windows 10. It’s strongly recommended that you make a restore point before making these changes so you can return to the previous state.
When sharing a computer with multiple users, knowing how to block apps on computer can give the administrator greater control and peace of mind.
For administrators seeking to maintain control, understanding how to limit user access in Windows 10 is paramount.
A popular tool often used for this purpose is the Windows App Blocker, designed for those who use Windows 10 restrict access to programs.
In such cases, you need a reliable recovery tool, such as when you accidentally delete important files or your system crashes.
File Recovery can save lost data from storage media if something happens, so you’re always prepared.
We recommend installing a reliable anti-malware program to ensure your system runs smoothly.
Auslogics Anti-Malware has explicitly been designed to regularly scan your system and keep it safe from even the rarest data safety threats.
FAQ
It is possible to block access to built-in Windows apps. Both the methods mentioned above—through the Registry and Group Policy Editor—can be employed to restrict access to built-in apps.
When using these methods, ensure you know the exact name of the executable file of the builtin app.
Yes, you can. Using the Group Policy Object Editor snap-in in the Microsoft Management Console, you can tailor restrictions for specific user accounts.
While one user may be restricted from accessing certain software, another may have full access.
No, the methods described above are for blocking access to applications and programs, not websites.
You can block specific websites with internet filtering software, parental control settings, or by editing the Windows System host file.
Some routers also provide website-blocking features within their firmware .