
- Why Is the User Account Picture Not Showing Up in the Start Menu on Windows 10?
- How to Fix the Profile Picture Not Showing Up on Windows 10
- Solution 1: Restart Your Computer and Log Into Your Account Again
- Solution 2: Repair Damage With an Anti-Malware Tool
- Solution 3: Run a System File Checker Scan
- Solution 4: Use the Windows Store Apps Troubleshooter
- Solution 5: Check for Old Account Pictures
- Solution 6: Check for Operating System Updates
- Solution 7: Change to a Different Picture in Settings
- Conclusion
Windows 10 is undoubtedly an impressive OS. However, as efficient as it is, it is not free from occasional bugs and errors. While some of these issues affect the core functionalities of Windows 10, others interfere with minor features. No matter where the problem is, it can be disturbing when your computer is not working as it should. In such cases, you are right to seek solutions that will help you rectify whatever is wrong.
A common error reported by users is their profile picture not showing up in the Start menu. It’s only natural to feel annoyed with this problem. After all, anyone expects their computer to function properly all the time. So, in this guide, you will learn how to fix the Windows 10 profile picture not showing up.
However, before we begin, let’s take a look at some of the reasons why this problem is likely to occur on your device.
Why Is the User Account Picture Not Showing Up in the Start Menu on Windows 10?
There are several reasons why your profile picture is not showing up in the Start menu. For starters, it could be an issue with your system settings. The Settings app contains features that are responsible for the normal functioning of your computer. When any of these are modified intentionally or accidentally, your device responds by making changes that you might not be comfortable with.
Another likely cause could be an error with your login information or a corruption issue within the system files. In addition, a momentary bug affecting your operating system can be responsible for this problem.
While this might sound unlikely, malware can also cause this issue. As you surf the Internet, it is possible to download harmful programs onto your device accidentally. These malicious codes could leave behind some issues, even after you have uninstalled them. This is because some antivirus tools only remove malware from your PC without repairing the damages it left. These include data damage, file corruption, and unintentional alterations, which may result in your profile picture not showing up.
To resolve this, you need to get an antivirus tool that will remove the malware while repairing the issues it left behind. In this guide, you will learn about the best anti-malware that will help you do this easily.
Here are some of the reasons why your user account picture is not showing up on Windows 10:
- Changes in your system settings
- Login information errors
- Corrupt system files
- Bugs affecting the operating system
- Malware
How to Fix the Profile Picture Not Showing Up on Windows 10
So, what if the profile photo is not showing up on Windows 10? What should you do? Here is a quick look at the methods you can apply to fix this error on your computer:
- Restart Your Computer and Log Into Your Account Again
- Repair Damage With an Anti-Malware Tool
- Run a System File Checker Scan
- Use the Windows Troubleshooter
- Check for Old Pictures
- Check for Operating System Updates
- Change to a Different Picture in Settings
Now, let’s take a detailed look at each of these solutions.
Solution 1: Restart Your Computer and Log Into Your Account Again
As casual as it sounds, this simple fix can rectify the issue easily:
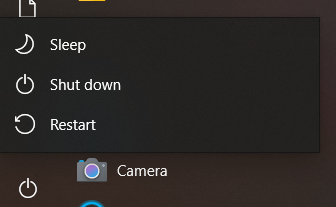
- Reboot your system: go to the Start menu, click on the Power button and select Restart.

- Check to ensure your internet connection is working properly: navigate to the system tray, locate the Internet connection icon and check your connection status.

- Now, log into your Microsoft Account all over again.


Some users have reported that doing this was helpful in resolving the error on their Windows 10 computers. However, if your profile picture still does not show up after applying this fix, move to the next method.
Solution 2: Repair Damage With an Anti-Malware Tool
When you surf the web without precautions, you may unknowingly install malware on your PC. When this happens, your system files will get corrupted, damaged, or even deleted. Even if you have an antivirus app on your computer to remove harmful programs, it may be unable to repair the damage.
In some cases, your normal antivirus can fail to detect certain malware hiding deep within your system. When this happens, you need software built specifically to locate and remove sophisticated security threats. In addition, it will repair any harm that has already occurred.
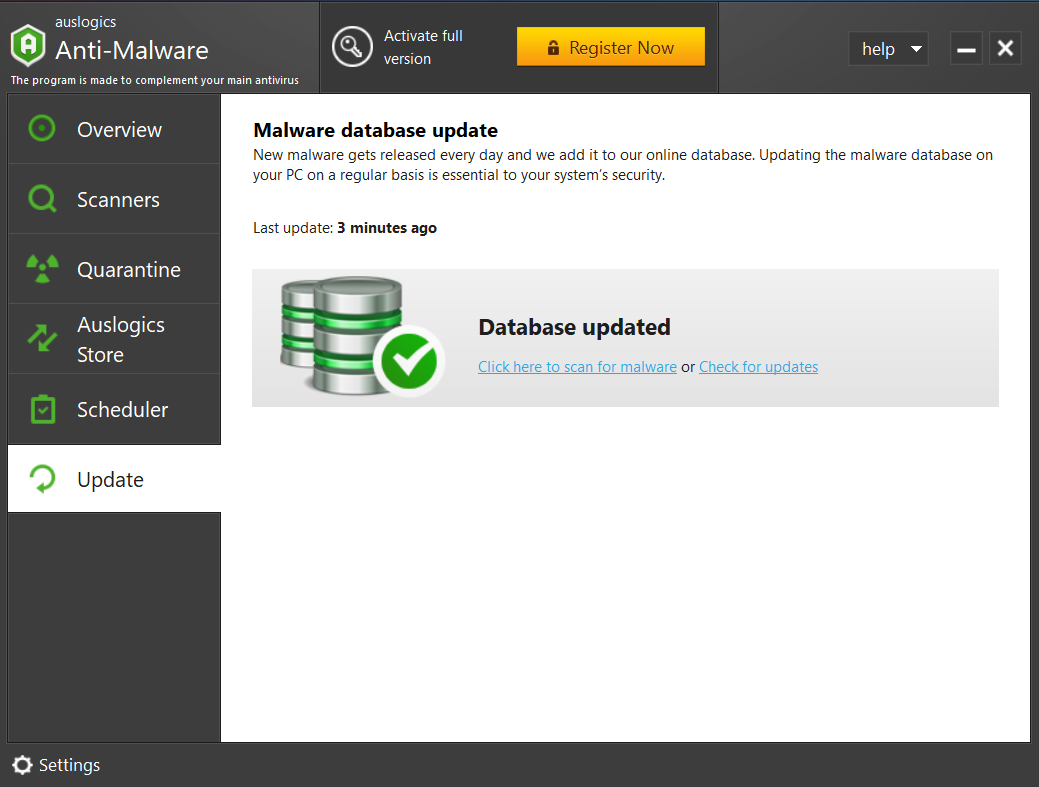
Auslogics Anti-Malware is a tool that detects threats that your regular antivirus may miss. This easy-to-use app does not conflict with Windows Defender or other antivirus solutions. It will run a scan on your computer and spot malware no matter how discreetly it operates in the background. Besides, it will analyze all auto-start items to detect any suspicious entries. Once an anomaly is found, it will give you a full report. Within a few clicks, you can resolve all security issues on your device.
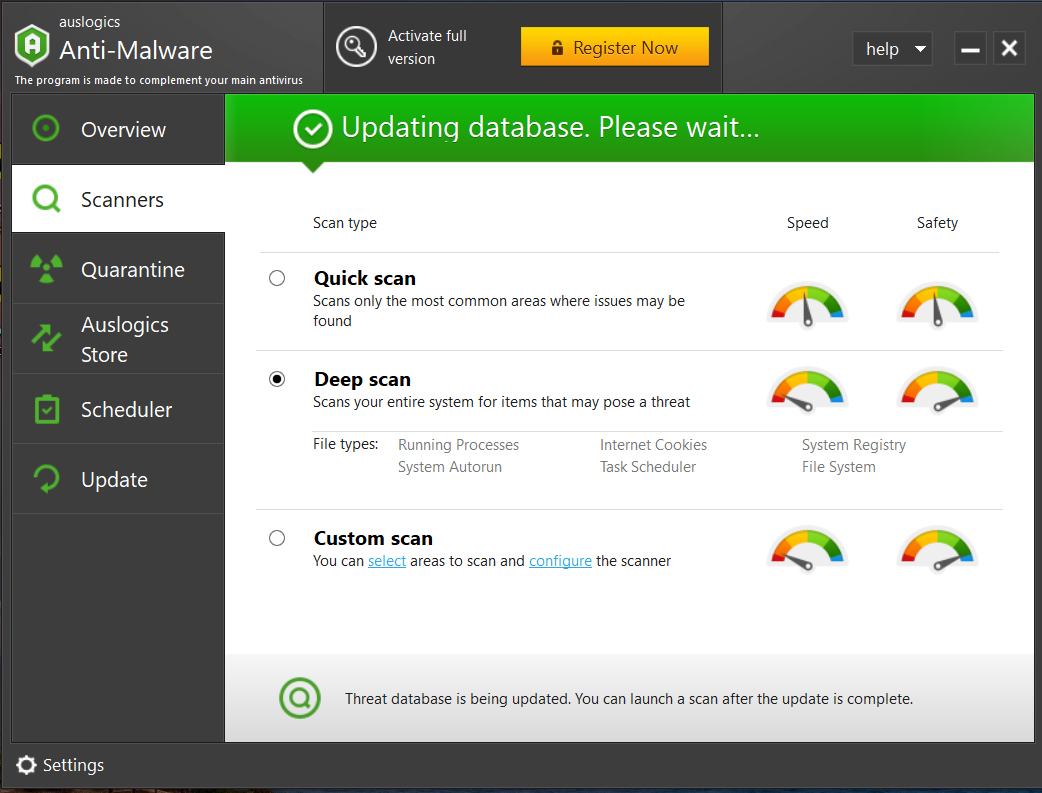
Auslogics Anti-Malware has three modes that you can use to protect your Windows 10 PC. They are as follows:
- Quick Scan: You can use this scan to analyze common and important areas where threats are most likely found.
- Deep Scan: This option scans your system entirely, including the registry entries. If any threats are lurking around, the tool will find them.
- Custom Scan: This mode allows you to choose specific files and folders that you want to scan.
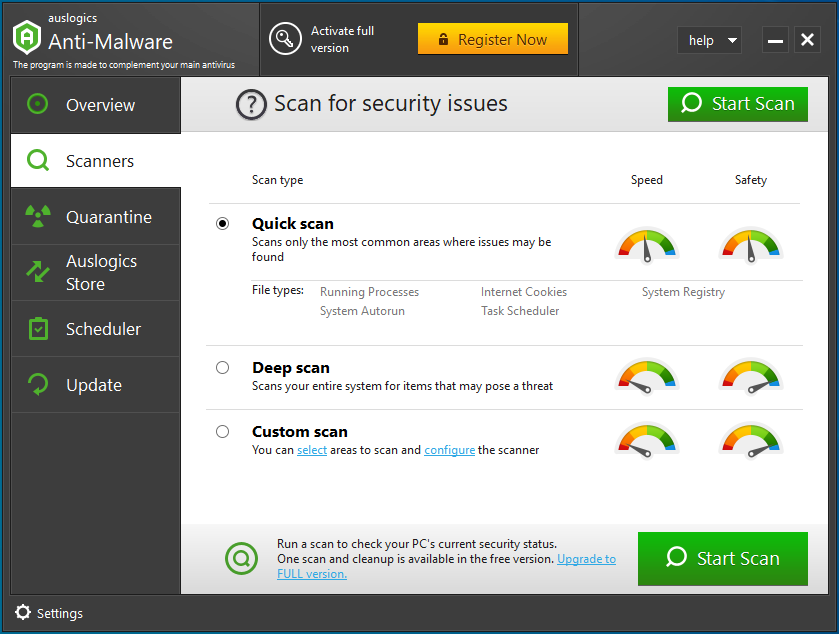
To resolve the profile picture error, we recommend using the Deep Scan mode. While it takes longer to perform a scan, it will carry out a more extensive search. This way, it will easily find and resolve any damage that could be causing issues on your device.
Auslogics Anti-Malware has been tested by manufacturers and IT professionals and is constantly updated, meaning it is effective at resolving threats that your normal antivirus may miss.
Solution 3: Run a System File Checker Scan
Another solution is to use the System File Checker to scan for and fix system file corruption. To do this, follow the steps outlined below:
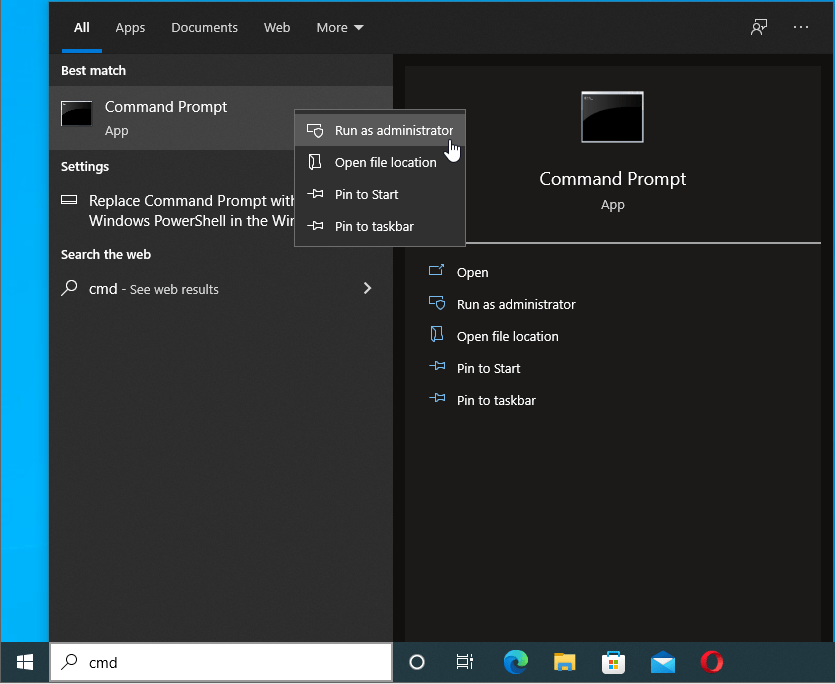
- Open the search box and type in “cmd” (no quotes). Right-click Command Prompt from the results, then select Run as Administrator.

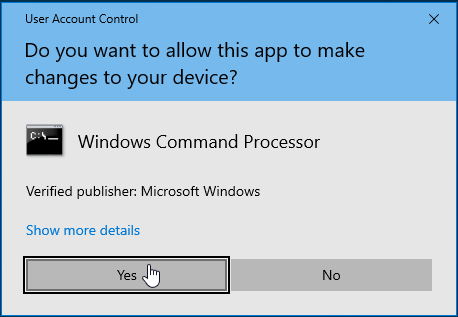
- Click Yes in the UAC window.

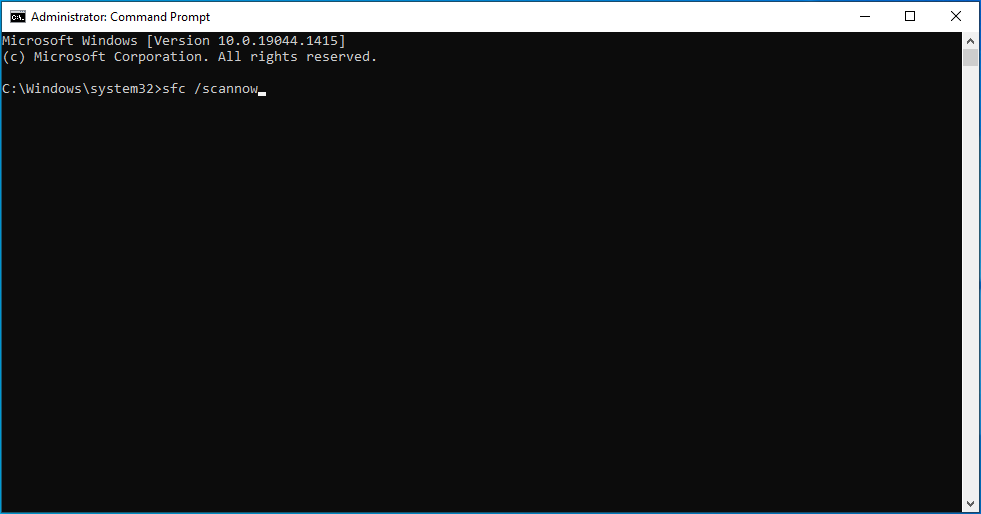
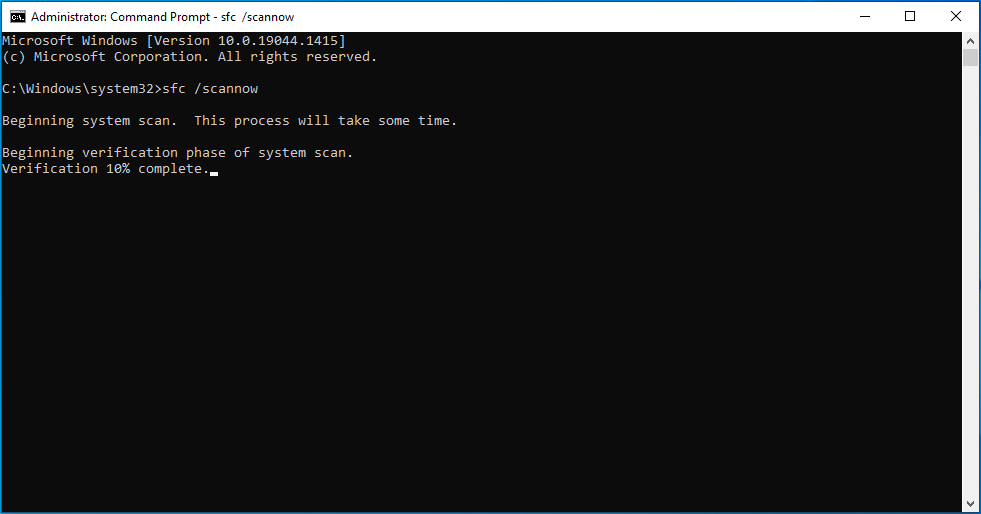
- Once the Command Prompt is up, type in the following command and press Enter: sfc/scannow.

- Wait patiently as SFC scans the system for any issues.
- Once the process is complete, follow the on-screen instructions to complete the procedure.

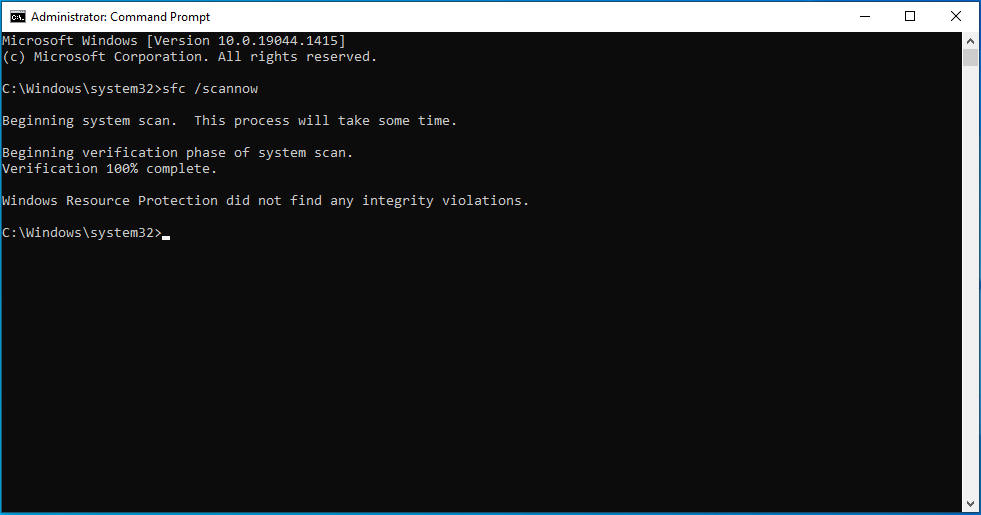
Check to see if your profile picture is now showing. If it is not, move to the next fix.
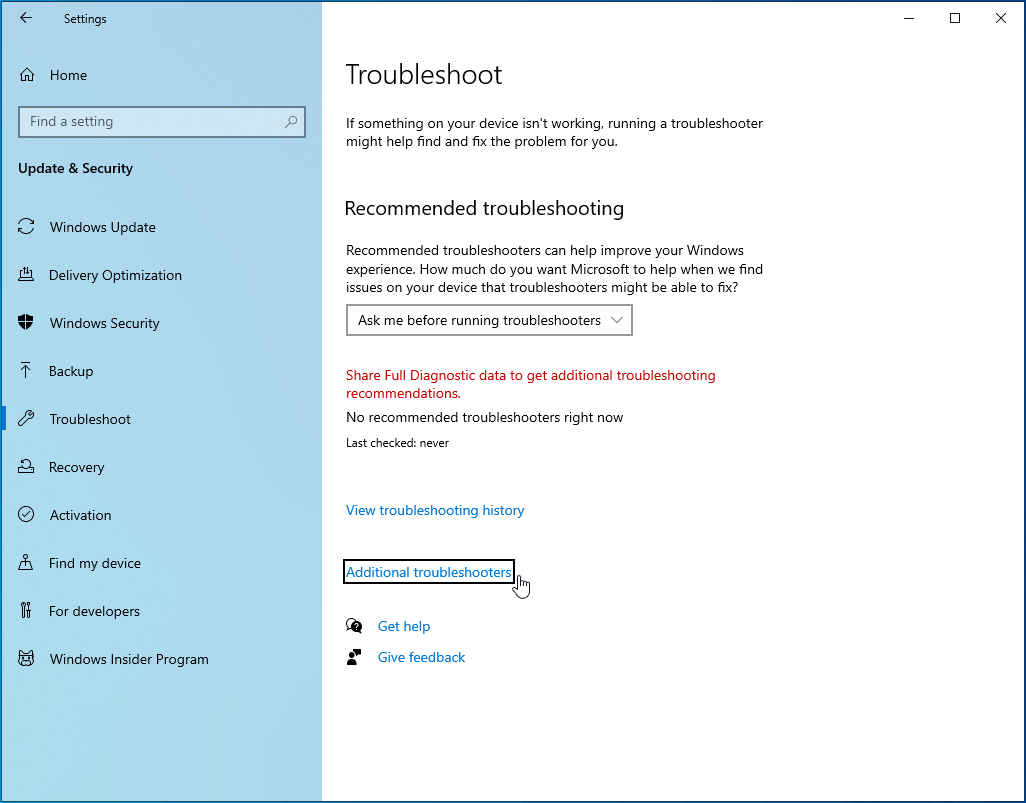
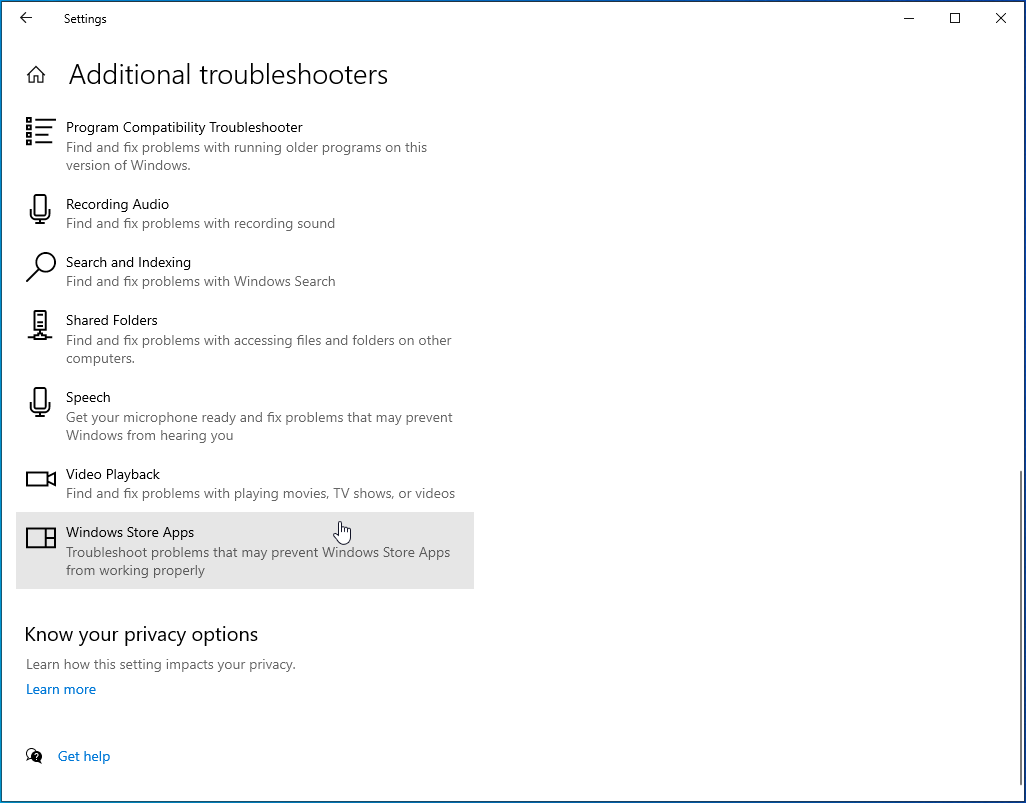
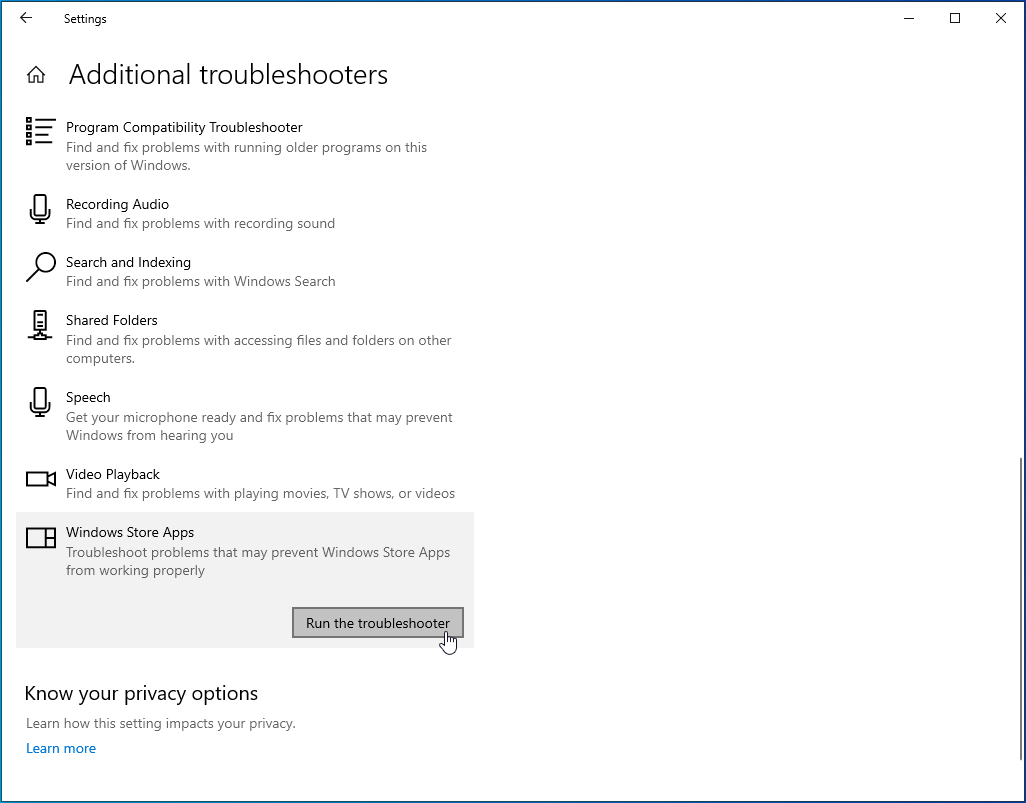
Solution 4: Use the Windows Store Apps Troubleshooter
The Windows operating system comes with the built-in Windows Store Apps Troubleshooter. To use this program, follow the steps below:
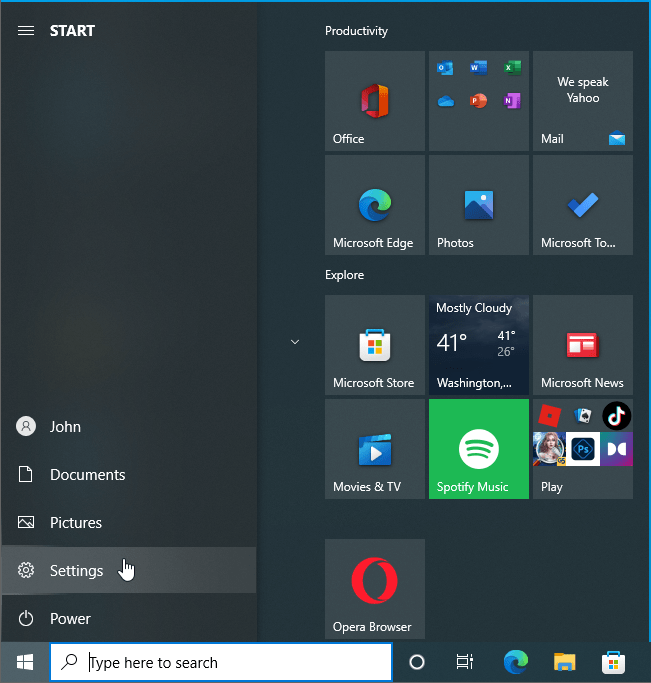
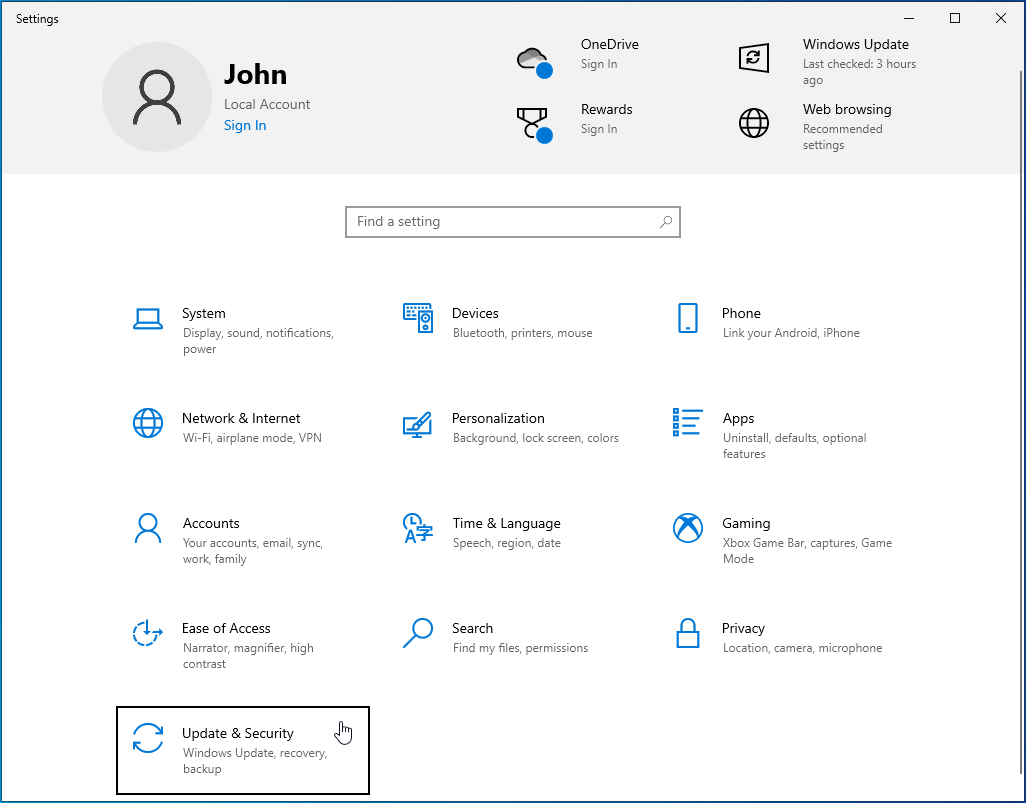
- Click the Start button and choose Settings from the options.

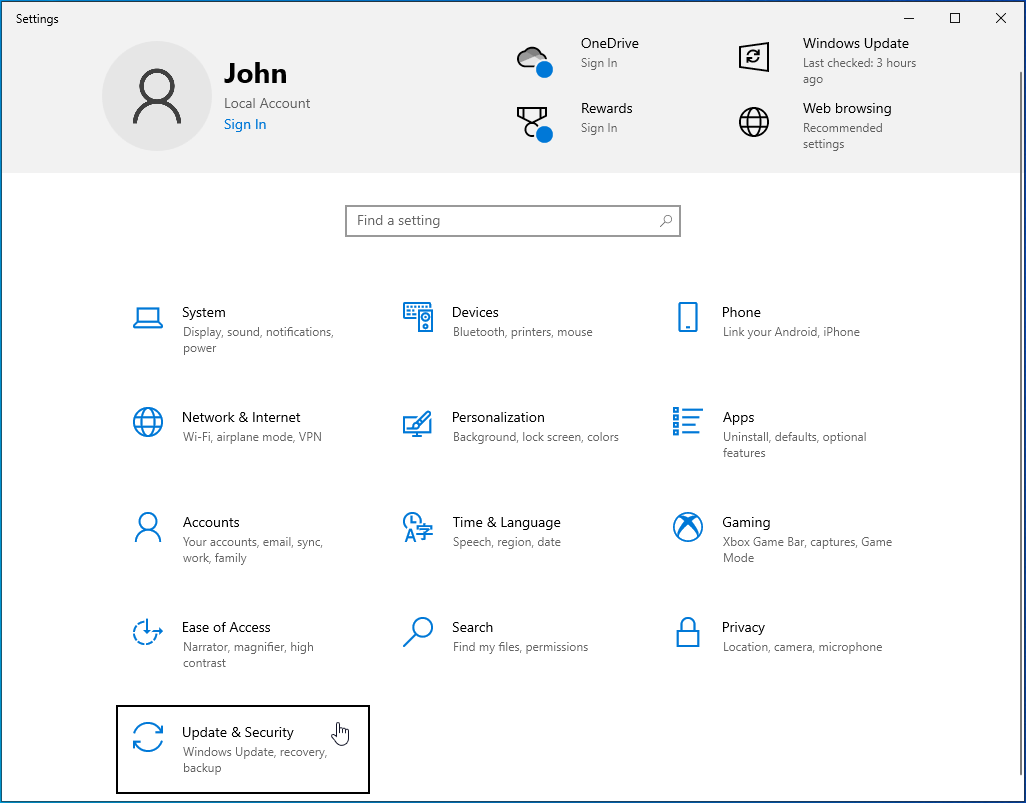
- On the new page, go to the Update & Security section.

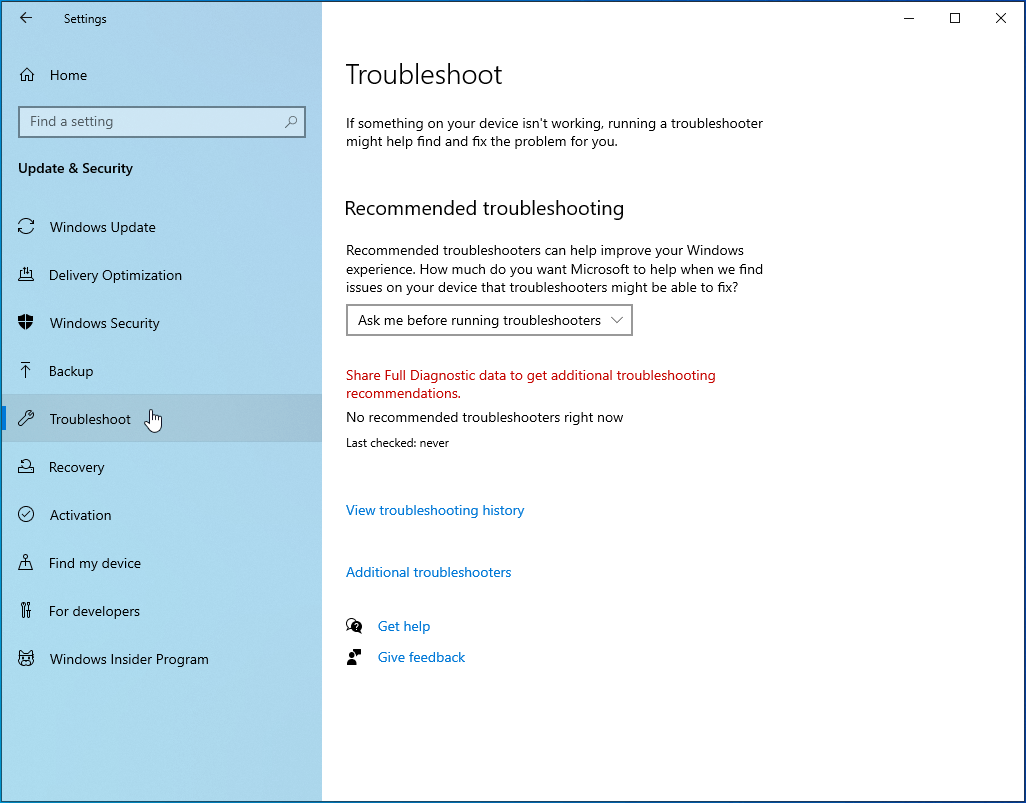
- Scroll through to locate the Troubleshoot option.
- Open this and select Additional troubleshooters.
- Click on Windows Store Apps.
- Click “Run the troubleshooter”.
- Wait while the Windows Store Apps Troubleshooter is scanning your system.

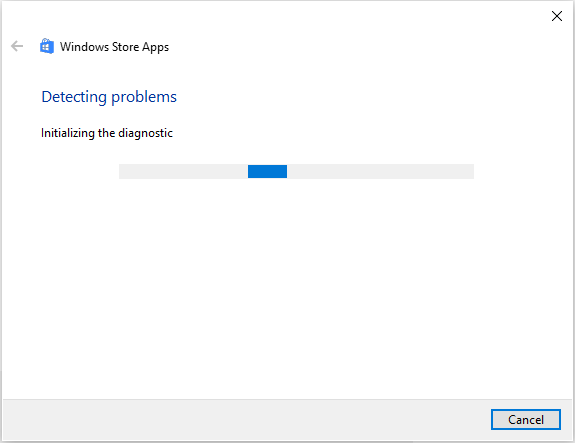
Once the process is done, check to see if you can now see your profile picture. If the problem persists at this point, move to the next solution.
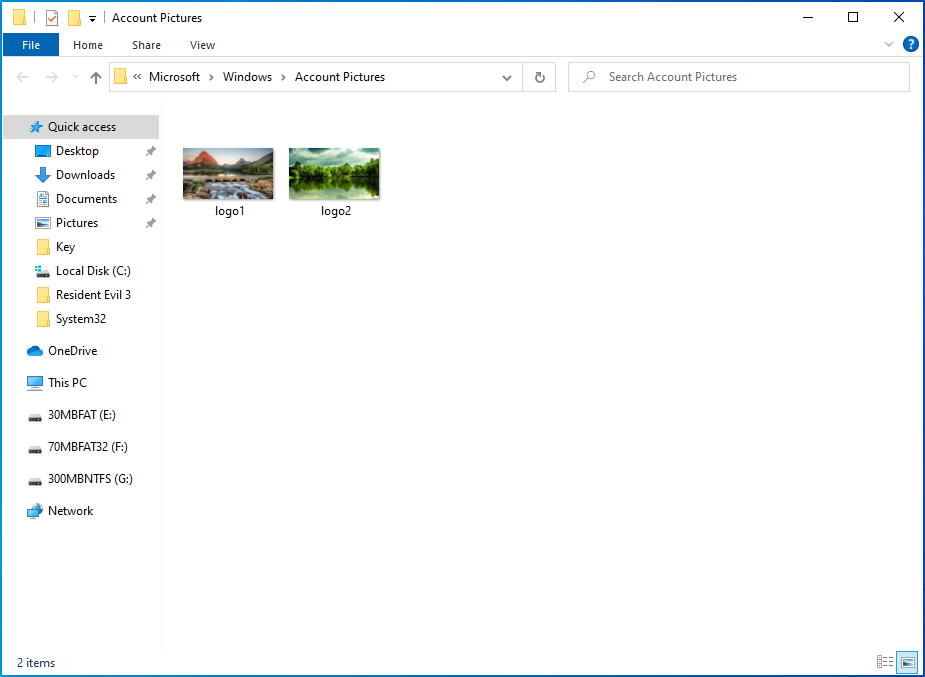
Solution 5: Check for Old Account Pictures
If you have old account pictures saved in Settings, they might interfere with any new account picture you are trying to set up. In addition, some bugs can prevent the picture from showing up. You need to follow these steps to fix it:
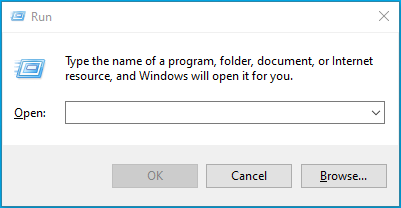
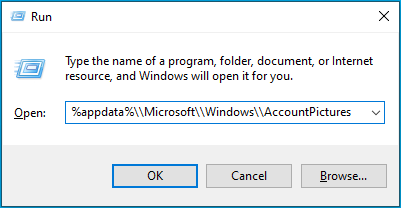
- Open the Run box by pressing the shortcut Windows key + R on your keyboard.

- Now, copy and paste this command line and hit the Enter key on your keyboard: %appdata%\\Microsoft\\Windows\\AccountPictures.
- If there are any other account pictures on the list, delete them and reboot your PC.

Your profile picture should show up now. However, if no old account pictures are listed, move to the next fix.
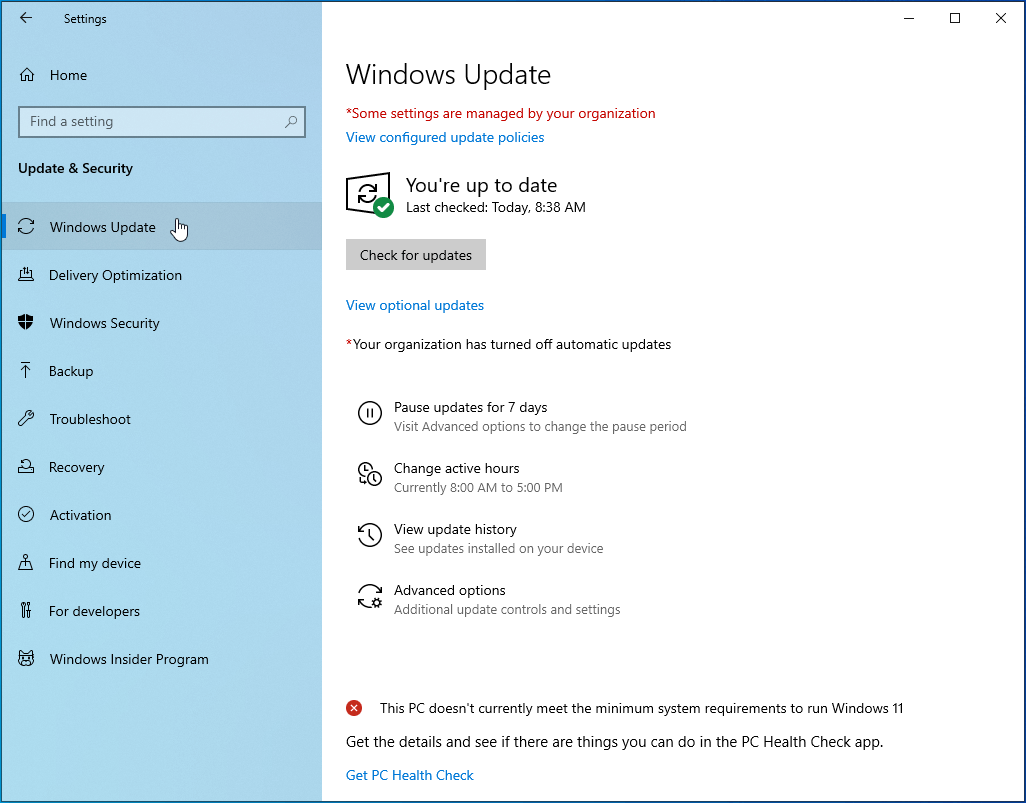
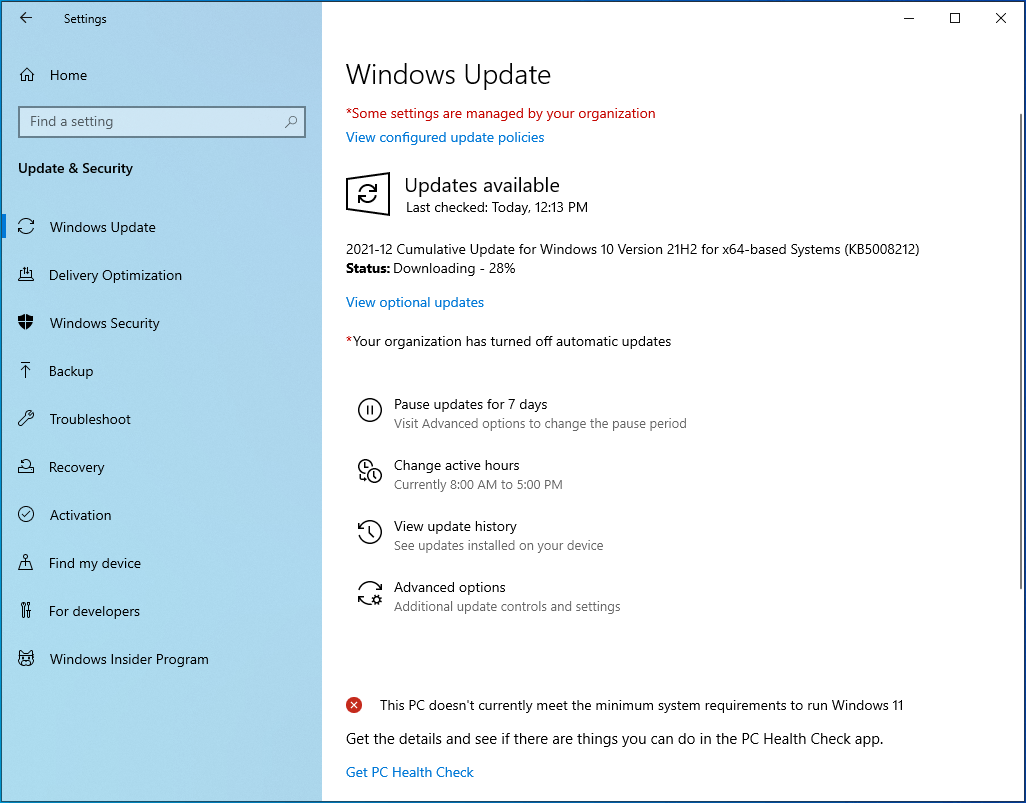
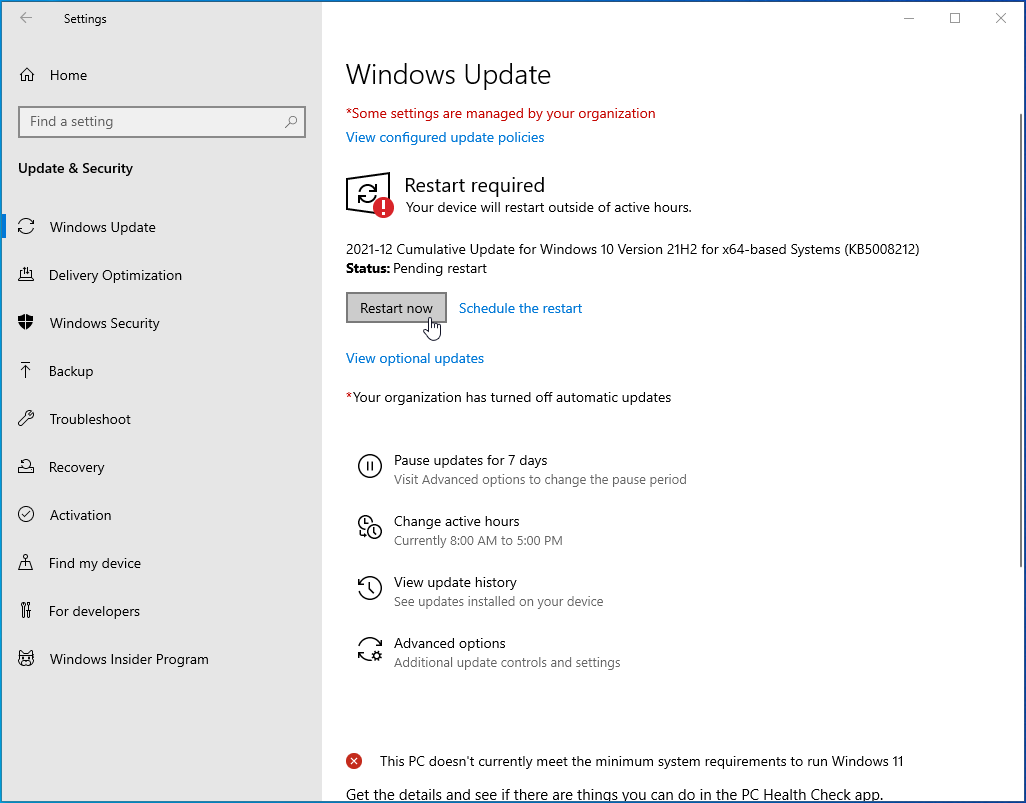
Solution 6: Check for Operating System Updates
Microsoft regularly releases updates and patches aimed at fixing bugs and improving system function. If your operating system is outdated, your computer can throw up errors. So, when you encounter certain issues, it is recommended that you check to confirm that your OS is up to date.
To apply this solution, follow these steps:
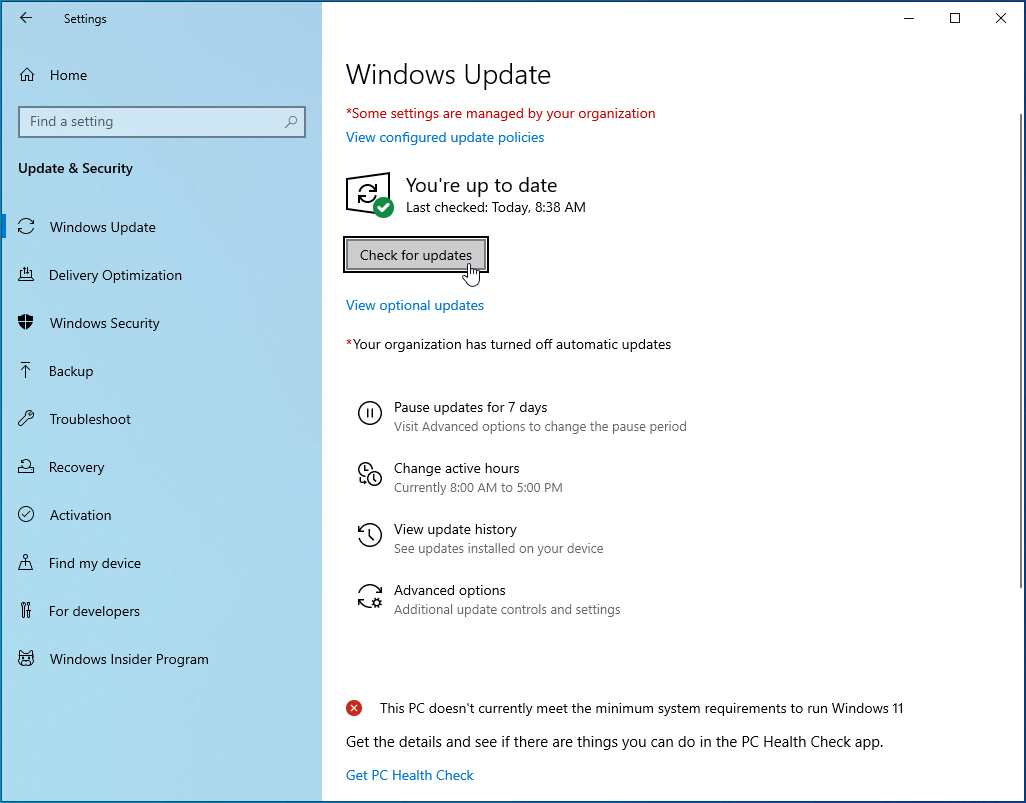
- Press the Windows Start button and click the Settings option.
- From here, select Update & Security.
- Go to the Windows Update section.
- Click on Check for Updates.
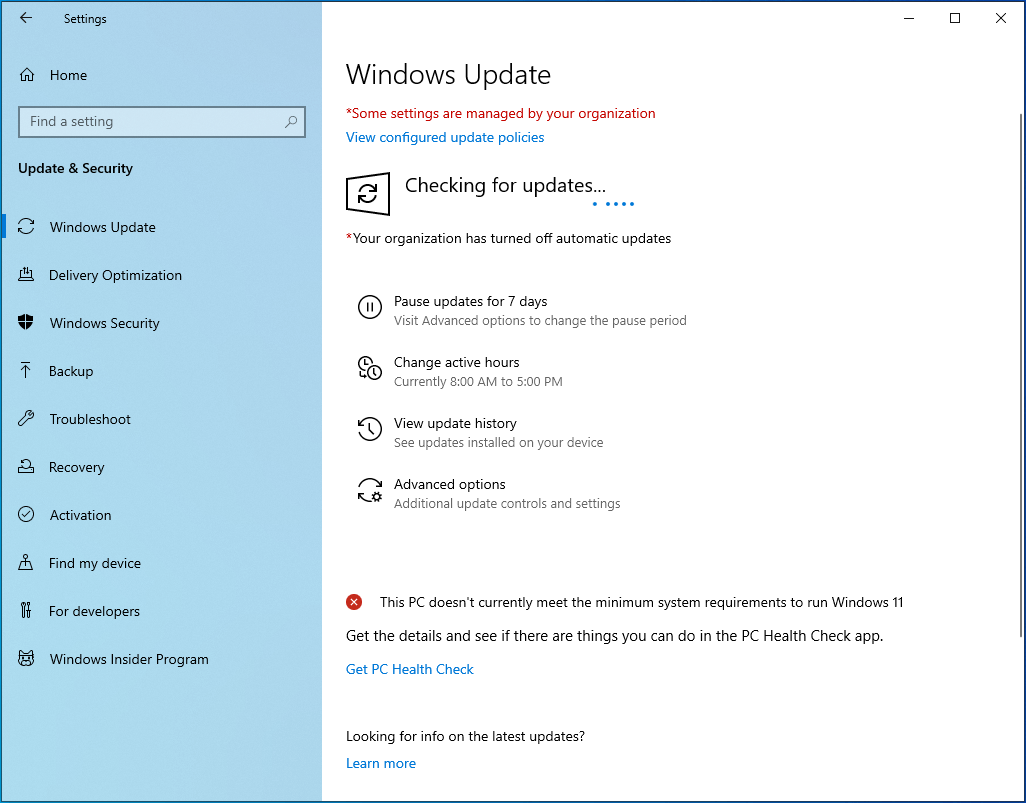
- Wait patiently while Windows performs a search.
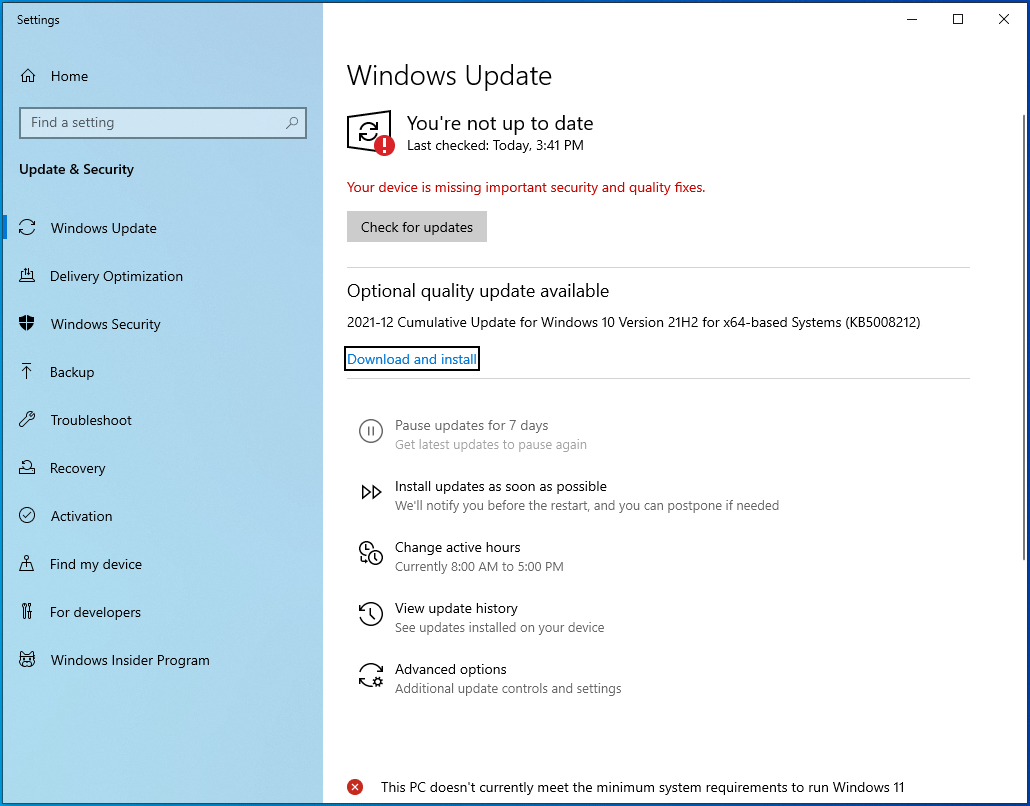
- If there are updates available, click Download and install.

- At this point, Windows will commence the installation process.
- Once it is complete, restart your computer and check to see if the problem has been resolved.

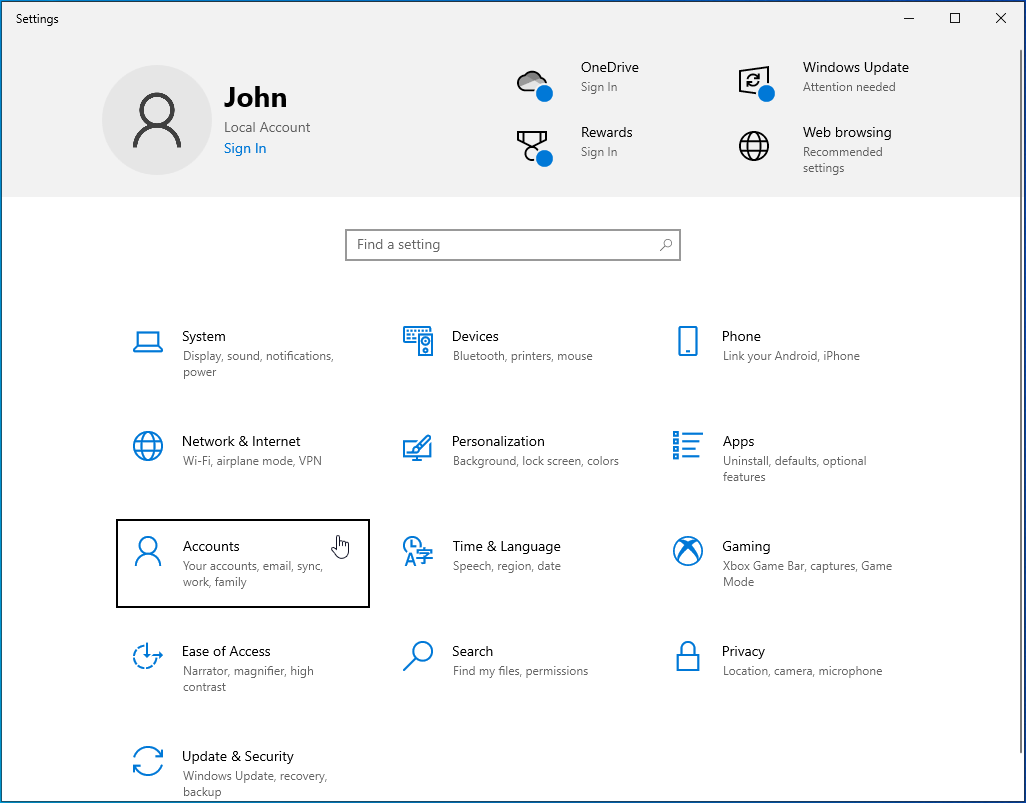
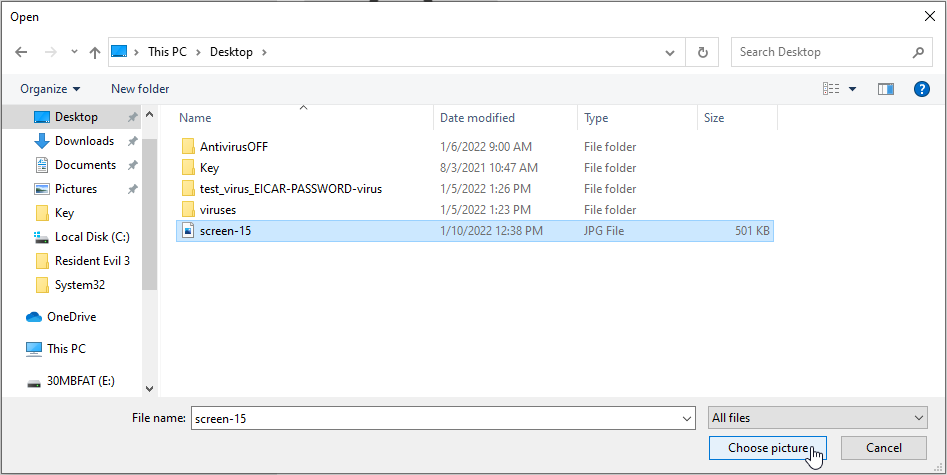
Solution 7: Change to a Different Picture in Settings
The next solution is to attempt to change to a different picture. You can do this through Settings. Here is how:
- Click on the Start icon and go to Settings.
- In the new window, click on Accounts.
- On the right pane, scroll down until you reach Create Your Picture.
- Click Browse for One.
- Locate the file that you wish to use as your profile picture and then choose the picture.

- Your new account picture will appear.

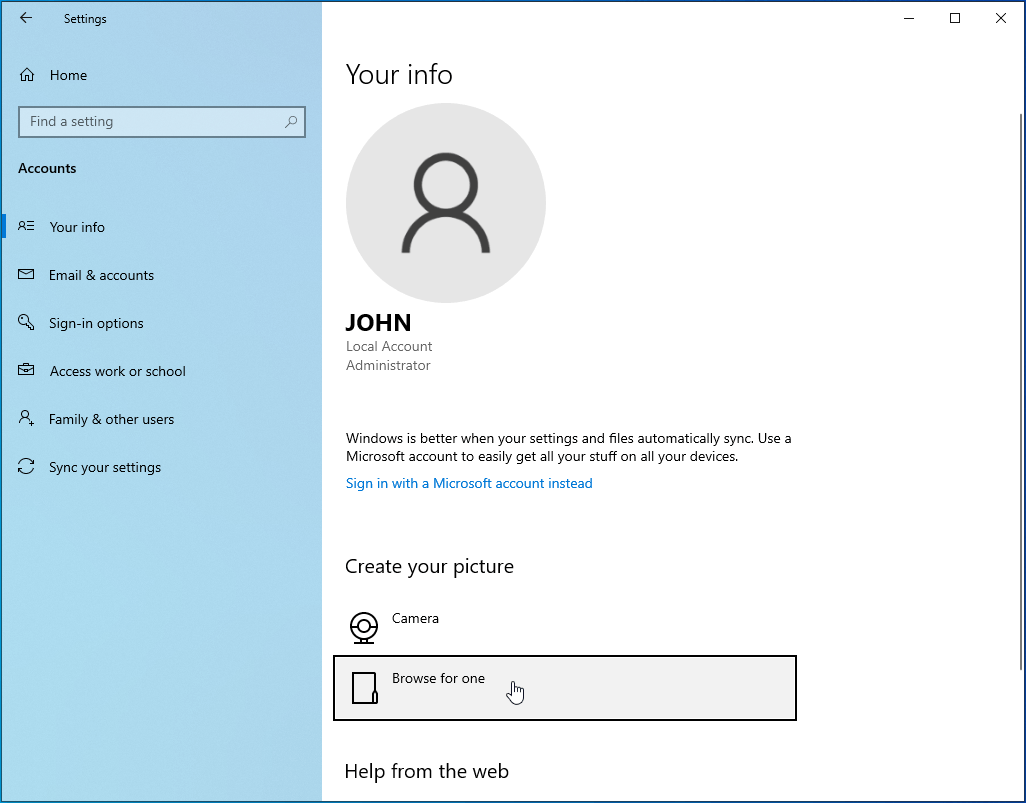
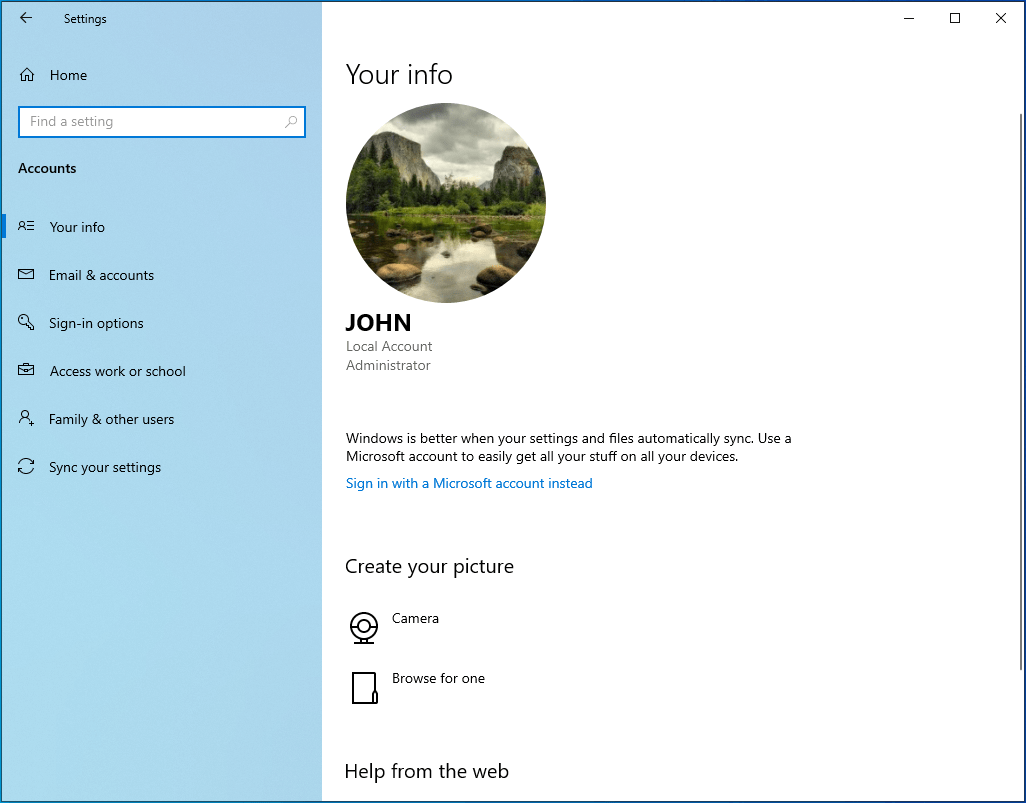
Now close the Settings window and restart your PC.
Your new picture should be showing now.
Conclusion
In this article, we described recommended solutions for fixing your profile picture not showing on Windows 10. Other users have reported that these methods helped them to resolve the error.
If you have any questions or suggestions, do not hesitate to leave them in the comments section. If you find this guide helpful, you can share it with your friends and colleagues as they might be facing the same error as well.