
Microsoft Windows is a multi-purpose computer operating system that appeals to a wide range of people. While one may have minor gripes with the interface or some settings, by and large, it gets the job done.
Microsoft doesn’t plan on relinquishing its stranglehold on the consumer PC market anytime soon. So, the company is always looking to add even more features to its flagship operating system through regular updates. It also tries to pay attention to customer concerns about the OS’s vulnerabilities. Major software flaws and security loopholes are quickly solved with patches and security updates.
Despite its eminence, Windows isn’t without its flaws. The next bug or Windows error is always a matter of when, rather than if. Indeed, the vast majority can be classified as mild annoyances that don’t impact the user’s productivity too much. However, people would still rather have an error-free OS.
Microsoft tries to stay on top of the situation and puts out updates to solve bugs while also bringing new features. Unfortunately, some updates bring more problems than they solve. Others merely add new headaches on top of existing system issues.
Even so, Windows updates are important for your PC, for reasons of security and performance. Moreover, you get to use the latest features. This, in our book, is worth the risk of the occasional post-update glitch.
This brings us to the premise of this article: The Contact app on Windows 10 becoming ms-resource:AppListName after an update. As far as update bugs go, this is one of the strangest yet.
Although the change doesn’t really affect any major functions, visually, it doesn’t feel right. The affected users claimed that the issue occurred after updating Windows to the latest version.
Looking for how to remove ms-resource:AppListName from the Windows 10 Start menu? This guide will walk you through several methods to use.
What If Ms-resource:AppListName Appears on the Start Menu?
Windows being Windows, strange things keep happening all the time. Imagine the native Contacts application being replaced by the ms-resource:AppListName. This is what several users, and presumably also yourself, have experienced after an update.
Even more strangely, the error doesn’t look the same for everyone. Some affected users explained that the Contact app’s name was replaced with ms-resource:AppListName but the app itself continued to function normally. Others claimed that both the name and the app were altered. Clicking ms-resource:AppListName doesn’t open the Contact app — it doesn’t open anything at all.
One popular theory is that ms-resource:AppListName is a holdover of the Microsoft.Windows.HolographicFirstRun application, which was removed after a recent update. However, that doesn’t explain why it replaced the Contacts app.
Whatever the case, it is not a good look to have the Start menu populated by broken names and empty icons. Ms-resource:AppListName isn’t the only weird label that replaces the name of Windows apps after an update. Affected users might also see the following names in their Start menu:
ms-resource:AppDisplayName
ms-resource:AppFriendlyName
ms-resource:AppName
ms-resource:AppName/Text
ms-resource:ProductName
ms-resource:SecondaryTitleDescription
ms-resource:StoreTitle, and more.
Most people use the Start menu as a shortcut to open frequently used apps, therefore, seeing a bunch of strange names instead can be very frustrating. The good news is that there are several ways to get rid of ms-resource:AppListName and similar empty names.
Before you go ahead with the removal, we recommend you perform a full system scan with a Microsoft-recommended security tool like Auslogics Anti-Malware.
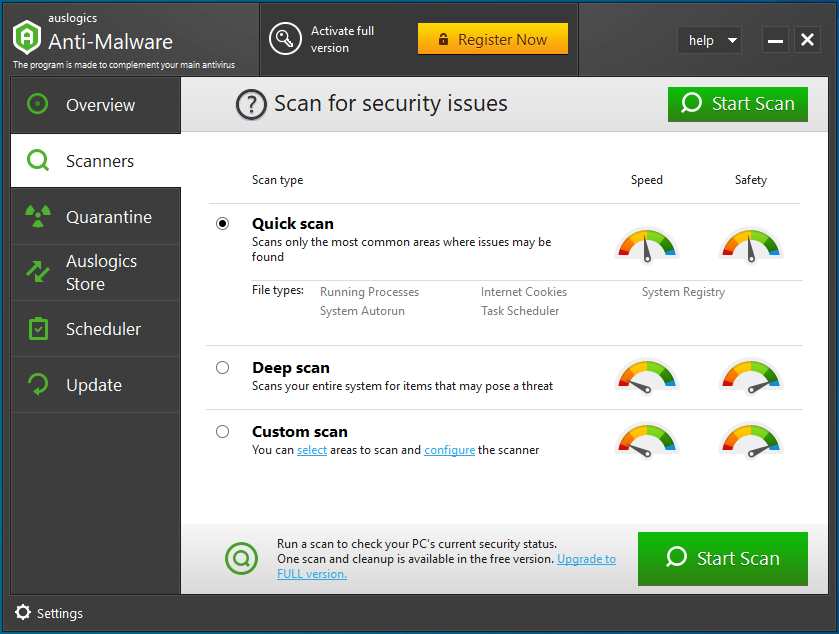
It will detect malware and potentially unwanted applications that could be responsible for your Windows issues. Auslogics Anti-Malware doesn’t burden your CPU, unlike other AV tools. What’s more, it can operate in conjunction with your primary security suite.
How to Fix the Start Menu Broken Item how to fix start menu broken item Ms-resource:AppListName
Here are five ways to remove ms-resource:AppListName and similar empty names from the Start menu. We will explain each method, in turn:
- Scan the PC with the Windows Store Apps troubleshooter
- Scan the PC with antivirus software
- Manually delete the empty name
- Restart Windows Update components
- Resolve the issue with PowerShell commands
Fix 1. Scan the PC with the Windows Store Apps Troubleshooter
The Contacts app is a native Windows application. This means that you can update it through the app store on Windows. In other words, the Contacts app is a Microsoft Store app.
For this reason, you can troubleshoot the app with the Windows Store Apps troubleshooter. The tool is a great and quick way to resolve UWP app issues. If the ms-resource:AppListName bug is caused by underlying Microsoft Store errors, the troubleshooter can help to resolve it.
Here’s how to run the troubleshooter:
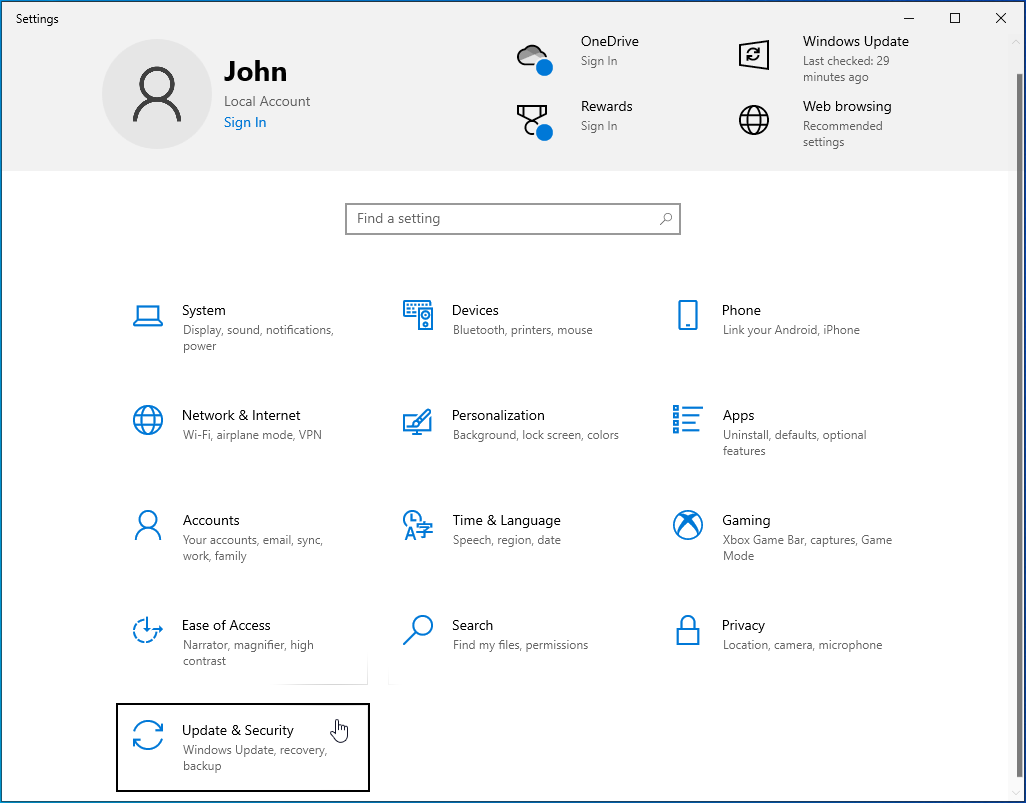
- Execute the Win key + I command on your keyboard to launch the Settings app.

- Select Update & Security.
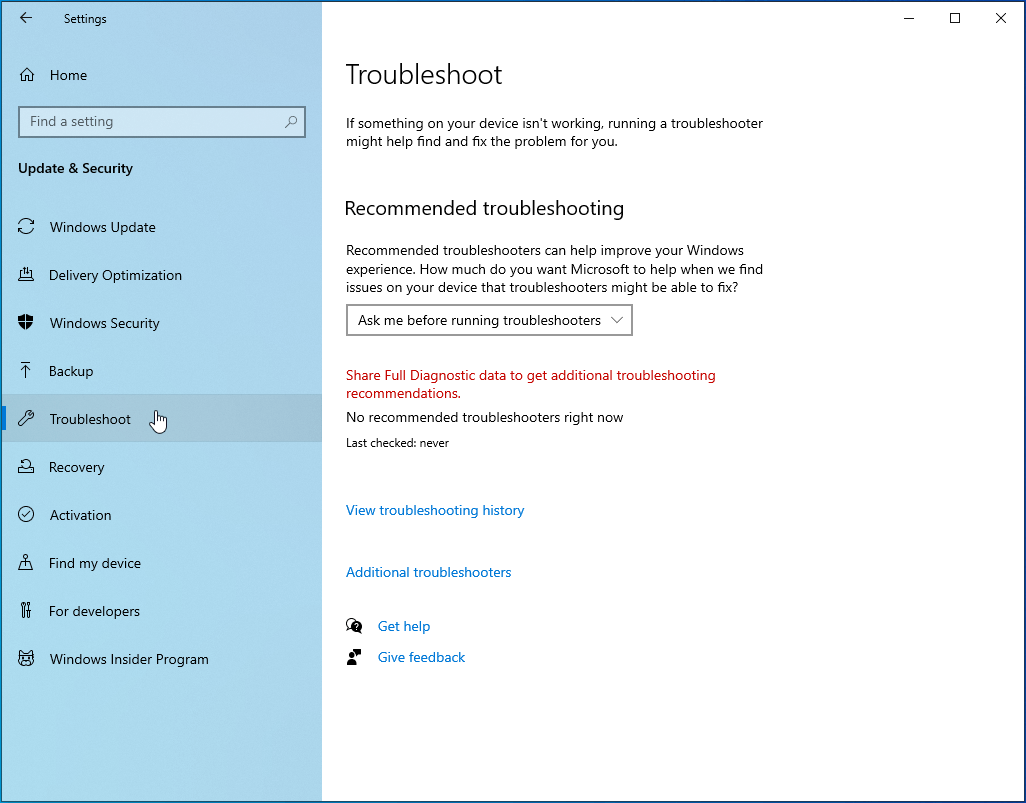
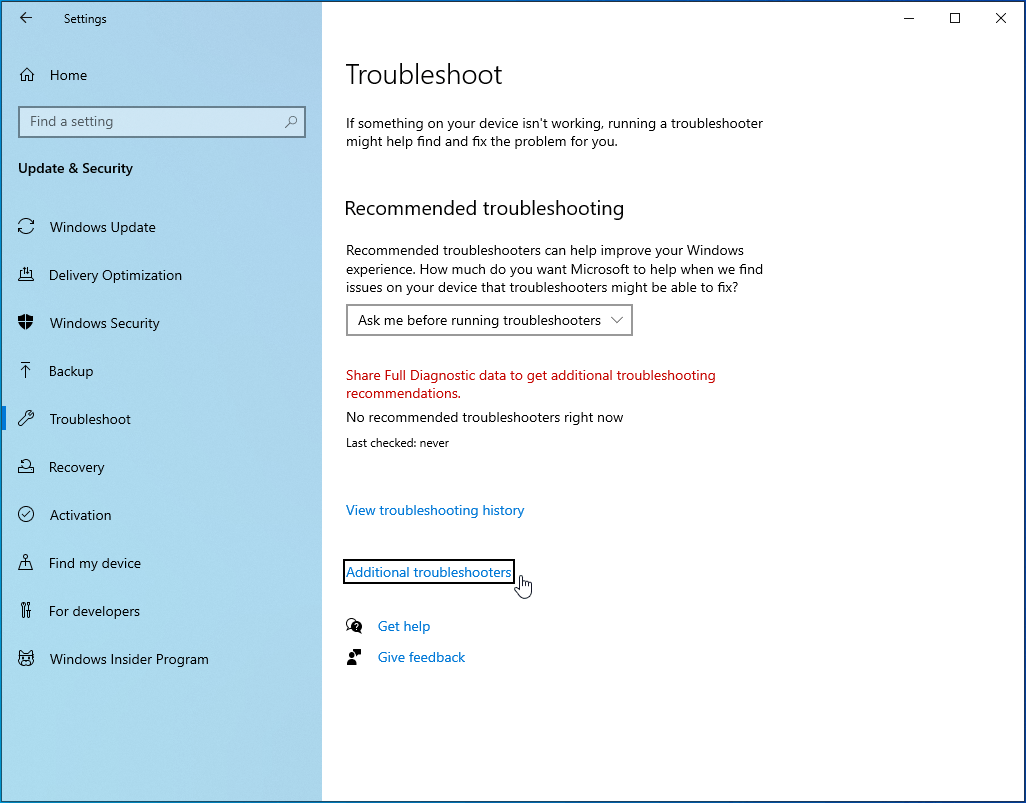
- On the next screen, select the Troubleshoot tab on the left.
- On the Troubleshoot screen, click the “Additional troubleshooters” link.
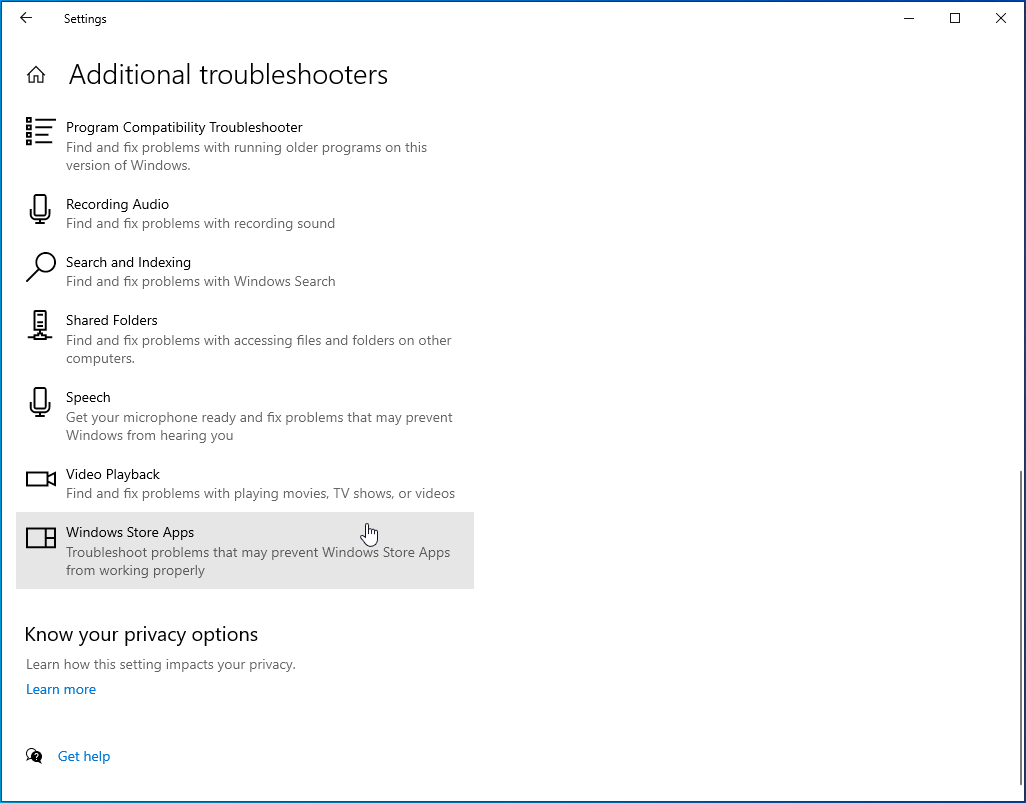
- On the Additional Troubleshooters screen, select Windows Store Apps.
- Click the “Run the troubleshooter” button to launch the tool.
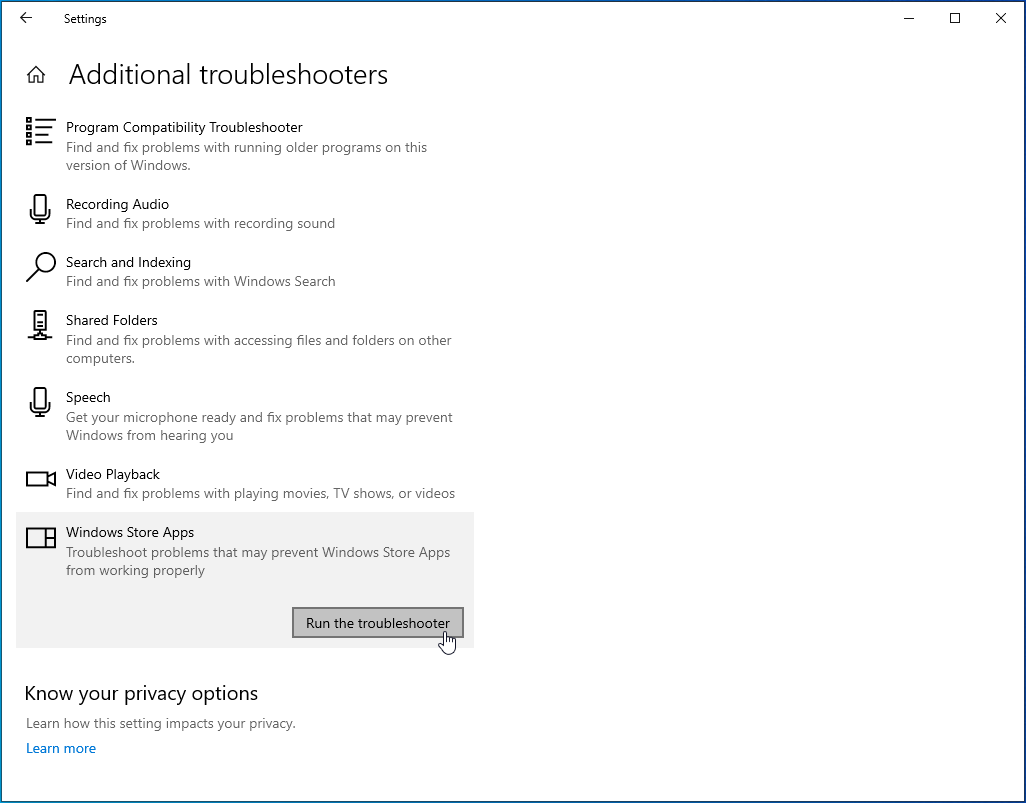
Follow the on-screen instructions to resolve your issue.
Fix 2. Scan the PC With Antivirus Software
Several users claimed that scanning with an antivirus tool resolved the error. They reported that the ms-resource:AppListName got removed after completing the scan. This suggests that malware infection might be the reason why Contacts and other Windows apps got their names changed.
Earlier, we suggested using Auslogics Anti-Malware to run a full PC scan. The tool has been vetted by Microsoft and is very suitable to use. However, if you’d rather stick with the native Windows Defender, you can use Offline Scan to run a comprehensive analysis.
- Click the arrow on the right of your taskbar to show hidden service icons.

- Click the Windows Defender icon.

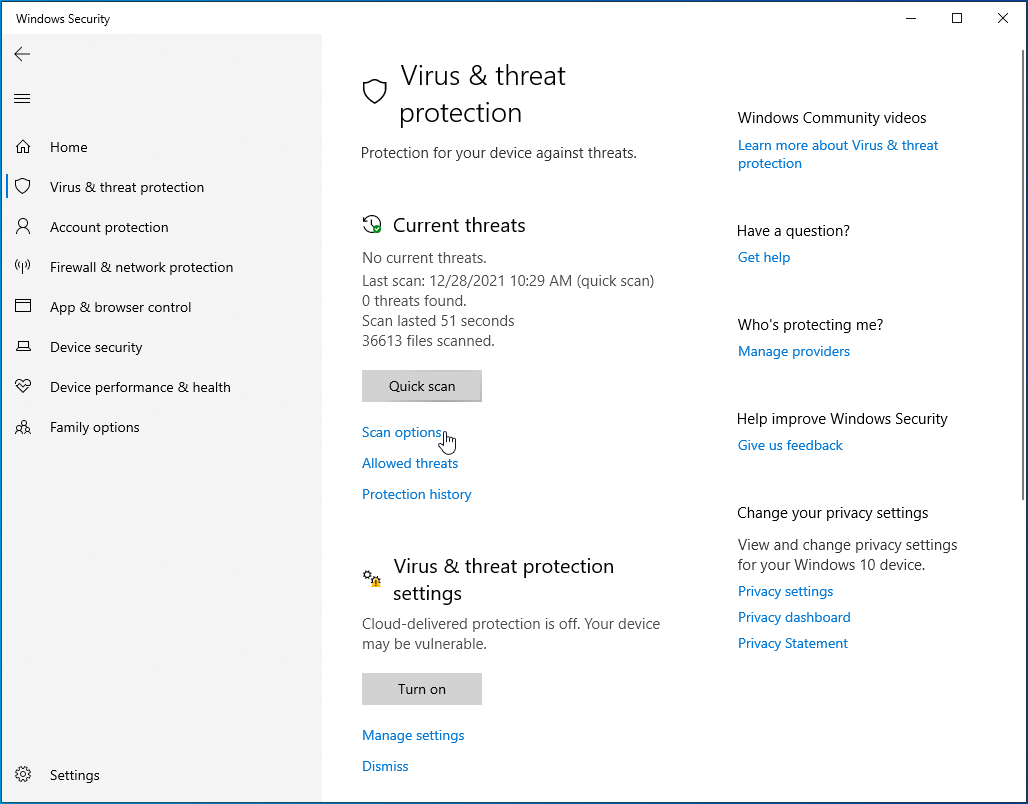
- On the Windows Security screen, select Virus & Threat Protection.

- On the next screen, click Scan Options.
- Select Microsoft Defender Offline Scan on the Scan Options screen and then click the Scan Now button to commence the scan.


Make sure to save your current work before you click the Scan Now button. Once you click the button, Windows will immediately reboot the system.
Fix 3. Manually Delete the Empty Name
Be it ms-resource:AppListName or another empty name, you can remove it manually. If the empty name is visible in Start menu, it is also removable.
The process won’t take more than a few clicks. Here’s how:
- Open Run. Either right-click the Start menu icon and select Run or press the Windows and R keys at the same time to launch the tool.

- Type or paste “%AppData%” (no quotes) into the box.
- Click OK to open the path below in File Explorer:
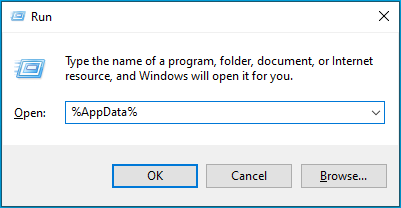
C\Users\Username\AppData\Roaming
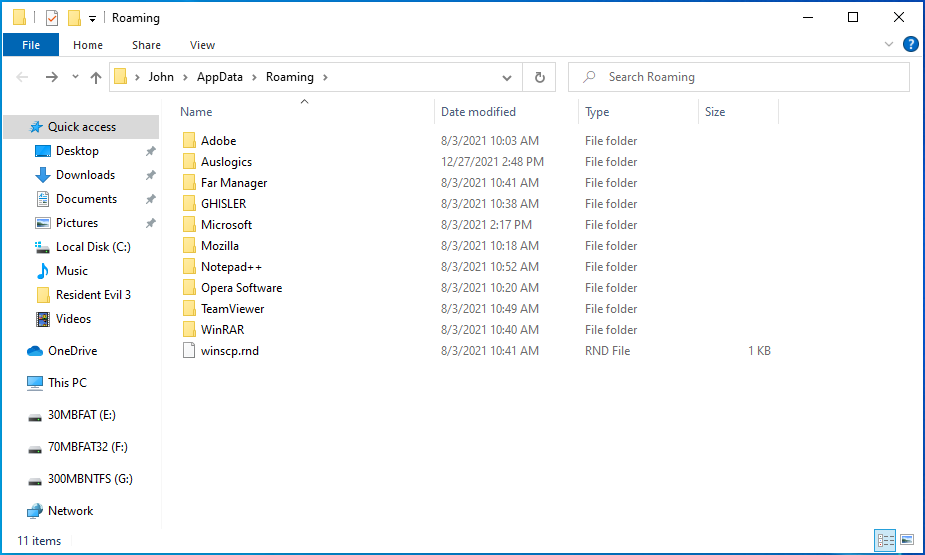
In the Roaming folder, navigate to Microsoft > Windows > Start Menu > Programs.
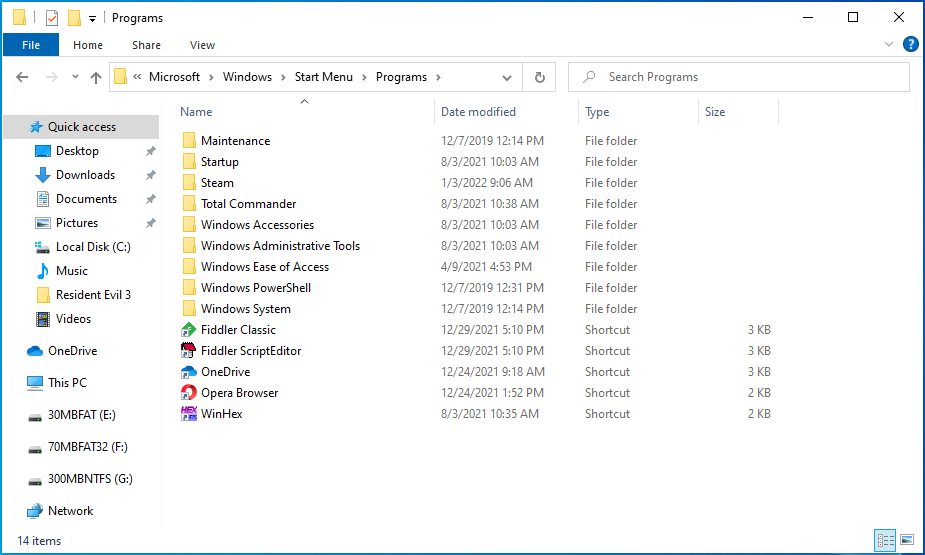
Look for ms-resource:AppListName or another empty name in the Programs folder. Right-click it and select Delete.
If this doesn’t resolve the issue or if ms-resource:AppListName doesn’t appear in the Programs folder, try the next solution.
Fix 4. Reset Windows Update and Related Components
Since the issue started after updating your operating system, it follows that an underlying Windows Update bug could be responsible for the weird renaming of the applications.
Resetting the Windows Update service and related components could be the solution you’ve been looking for. Follow the procedure below to completely reset Windows Update.
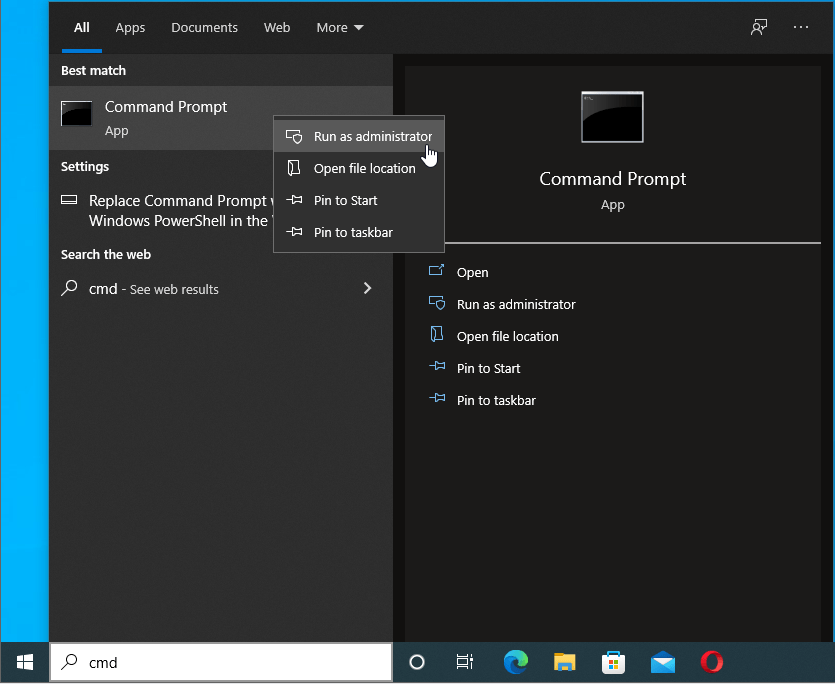
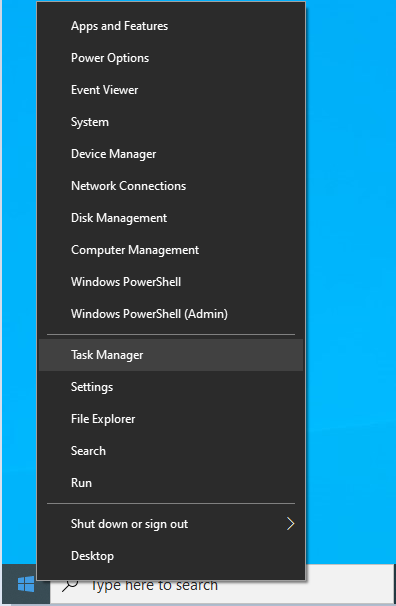
First, open a Command Prompt window with admin rights. To do this, right-click the Start menu and select Command Prompt (Admin). Alternatively, type “cmd” (no quotes) in the Start menu and select “Run as administrator” under Command Prompt in the search results.
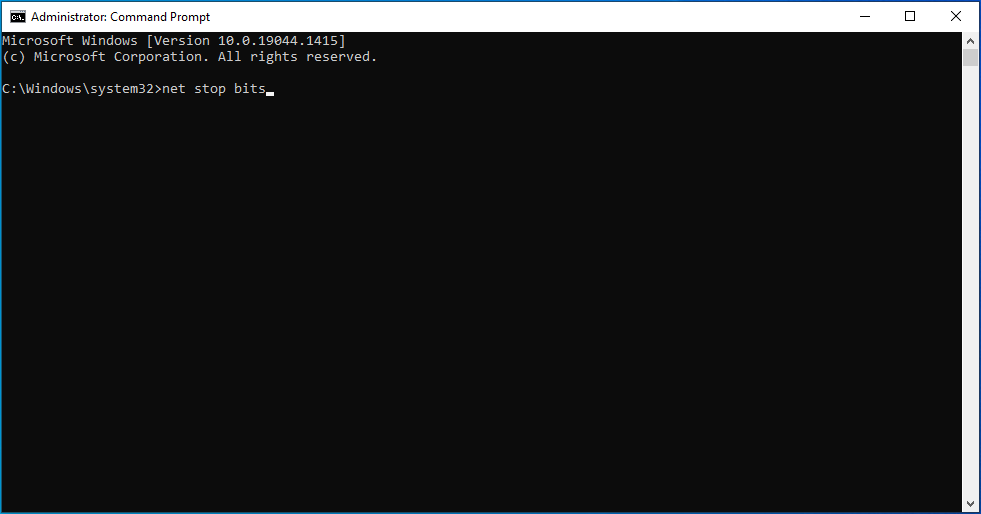
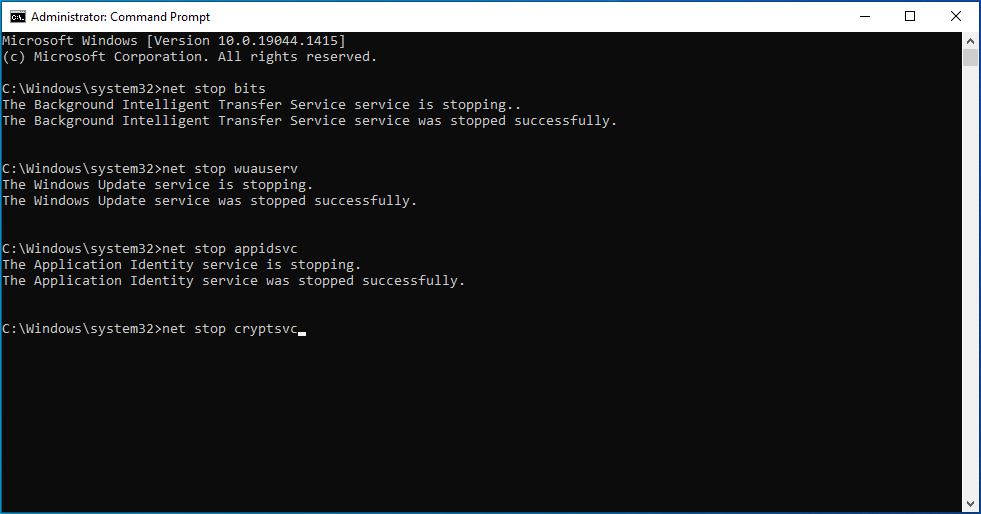
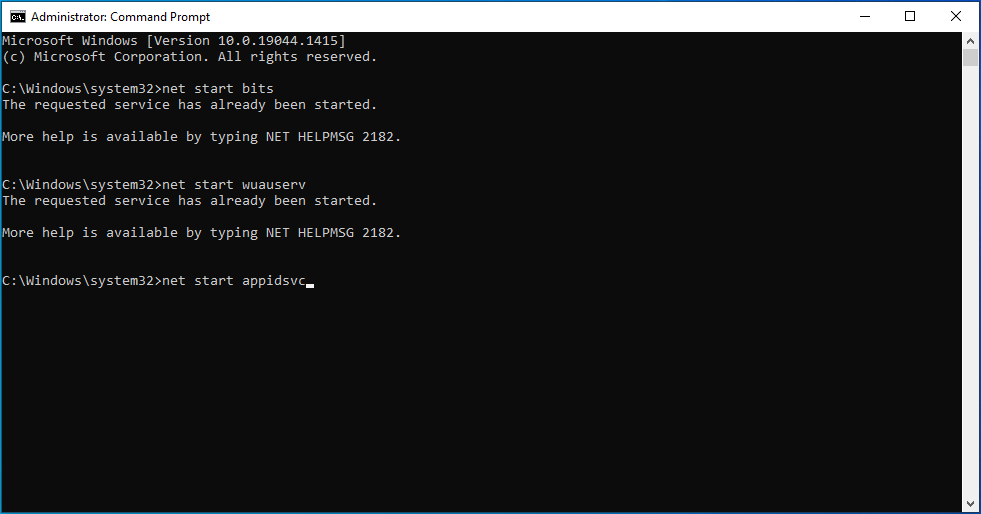
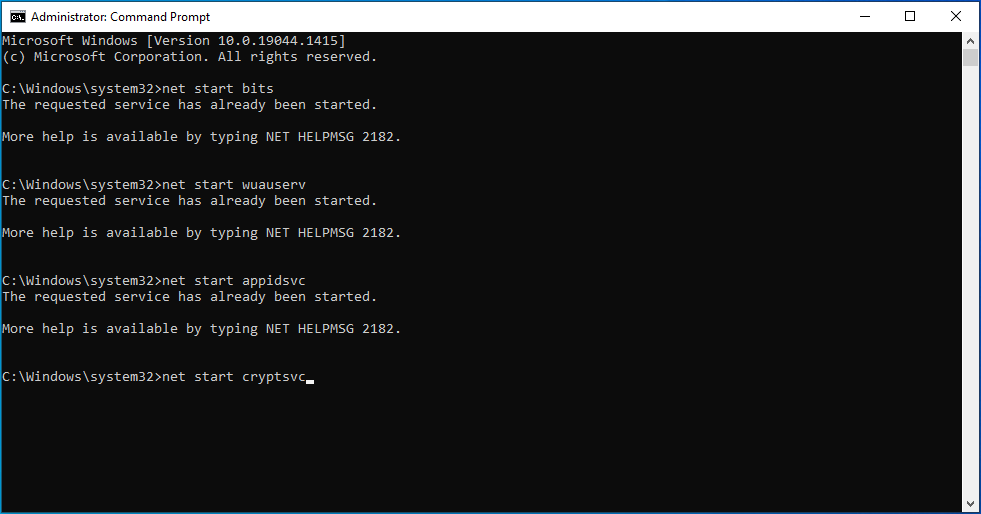
Next, stop the Windows Update Service, Background Intelligent Transfer Service, Application Identity Service, and Cryptographic Service by running the commands below, one after the other. To run a command, type or paste it and then click Enter:
net stop bits
net stop wuauserv

net stop appidsvc

net stop cryptsvc
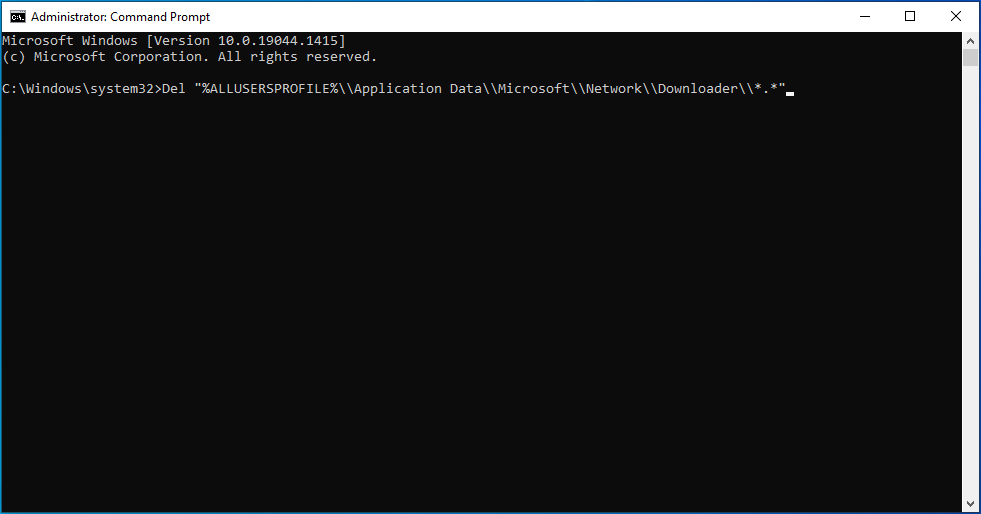
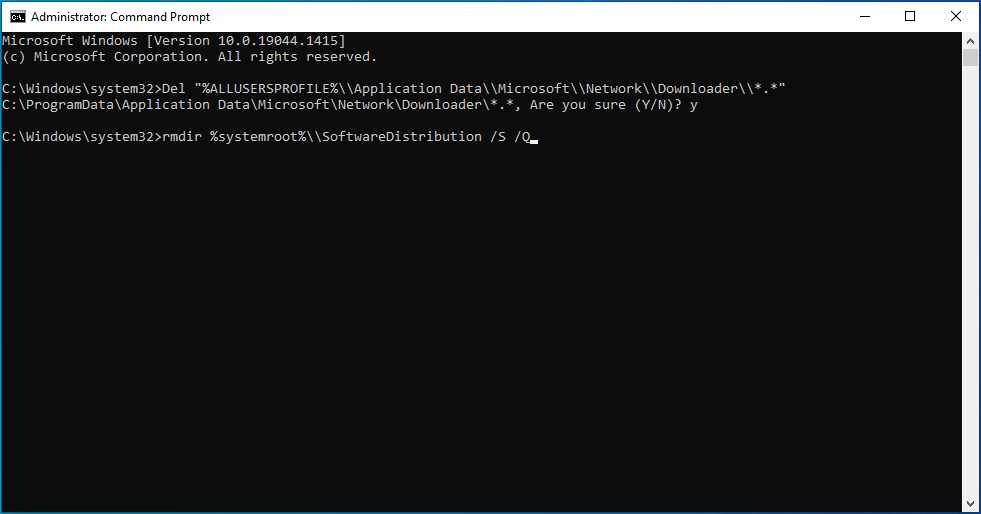
Next, delete the Windows Update download folder and rename both the software distribution and catroot2 folders. Run the three commands below:
Del “%ALLUSERSPROFILE%\\Application Data\\Microsoft\\Network\\Downloader\\*.*”
rmdir %systemroot%\\SoftwareDistribution /S /Q
rmdir %systemroot%\\system32\\catroot2 /S /Q

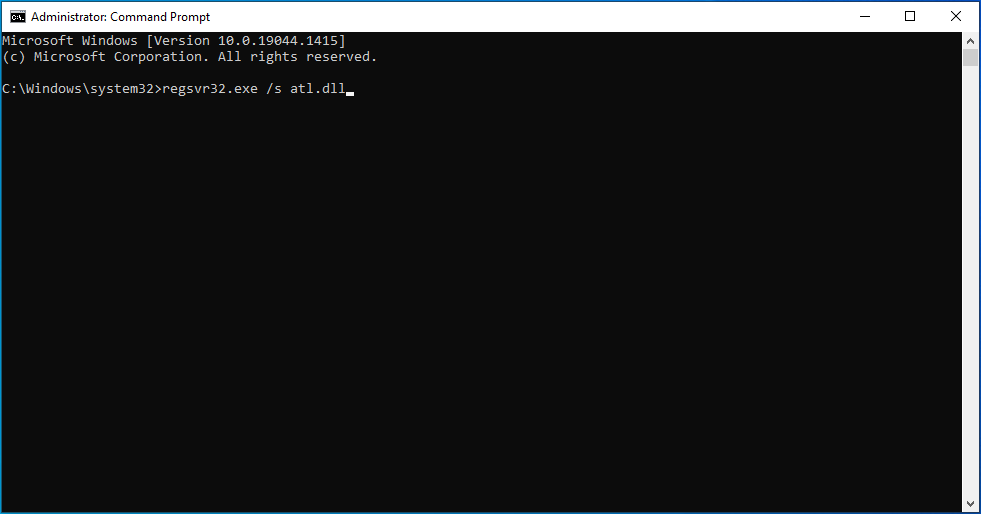
Next, register some relevant DLL files by running the following commands:
regsvr32.exe /s atl.dll
regsvr32.exe /s urlmon.dll
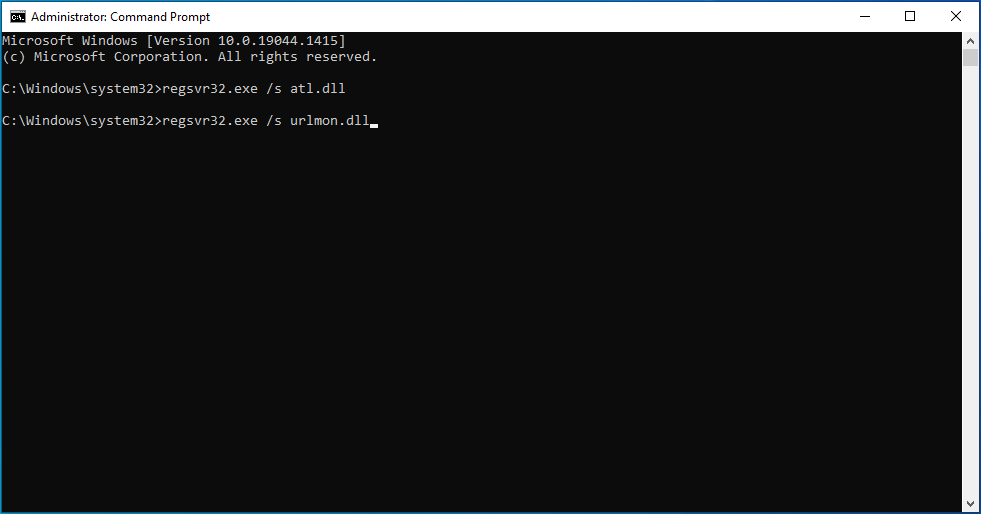
regsvr32.exe /s mshtml.dll

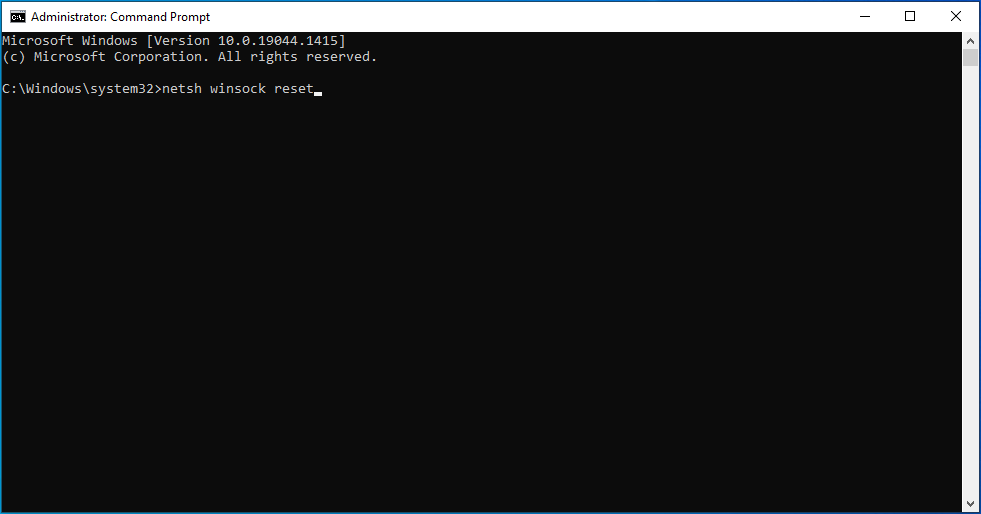
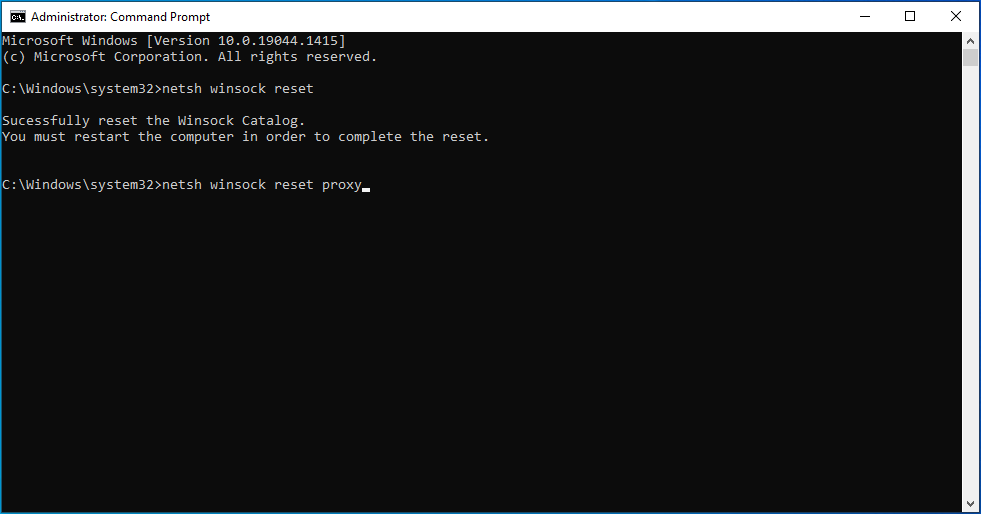
To erase any network issues possibly affecting Windows Update, run the following commands to reset Winsock:
netsh winsock reset
netsh winsock reset proxy
Finally, restart the four services you stopped at the beginning by running the commands below:
net start bits

net start wuauserv

net start appidsvc
net start cryptsvc
Reboot the PC and check whether you’re still getting any weird renaming errors.
Fix 5. Resolve the Issue with PowerShell Commands
If the issue is caused by the remnants of the Microsoft.Windows.HolographicFirstRun app after it has been removed, some of the methods above might not work. Fortunately, we can still use PowerShell to completely remove the Microsoft.Windows.HolographicFirstRun package from the computer.
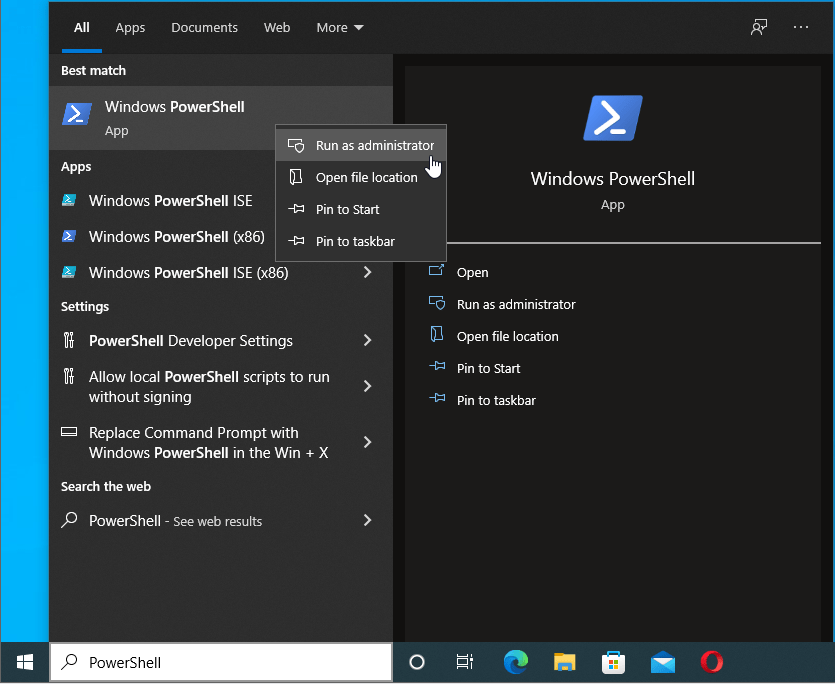
Open an elevated PowerShell window. Type “PowerShell” (no quotes) in Start and select “Run as administrator” under PowerShell in the search results.
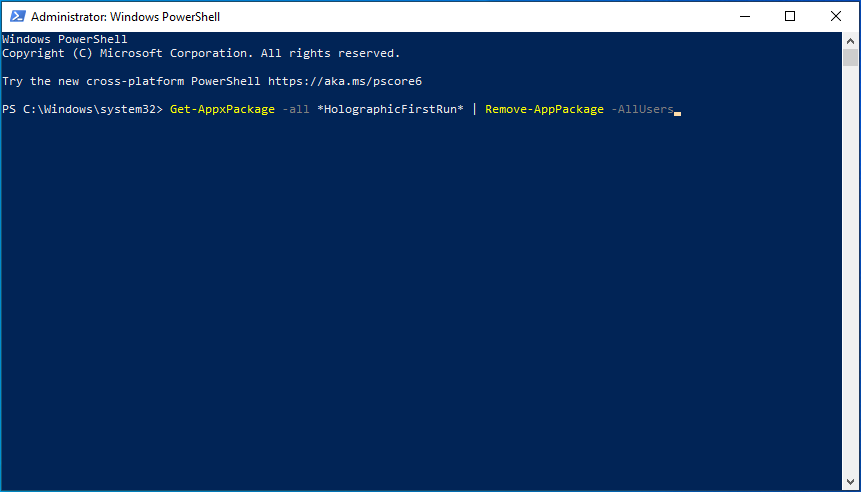
Next, run this command in the PowerShell window to completely remove the problematic package:
Get-AppxPackage -all *HolographicFirstRun* | Remove-AppPackage -AllUsers
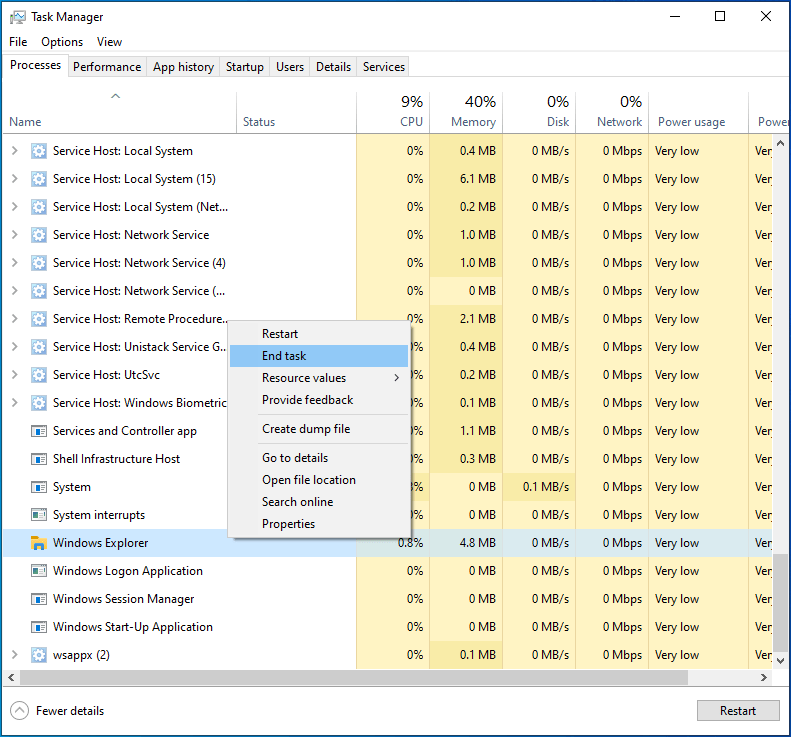
After this, close PowerShell and right-click any empty space on your taskbar, and select Task Manager to open the tool.
Locate Windows Explorer in the Processes tab, right-click it and select End Task.
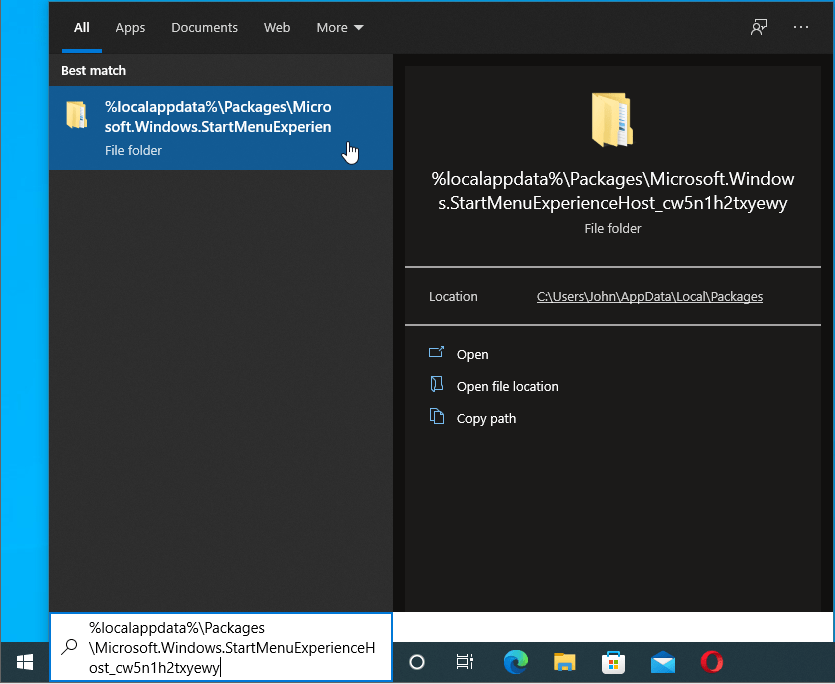
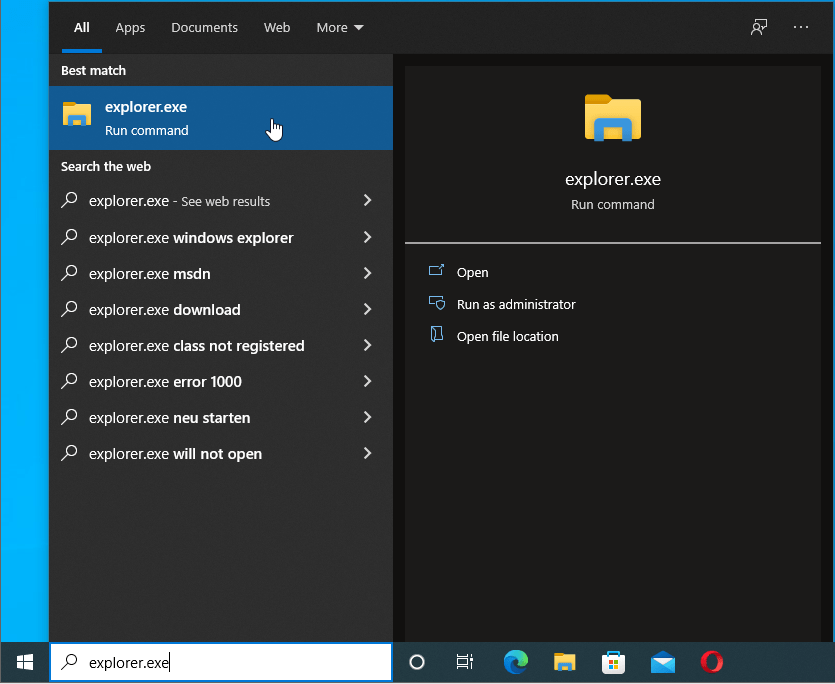
Next, press Win key + S and paste the following into Search, and hit Enter:
%localappdata%\\Packages\\Microsoft.Windows.StartMenuExperienceHost_cw5n1h2txyewy
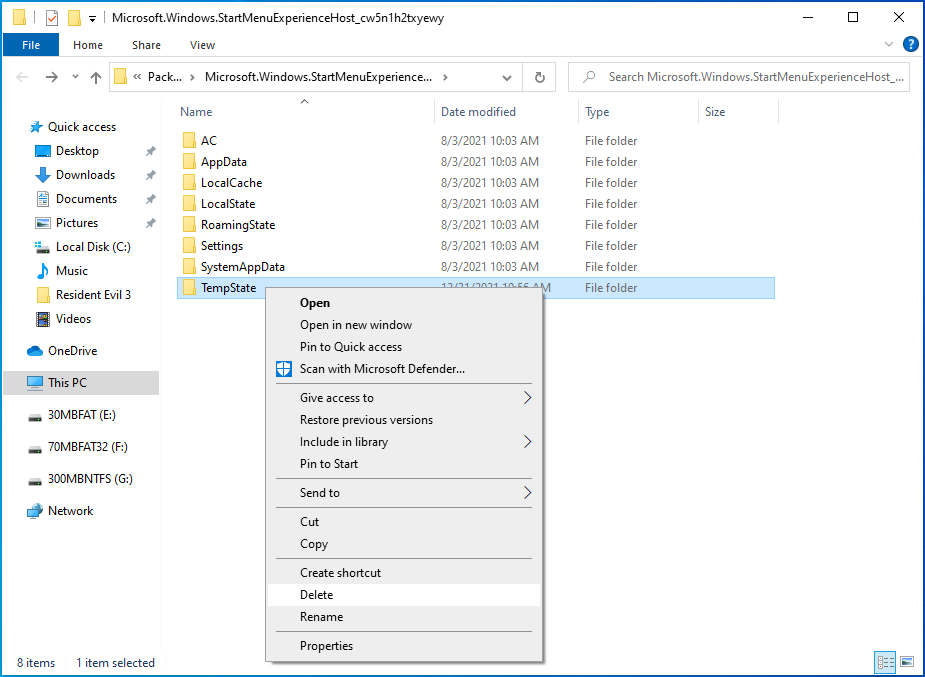
Locate TempState in the new window and delete it.
Next, type “explorer.exe” (no quotes) into Search and press Enter to relaunch Windows Explorer.
That’s it. Your issue should be resolved.
Did we miss anything?
If you have tips to add, share them in the comments below!