
The Intel Management Engine Interface (IMEI) is a built-in driver that allows communication between your device’s OS and the IME firmware. The driver activates some specialized/dedicated features on your motherboard, allowing you to control your PC remotely. It also works for a computer that’s powered off or doesn’t have an operating system installed. However, when your IMEI driver fails, you lose access to its functionalities. Instead, you get a question or yellow exclamation mark when you view the driver from the Device Manager. Now, when you open its properties, you’ll see the Error Code 10. It is often accompanied by a message that says, “This device cannot start. (Code 10).” Do you want to learn how to fix Intel Management Engine Interface issues? If so, keep reading.
What Is the Code 10 Error in the Device Manager?
The Code 10 error appears when the Device Manager cannot start a piece of hardware due to corrupted or outdated drivers. It’s a general error message that pertains to unspecified hardware or driver issues. It can appear on any Windows version, including Windows 7, 8, or 10. It’s common to removable devices, and it occurs when Windows fails to run a piece of hardware like a flash drive or printer. If the IMEI problem led to the Error Code 10, you need not worry. Fortunately, we’ve compiled available solutions to the “Intel Management Engine Interface device cannot start” error. Let’s examine them one after the other.
How to Fix the Intel Management Engine Interface on Windows 10
-
Reboot Your PC
This is a basic troubleshooting step that clears many simple computer issues, including Code 10 errors. All it takes is a simple restart. What’s more, it saves you the time and energy needed to try out other advanced methods. Always take this basic troubleshooting step before trying out the more advanced ones. Simply restart your PC and try accessing the device again. If the error message reoccurs after this, try the more advanced troubleshooting steps below.
-
Run the Hardware and Devices Troubleshooter
Windows has several automated troubleshooters that help solve various issues. An example is the Hardware and Devices Troubleshooter. It helps resolve driver-related problems, so it’s worth giving a try whenever you run into the error code 10 issue. However, Microsoft has removed this utility from its Troubleshoot menu on Windows 10. Luckily, you can access the utility via the Command Prompt or PowerShell. Follow the steps below to access the Hardware and Devices Troubleshooter using the Command Prompt or PowerShell:
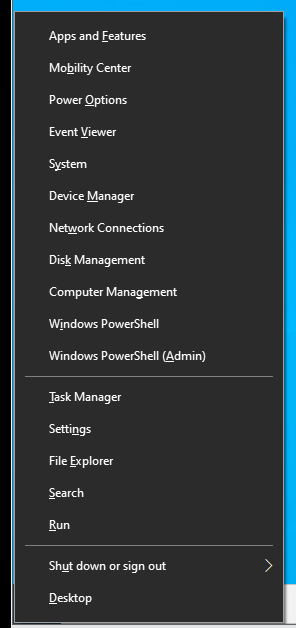
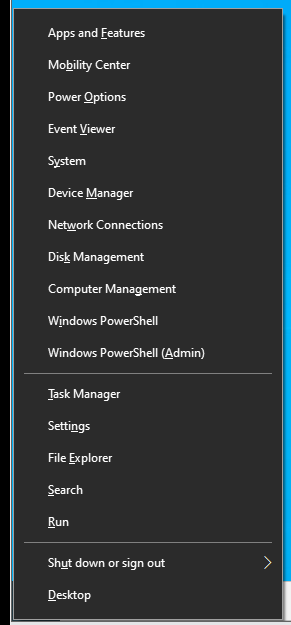
- Press the Windows key + X to launch the Power User menu.

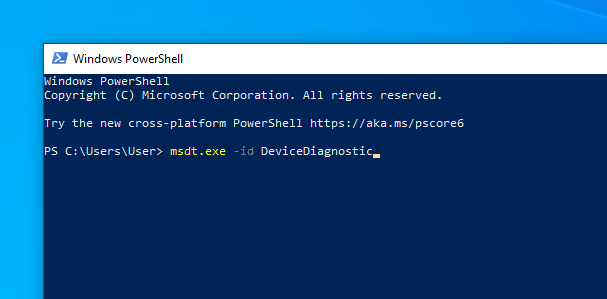
- Now, click on the Command Prompt (Admin) or Windows PowerShell option from the menu to open the corresponding console. Enter the following command line after that and hit the Enter button:
msdt.exe -id DeviceDiagnostic
 That will open the Hardware and Devices Troubleshooter in a new window.
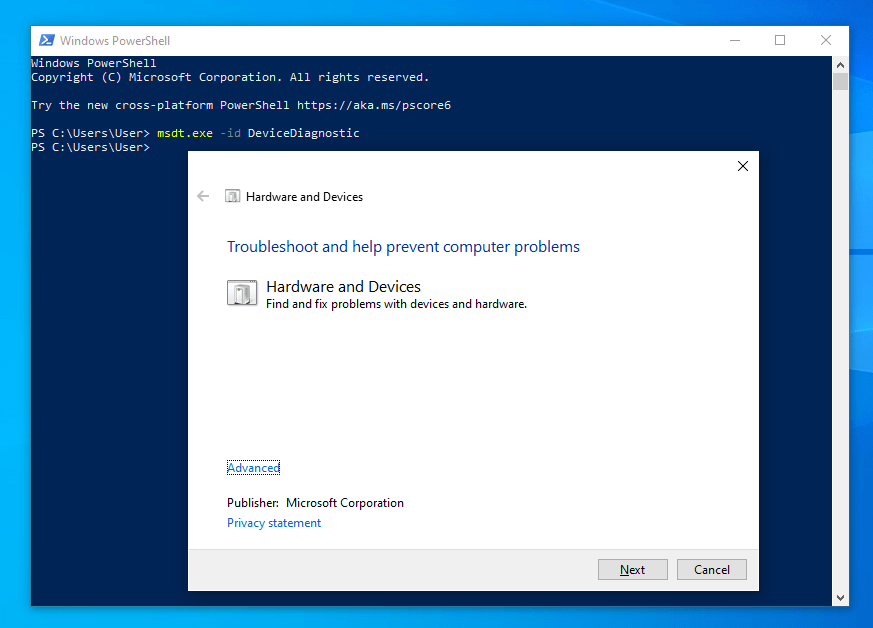
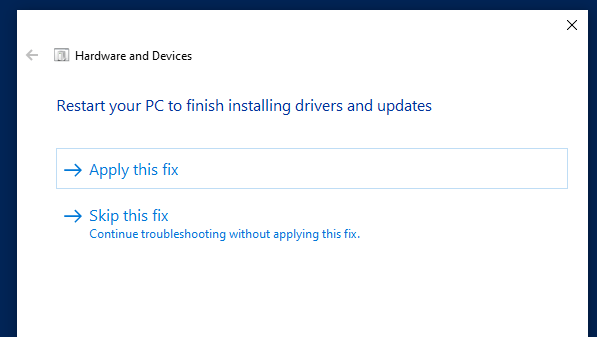
- After that, click Next and follow the on-screen instructions to complete the troubleshooting process. Once the wizard completes, it will notify you of any issues found. It will also show you the results of its attempt to fix the issues.

If this doesn’t work, try the next solution.
-
Apply Windows 10 Updates
Windows system updates include patches that can help fix problems associated with the Intel Management Engine Interface drivers. So, if you have pending updates, follow the on-screen instructions to apply the updates as soon as possible. Here’s how to do that:
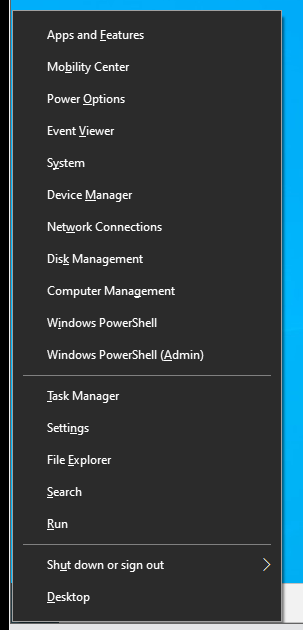
- Press the Windows + X shortcut to launch the Windows Power User menu.

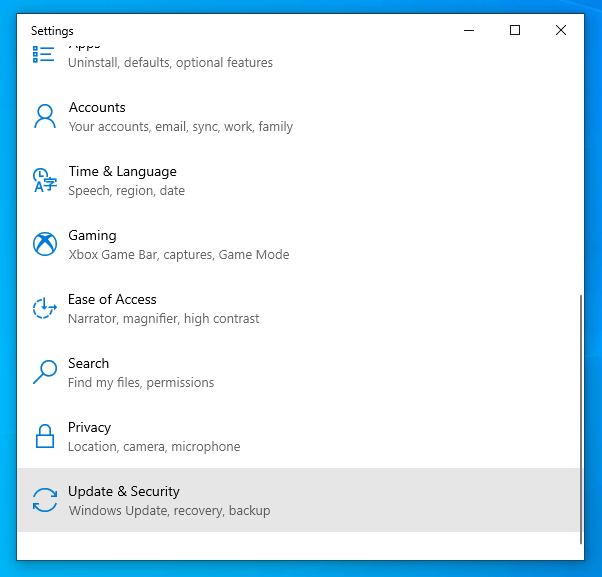
- Now, click on Settings from the menu to launch the Settings window.
Alternatively, press Win + I to launch the app.
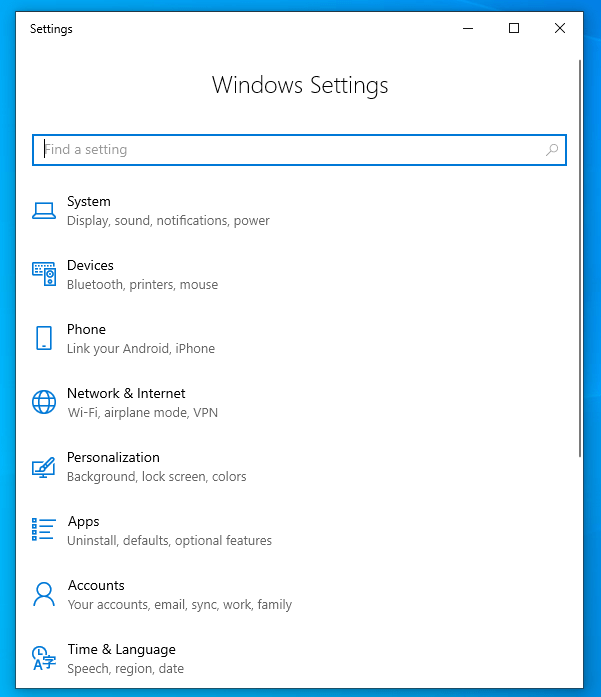
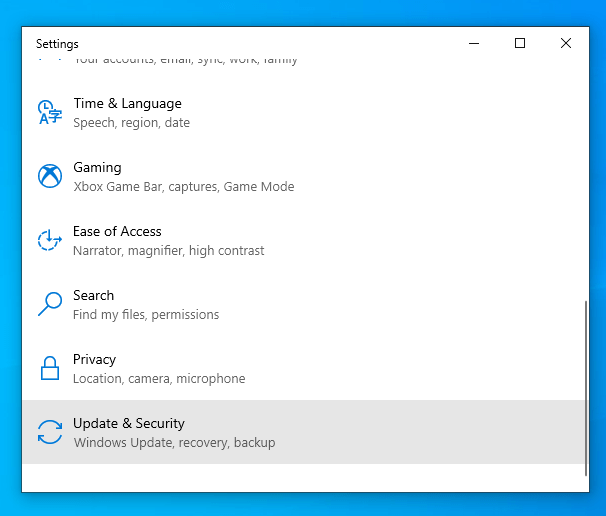
- From there, click on Update and Security. That will take you to the Windows Update tab.

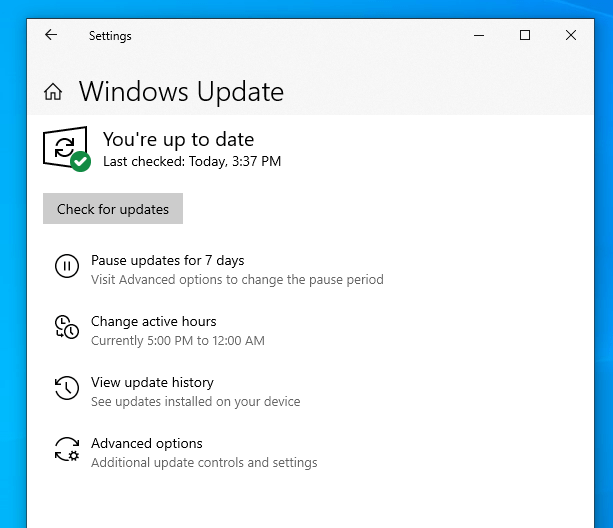
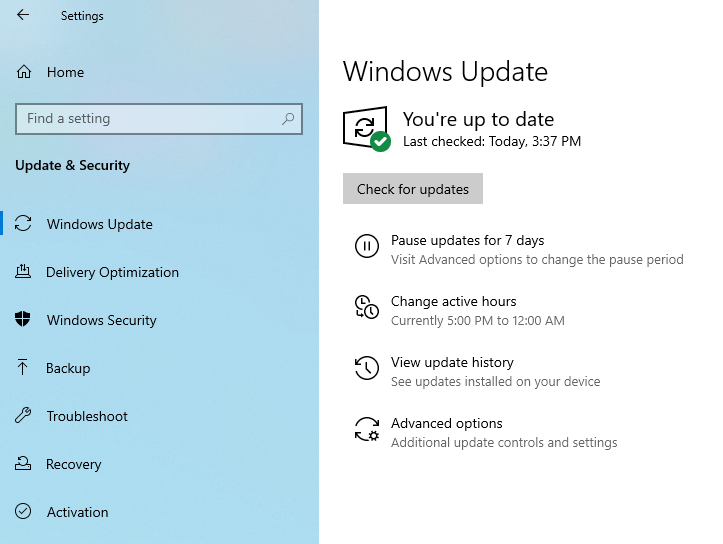
- After that, click on the “Check for updates” button. Windows will search for updates automatically.

- If found, apply the updates and restart your Windows 10 computer.
Note: If the “Intel Management Engine Interface device cannot start” error started after a system update, you can remove that update from your PC. Here’s how to uninstall a recent Windows 10 update:
- Press the Windows key + X to launch the Power User menu.

- Now, click on Settings from the menu to launch the Settings window.
Alternatively, press the Windows key + I to launch the Settings window.

- From there, click on Update and Security. That will take you to the Windows Update tab.

- Now, click on “Advanced options” on the right window pane.

- After that, navigate to the “View your update history” link and click on it.
- In the next window, you’ll see a list of applied Windows 10 updates on your PC.
 Select the latest update to uninstall it.
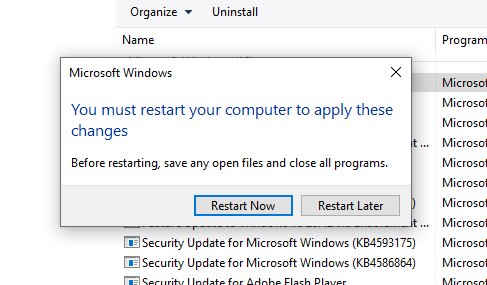
- Once done, restart your PC and check to see if the IMEI error persists.

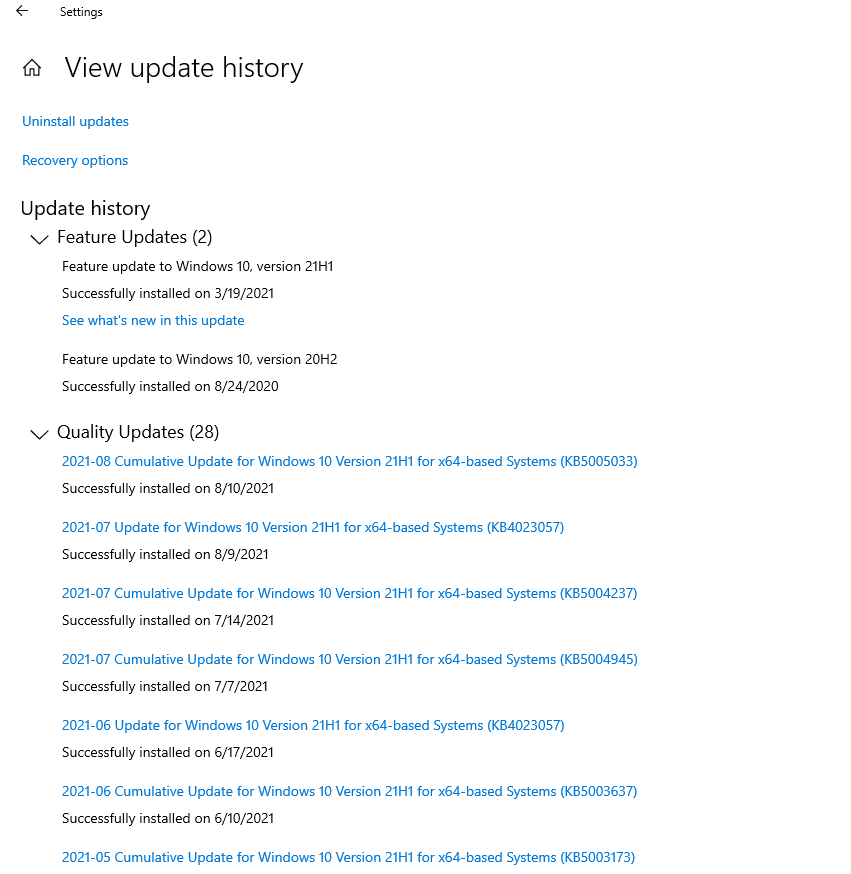 Select the latest update to uninstall it.
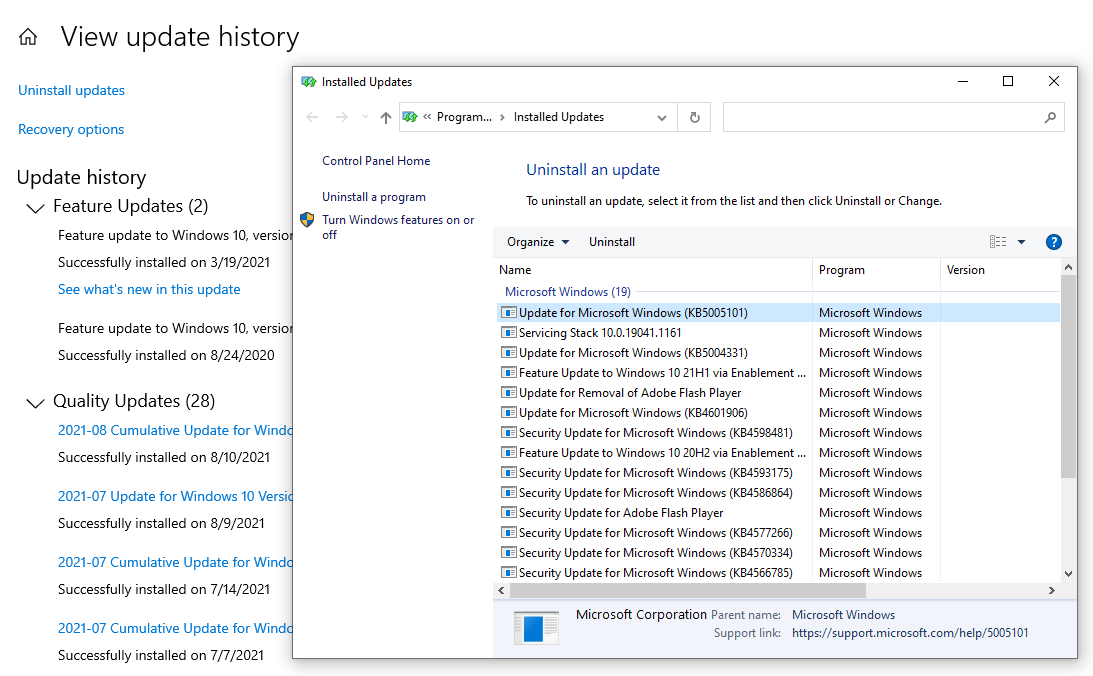
-
Update the Intel Management Engine Interface Drivers
Often, when device hardware fails or misbehaves, it’s due to a corrupted or outdated driver. You can correct that by updating the driver manually or automatically. You can update your Intel Management Engine Interface drivers manually by following the steps below:
- Press the Windows key + X to launch the Power User menu.

- Then, click on Device Manager from the menu list.

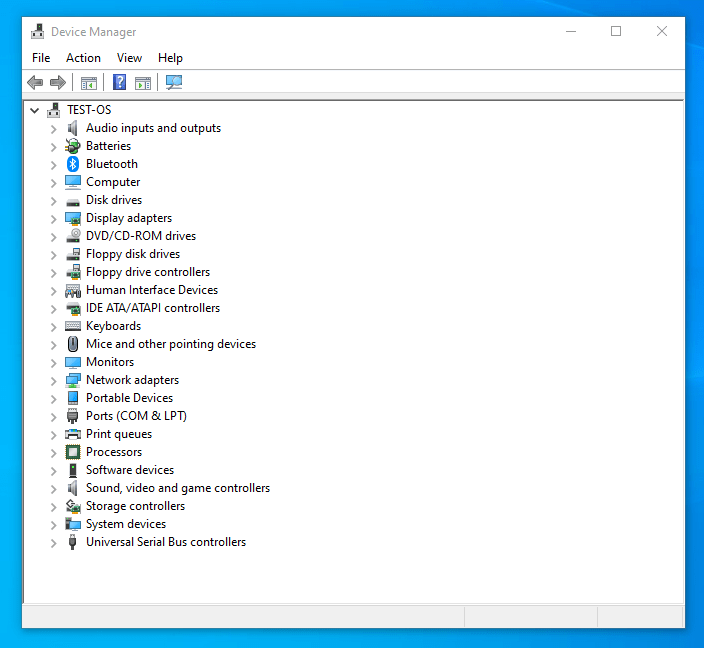
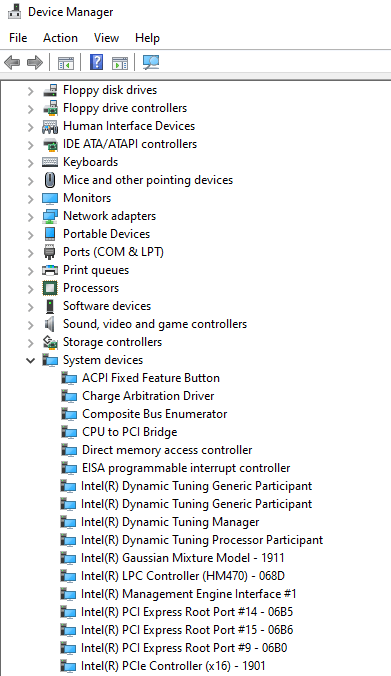
- From the Device Manager window, locate and expand the “System devices” category.

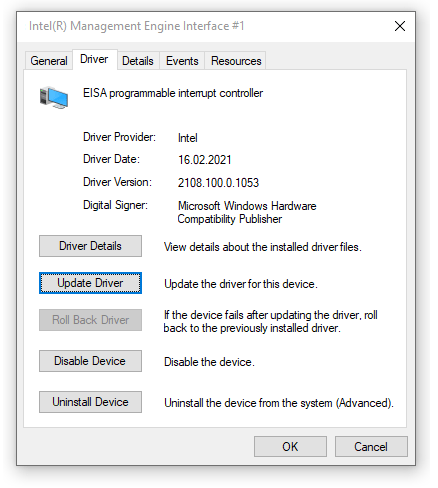
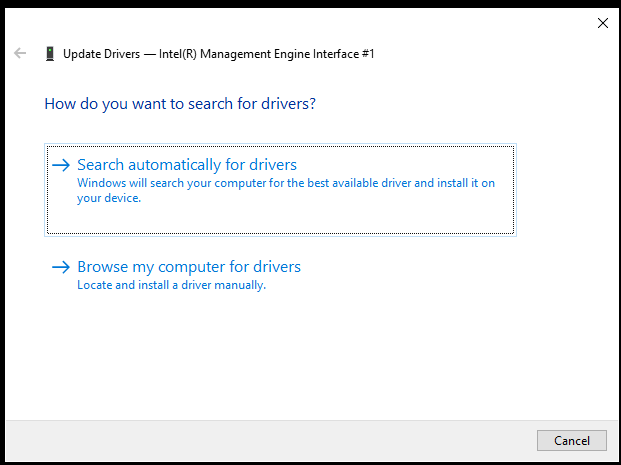
- Then, find and right-click on the Intel Management Engine Interface and select “Update Driver” from the pop-up menu.

- After that, select the “Search automatically for drivers” option.

- Once the update is complete, reboot your PC and see if that resolved the Code 10 error issue.


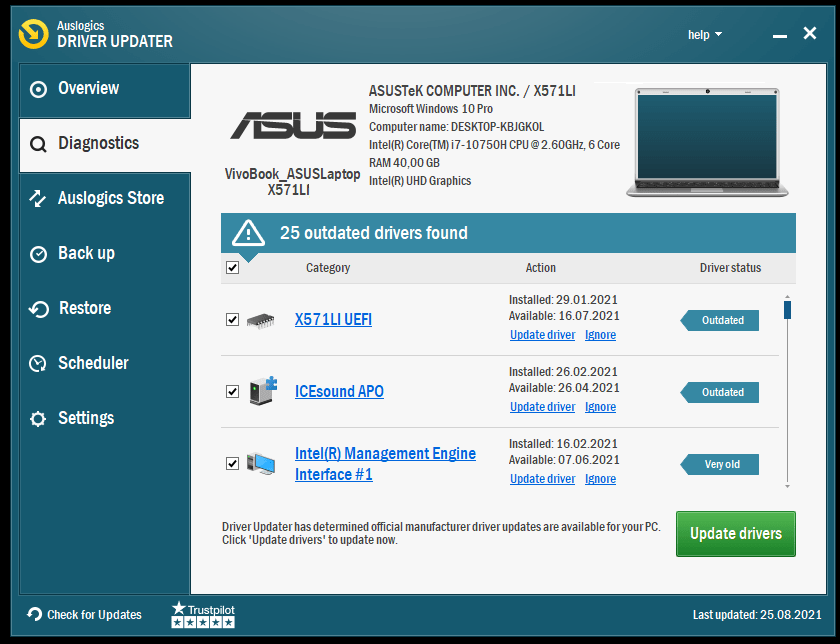
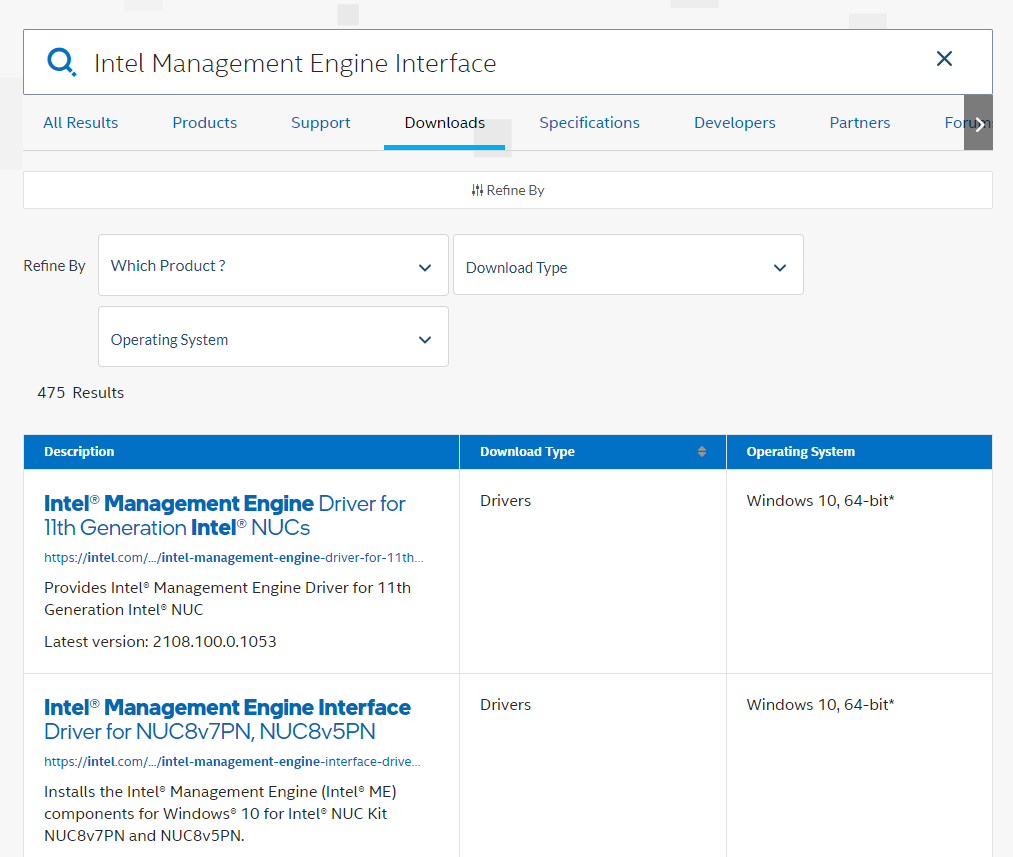
Note: The automatic update option will not work if you’ve disabled the feature in your device installation settings. Besides, you can only update one driver at a time. You can also manually update your IMEI driver by downloading its most recent version from the manufacturer’s official website. However, failure to download drivers that are compatible with your Windows 10 variant will lead to a waste of time and effort. Alternatively, you can download a trusted third-party app such as Auslogics Driver Updater. Use it to update or reinstall your GPU drivers. It’ll also scan your device for other driver-related issues and apply the appropriate fix to each problem. It’s a fast, safe, and intuitive tool that ensures smooth hardware operation without conflicting with other applications. What’s more, it can update multiple drivers simultaneously, saving you time and effort. You get to enjoy all these benefits at an affordable price.
-
Remove and Reinstall the Drivers Manually
If updating the drivers does not work out for you, you can remove the drivers from your computer and reinstall them manually afterward. That will help fix incompatibility issues and other similar problems, like internal corrupted files. Here’s how to go about it:
- Press the Windows + X shortcut to launch the Power User menu.
- Then, click on Device Manager from the menu list.
- From the Device Manager window, locate and expand the System Devices category.
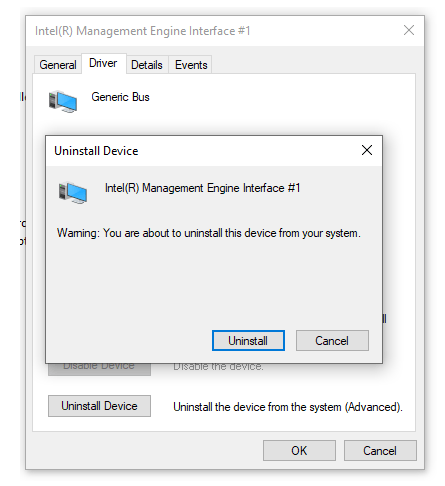
- Then, find and right-click on Intel Management Engine Interface and select Uninstall from the pop-up menu. Wait for the process to complete. You can also uninstall other related apps or files through the Control Panel.

- After that, search for and download the compatible IMEI driver version from your manufacturer’s official website.

- Run the executable file and follow the on-screen instructions to install the driver.
- Once done, restart your computer and check to see if the issue persists.


-
Run a System Scan
You can fix the error automatically by running System File Checker. SFC is a Windows troubleshooting utility that scans and automatically fixes core system errors. Here’s how to use the utility:
- Press the Windows key + X to launch the Power User menu.
- Now, click on Command Prompt (Admin) from the menu to open the elevated Command Prompt console. Enter the following command line and hit the Enter button:
sfc /scannow That will initiate a system scan, which may take a while to complete (depending on the size of your system files).
- Reboot your PC after the scan and check to see if that resolves the “Intel Management Engine Interface device cannot start” error.
-
Update BIOS
If the troubleshooting steps mentioned above failed to resolve the “Intel Management Engine Interface device cannot start” error, try updating your BIOS. Depending on your manufacturer and motherboard, you can automatically download and install the latest update through the BIOS. Otherwise, you’ll have to download it from your manufacturer’s official website and then install it manually. Hopefully, this last solution will help resolve the “Intel Management Engine Interface device cannot start” error on your Windows 10 PC.
Conclusion
The fixes discussed above should help fix the Intel Management Engine Interface driver Error Code 10 on your computer. Was this guide helpful? Please leave a comment below. Don’t forget to share this post and check our guide for more Windows 10 tweaks.