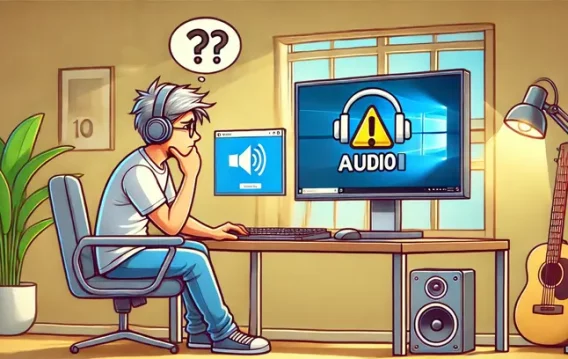
- What Does ‘Generic Audio Driver Detected’ Mean?
- How to Resolve the ‘Generic Audio Driver Detected’ Issue
- First solution: Make sure audio services are enabled
- Second solution: Disable and enable the audio device
- Third solution: Roll back the audio driver if you started experiencing the problem after an update
- Fourth solution: Update the audio driver
- Fifth solution: Turn off audio enhancements
- Sixth solution: Use generic audio drivers
- Conclusion
Sound is an integral part of any PC. Whether your computer doubles as a media device or you primarily use it for work, you still need your speakers to function. Since errors and glitches are inevitable, it isn’t out of the ordinary for your system to experience sound problems once in a while.
Audio problems raise their ugly heads on Windows PCs when you least expect them, although the activities that happened prior to a sound problem might explain why it occurred. Audio issues can happen after a major Windows update or upgrade. They could be the results of audio driver glitches, audio device issues, software conflicts, or malfunctioning Windows services.
When your system’s sound becomes faulty, one of the first steps to take is running the audio troubleshooter. The troubleshooter looks for common bugs that are known to affect audio output. Once it finds these glitches, it will attempt to fix them.
That said, the tool doesn’t have a fix for every problem. One of those untreated issues is the Generic Audio Driver problem, which the tool reports to be “detected” after running its scan.
The troubleshooter will only report the problem in this case. You won’t find any option to resolve it in the dialog window. The only options available are “Give feedback on this troubleshooter”, “Close the troubleshooter”, and “View detailed information”.
In this article, we’ll show you how to get rid of the problem and get your audio device to work again.
What Does ‘Generic Audio Driver Detected’ Mean?
The error message is an indication that something has gone wrong with the audio driver. The present driver may be corrupt or missing, or some of the services required for the driver to work properly aren’t running.
How to Resolve the ‘Generic Audio Driver Detected’ Issue
We’ll be walking you through the main troubleshooting techniques that are known to resolve this particular problem. Make sure you apply the fixes in this article in the order that they are arranged.
First solution: Make sure audio services are enabled
There are different audio services that manage audio output on your system. They make sure the audio device responds to the commands that your computer executes. If these services are turned off, the audio device won’t work.
The troubleshooter may be reporting the error because your audio services have been disabled. Head over to the Services application and make sure the services are running as they should.
The following steps will guide you:
- Launch the Run dialog box by right-clicking the Windows logo in the taskbar and selecting Run once the Power User menu appears.
- Pressing the
Win keyboard button and Rtogether is another way to launch the Run dialog box. - After Run opens, type
services.mscinto the text box, and then press theEnterkeyboard button. - When the Services application opens, head to the Windows Audio service and click on it. If it’s running, go to the left side of the screen and click on Stop. Once the service is stopped, click on Start.
- Repeat Step 4 for the Windows Audio Endpoint Builder and the Multimedia Class Scheduler services.
Second solution: Disable and enable the audio device
Restarting the audio device may fix any glitch that’s caused by application conflicts. As you know, the audio device can be used by different applications. If more than one program requests audio output at the same time, the driver may suffer a malfunction. When you disable and enable the audio device, the backlog of problems will be cleared.
Follow these steps:
- Launch the Run dialog box by right-clicking the Windows logo in the taskbar and selecting Run once the Power User menu appears. Pressing the
Win keyboard button and Rtogether is another way to launch the Run dialog box. - After Run appears, type
devmgmt.msc, and then press theEnterkeyboard button. - Once the Device Manager opens, locate “Sound, video and game controllers” and click on the arrow beside it.
- Your audio device(s) will now appear.
- Right-click your active audio device and click on Disable Device in the context menu. Do the same if you have other audio device entries in the menu.
- Now, right-click on the device again and, this time, select Enable Device from the context menu. Remember to do the same for the other audio devices.
- Once you’ve done that, reboot your PC, then check if the problem has been resolved.
Third solution: Roll back the audio driver if you started experiencing the problem after an update
If the issue started occurring after you updated your system, a driver update may be the cause. With the Device Manager, you can easily reverse the damage by removing the problematic driver and installing the previous driver.
The steps below will show you what to do:
- Launch the Run dialog box by right-clicking the Windows logo in the taskbar and selecting Run once the Power User menu appears. Pressing the
Win and Rkeyboard buttons together is another way to launch the Run dialog box. - After Run appears, type
devmgmt.mscand then press theEnterkeyboard button. - Once the Device Manager opens, locate “Sound, video and game controllers” and click on the arrow beside it.
- Your audio devices will now appear.
- Right-click on your main speaker and click on Properties.
- After the Properties dialog window opens, head to the Driver tab.
- Under the Driver tab, click on the Roll Back Driver button.
- Carefully follow the subsequent instructions that pop up, and then click on the Yes button.
- Once the process is complete, reboot your computer.
Sometimes, the Roll Back Driver button under the Driver tab won’t be active. This could be because the previous driver has been deleted. If that’s the case or if rolling back the driver doesn’t work, you can restore your system to a previous state when the issue wasn’t present.
Follow these steps:
- Right-click on the Windows logo in the taskbar and click on File Explorer when you see the Power User menu. You can also tap the
Windows and Ekeyboard buttons together to launch the program. - After the File Explorer opens, go to the left side of the window and right-click This PC.
- Click on Properties in the context menu.
- Once the System window opens, go to the left pane and click on the System Protection link.
- The System Protection tab of the System Properties dialog window will now appear.
- Click on the System Restore button.
- On the first page of the System Restore wizard (where you see “Restore system files and settings”), click on Next.
- Choose a restore point on the next page, and then click on “Scan for affected programs” to find out what applications will no longer be available once you restore the system.
- Once you’ve perused the list of affected programs, click on Close.
- After that, click on the Next button.
- Click on Finish.
Fourth solution: Update the audio driver
The audio driver is one of the main reasons you’re seeing the error. As you know, the driver is the program that transfers instructions from the operating system to the audio device. This means the device will malfunction or not respond properly if the driver has an issue.
To get rid of the error, in this case, you have to make sure the program is running properly. Your first step should be to make sure it’s up to date.
You can use different methods to update your audio driver. Going to the manufacturer’s website is one way to go about it; however, you can use the Windows Update troubleshooter, the Device Manager, or a third-party program to get things done.
Use Windows Update
Windows Update downloads and installs different types of updates when they’re available for your PC. These updates include driver updates for devices, such as the audio adapter and speaker.
Normally, the utility only downloads and installs driver updates for devices that are supported by Microsoft. Your system’s main audio device should be able to run on Microsoft’s driver.
Also, other software updates that are critical to audio-related services can be downloaded via Windows Update.
These steps will show you how to manually start the update process:
- Go to the taskbar and right-click on the Start button.
- Once you see the Power User menu above the Start button, select Settings.
- This should open the Settings application. You can also use the
Windows + Ikeyboard shortcut to summon Settings. - After the home page of Settings is displayed on your screen, click on the icon for Update & Security.
- On the Update & Security page, click on the Check for Updates button.
- Allow the utility to check for any available updates and download them.
- Once the updates have been downloaded, click on the Restart Now button.
- Your PC will reboot and install the updates.
- After the process completes, check for the audio problem.
Use the Device Manager
Using the Device Manager is another way to download and install a compatible audio driver for your audio device. You can use the program to specifically search for the device’s driver update.
These steps will show you how to use the program:
- Launch the Run dialog box by right-clicking the Windows logo in the taskbar and selecting Run once the Power User menu appears. Pressing the
Win and Rkeyboard buttons together is another way to launch the Run dialog box. - After Run appears, type
devmgmt.msc, and then press theEnterkeyboard button. - Once the Device Manager opens, locate “Sound, video and game controllers” and click on the arrow beside it.
- Your audio devices will now appear.
- Right-click on your main speaker and click on Update Driver in the context menu.
- After the Update Driver window opens, click on “Search automatically for updated driver software”.
- Allow the Device Manager to search the internet for the right driver update and install it.
- If the process is successful, the issue should be resolved.
Update your audio driver automatically
There are different third-party programs designed to find and install driver updates. One of the best out there is Auslogics Driver Updater. With this tool, you won’t have to check for the right driver yourself and future updates will be handled with ease.
The program performs routine checks to flush out driver-related issues. It finds device drivers that are out of date, missing, or corrupt and then installs their manufacturer-approved updates. It can also save backup copies of previous driver versions, which will be used whenever updates act up.
These steps will show you how to use the tool:
- Head to Auslogics Driver Updater’s download page.
- After the page opens, click on the button that says, Download Now.
- Next, click on Today’s Price to purchase a license key. Make sure you fill in the necessary information and make your payment to get the license key.
- Once the download is complete, run the setup wizard.
- Next, select the language you want.
- Choose an installation location.
- You’ll see boxes that say, “Create a desktop icon”, “Launch program at Windows startup”, and “Send anonymous info to help improve our service”.
- After making your selections, click on “Click to install and check drivers”.
- Allow the program time to load.
- After the last installation window appears, tick the box for “Launch Driver Updater and scan PC drivers”, and then click Finish.
- Once you’ve done that, the tool will start scanning your PC.
- Once the scan is over, Auslogics Driver Updater will display the outdated drivers and their descriptions. Tick the ones that you’d like to update, and then click on Update drivers.
- The tool will now automatically back up the previous versions of the drivers. This way, you can easily restore them if the latest updates encounter problems.
- The program will start to install the latest official versions of the drivers.
If updating the driver fails to resolve the problem, try reinstalling it. Here’s you what you should do:
- Launch the Run dialog box by right-clicking the Windows logo in the taskbar and selecting Run once the Power User menu appears. Pressing the
Win keyboard button and Rtogether is another way to launch the Run dialog box. - After Run appears, type
devmgmt.msc, and then press theEnterkeyboard button. - Once the Device Manager opens, locate “Sound, video and game controllers” and click on the arrow beside it.
- Your audio devices will now appear.
- Right-click on your main speaker and click on Uninstall Device in the context menu.
- Once the Uninstall Device confirmation box opens, check the box beside “Delete the driver software for this device”.
- Click on the OK button.
- Now, restart your system.
After restarting your system, Windows will try to automatically reinstall the driver. If it doesn’t, follow the steps above to install its updates. If you have Auslogics Driver Updater, run it.
Fifth solution: Turn off audio enhancements
Audio enhancements are designed to improve the sound quality and performance of audio devices. However, they end up causing many problems in certain cases. Audio enhancements could be the reason you see the “Generic audio driver” message whenever you run the troubleshooter to resolve your audio output problems.
Try turning off the ‘audio enhancements’ feature for your device and check if the issue is resolved. The steps below will show you what to do:
- Launch the Run dialog box by right-clicking the Windows logo in the taskbar and selecting Run once the Power User menu appears. Pressing the
Win keyboard button and Rtogether is another way to launch the Run dialog box. - After Run appears, type
control panel, and then press theEnterkeyboard button. - Once the Control Panel opens, make sure Category is selected in the “View by” drop-down menu in the top-right corner of the screen.
- Click on Hardware and Sound.
- On the Hardware and Sound page, click on Manage Audio Devices under Sound.
- Once the Sound dialog window appears, stay in the Playback tab and right-click your main audio device.
- Click on Properties in the context menu.
- When the Properties dialog box for the device opens, go to the Enhancements tab.
- Now, check the box beside “Disable all sound effects” or “Disable all enhancements” (depending on the option that’s there) under System Effects Configuration.
Sixth solution: Use generic audio drivers
If none of the above solutions worked, try using Windows’ native sound drivers. These are basic drivers that ship with Windows 10. They tend to work in situations where manufacturer drivers fail to deliver.
The following guide will show you how to find generic audio drivers in Windows 10 and install them:
- Launch the Run dialog box by right-clicking the Windows logo in the taskbar and selecting Run once the Power User menu appears. Pressing the
Win and Rkeyboard buttons together is another way to launch the Run dialog box. - After Run appears, type
devmgmt.mscand then press theEnterkeyboard button. - Once the Device Manager opens, locate “Sound, video and game controllers” and click on the arrow beside it.
- Your audio devices will now appear.
- Right-click on your main speaker and click on Update Driver in the context menu.
- After the Update Driver window opens, click on “Browse my computer for driver software”.
- On the next page, select “Let me pick from a list of device drivers on my computer”, and then click on the Next button.
- Click on “High Definition Audio Device”, then click Next.
- If a dialog warning comes up, click on Yes.
- Once the operation is complete, restart your system and try checking for the problem.
Conclusion
We believe that your system can now play sounds without issues. There’s a comments section below where you can send us your thoughts about the problem or share your experiences. You’re welcome to use it.