
- The Windows 10 Timeline
- How to Enable Collecting Activity History in Windows 10
- How to Disable Collecting Activity History in Windows 10
- How to Stop Windows from Saving Your Activity History
- Disable Collecting Activity History in Windows 10 Using Group Policy
- Disable Collecting Activity History in Windows 10 Using the Registry
- Protect Your Browsing Data from Trackers
Does Windows 10 send your activity history to Microsoft? Apparently, Microsoft has failed to explain exactly how it collects data and how you can control it. Usually, disabling your activity history or clearing it should clear all your data from Microsoft’s servers.
However, recent discussions on Reddit have raised suspicions that Windows 10 collects your activity data even when the feature is disabled.
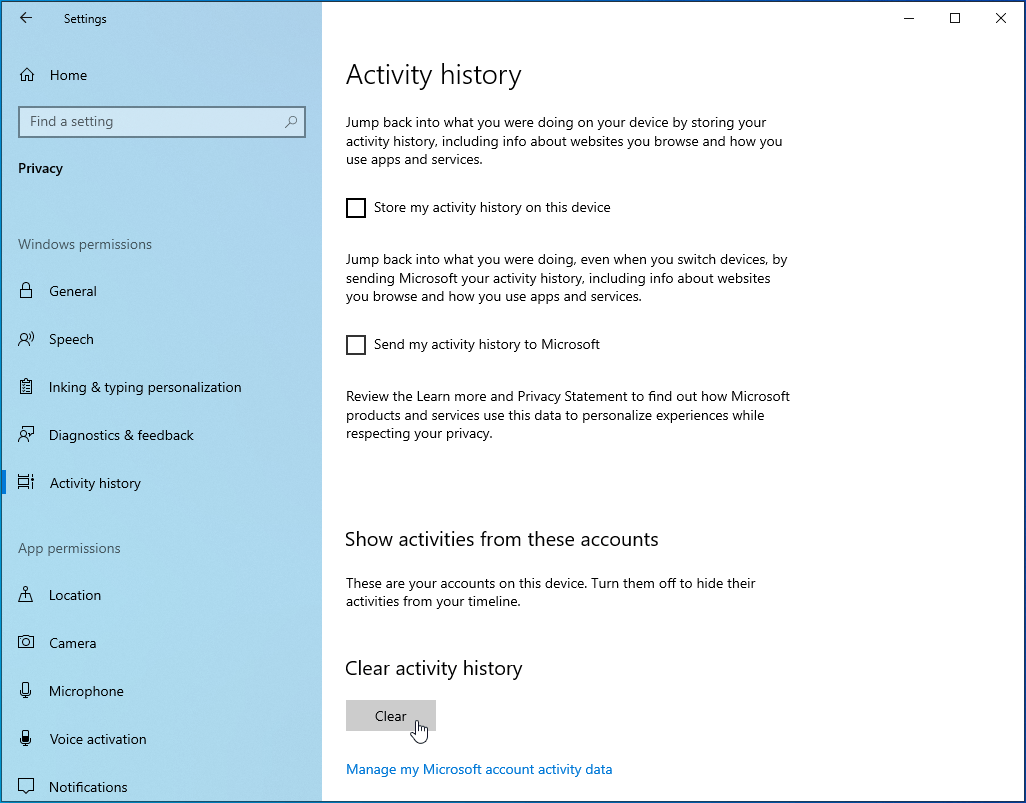
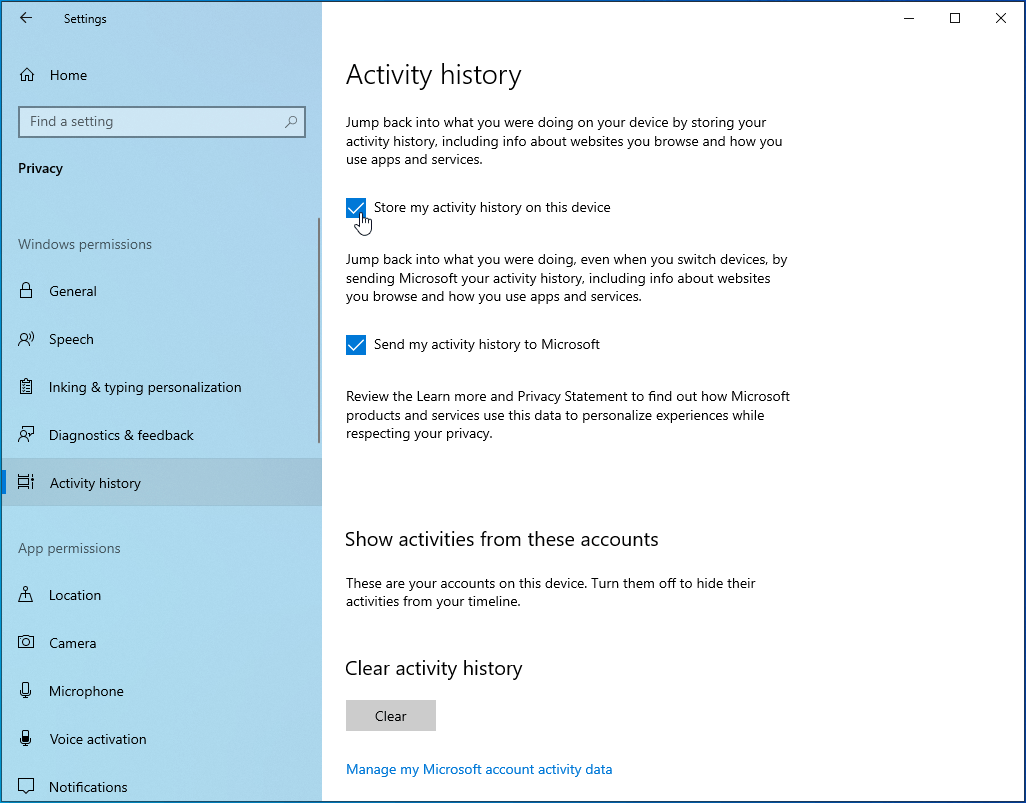
You can even try this yourself. Pull up Windows Settings (Win + I).
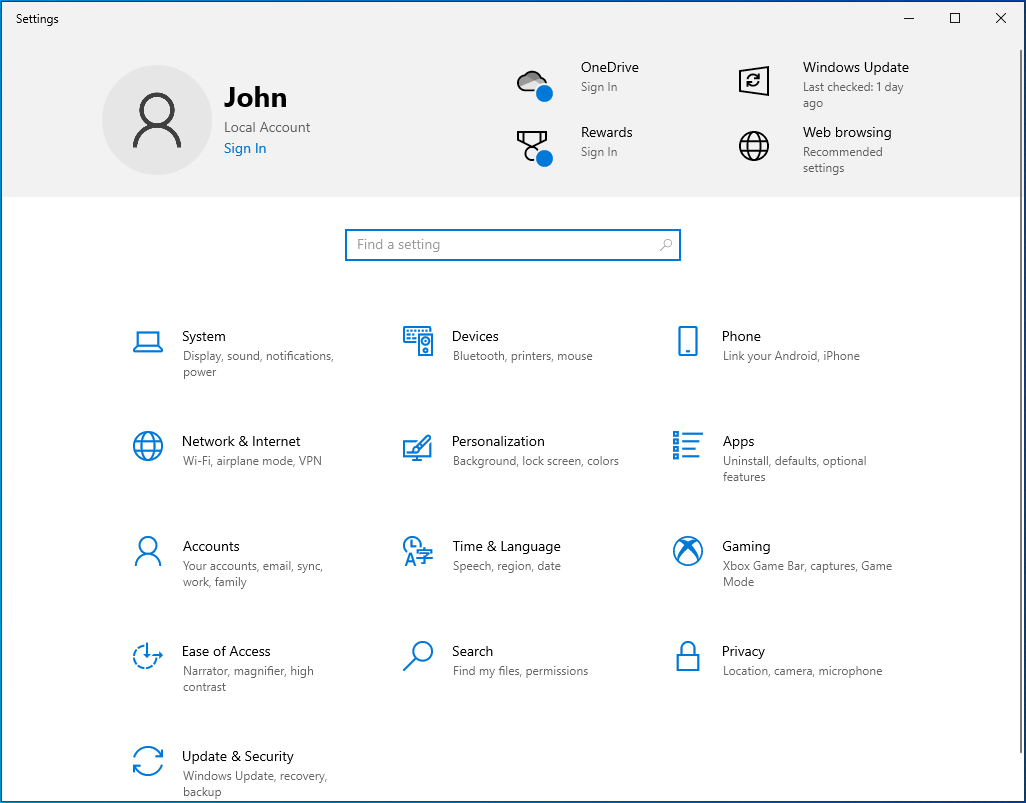
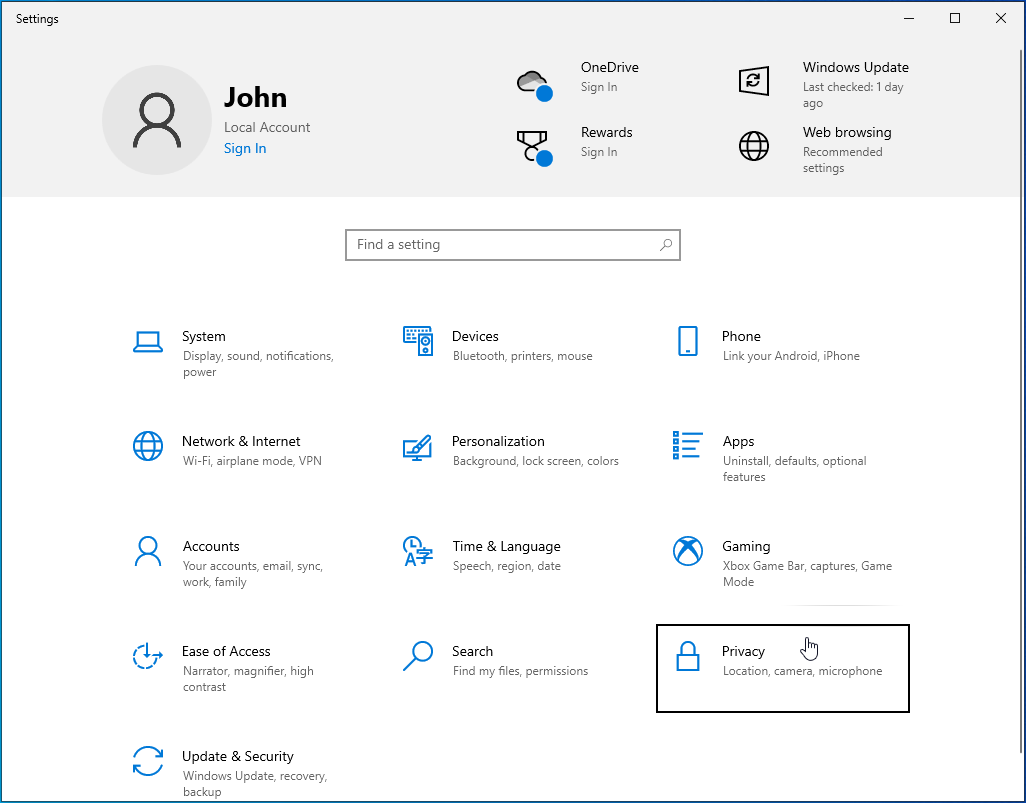
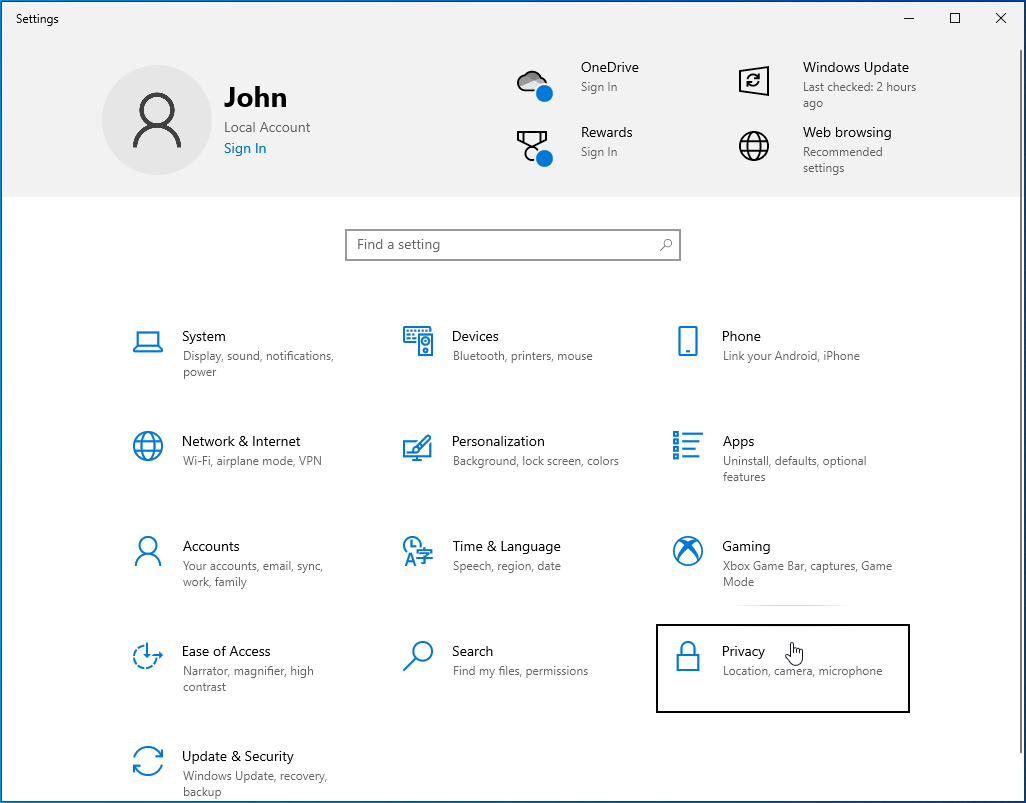
Head over to Privacy.
Go to Activity history.
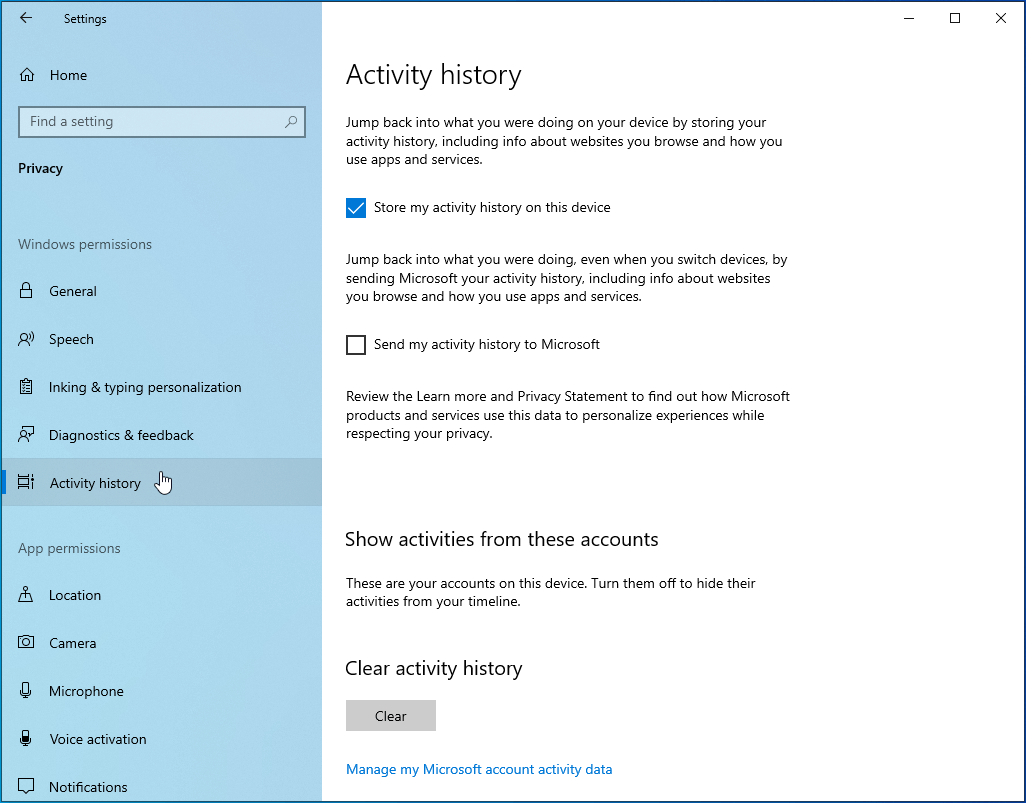
Disable everything under this section.
Clear your activity history.
Give it a few days and then visit the Windows Privacy dashboard. You will still find some application, media, and even browsing history under the “My Activity” section.
While you can manually delete the data, the fact that it’s still being tracked is sure to raise some concerns about Microsoft’s intentions. To that end, Microsoft’s Marisa Rogers responded by releasing the following statement:
“Microsoft is committed to customer privacy, being transparent about the data we collect and use for your benefit, and we give you controls to manage your data. In this case, the same term “Activity History” is used in both Windows 10 and the Microsoft Privacy Dashboard. Windows 10 Activity History data is only a subset of the data displayed in the Microsoft Privacy Dashboard. We are working to address this naming issue in a future update.”
It could be that the Activity History page in the Privacy Dashboard shares the same name as the “Activity history” feature associated with the Windows Timeline. According to Microsoft, you can prevent Windows 10 from sending app usage history to Microsoft’s servers by disabling the “Send my activity history to Microsoft” option.
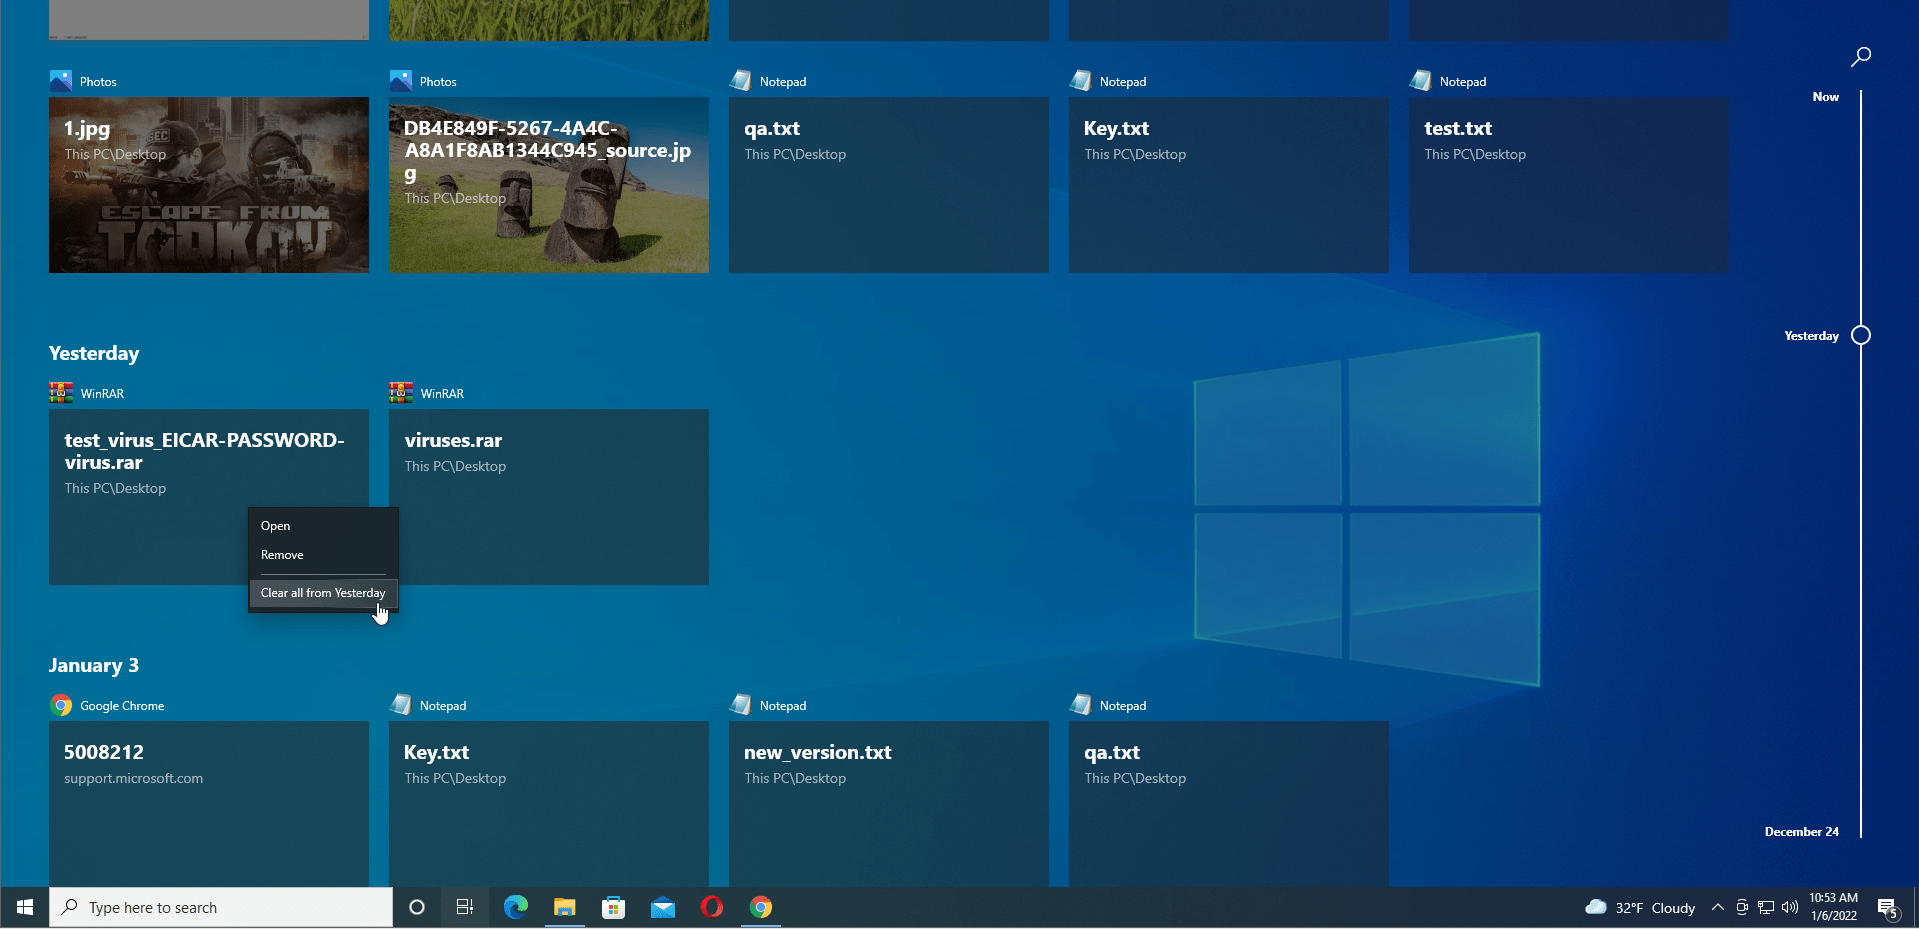
The Windows 10 Timeline
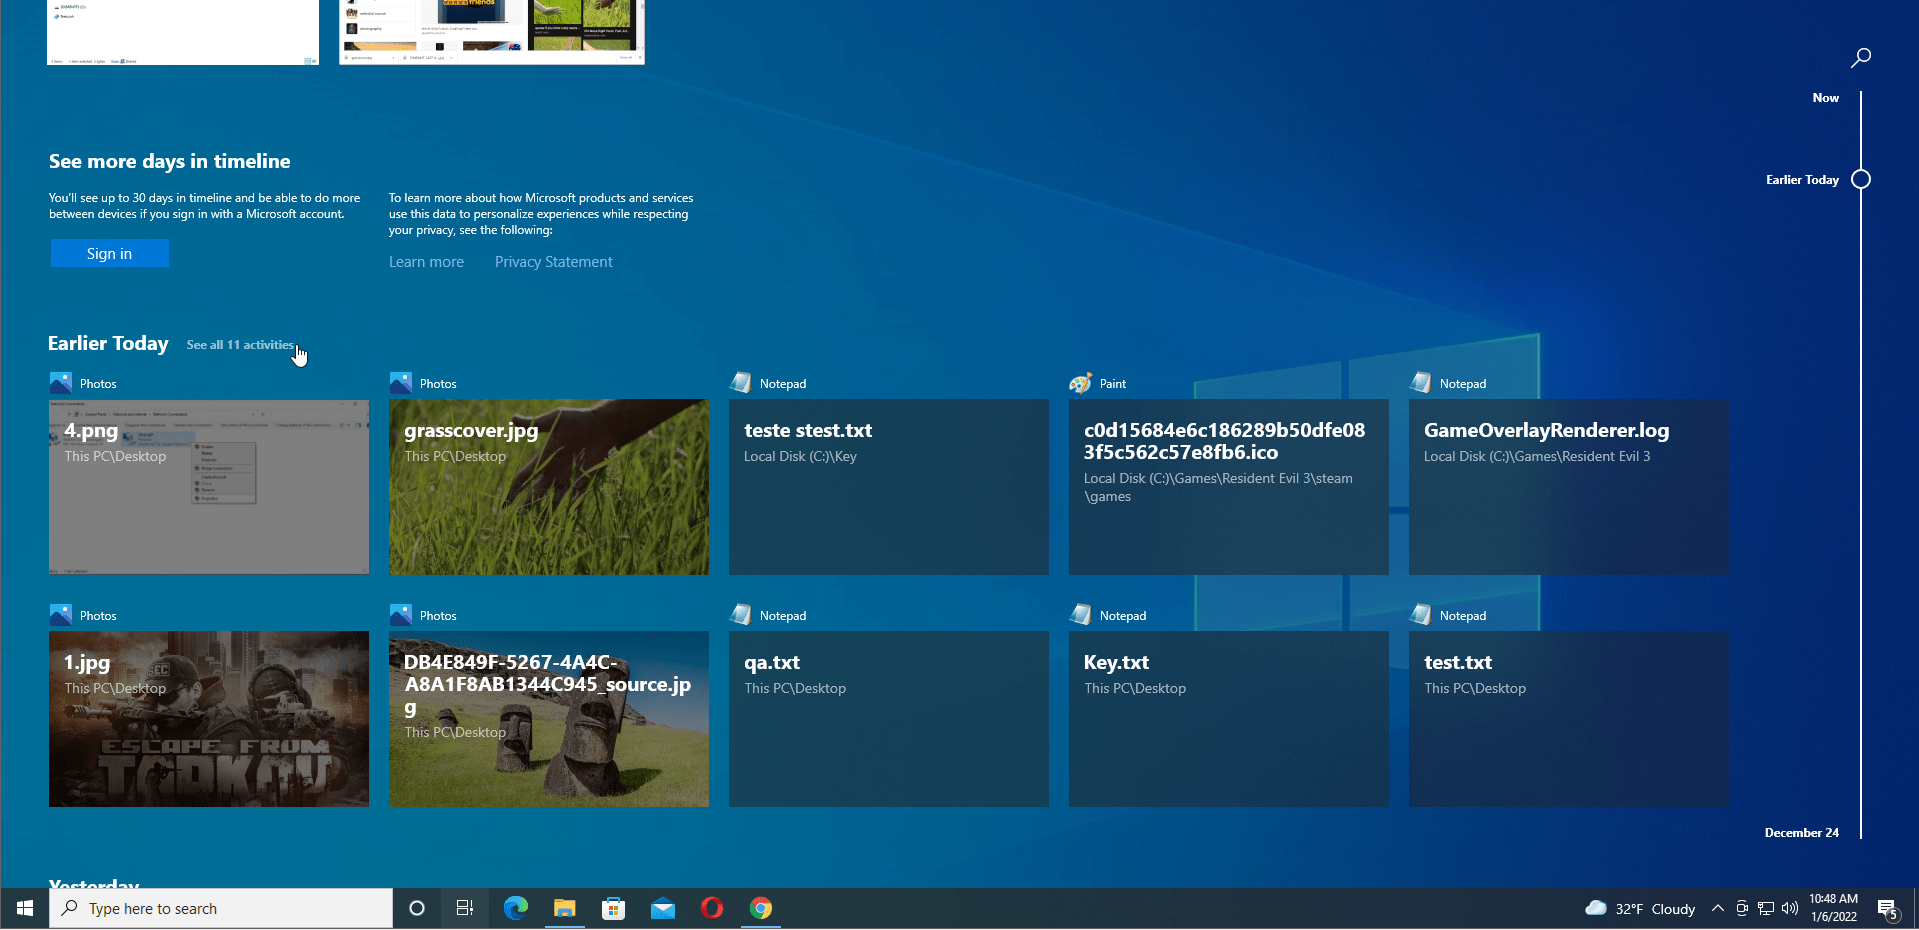
The Windows 10 Timeline stores a history of your activities on all devices connected to your Microsoft account for the last 30 days. The feature is said to improve your workflow by allowing you to quickly resume work from where you left off. It also makes recently accessed files easier to find.
There are several ways to check what’s on your timeline. The quickest method to do so is by using the Windows logo key + Tab shortcut. This will open your activities for the past 30 days. You can browse through your Timeline, which is organized using date headers.
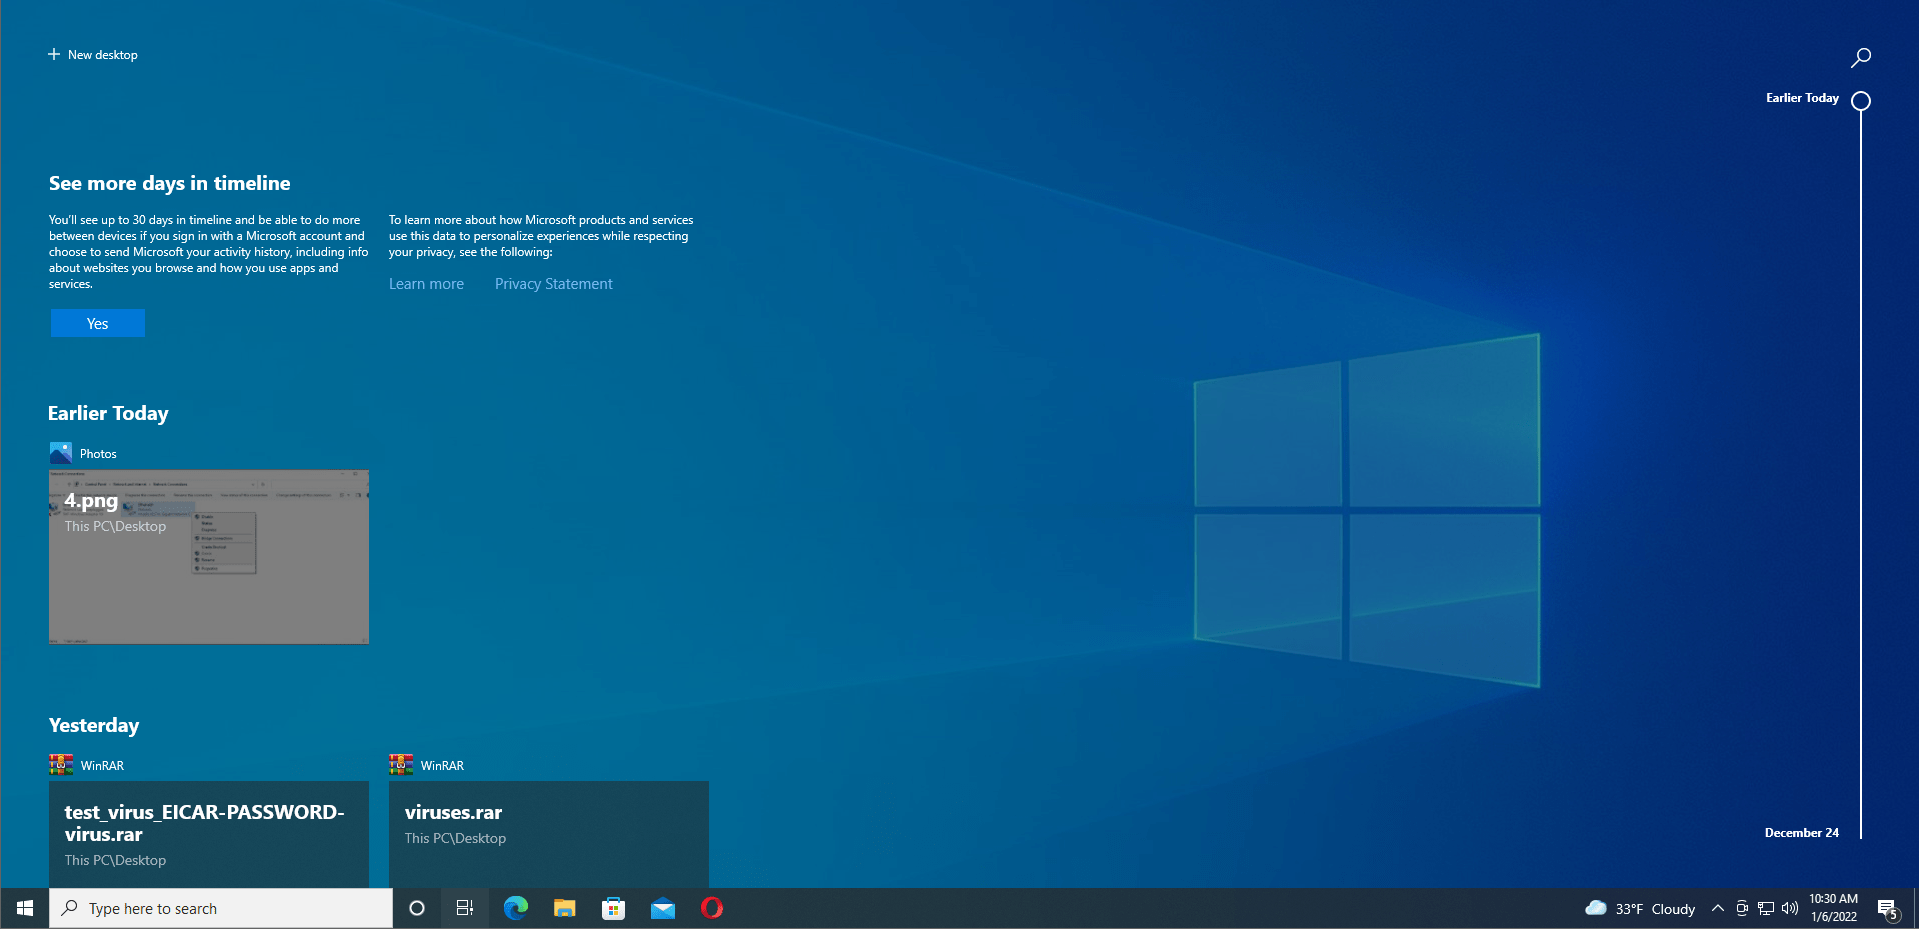
The number of activities displayed for each day depends on your screen size. If there are more than two rows of logged items on a specific day, the Timeline displays the most relevant ones. To view the other activities, click on the “See all X activities” link next to the date, where “X” describes the actual number of events tracked that day.
You can also remove an activity from your Timeline by right-clicking on it and selecting “Remove”.
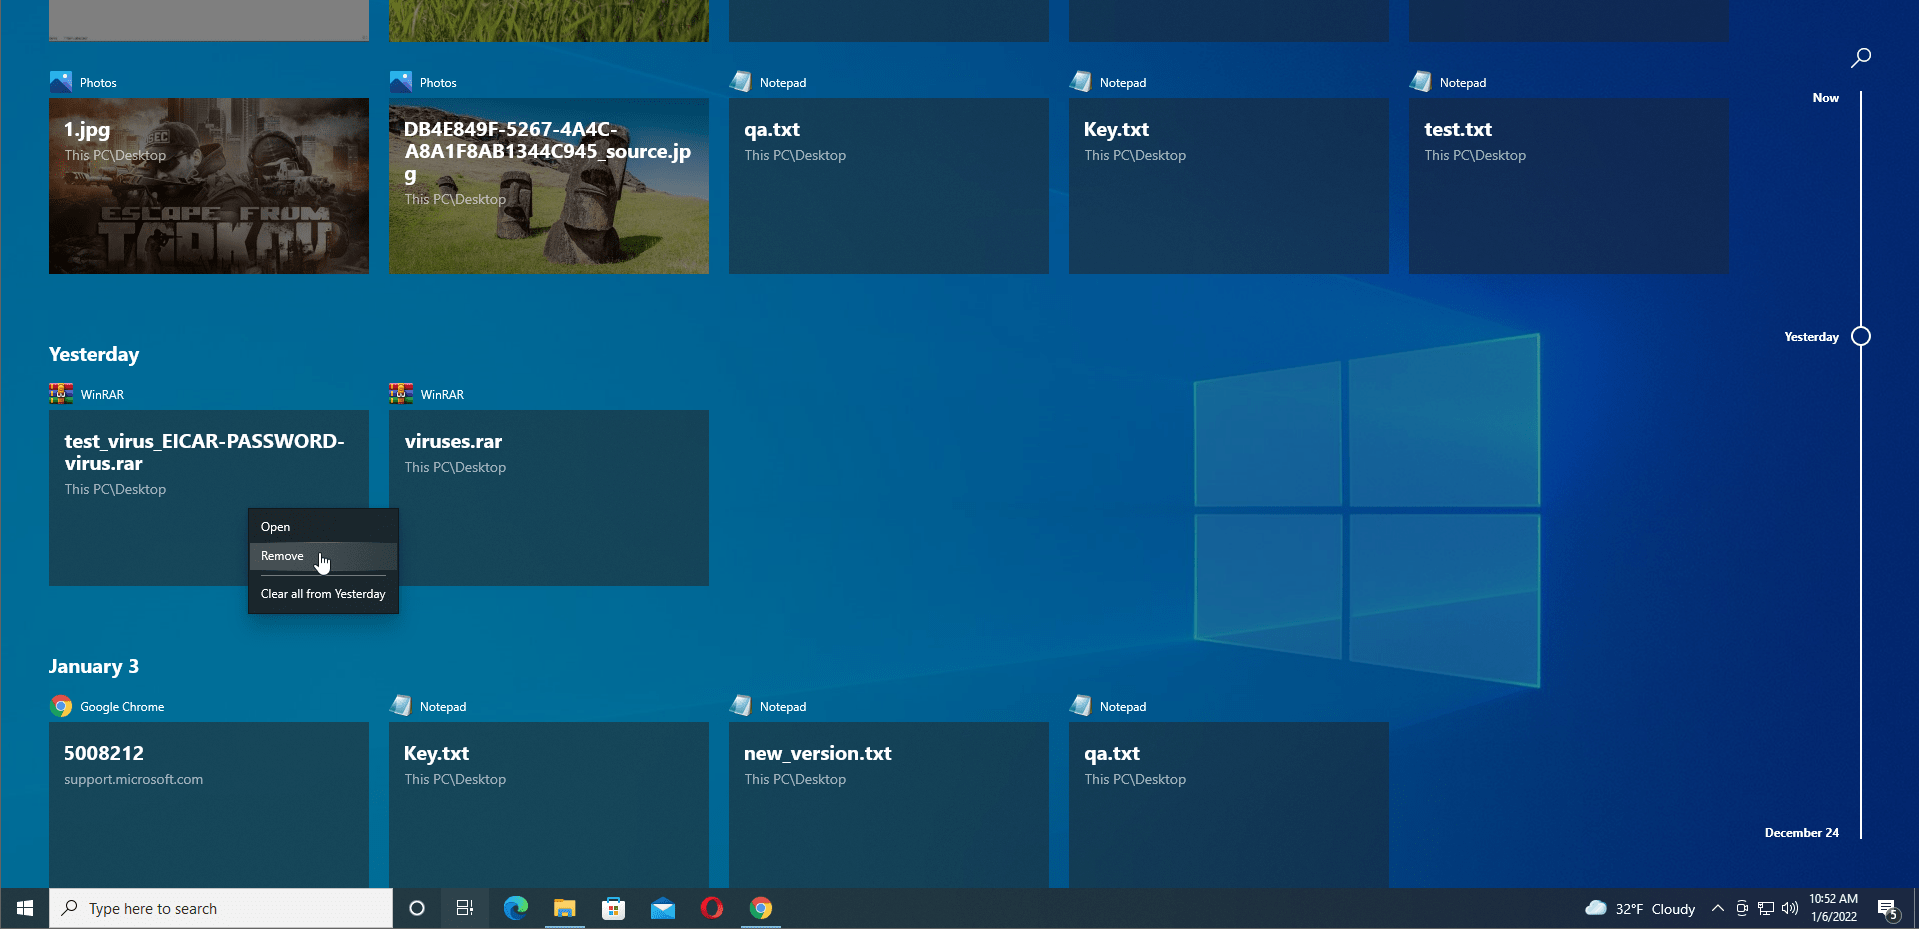
To clear a group of activities, right-click on any activity and select “Clear all from *date*”. This will clear everything from that date.
The Timeline seems to support certain apps, particularly Microsoft apps that ship with Windows 10.
How to Enable Collecting Activity History in Windows 10
You might not know this, but the Timeline is enabled by default. You can verify if that’s your case by following the steps below:
- Open the “Settings” app using the Win + X keyboard shortcut and select “Settings”.

- Select the “Privacy” tab.


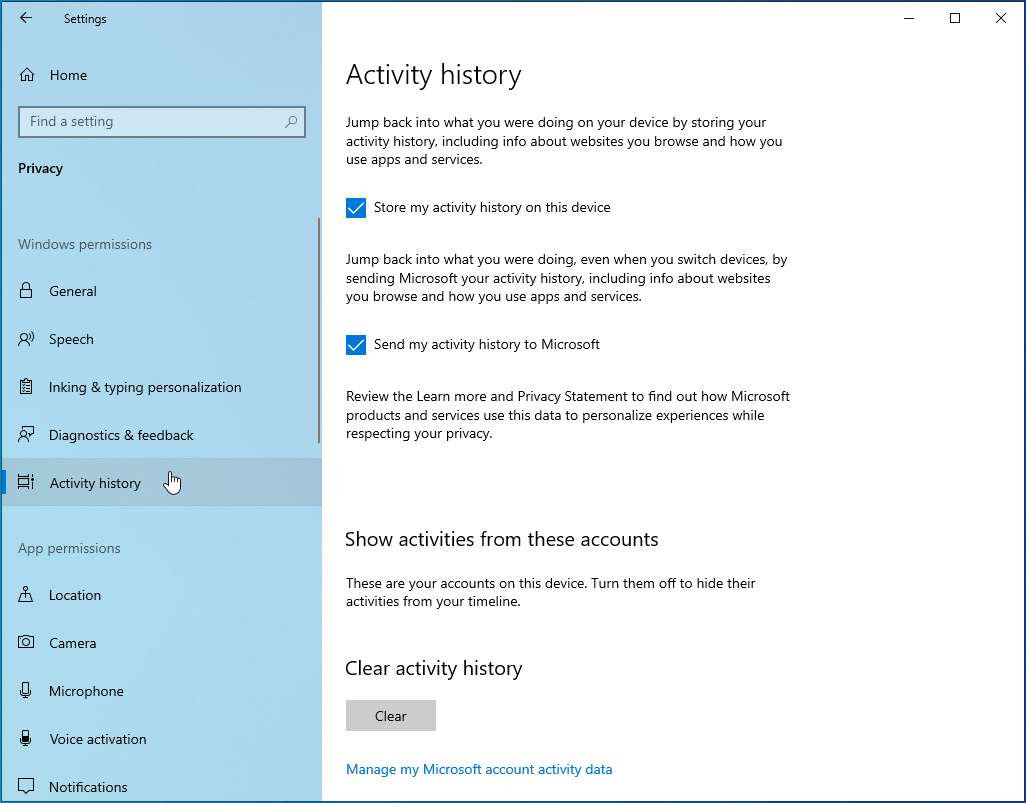
- Click on the “Activity history” option in the left sidebar.

- You should see the timeline-related settings on the right sidebar. To enable collecting activity history, check the “Store my activity history on this device” checkbox.
- Next, move to the “Show activities from these accounts” section and toggle the button next to the accounts whose activities you want to be tracked in your Windows Timeline to “On”.
Windows 10 will record and display the activities of the selected account(s).
How to Disable Collecting Activity History in Windows 10
When you enable the options under “Activity history”, you allow Microsoft to store activities like how you use your apps and services and your browsing history. As you are already aware, you might not be able to completely stop Microsoft from tracking your activity. However, if you don’t want any of your details tracked by Microsoft, stop activity synchronization using the following steps:
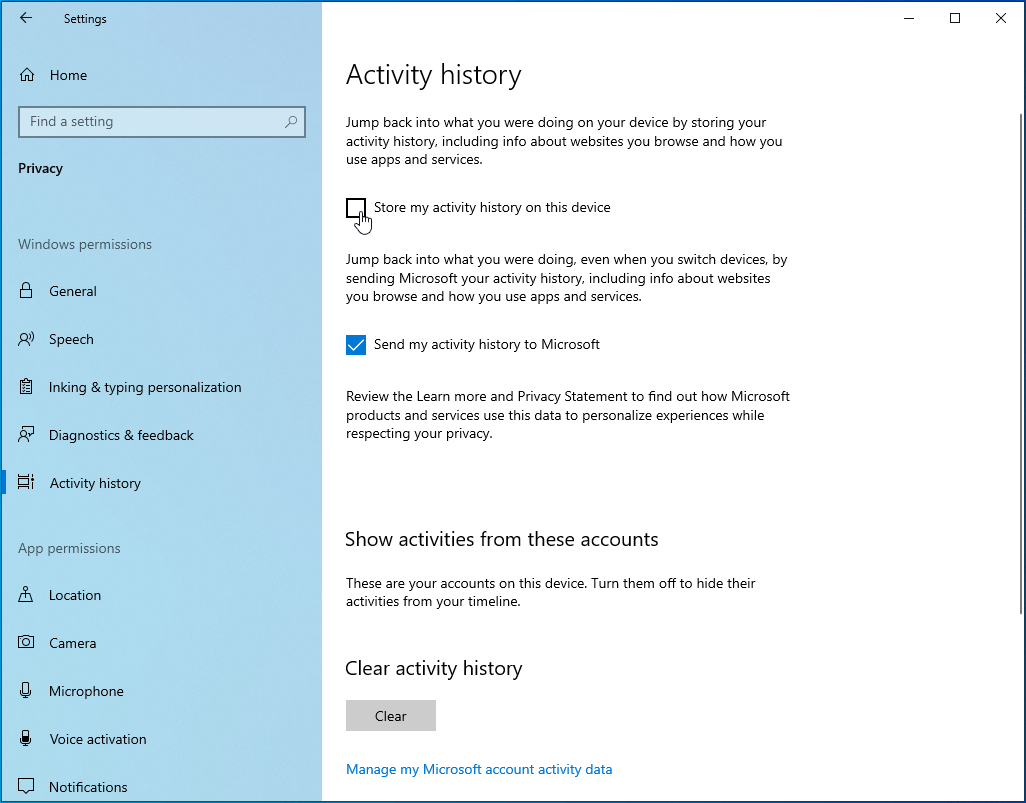
- In the “Settings” app, go to Privacy.
- Click Activity history.
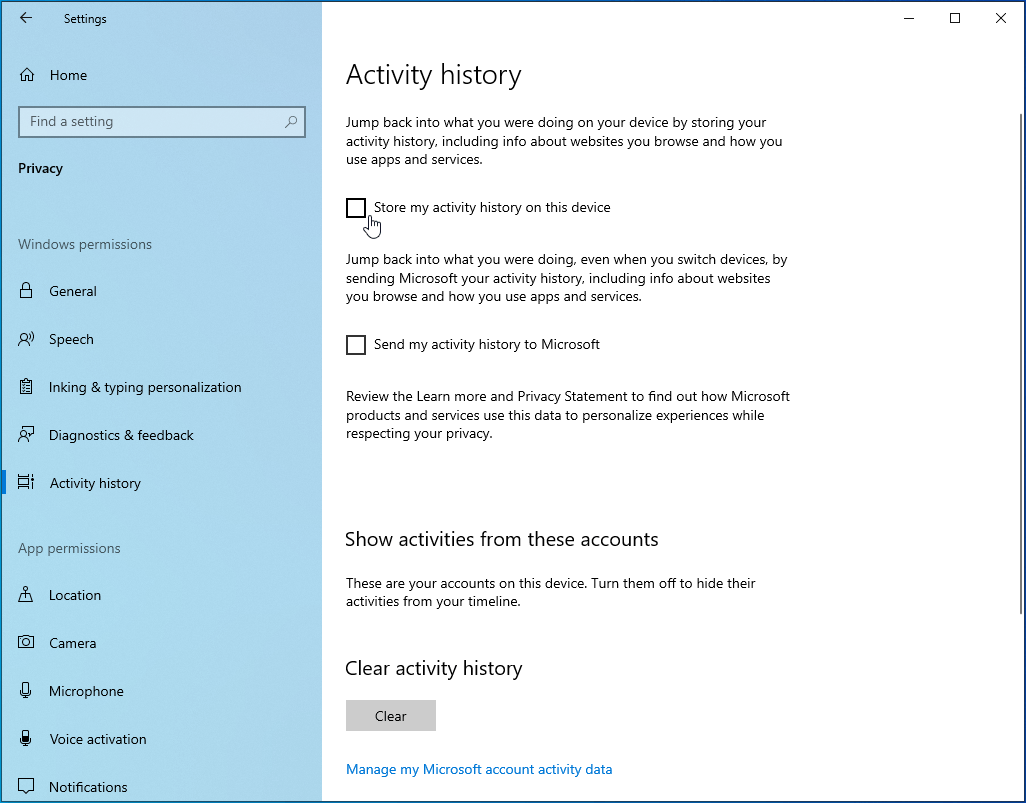
- Uncheck “Store my activity history on this device”. This action will prevent Windows from remembering activities on your device.
- Scroll down and uncheck the “Send my activity history to Microsoft” option. This action prevents your Timeline data from being sent to Microsoft’s servers.
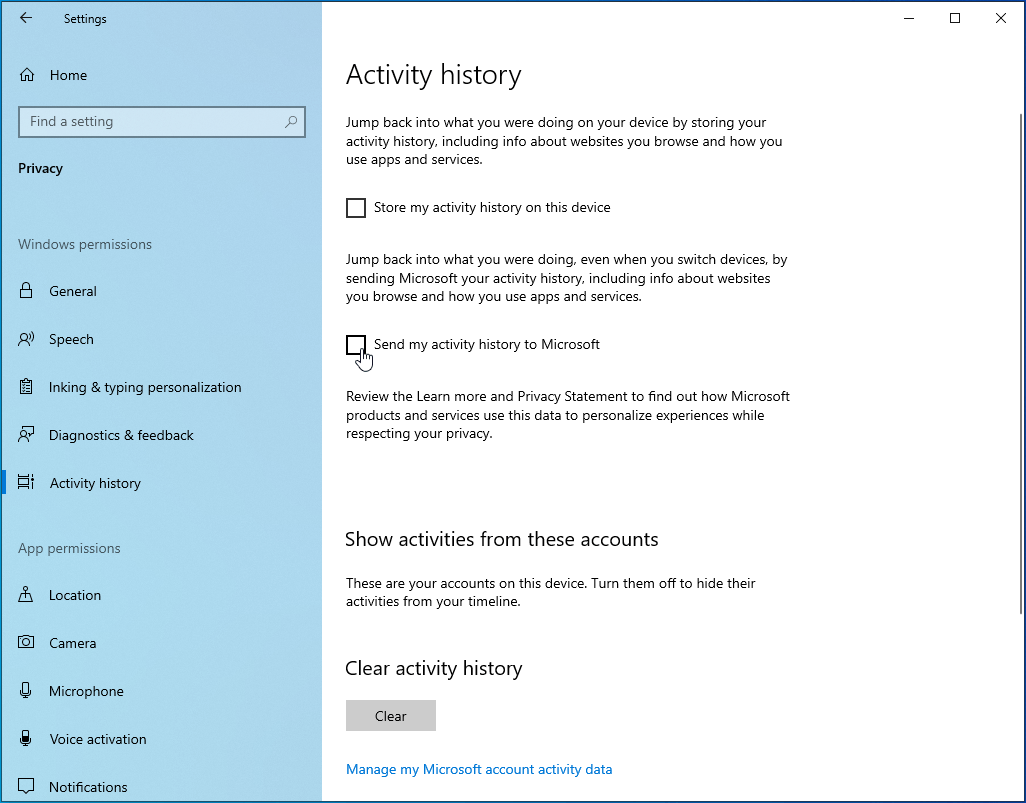
- You’ll also need to toggle the button under “Show activities from accounts” to “Off”.
How to Stop Windows from Saving Your Activity History
As mentioned above, you can decide not to allow Windows 10 to synchronize your activities across all your devices. We mentioned that disabling these features doesn’t necessarily mean that Microsoft won’t be tracking your app usage. Luckily, there’s a workaround to completely stop Windows 10 from collecting your activity data.
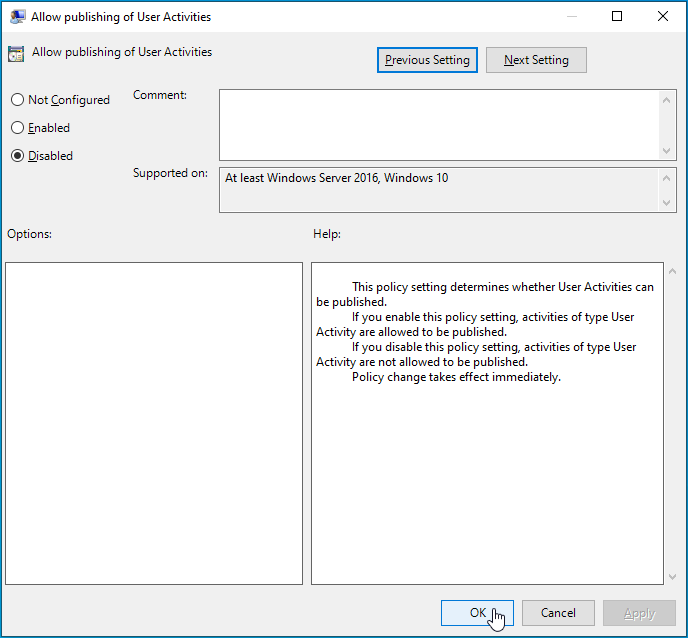
Disable Collecting Activity History in Windows 10 Using Group Policy
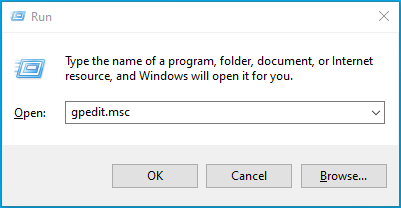
- Press the Win + R shortcut to launch the “Run” command window.

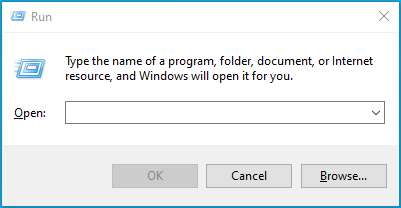
- In the “Run” dialog box, type gpedit.msc and press “Enter” to bring up the Local Group Policy Editor console.
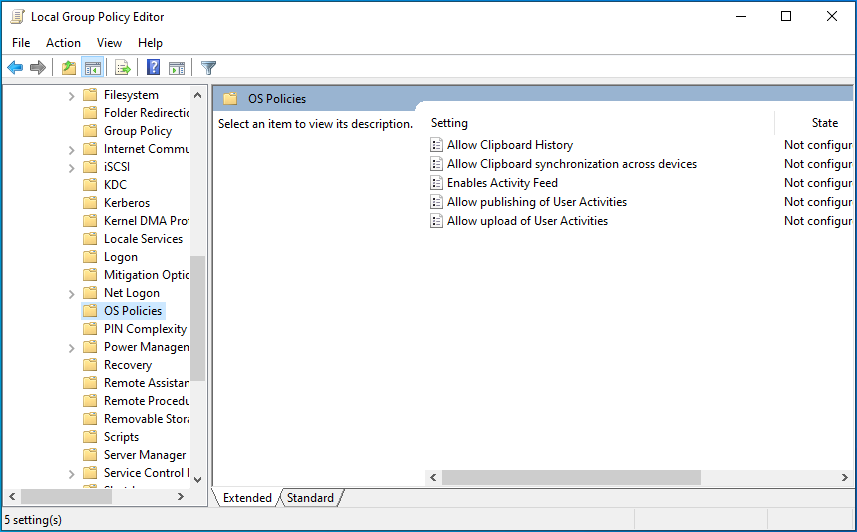
- Browse to this location: Computer Configuration > Administrative Templates > System > OS Policies.

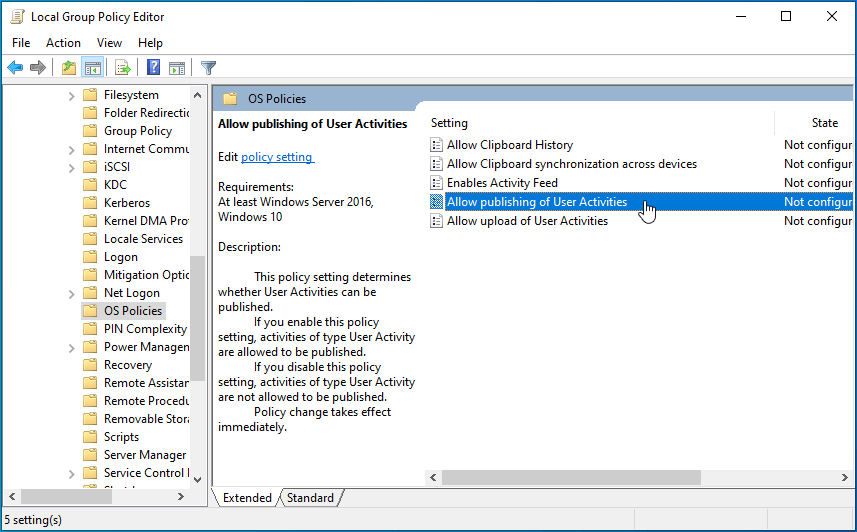
- On the right pane, you’ll see several policies. Double-click on the “Allow publishing of User Activities” policy to edit it.
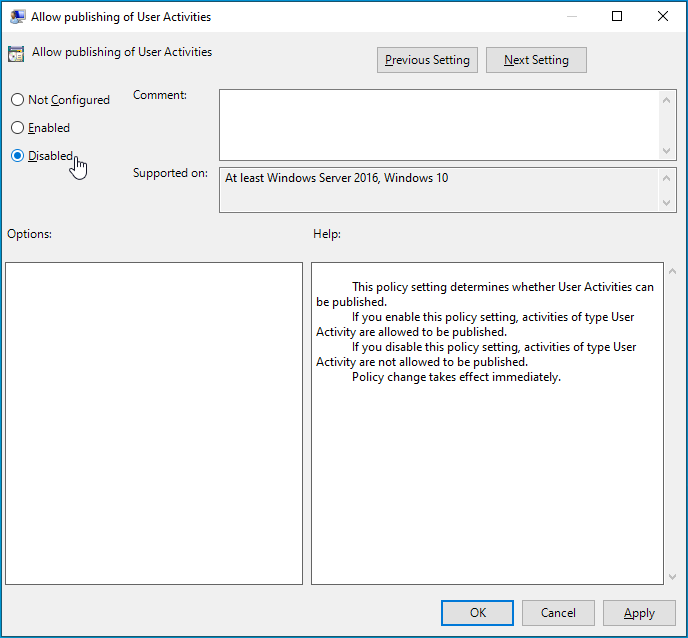
- The “Not Configured” setting is selected by default. Select “Disabled” to prevent your activity from being tracked and stored.

- Click Apply > OK to effect these changes.
Disable Collecting Activity History in Windows 10 Using the Registry
The second method involves editing the Windows Registry. According to a tutorial posted on Tenforums, user Shawn Brink suggests downloading a .reg file that will block the Windows 10 activity tracker.
As always, be sure to back up your registry before modifying it. Additionally, create a restore point before you proceed to make the changes below. In case something bad happens, you can reverse the changes and keep using your computer normally.
Here is how to implement Brink’s workaround:
- Download the reg file from Brink’s tutorial and save it to your preferred location.
- The .reg file makes changes to the registry key below. It adds the PublishUserActivities DWORD and modifies its value to 0. To explain it further, here are the changes the file makes:
- HKEY_LOCAL_MACHINE\SOFTWARE\Policies\Microsoft\Windows\System
PublishUserActivities DWORD
0 = Disable
1 = Enable
- Once the file has been downloaded, double-click on it to launch it and then select “Run” to merge it with the registry.
- When you get a UAC prompt, click “Yes” to continue.
- An alert box will pop up warning you that any changes you make to your registry can result in your computer becoming inoperable – all of which can happen. However, several users tried this workaround, and none of them ran into issues. Click “Yes” to approve the merge.
- The changes should be applied immediately. Afterward, you’ll get one last dialog box notifying you that the information has been added to the registry. Click “OK” to close the file and complete the process.
- Now you’ll need to sign out of Windows and then sign back in. To do so, press the Windows logo key + X shortcut and then select Shutdown or Sign out > Sign out. When you sign back in, the changes will have taken effect and Windows will no longer track your activity.
- You can reverse the process above and re-enable activity tracking anytime by downloading the reg file, also available in Brink’s tutorial.
Protect Your Browsing Data from Trackers
Have you ever wondered why you see product or service ads related to your previous searches when surfing? Well, it’s the work of browser trackers. You see, every time you enter a search query or open a web page on your browser, your browsing history is tracked silently in the background without your knowledge.
The collected data informs advertisers of your surfing habits, and they use this information to learn about services or products that you are interested in. Targeted advertising can be annoying since you keep getting unwanted popup ads, spam messages, and irrelevant notifications when browsing.
Moreover, you may also be the target of price discrimination if you’re from a certain region or country. This applies especially when booking plane tickets or hotels online, etc. To avoid being bombarded by customized ads, it’s advisable to block browser tracking using a third-party anti-tracking tool.
Unfortunately, not all tools are effective, and some may still leak your browsing history. You want a tool you can trust. We recommend BoostSpeed’s Active Browser Anti-Tracker. This software protects your web browsing data by clearing it every time you quit the browser. The program works on all popular browsers, including Edge, Chrome, Firefox, and Opera.
The process is automatic, so you don’t have to worry about forgetting to clear the data manually or receiving unwanted ads and pop-ups. Active Browser Anti-Tracker protects your privacy, keeping you secure. Even Windows won’t be able to track the information about the websites you browse.
![]()
The tool is among the many that come with Auslogics BoostSpeed, which is designed to optimize your system to boost performance.
We hope you find this article useful. For further assistance or expert advice from our technical support team, please don’t hesitate to comment below.