Zoom and other communication platforms have taken on outsized importance at this time. With remote activity being a preference or requirement depending on where you live, many people now rely on video messengers for work or social interaction.
With increased use comes a higher possibility for errors. Zoom may be the biggest communication app out there, but it isn’t perfect. The platform’s users often encounter random connectivity and server bugs that interfere with what they’re doing. The Can’t Connect to Your Service error with code 104101 is one of the most daunting.
If you’re wondering, “How do I fix the Zoom meeting error 104101?”, this article is for you. Read on for the best and easiest ways to remove the error and restore your Zoom feed.
What Is the Error Code 104101 in a Zoom Meeting?
As far as app error codes go, Zoom’s are particularly easy to interpret. The error code 104101 indicates an issue with the platform’s servers or the individual’s system settings. The cause can vary, but the result is an inability to maintain the connection with the Zoom servers. This in turn prevents the user from establishing a video connection with other users.
The error code 104101 and similar Zoom server errors often happen because of a strain on the network resources. Your device receives a certain amount of bandwidth, which is shared among all the programs that need an Internet connection. If too many of these are active at the same time, the Zoom app may not get enough. It can become slow and start showing connection errors here and there.
Related to this is the issue of general system slowdowns caused by too many apps using other resources, like the system memory. This can become problematic, especially on an old PC or one that isn’t optimized. Users can mitigate this kind of effect by using effective PC optimization software.
On the other hand, you can get the Can’t Connect to Your Service error even when Zoom is the only active app of its kind. This can happen if the network connection is poor. Video apps generally require a fast connection to run optimally.
Software issues can also make the error code 104101 appear on Zoom. An outdated Zoom app may frequently display this error, especially when using a feature only optimized on the latest version. Running the latest version of Zoom on an outdated operating system may yield similar frustrations. In this case, the system isn’t powerful enough to handle the increased demands of the Zoom app.
Missing or corrupt files can contribute to the error 104101 issue on Zoom as well. All apps need their component files to be working properly. If a file gets deleted or broken because of cyber attacks, etc., it can cause errors in the main application.
If you happen to use Zoom on the web, then an error in your browser can directly cause the program to display the Can’t Connect to Your Service message. You can check your browser cookies, history and extensions for unauthorized changes or malicious plug-ins and remove them.
Now you know how to answer the “What does the error code 104103 mean in Zoom?” question. With all that said, you’d be asking: “How do I fix the Zoom server error?” We’ve provided several solutions in the next section.
How to Fix the Zoom Server Connection Error Code 104101
Why does Zoom say, “Unable to connect?” This could be due to server or system issues. How can these issues be fixed? Read on to find out more.
You can try the solutions in the order that suits you. It depends on what you’ve already tried and your level of comfort when fiddling with software settings. However, you can try these simple steps first before you dive into deeper troubleshooting:
- Reboot the computer
- Reset or restart your router
- Close and restart the Zoom app
- Update Zoom if you’re using an older version
- Scan your PC with anti-malware software
- Clear browser cookies and remove unknown extensions
Fix 1. Turn Off Your Antivirus
It makes sense to enable your security software and keep it active at all times. The flip side to this is that there are occasions where your protection tool interferes with another app and stops it from working properly.
Sometimes, this happens to the Zoom app. If you’re using an overzealous antivirus, it can block some of Zoom’s features, which results in the error code 104101 or a similar bug.
It’s often difficult to immediately pinpoint what caused the Can’t Connect to Your Service error. One way to find out is to turn off your antivirus tool and see what happens. If the Zoom connection goes through, then you know which software is at fault.
After you’re done with your Zoom session, you have several options. You may whitelist Zoom so the security software no longer interferes. You may also update the software and make sure the latest version doesn’t flag harmless programs like Zoom. Finally, you can switch to another tool that doesn’t give you headaches.
Fix 2. Configure Firewall Settings for Zoom
Windows Firewall is automatically active on Windows 10 and 11. It checks all outgoing and incoming connections and blocks those that are potentially harmful.
If you’re getting the error code 104101 while using Zoom, this might be related to Windows Firewall. It’s possible that Zoom connections are disabled. You can rectify this by establishing the correct settings in Firewall.
The first step in the process is opening the Firewall app on Windows. You can do that via the Control Panel, but a faster method is using the search function on Windows. Hit the Windows key, type “firewall”, and select Windows Defender Firewall.
When the Firewall window opens, select the “Allow an app or feature through Windows Defender Firewall” option.
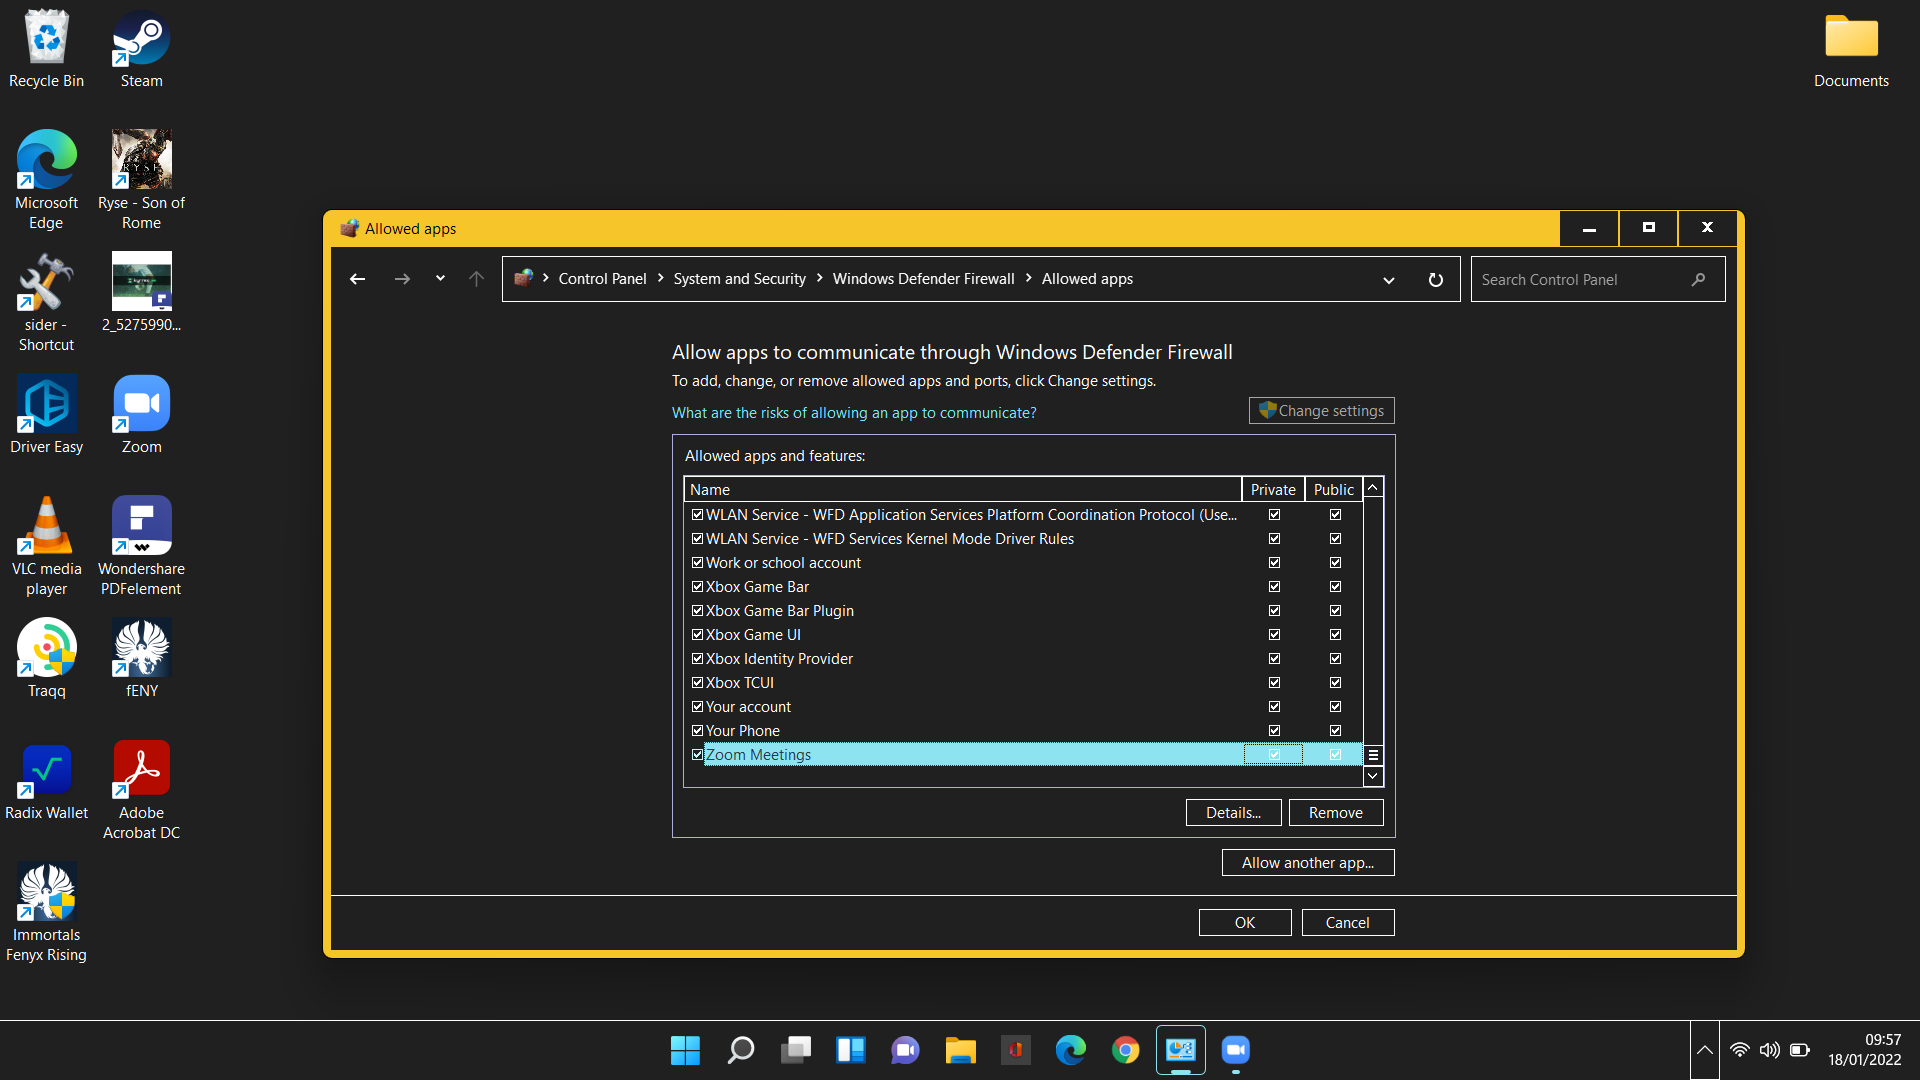
In the “Allowed apps” window, click the Change Settings button. Under “Allowed apps and features”, scroll down to Zoom Meetings. If Zoom isn’t on the list, click the “Allow another app” button, navigate to C\Users\Username\AppData\Roaming\Zoom\bin and select Zoom to add it to the list.
Make sure that Zoom Meetings is ticked for both Private and Public. Click the OK button to save the changes and return to the main Firewall window.
Next, navigate to Advanced Settings > Inbound Rules. Find Zoom Meetings, right-click it and select Properties. Under the Action group, select “Allow the connection” and click OK.
If Zoom Meetings isn’t on the Inbound Rules list, you can put it there. Follow these steps:
- Select Inbound Rules on the left and select New Rule on the right.
- Choose Program as the type of rule you’d like to create and click Next.
- Select This program path and click Browse.
- Navigate to C\Users\Username\AppData\Roaming\Zoom\bin, select the Zoom application and click Next.
- Select Allow the connection and click Next.
- In the next window, tick the Domain, Private and Public boxes and click Next.
- Type
Zoom Meetingsinto the Name field and click Finish.
After changing your Firewall settings for Zoom, check that the issue is resolved.
Fix 3. Change Your DNS Settings
Zoom connection errors can happen due to improperly configured DNS settings. You can reset the DNS via the Command Prompt or change your DNS service provider (or both) to fix this.
Here’s how to reset the DNS:
- Hit the
Windows keyand typecmd. - Click Run as administrator under Command Prompt and click Yes on the UAC prompt.
- Run the commands below in the Command Prompt to reset your DNS and winsock:
ipconfig /flushdns

netsh winsock reset
To change your DNS provider, follow these steps:
- Open the Control Panel and navigate to Network and Internet > Network and Sharing Center > Change adapter settings.
- Right-click your current network device and select Properties.
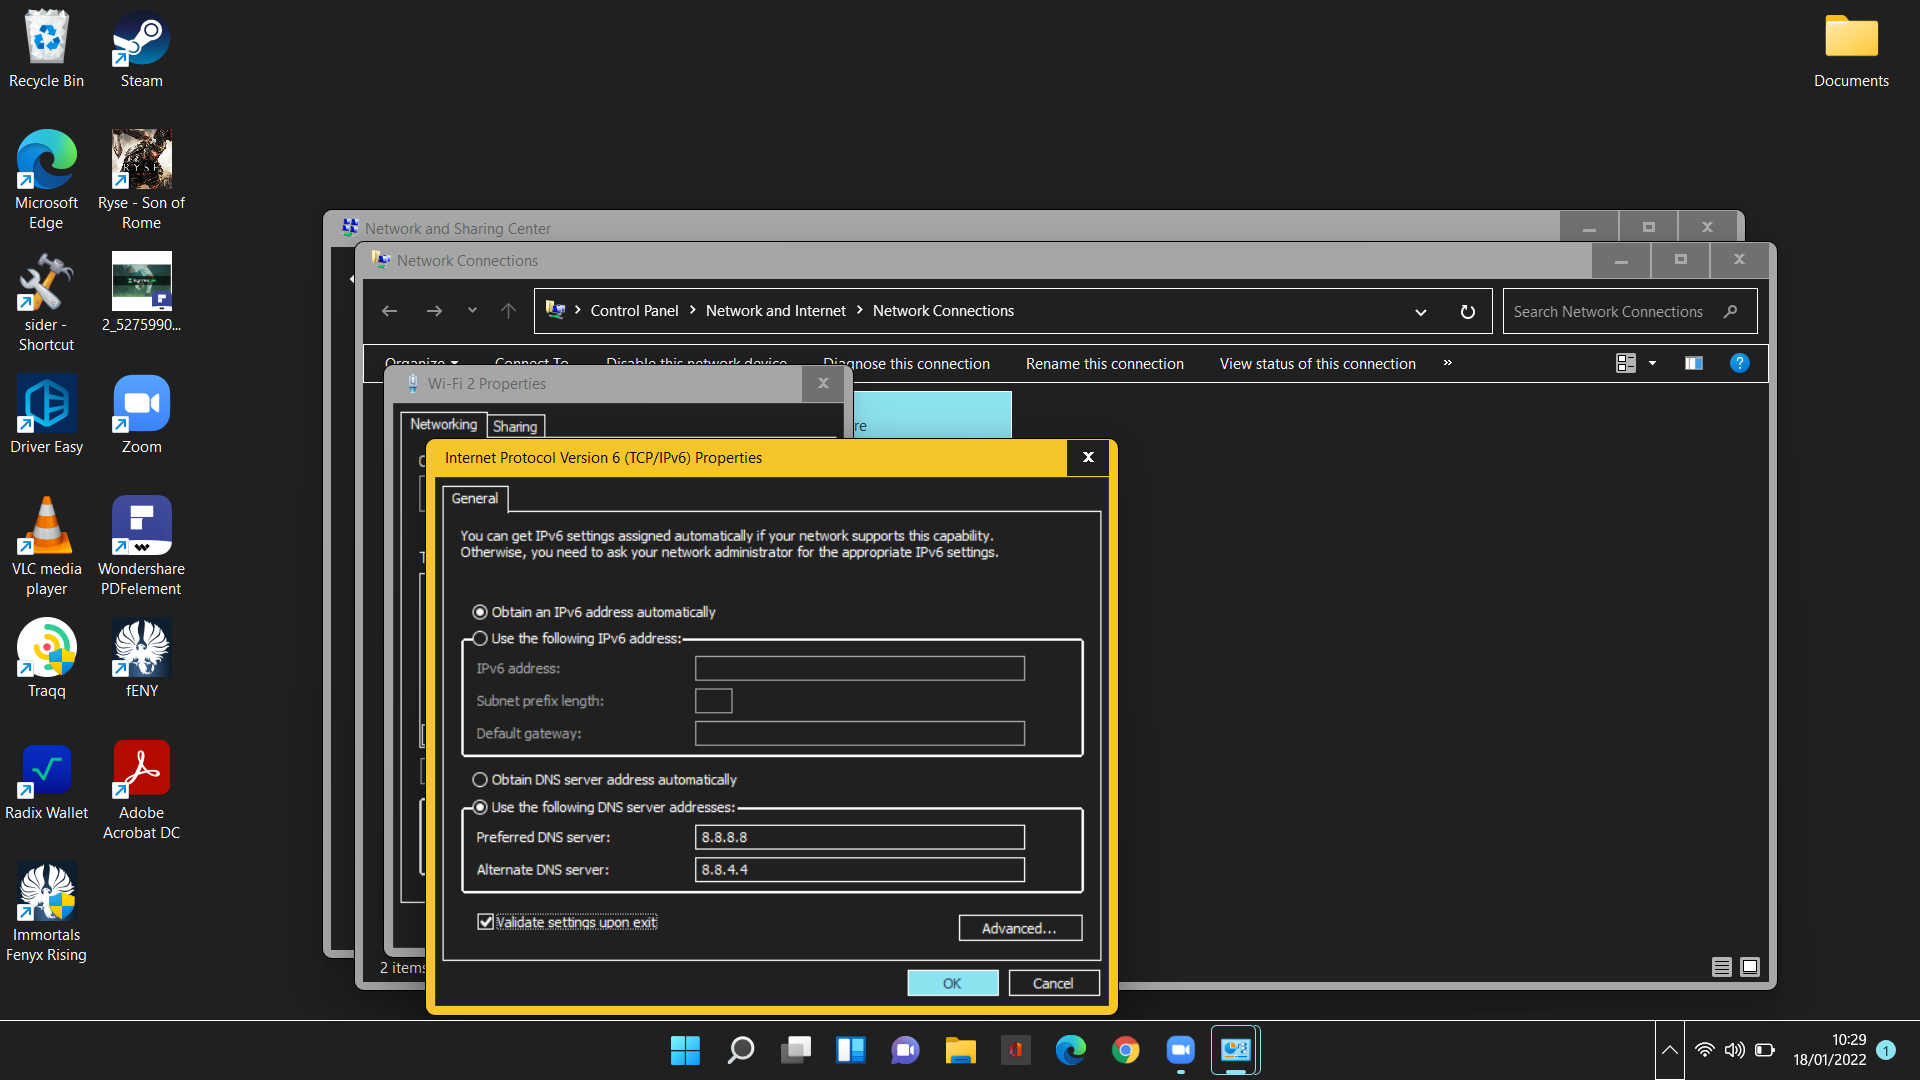
- In the Networking tab, select Internet Protocol Version 6 (TCP/IPv6) and select Properties.
- Select Use the following IPv6 address:.
- Add your Preferred and Alternate DNS server addresses in the given fields. You can use those from Google or another public DNS service.
- Tick Validate settings upon exit and click OK.
Repeat the steps for Internet Protocol Version 4 (TCP/IPv4).
Reboot your computer and check that Zoom now works normally.