- What are the causes of the Steam error code 41 on Windows 10?
- How to fix the ‘Steam servers too busy to handle this request’ error message
- Prevent your antivirus program from blocking Steam
- Turn off Game Mode
- Change the game’s launch option
- Clear the game’s cache
- Update your display card
- Using Windows Update
- Using the Device Manager
- Using Auslogics Driver Updater
- Conclusion
You can hardly play video games without using the Steam client. Most of the popular titles these days are exclusive to the platform, and game developers understand what they stand to lose should they elect not to publish via Steam.
Steam, as a client and game store, is superb. A lot has gone into optimizing it for the best user experience and reliability. That said, issues do occur from time to time. The problems you experience on Steam are not necessarily tied to the incompetence of the app’s developers; a number of them originate from your system.
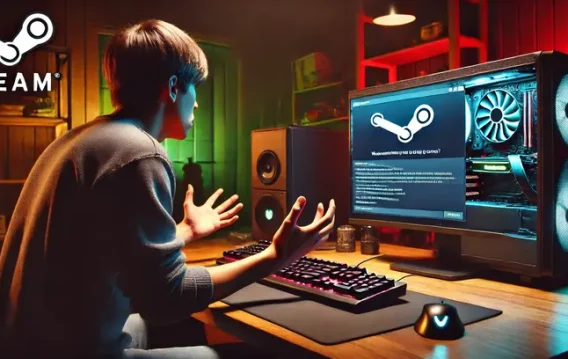
One of the many issues experienced by Steam users is the error code 41, which prevents gamers from loading certain games and performing online actions such as downloading and installing updates. The error message normally reads:
“The Steam servers are too busy to handle your request.”
Now, this issue suggests that something is wrong with Steam’s servers. You can confirm that by going online and checking if other users are experiencing the problem. Steam should put out a statement if this is the case, with an explanation and timeline that details when their servers will be up again. So, all you have to do in this situation is wait.
However, if Steam’s servers don’t have issues and the message keeps popping up, something’s wrong with your system. We’ll be walking you through the common causes of the problem and how to fix it.
What are the causes of the Steam error code 41 on Windows 10?
Apart from Steam’s servers going offline, there are other underlying causes of the problem. Understanding and going through them one after the other will help you get rid of the error.
One of the common reasons for this issue is a faulty Internet connection. If your system’s Internet is faulty, the Steam client will experience problems communicating with its servers. Below are other glitches that users have found to be triggering the error message:
Antivirus conflict
Your antivirus program might be blocking the app’s attempt to utilize your computer’s internet infrastructure. Disabling the antivirus program will easily resolve the problem, in this case. However, it’s better to add Steam as an exception. We’ll be showing you how to do that later.
Obsolete or faulty graphics card drivers
For some reason, graphics card drivers that are out of date tend to obstruct some of Steam’s activities. If you haven’t updated your driver in a while, this could be the cause of the issue. The same goes for a driver that is missing or corrupt. Read on to find out how to properly update the card’s driver.
Broken or missing game files
Your internet could be superb, and Steam could be able to communicate with its servers just fine. A bizarre trigger of the error is missing game files. In this case, you’ll have to verify the installation files of the game you’re trying to run.
Other possible causes include the Steam beta program, corrupted game cache, and Windows game mode.
How to fix the ‘Steam servers too busy to handle this request’ error message
Now that you know the possible root causes of the error message, you can take guided steps on resolving the problem. Start with confirming that you have a working internet connection, and then check if any of the problems above hit close to home. With that idea, you can go straight to what you think is the likely cause of the error on your system.
If you have no idea where to start, you can begin your journey with us and work your way through the solutions we’ve provided in the order that they are arranged.
Prevent your antivirus program from blocking Steam
As we mentioned earlier, your antivirus program could see Steam’s activities as suspect and block the client’s access to your network infrastructure. This is quite frustrating, but you can easily get rid of the problem by disabling the security program. As it turns out, disabling the program worked for many gamers.
That said, we don’t recommend that you turn off your system’s protection. Doing that will open you up to risks, especially when your system comes in contact with malicious software, which is flowing around everywhere these days. The best thing to do is add Steam as an exception since you are convinced it’s a legitimate program.
Adding the client as an exception will tell the antivirus program not to block it. Mind you, though, the “exceptions” feature varies in different antivirus programs. For some, it’s called “exemptions,” and for others, it’s called “exclusions”. Your antivirus program might have a different name for the feature, but rest assured it’s quite relatable. If you don’t know how to find it, a simple Internet search will point you to a guide that will walk you through the process.
If you use the Windows Security suite as your main protection program, however, you don’t need to perform an Internet search; the guide below will show you what to do:
- Go to the far right of your taskbar on your Windows 10 PC.
- Click on the white shield. If you don’t see the shield, click on the “Show hidden icons” arrow to slide the system tray up, then click on the shield.
- Once Windows Security opens, click on the Virus & Threat Protection tile.
- After you get to the Virus & Threat Protection interface of the security program, scroll down and click on Manage Settings under the Virus & Threat Protection Settings section.
- On the Virus & Threat Protection Settings interface, scroll down and click on “Add or remove exceptions” under Exceptions.
- Once the Exclusions page appears, click on the “Add an exclusion” icon, and then choose Folder from the context menu.
- Once the Select Folder dialog pops up, navigate to the folder where you installed Steam, select the Steam folder, and then click on the Select Folder button.
- Now, run the client and check for the problem.
Turn off Game Mode
As you know, Microsoft continues to put in effort to optimize Windows 10 for gaming. One of the fruits of this dedication is a feature known as Game Mode. When enabled, Game Mode allows your system to allocate more of its power to your game to improve performance and get rid of lags and problems. Since its introduction, it has shown promise, but not without issues.
As it turns out, turning off Game Mode may help you get rid of the error code 41 on your system. You can follow that path and check if it works for you.
If you don’t know how to disable Game Mode, follow these steps:
- Right-click on the Start button and click on Settings once the Quick Access menu appears. You can also tap the Windows and I keys simultaneously to open the Settings application.
- After the home page of Settings shows up, click on the Gaming icon.
- After the Gaming interface of the Settings app shows up, go to the Game Mode tab.
- Now, toggle off the Use Game Mode switch.
- You can now open Steam and try running the game.
Change the game’s launch option
We’ve pointed out that your system’s Internet connection might not be related to the issue. The problem might be coming from the game you’re trying to play.
It’s possible that the game’s current launch configuration isn’t helping. Thankfully, you can change its launch parameters in the Steam client.
One launch option that’s known to work is adjusting the game’s full-screen mode. The steps below will walk you through the process:
- Go to the Start menu, search for Steam, and then launch the client. If you have the app’s desktop shortcut, double-click it instead.
- Once Steam appears, go to the top of the window and click on Library.
- Once your list of games shows up, navigate to the game that is triggering the issue, right-click it, and then click on Properties.
- Go to the Properties page of the game on the right side of the window.
- Stay under the General tab, then click on the Set Launch Options button.
- Once the Launch Options text box shows up, type “safemode, fullscreen = 0” (without the quotes). Note that if there are pre-existing launch options in the box, you have to use a comma and space to separate them from this.
- Now, launch the game and it should open in windowed mode.
- If the game launches in windowed mode, you can easily switch it back to full-screen mode by tapping the Ctrl and Enter keys simultaneously.
Verify the integrity of your game files
Still on issues that emanate from the affected game, your next step should involve verifying the game’s installation files. When any of these files become corrupt or go missing, lots of different problems can occur, depending on the affected file. Some gamers verified the game’s installation files and found that the error code disappeared. So, try doing that and check if you achieve the same result.
The following steps will show you how to do that:
- Go to the Start menu, search for the Steam client, and then launch it. You can also double-click the app’s desktop shortcut.
- After the client pops up, click on Library in the top area of the window.
- Once you see the list of games attached to your Steam account, right-click on the affected game, and then click on Properties in the context menu.
- When the Properties interface of the game shows up on the right side of the window, click on Local Files.
- Now, click on the Verify Integrity of Game Files button.
- The Steam client will now begin to scan your game files, comparing them to those on its servers. It will automatically replace any file that is missing or corrupt.
- Once the process completes, restart the client and launch the game to check if the error code shows up again.
Clear the game’s cache
Another issue is the game’s cache. This is where certain parameters and preferences that you use on multiple occasions are stored. The cache folder might accumulate wrong settings over time, or it could be corrupt. Such problems could trigger the error code 41.
Clearing the game’s cache, in this case, will help you get rid of the problem. The steps below will show you how to do that:
- Launch the Run dialog box by right-clicking the Start button and selecting Run in the Quick Access menu. You can also tap the Windows and R keys simultaneously to open Run.
- After the dialog box appears, type %appdata%” (no quotes) into the text box and hit the Enter key.
- After the AppData folder opens, go to the game’s folder and delete it.
- You can now run the game and check if the issue has been resolved.
Update your display card
Games heavily rely on graphics cards to run. But not just games; the graphics card has processing input with almost every application on your computer, including the Steam client. It is possible that the display driver isn’t really compatible with the Steam client, causing the error code 41 to occur.
The graphics card driver could be corrupt, missing or obsolete. To resolve the problem and fix the error, update the piece of software. Before you do that, though, we recommend that you remove the current driver to make sure it doesn’t cause conflicts with the updated version. The following steps will show you how to perform the uninstallation:
- Press the Windows and S keys simultaneously to open the search bar beside the Start button. You can also click on the magnifying glass icon in the taskbar.
- After the search box appears, type “device manager” (no quotes) into the text field, then click on Device Manager in the results.
- Now, expand Display Adapters once you see the Device Manager.
- Right-click on your video adapter and click on Uninstall Device.
- After the Uninstall Device confirmation box opens, tick the checkbox beside “Delete the driver software for this device,” then click on the Uninstall button.
- Once Windows removes the device, restart your PC.
You can also use freeware, such as the Display Driver Uninstaller or AMD Cleanup tool (for AMD users,) to remove the driver and its leftover files.
Now, once the driver is uninstalled, make sure you take the right steps to install the updated version. There are different methods that you can employ to download and install the card’s latest driver. You can use the Device Manager, Windows Update, and third-party applications.
Downloading the driver from the GPU manufacturer’s website is another way to go. However, you can save yourself the stress of checking and double-checking the right driver for your card’s model by using the methods we stated earlier.
If you don’t know how to use those tools, we’ll be explaining the processes one after the other.
Using Windows Update
Windows Update installs system-wide updates for Microsoft applications and core Windows utilities. It also updates drivers for different devices, including your graphics card. Using the tool means you’ll be updating your driver straight from Microsoft’s servers.
The only downside to using Windows Update is the uncertainty surrounding the availability of updated drivers. Before Microsoft releases these drivers, they go through different testing and verification processes, which delays release. That said, the driver could be available when you update your system.
Follow these steps to download and install updates for your PC:
- Open the search utility beside the Start button. You can do that by clicking on the magnifying glass icon in the taskbar or by using the Windows + S keyboard combo.
- After the search box appears, type “update” (no quotes) into the text box, then click on “Check for updates” in the results.
- The Windows Update tab of the Settings application will now appear.
- If you have pending updates, the utility will begin to download them automatically. Sometimes, though, you’ll have to click on the Download Now button to kick-start the process.
- After the tool downloads the updates, grant it permission to restart your PC and install them by clicking on the Restart Now button.
- Your computer might reboot several times during the installation process.
- Once the updates are installed and your system boots up normally, launch the Steam client and check if the issue persists.
Using the Device Manager
With the Device Manager, you can prompt Windows to perform an online search for your graphics card’s updated driver software. The steps below will show you how:
- Press the Windows logo and X keys together to launch the Quick Access menu, which shows up on the left edge of your screen.
- After the menu appears, click on Device Manager.
- Once you see the Device Manager, navigate to the Display Adapters menu and click on the arrow to its left.
- Now, right-click on your graphics card and select Update Driver from the context menu.
- When the Update Driver window appears, click on “Search automatically for updated driver software.”
- The tool will now search for the latest driver for your graphics card and install it.
- Restart your system and run the client after the process is complete.
Using Auslogics Driver Updater
Apart from Windows Update and the Device Manager, you can use a third-party application such as Auslogics Driver Updater to download and install the updated version of your graphics card’s driver.
The tool makes the process easier than what you will experience using the built-in Windows tools. It is designed to scan your system for problematic device drivers, whether they are missing, outdated or corrupt. Once it finds these drivers, it will allow you to automatically install their updated versions.
When you use Auslogics Driver Updater, you don’t have to wait for Microsoft to release the drivers. You can easily get timely releases as the program is designed to fetch official drivers once they are published. Also, during future updates, the tool will back up the current drivers before updating them.
The steps below will show you how to download, install, and use the program:
- Go to this webpage and click on the Download button.
- Once your browser downloads the setup file, run it.
- Click on Yes once the User Account Control dialog pops up.
- After the installation wizard shows up, enter your setup preferences, then click on the Click to Install button.
- Once the installation process is complete, the tool should start up automatically and begin to scan your system for faulty drivers. If it doesn’t start on its own, open the Start menu and launch it, then click on the Start Scan button.
- Once the scanning process is complete, you’ll see all the problematic drivers on your system. Your graphics card driver will appear on the list if it has any issue.
- Now, click on the Update button.
- After the update process is complete, restart your system and launch the client to check for the problem.
Conclusion
The error code 41 in Steam should no longer be a bother if you carefully go through the solutions above. If nothing works, opt out of the Steam beta program or reinstall the affected game. If you have further questions or want to share your thoughts on the issue, use the comments section below.