
![[EASY GUIDE] How to Change the Default Font in Microsoft Word?](https://www.auslogics.com/en/articles/wp-content/uploads/2023/11/shutterstock_2265671591-1.jpg)
- How to Modify the Default Font in Microsoft Word
- If the Default Setting “Doesn’t Stick”
- How to Modify the Default Font in Word 2010
- How to Modify the Default Font in Word 2007
- How to Fix the “Word Doesn’t Remember Preferred Font Settings” Problem?
- FAQ
- Can I Change the Default Font to a Custom Font I’ve Installed?
- Will Changing the Default Font Affect Existing Documents?
- Can I Change the Default Font for Specific Types of Documents, Like Resumes or Business Letters?
- Does This Guide Work for All Versions of Microsoft Word?
- What if I Want to Reset the Default Font Back to the Original Settings?
You are probably well aware that Microsoft Office Word (as well as most other document apps) lets you set and save your preferred font settings. This is a convenient, time-saving feature that allows you to get started with your project without having to worry about formatting your document every single time. Thus, if there is a particular font in Microsoft Office Word that you use most of the time, you can set it to be your default font that will activate as soon as you open the specific Microsoft Word template.
However, some users have reported that Word does not remember their preferred font settings after they had upgraded from the trial version of the program to the full version. The trial version of Office Word, in this case, does not store any new settings or changes you have tried. This should not be the case — luckily, this problem should have a simple fix. So, how do you set and keep a preferred default font in Word? We will go over the steps in detail right down below.
How to Modify the Default Font in Microsoft Word
Using your favorite font in Word is quite easy. All you need to do is set it as the default font in Microsoft Word. Here’s how:
- Go to Home.
- Click the Font Dialog Box Launcher.
- Go on to select the type and size of font that you would like to set as default.
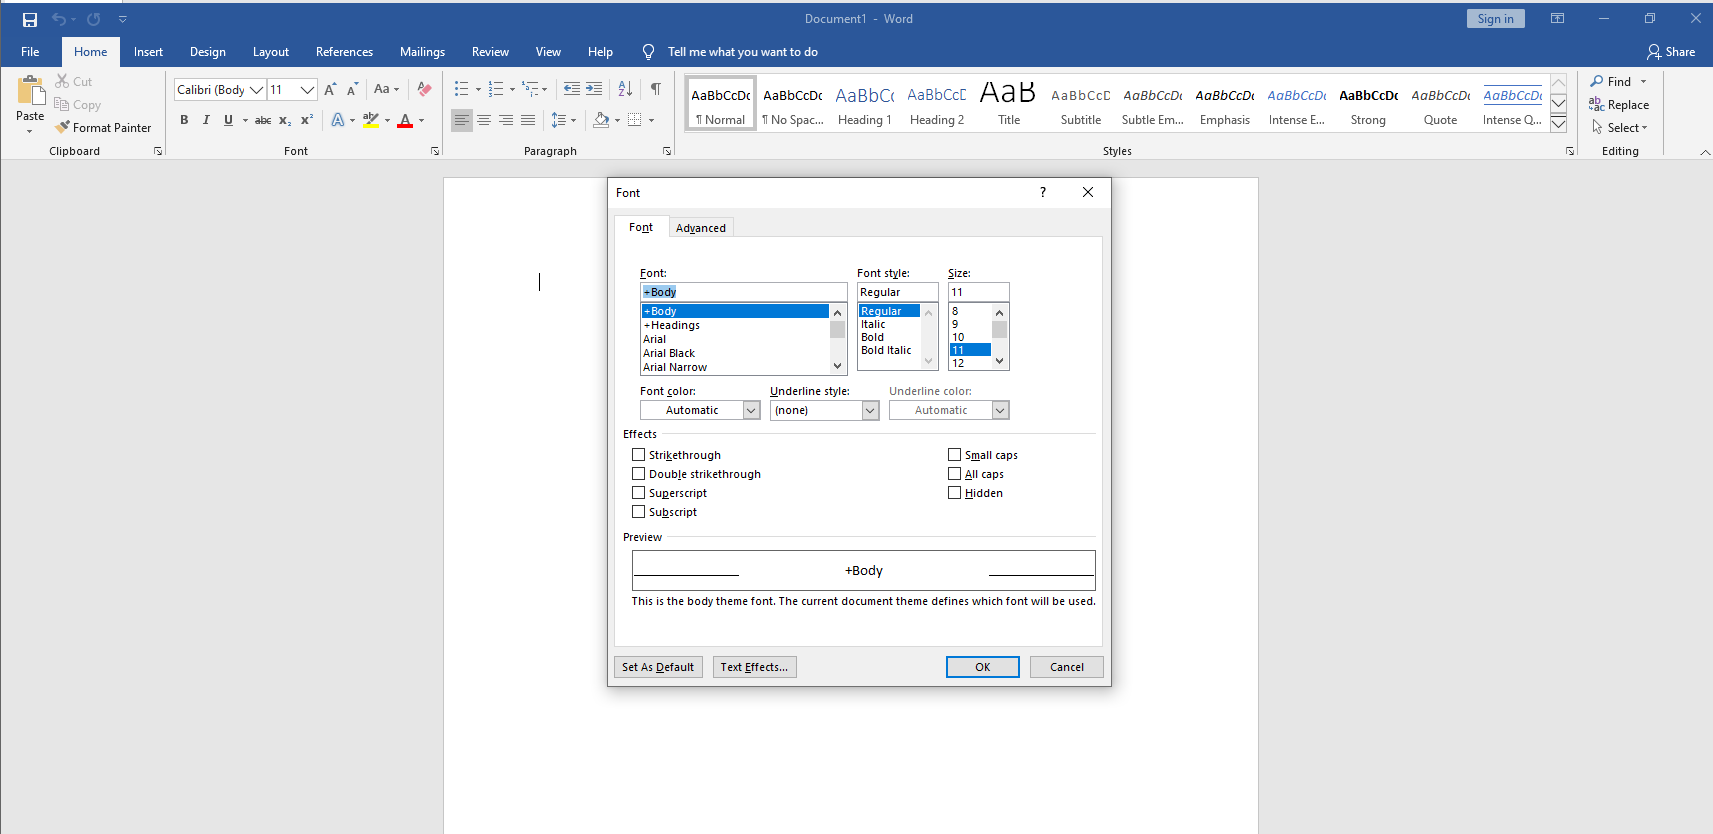
- Click Set As Default.
Next, select one of these options:
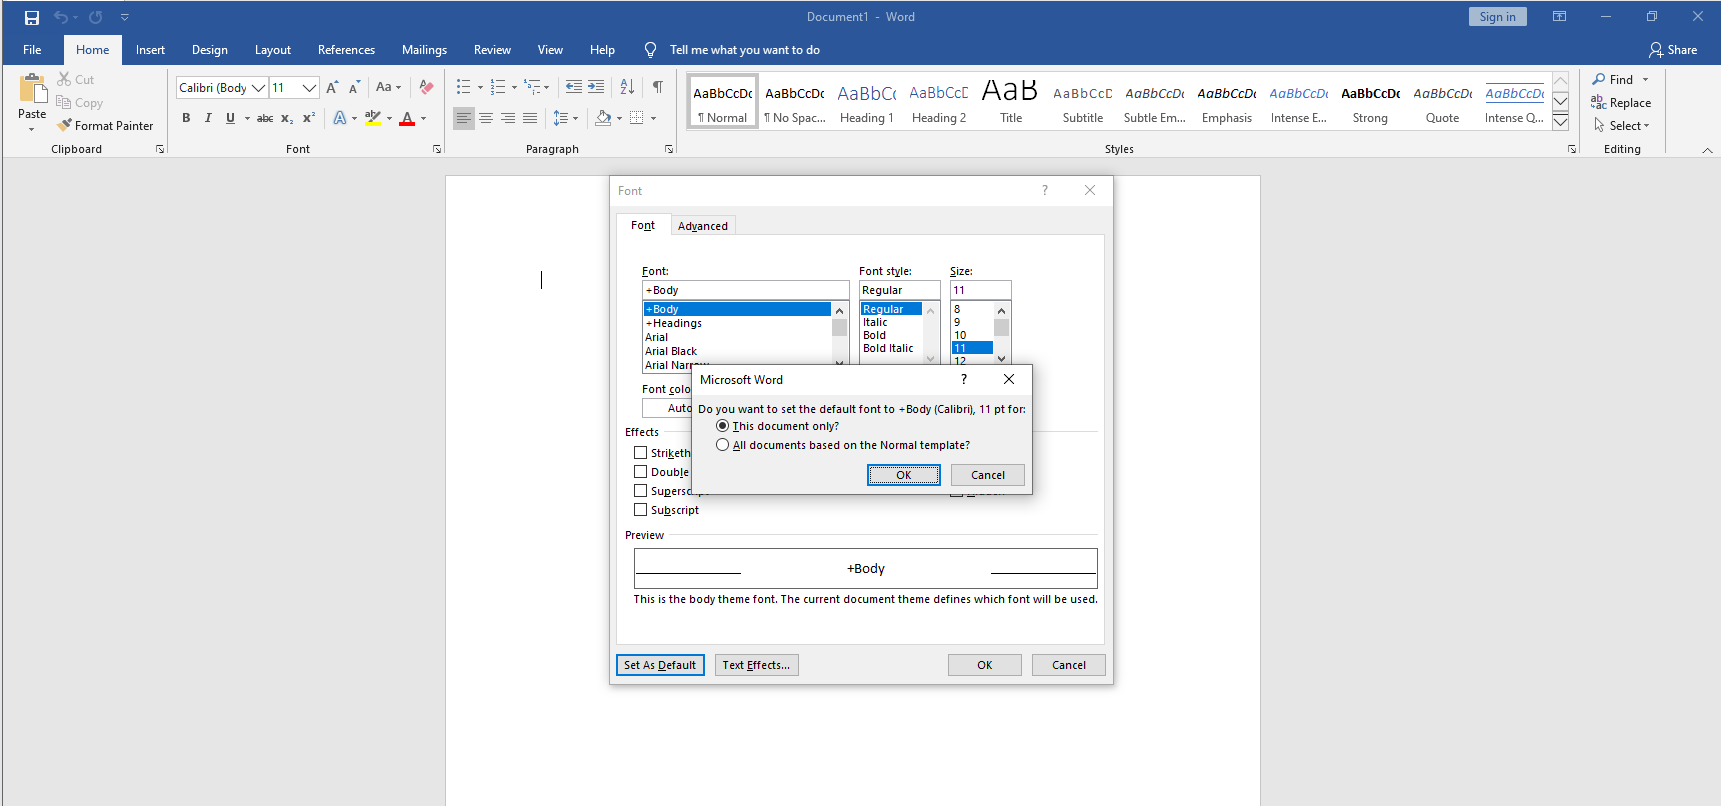
- This document only
- All documents based on the Normal template.
- Click OK.
If the Default Setting “Doesn’t Stick”
Now that you’ve set your preferred font settings in Word, you will be expecting to see them every time you open a new file. However, in some rare cases, the default font may unexpectedly revert back to the original. This may happen due to certain permission settings or specific add-ins that may interfere with your recent changes.
There are two things you can do here:
Option One: Check Permissions
- Go to Start.
- In the Search bar, type in Normal.dotm.
- Click Search.
- Next, right-click Normal.dotm, and select Properties.
- In the General tab, check if the Read-only option is enabled. If it is, disable it.
- Go to the Security tab.
- Under Group or user names, click your name.
- Make sure you have the Write permission in the Permissions box.
- Click OK to confirm.
If you find it impossible to deselect the Read-only box or lack the necessary Write permission, reach out to the individual responsible for managing your company’s computer systems.
Option Two: Turn Off Add-ins
If you possess Write permissions and the default font setting remains unchanged, consider disabling Word add-ins and modifying the default font setting using the following steps:
- Go to File and select Options.
- Under Options, locate and select Add-ins.
- In the Add-ins box, locate the add-in that you want to disable (the one you suspect to be causing the font reset issues).
- Take note of the add-in type listed in the Type column.
- In the Manage list, select the add-in type.
- Click Go.
- Remove the checkmarks next to the add-ins you want to disable.
- Select OK.
Repeat the steps above for the add-in types that may be causing the issue.
Go on to set your font preferences in Word again. Once you’ve changed the default font, you can turn the add-ins back on.
Also Read: How to Repair And Recover a Corrupted Microsoft Word File?
How to Modify the Default Font in Word 2010
Start by creating a new document based on the Normal template. Here’s how:
- Click on the “File” menu.
- Select “New.”
- Choose “Blank Document.”
- Click on “Create.”
- In the Font group, access the Font flyout.
- Customize your default font settings, including font style and font size. If you have specific text selected, the properties of the selected text will be configured in the dialog box.
- Click on “Set As Default.”
- Choose the “All documents based on the Normal.dotm template?” option and confirm by clicking “OK.”
Changing fonts in Word can be a creative and useful way to enhance your documents. Now you’re equipped with the knowledge of how to change the default font in Word 2010.
How to Modify the Default Font in Word 2007
If you are running an older version of Word, the steps you will need to take are slightly different. Here’s what to do:
- Click the Microsoft Office Button.
- In the New Document task pane, click “Blank Document.”
- Next, click “Create.”
- In the Font group, find and click on “Fonts.”
- Customize your font preferences, including font type, point size, and any desired attributes within the Fonts dialog box.
- Once you’ve made your font selections, click on “Default.”
- When you receive the message “Do you want to change the default font to [font name]? This change will affect all new documents based on the NORMAL template,” click “Yes.”
- Click “OK” to confirm your font choice.
- Now, click on the Microsoft Office Button again, and select “Word Options.”
- In the Customize tab, locate “Commands Not in the Ribbon” in the list, and then choose “Save All.”
- Click “Add,” followed by “OK.”
- To add the “Save All” command to the customized Quick Access Toolbar, click “Save All.” If prompted to save the open document, select “Cancel.”
Also Read: [EXPLAINED] Does Windows 11 Come with Microsoft Office?
How to Fix the “Word Doesn’t Remember Preferred Font Settings” Problem?
Now that you’ve set your preferred font setting in Word, it’s time to take care of one more minor issue. Occasionally, you may run into the following error message in Word: “Office Word doesn’t remember preferred font settings”
If Word fails to retain these preferred font settings, here are the steps to take:
- First, go to C:\Users\YourUsername\AppData\Roaming\Microsoft\Templates.
- Double-click Normal.dotm in order to open the Normal template in Word.
- You will see a blank template — this is where you will need to make all your formatting changes for Microsoft Word to remember.
- Go ahead and change the fonts, margins, spacing, and any other settings you feel like altering.
- Note that all the changes you have made in the blank template will appear in any new Word document you create from now on.
- After you are done with the changes, click the File tab, and then select Save.
- What if you can’t see Normal.dotm in the Templates folder? Then you will need to create one.
- Check if you see any files with similar names (like Normal1.dotm) — if you do, delete them. Now, you will need to create a new Word file in exactly the same location as where Normal.dotm should be: C:\Users\YourUsername\AppData\Roaming\Microsoft\Templates.
Note that the normal template should not have any text in it. Typically, this file would be created by Microsoft Office Word itself — and it would be blank. In the newly created file, make the changes that you want to fonts, margins, spacing, etc., and save them.
This file will be responsible for your Word template — and, should you have any formatting issues with your templates in the future, you now know where to look for solutions. Note that every time you create a new template, Microsoft Office will create a file like this to save and remember your preferred template settings. This is one of the most frequently used files in the Office app — and if you feel that Word is not working properly, try deleting it and it will be recreated anew.
Last but not least, a common source of glitches and errors like the one described above is a malware file working in the background on your PC. In order to prevent your system from being affected by a virus infestation, it’s best to always have reliable anti-malware software in place. A program like Auslogics Anti-Malware will run regular automated checks of your system and detect even the rarest and well-hidden malicious items. The program will then delete the intruders before they manage to cause problems on your computer. A great thing about Auslogics Anti-Malware is that it has no Windows 10 compatibility issues and can run alongside your primary antivirus if you already have one installed.
Also Read: Signs of Malware: How to Know if Your Computer is Infected
Has the above solution been helpful in resolving your Microsoft Word template problem? Share in the comments below.
FAQ
Can I Change the Default Font to a Custom Font I’ve Installed?
Yes, you can change the default font to a custom font you’ve installed in Microsoft Word. Simply follow the steps outlined in the guide to set your preferred custom font as the default.
Will Changing the Default Font Affect Existing Documents?
Changing the default font will not retroactively affect existing documents. It will only apply to new documents you create based on the Normal template.
Can I Change the Default Font for Specific Types of Documents, Like Resumes or Business Letters?
Yes, you can change the default font for specific types of documents by customizing the Normal template for those documents. The guide provides steps to modify the Normal template to suit your preferences.
Does This Guide Work for All Versions of Microsoft Word?
The guide provided is intended for specific versions of Microsoft Word, so it’s important to ensure it matches the version you are using. Instructions may vary slightly between versions.
What if I Want to Reset the Default Font Back to the Original Settings?
If you wish to revert to the original default font settings, you can follow the guide’s steps to reset the font to its default state, typically “Calibri” for many versions of Word. This will apply to new documents based on the Normal template.