
![[FIXED] Troubleshoot 0xC1900101 Install Error in Windows 10](https://www.auslogics.com/en/articles/wp-content/uploads/2023/06/shutterstock_2085159631-1.jpg)
Installing Windows can be bad enough. And now you are running into the 0xC1900101 install error, on top of everything else. But no worries – here’s how get rid of the annoying “Windows 10 failed to update” on your PC.
What Are the Causes of the 0xC1900101 Install Error in Windows 10
The possible reasons for why you are seeing the “windows update failed to install” on your PC include:
- Outdated or incompatible drivers
- Compatibility issues with hardware components
- Conflicting software or antivirus programs
- Insufficient disk space
- Corrupted system files
- Network connectivity problems
Now, let’s get into the solutions!
Here’s How to Fix Install Error – 0xc1900101 on Windows 10
Here are some possible fixes to troubleshoot and resolve the 0xC1900101 install error in Windows 10:
1. Update Corrupted Drivers
Probably the most common reason for the 0xc1900101 install error are outdated device drivers. Updating them is often enough to resolve compatibility issues.
Now, there are several ways to update your drivers.
Update drivers via Device Manager:
- Press Win + X and select “Device Manager.”
- Expand the categories and right-click on a device.
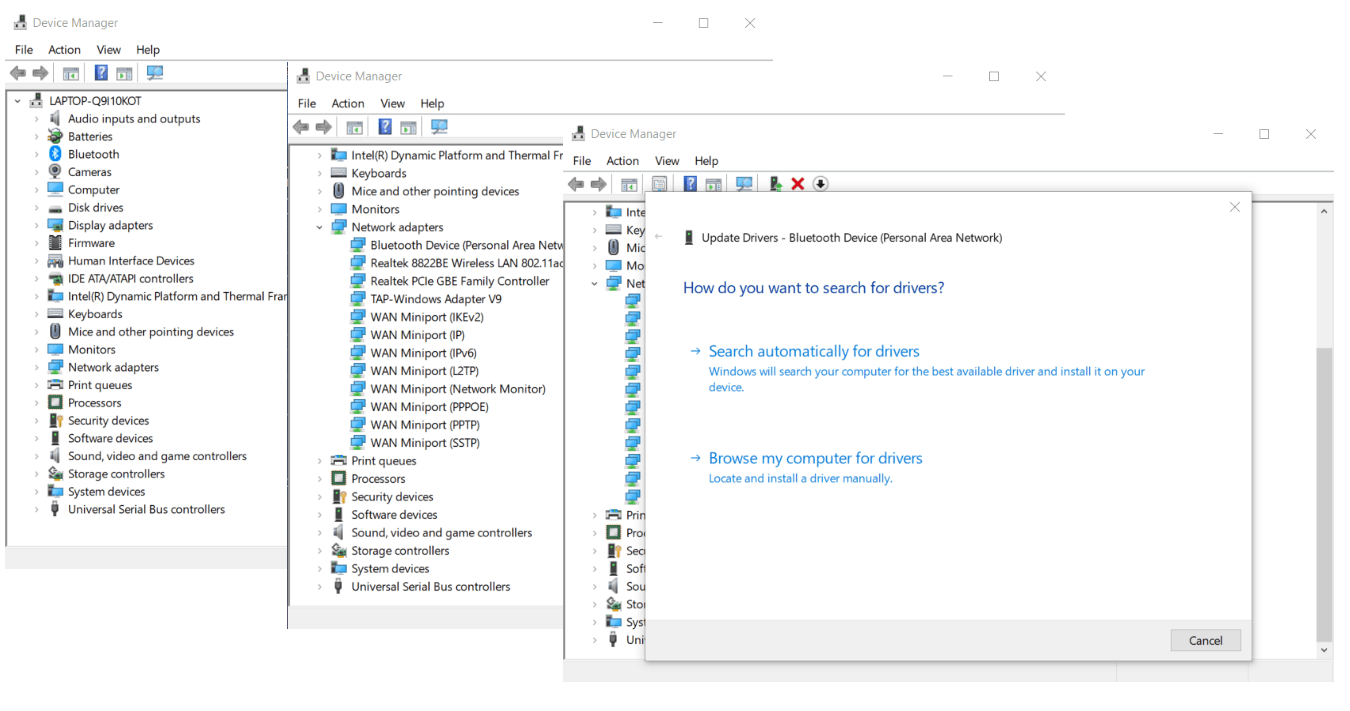
- Choose “Update driver” and select “Search automatically for updated driver software.”
- Repeat the process for other devices.
Although Device Manager is a handy tool for managing and updating device drivers, it’s worth noting that it may not always be successful in installing the latest available drivers. In such cases, using dedicated driver update software can be a more convenient and reliable option to ensure you have the most up-to-date driver versions.
Keep Your Drivers Updated With Auslogics Driver Updater
To make sure that your drivers are always up to date and avoid Windows 10 update failed to install errors altogether, it’s best to use dedicated driver updating software such as Auslogics Driver Updater.
Here’s how you can use Auslogics Driver Updater to effortlessly update your device drivers:
- Download and install Auslogics Driver Updater on your PC.
- Launch the Auslogics Driver Updater app and start with a free driver scan. This allows you to evaluate the software before upgrading to the full version.
- Click on “Scan for driver issues.”
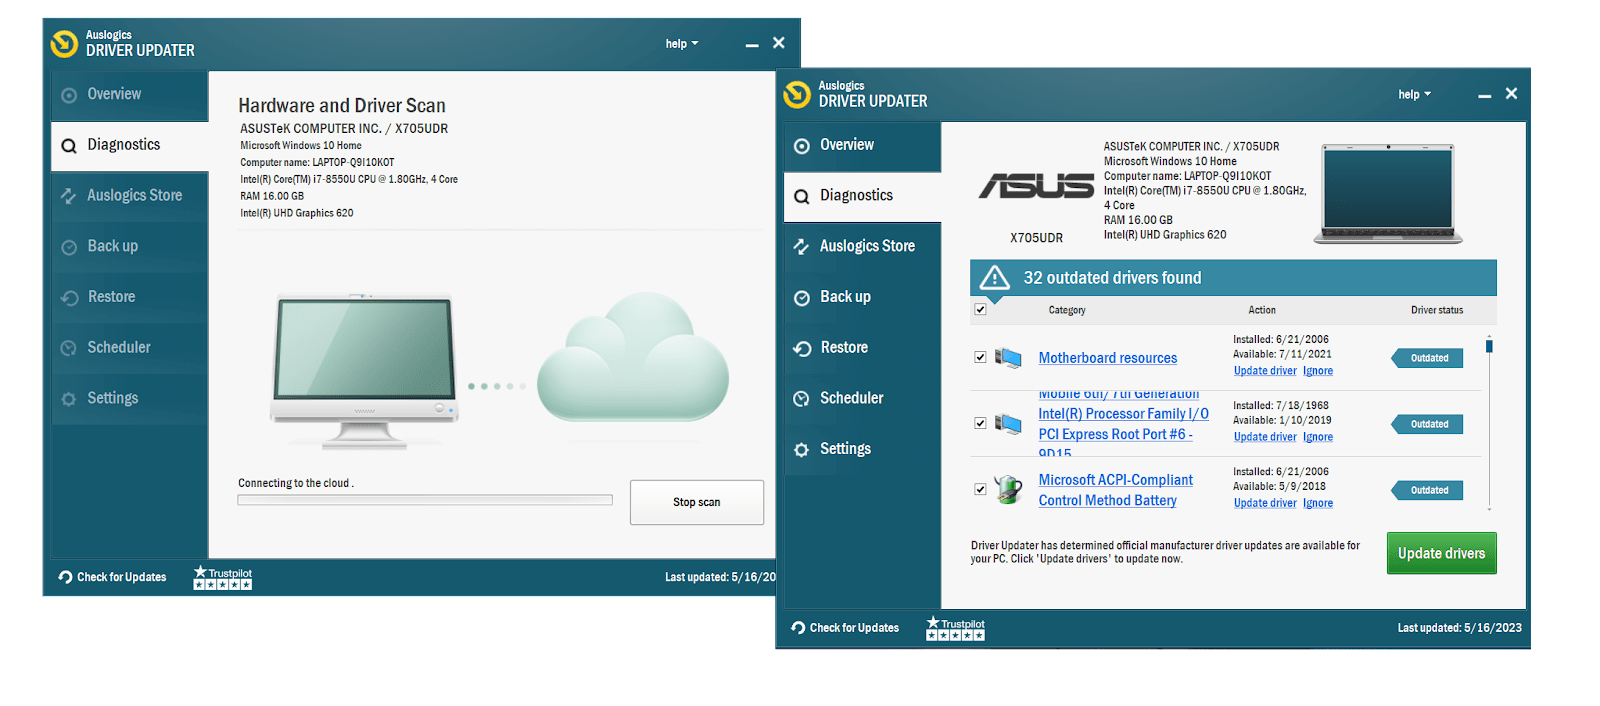
- Wait for the tool to complete the scan: it’s checking your hardware and identifies any outdated or missing drivers.
- Once the scan is finished, let the tool fix the detected issues and follow any prompts to restart your computer.
And here’s a great idea: you can configure Auslogics Driver Updater to update drivers automatically.
Here’s how:
- Launch the Auslogics Driver Updater app.
- Go to the Scheduler tab.
- Enable the “Enable automatic maintenance” option.
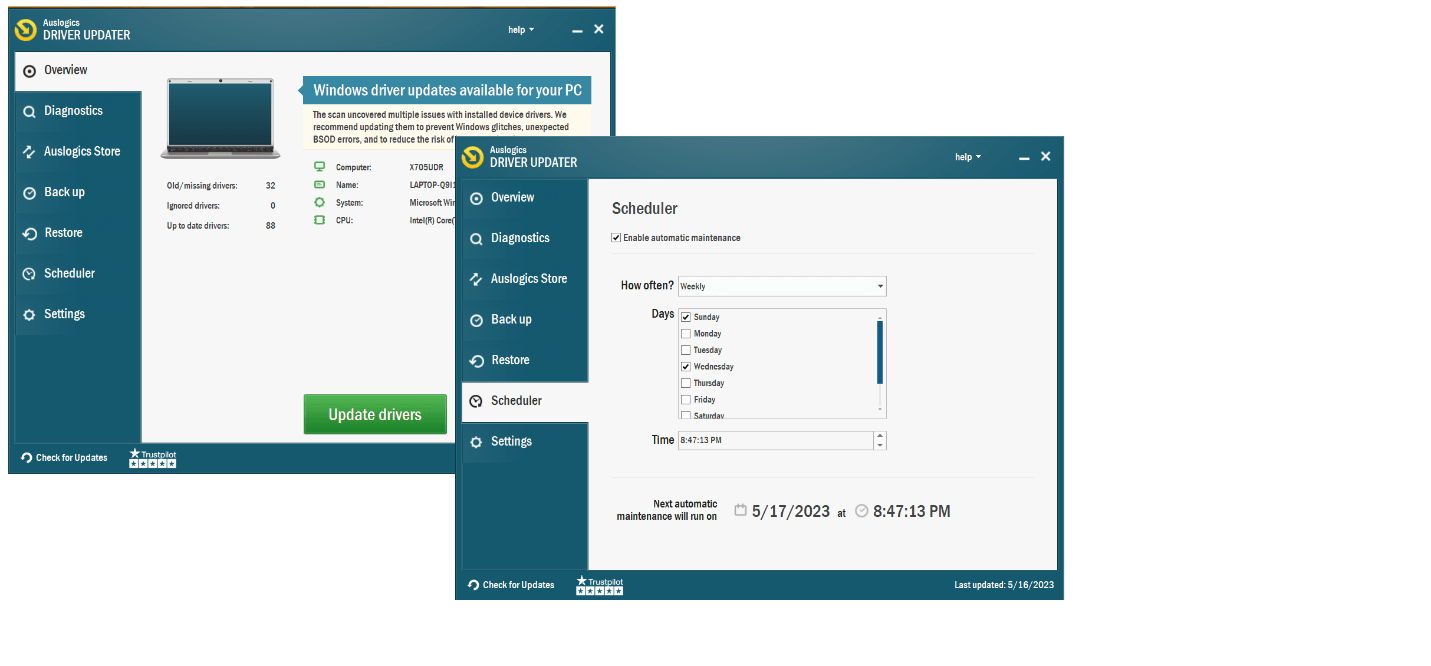
- Set the values for how often you want the software to scan your drivers.
Here are more ways to update your system drivers: [EASY GUIDE] How to Update Device Drivers on a Windows 10 PC?
2. Perform a Clean Boot
If you’re experiencing a rollback issue due to driver conflicts, you can try resolving it by performing a clean boot before starting the upgrade process. This involves running setup with a minimal set of drivers and startup programs.
- Press Win + R, type “msconfig,” and hit Enter.
- In the System Configuration window, go to the “Services” tab.
- Check the box “Hide all Microsoft services” and click “Disable all.”
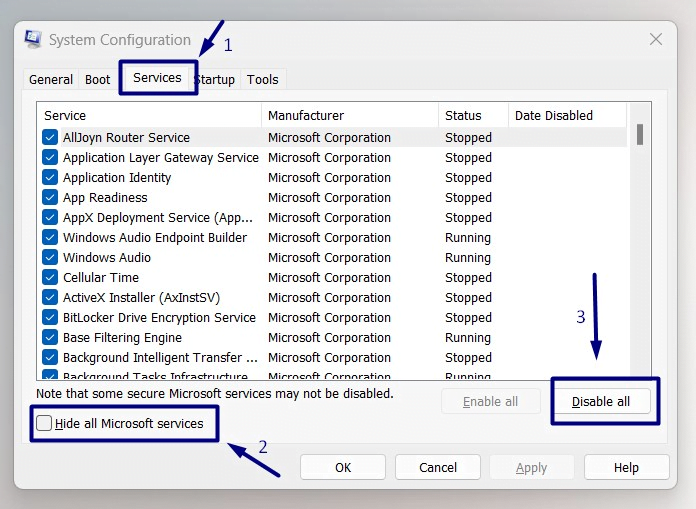
- Go to the “Startup” tab and click “Open Task Manager.”
- Disable all startup items one by one.
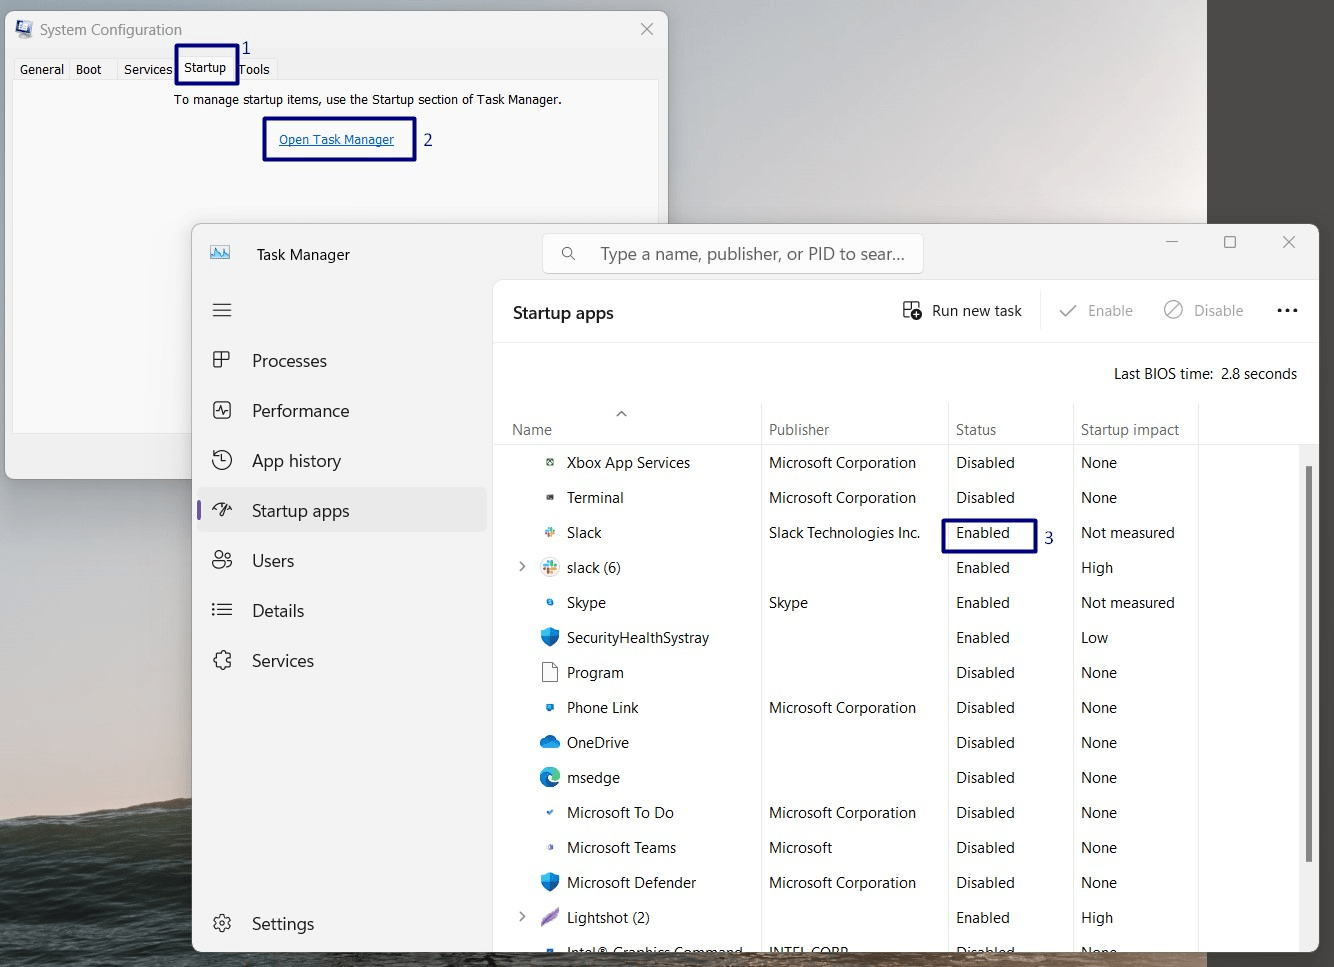
- Close Task Manager and click “OK” in the System Configuration window.
- Restart your computer and try the installation again.
Also Read: How to Perform a Clean Boot in Windows 10?
3. Disable Security Software
Antivirus or security software can block certain installation processes. Temporarily disabling them can help overcome the error.
- Open your antivirus or security software.
- Look for options like “Real-time protection” or “Enable protection.”
- Disable the feature or select “Turn off.”
- Confirm the action and proceed with the installation.
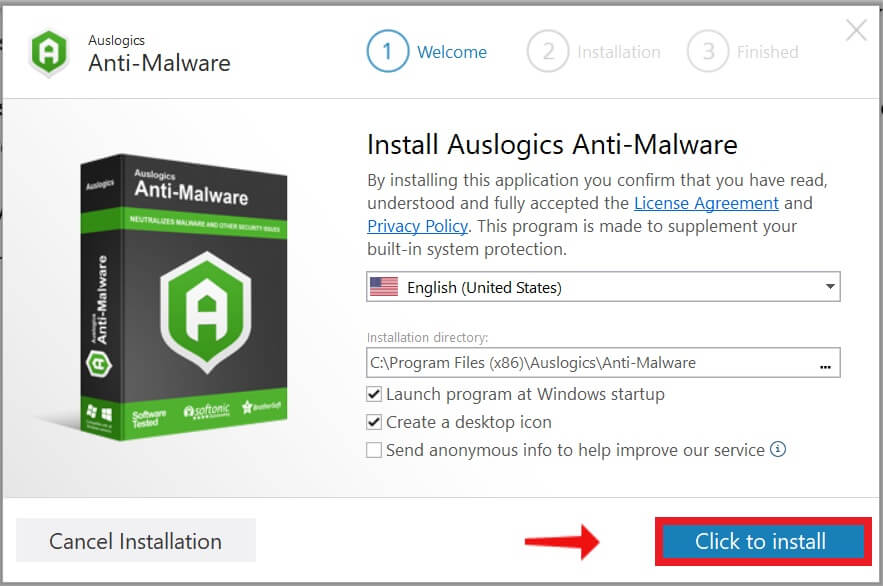
If you notice that your current antivirus is often getting in the way of Windows processes, consider switching to an anti-malware program that is fully compatible with Windows 10 – such as Auslogics Anti-Malware.
Also Read: How to Remove Virus and Other Malware from Windows
4. Remove External Devices
If none of these fixes helped you resolve the 0xc1900101 install error, try disconnecting external devices. Sometimes, connected external devices can interfere with the installation:
- Disconnect all unnecessary external devices (except the keyboard and mouse).
- Restart the computer.
- Attempt the installation again.
5. Check Your Connection
Ensure that you have a stable and reliable internet connection. If you don’t, you may be running into the “0xc1900101 error.
- Restart your modem, router, or any other network equipment you are using.
- If you have any VPN or proxy settings enabled, temporarily disable them and try the installation again.
- If you are using a wireless connection, try using a wired Ethernet connection to eliminate any potential wireless network issues.
Related: Tips on How to Speed Up Your Internet Connection
6. Free Up Disk Space
Insufficient disk space can cause installation failures. Deleting unnecessary files can create space and resolve the error:
- Press Win + I and select “System.”
- Go to “Storage” and click on “Temporary files.”
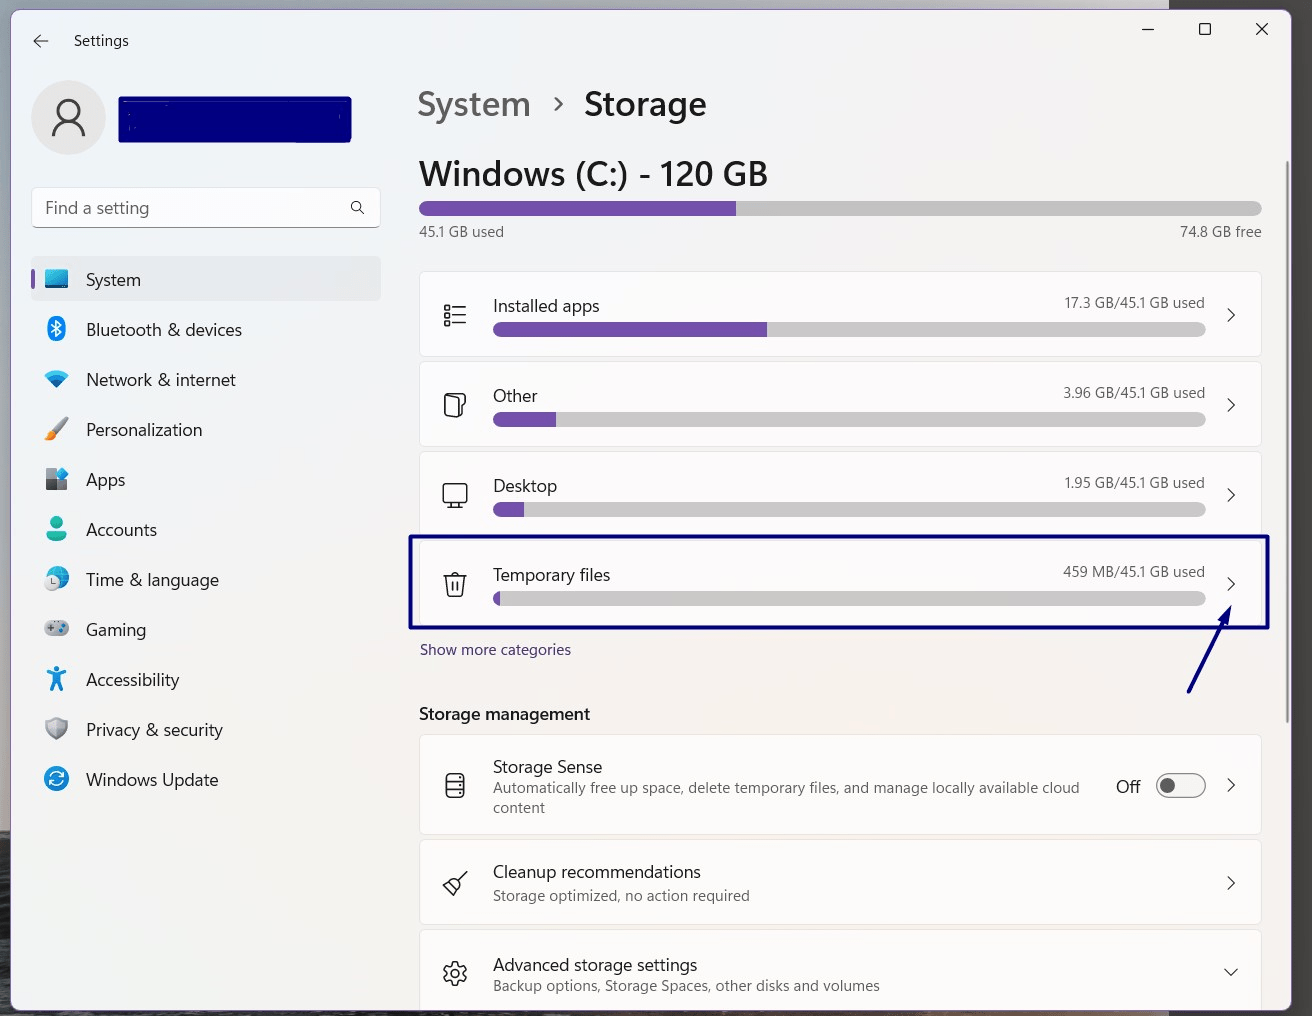
- Check the boxes next to file types you want to remove and click “Remove files.”
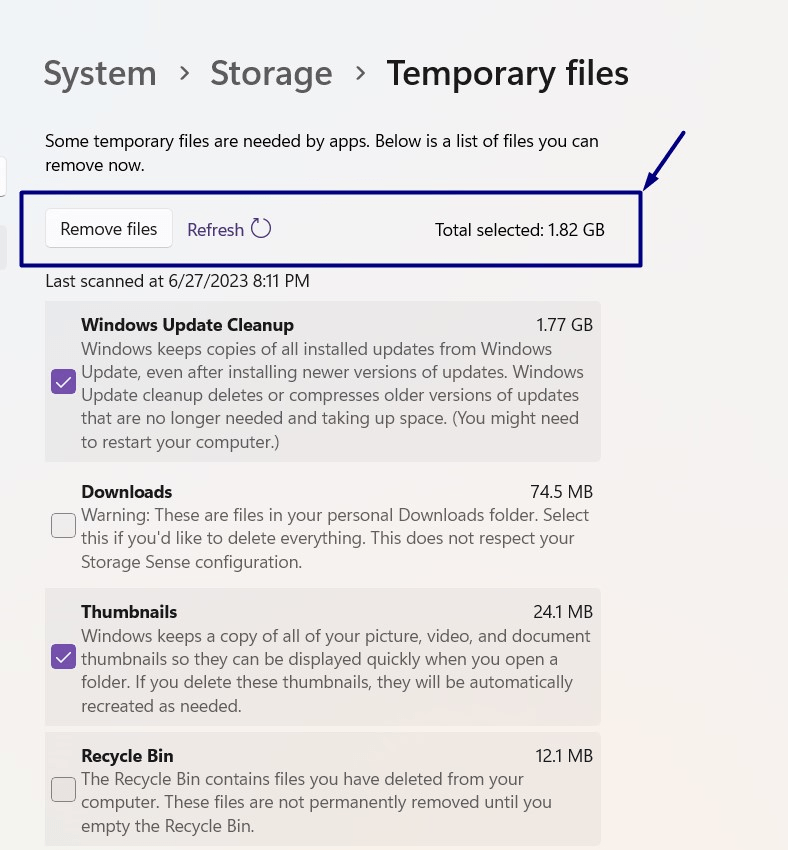
- Delete any other unnecessary files or folders to free up additional space.
- Retry the installation process.
Also Read: How to Free Up Space on PC With Windows Disk Cleanup
Remember to restart your computer after applying each fix and attempt the installation again. If the error persists, you may need to seek further assistance from Microsoft support or consult an IT professional.
FAQ
What Does the 0xC1900101 Error Mean in Windows 10 Installation?
The 0xC1900101 error in Windows 10 installation means there is a compatibility issue between your system and the Windows 10 upgrade process. It indicates that something on your computer is not compatible with the version of Windows 10 you’re trying to install. Updating drivers, disconnecting external devices, disabling the security software, performing a clean boot, or freeing up disk space can help resolve this error. Following these steps will allow you to successfully install Windows 10 without encountering the 0xC1900101 error.
Why Does My Windows Update Keep Failing?
Windows Update failures can happen due to different reasons:
- Poor Internet connection: Make sure you have a stable Internet connection before updating.
- Insufficient disk space: Free up space on your computer by deleting unnecessary files or programs.
- Conflicting software: Temporarily disable or uninstall third-party programs or security software that may interfere with the update process.
- Corrupted system files: Use the System File Checker (SFC) utility to repair damaged system files.
- Outdated drivers: Update your device drivers, especially those related to hardware components.
- Windows Update service issues: Restart the Windows Update service or run the Windows Update Troubleshooter.
- Software conflicts: Disable antivirus programs temporarily during updates to prevent conflicts.
Try these steps to resolve Windows Update failures. If the issue persists, seek further assistance from Microsoft support or consult a technical professional.
How Do I Force Windows 10 to Update?
To force Windows 10 to update, follow these steps:
- Check for updates manually in “Settings” > “Update & Security” > “Windows Update.”
- Restart your computer and check for updates again.
- Run the Windows Update Troubleshooter in “Settings” > “Update & Security” > “Troubleshoot” > “Windows Update.”
- Reset Windows Update components by opening Command Prompt as administrator and running specific commands.
- Use the Media Creation Tool from Microsoft’s website to create installation media or upgrade Windows 10.